
Oh, Taco Tuesday! Just saying it out loud makes me want to grab some chips and salsa, doesn’t it? There’s something so special about gathering around the table, sharing delicious food, and maybe even doing a little happy dance with each bite. If you’ve ever felt a little intimidated heading into the kitchen for your own Taco Tuesday, or if you’re just looking for some super easy, foolproof recipes, then guess what? You’ve landed in the perfect spot! This is The Ultimate Taco Tuesday Recipes Guide for Beginners, designed to make you feel like a taco-making pro, no stress involved!
I remember my very first Taco Tuesday. It was in my tiny Brooklyn apartment, crammed with friends, and I was determined to impress them with my cooking skills. As I chopped fresh tomatoes and mixed spices, my hands were a little shaky, but my heart was full of excitement. My uncle’s voice, that constant reminder that cooking is really just about love and experimenting, echoed in my mind. By the end of the night, the laughter and stories were flowing just as freely as the salsa, and those simple tacos turned into the most joyful celebration of friendship. That night totally ignited my passion for cooking, and honestly, I want to share that fun and those amazing flavors with all of you!
As an Urban Forager and Hyperlocal Ingredient Specialist, I’m all about bringing the freshest, most vibrant tastes right to your table. And trust me, these recipes are designed to be fun, accessible, and absolutely delicious, even if you’re just starting out. So, let’s get this taco party started!
Why This The Ultimate Taco Tuesday Recipes Guide for Beginners is Your Go-To
So, why should you trust this guide for your Taco Tuesday adventures? It’s all about making delicious, authentic-tasting tacos feel totally doable, even if your kitchen experience is just starting out. We break down everything so clearly, you’ll feel like you’ve got a seasoned pro cheering you on every step of the way. It’s built on a foundation of helping folks just like you whip up something amazing without any fuss!
Beginner-Friendly Approach to Tacos
Honestly, cooking shouldn’t feel like a science experiment. This guide is crafted with you in mind, focusing on simple techniques and clear instructions. We’re here to show you that making incredible tacos is totally within reach. Forget complicated jargon; we’re talking about straightforward steps to amazing flavor, perfect for anyone dipping their toes into the culinary waters or just looking for a reliable, easy win for Mexican night!
Flavorful Birria Tacos: A Step-by-Step Journey
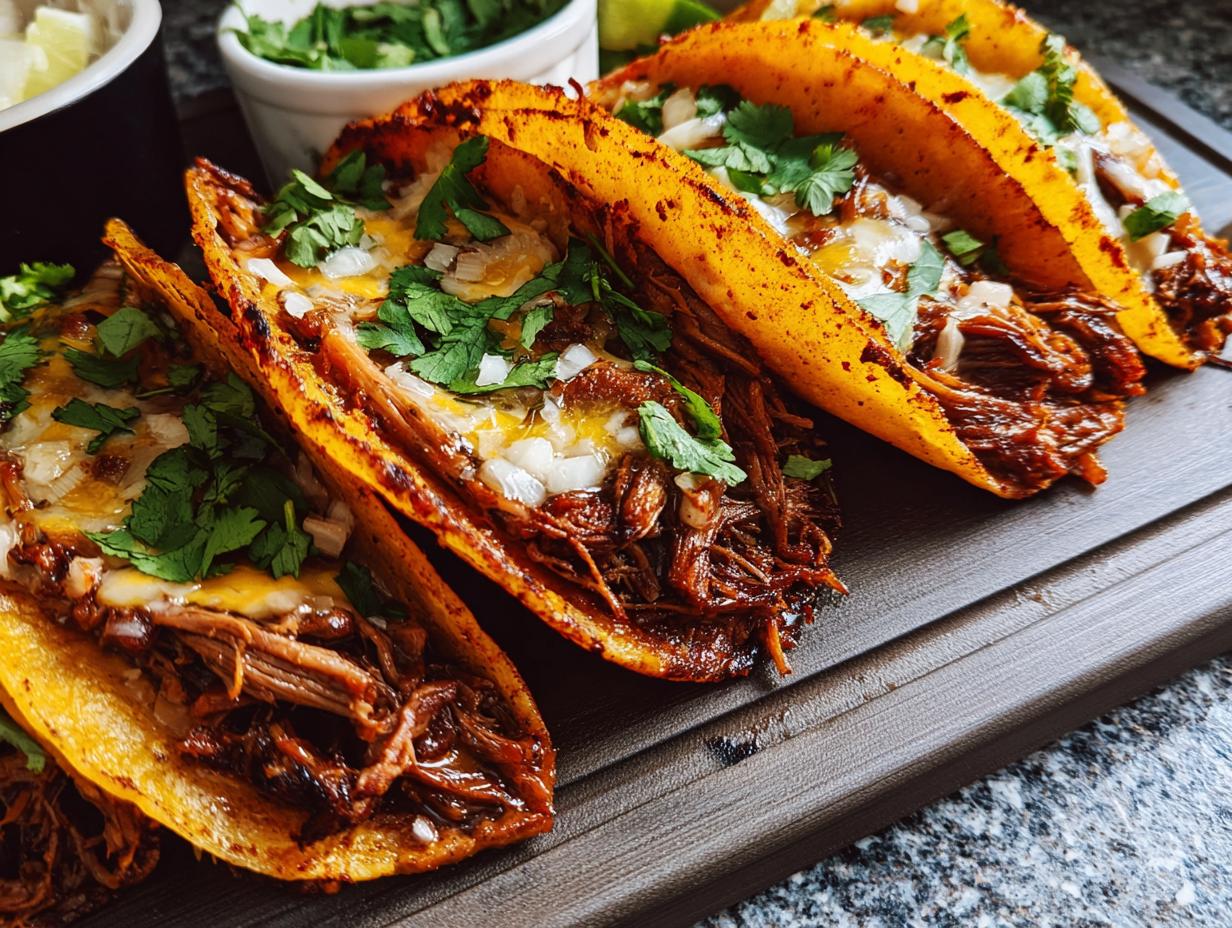
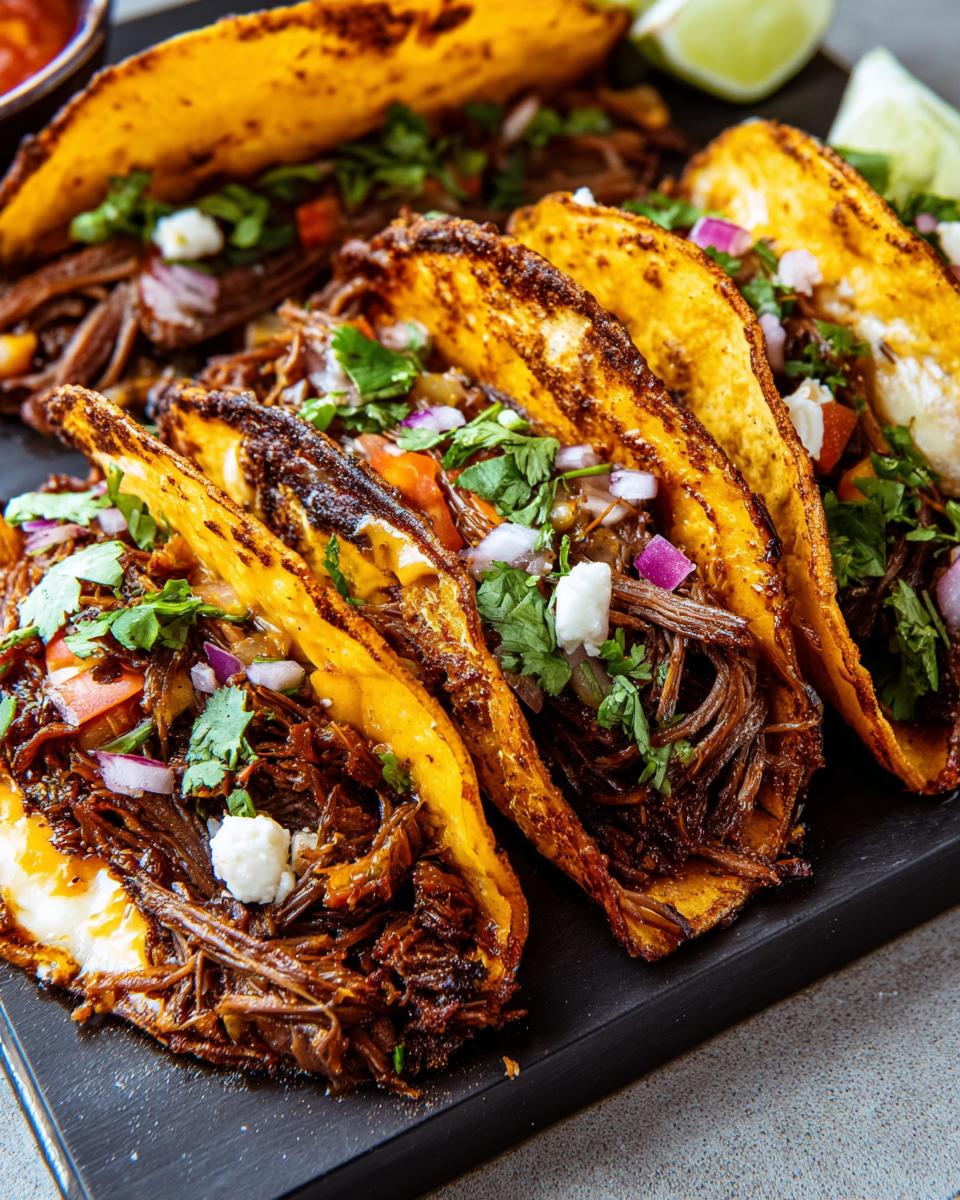
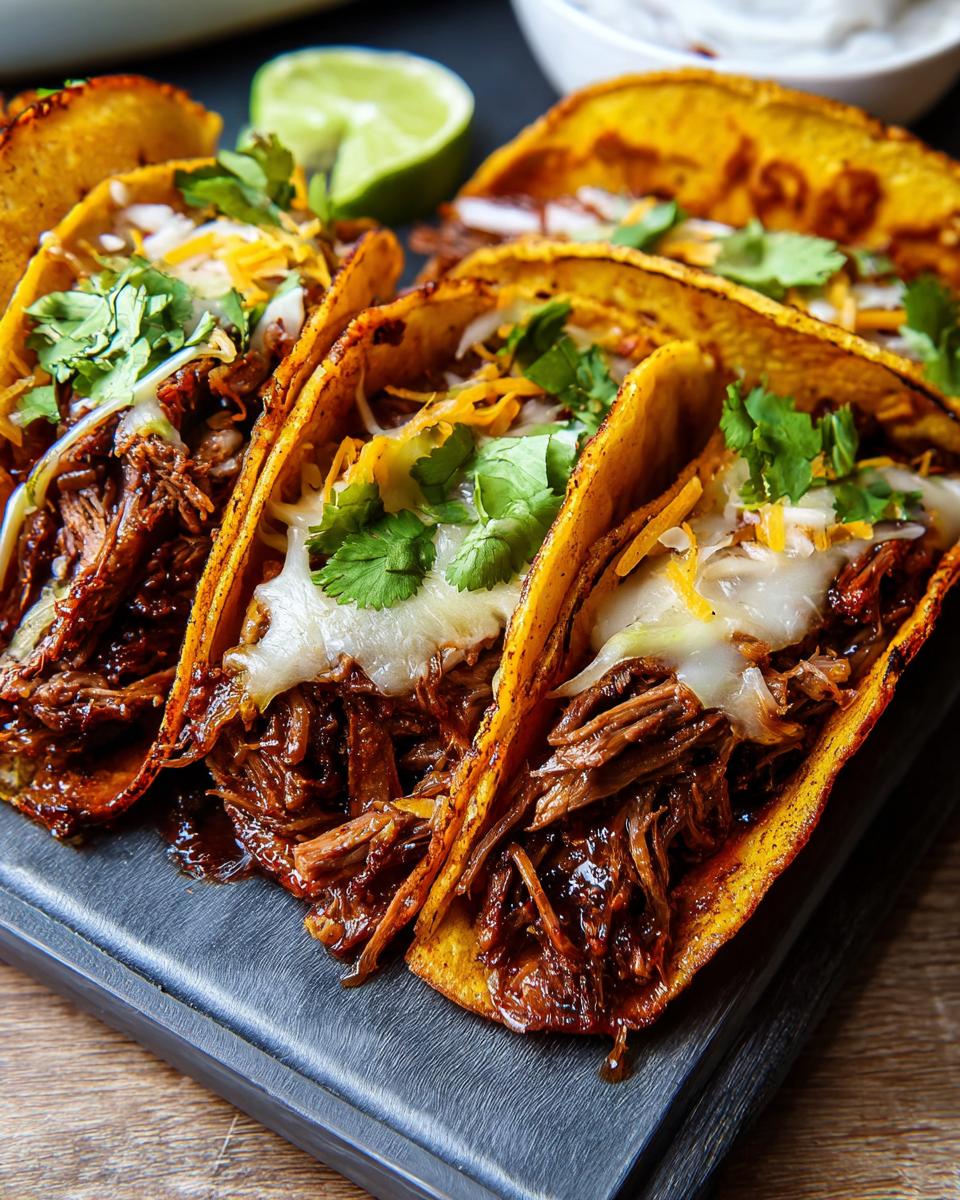
Ready for some serious flavor? We’re diving headfirst into making Birria Tacos, and trust me, they are a showstopper! This recipe is your perfect introduction to a truly craveable dish. We lay it all out, from tender, shredded beef to that amazing crispy shell, making the whole process feel like a fun adventure rather than a chore. It’s proof that The Ultimate Taco Tuesday Recipes Guide for Beginners delivers big on taste!
Gathering Your Ingredients for Birria Tacos
Alright, let’s talk about what you’ll need to make these incredible birria tacos happen. Don’t let the ingredient list scare you too much; it’s all about building layers of flavor, and I promise, it’s totally manageable! Think of it as collecting treasures for your feast. We’ll break it down into two main parts: what goes into the amazing birria itself, and then what you’ll need to get those tacos assembled and ready to rock.
For the Birria
- 5 dried guajillo chiles
- 3 dried morita chiles
- 3 dried pasilla chiles
- 2 lb. beef brisket or beef chuck roast
- 2 lb. oxtails, short ribs, or beef shank
- Kosher salt, to taste
- Freshly ground black pepper, to taste
- 2 Tbsp. vegetable oil
- 3 Roma tomatoes, halved
- 6 garlic cloves
- 10 whole cloves
- 1 (3″) cinnamon stick
- 1/4 cup white wine vinegar
- 1 1/2 tsp. cumin seeds
- 1 tsp. dried oregano
- 1 large yellow onion, quartered
- 5 bay leaves
For Assembly
- 6″ corn tortillas
- Shredded Oaxaca or mozzarella cheese
- Chopped white onion
- Chopped fresh cilantro
- Lime wedges, for serving
How to Prepare The Ultimate Taco Tuesday Recipes Guide for Beginners
Now for the fun part – making these amazing birria tacos! Don’t worry, I’ve got your back every step of the way. We’re going to break this down into bite-sized chunks so you can feel totally confident as you create this masterpiece. It’s all about building incredible flavor, and this guide is here to show you exactly how it’s done, making it a true treasure in The Ultimate Taco Tuesday Recipes Guide for Beginners.
Making the Flavorful Birria Base
First things first, let’s get that rich birria base going. Preheat your oven to 350ºF (175ºC). Grab a big, heavy pot – your trusty Dutch oven is perfect for this! Over medium heat, we’re going to lightly toast those dried guajillo, morita, and pasilla chiles. Just a couple of minutes, stirring them around until they’re fragrant and a little softened. You’ll know they’re ready when you can smell that wonderful chile aroma. Then, carefully transfer those chiles to a heatproof bowl and cover them with boiling water. Pop a small plate or something heavy on top to keep them submerged, and let them soak until they’re nice and pliable, about 20 minutes. This is where all that deep flavor starts to develop! While they soak, generously season your beef brisket and oxtails with salt and pepper. In the same pot you used for the chiles, heat up the vegetable oil over medium-high heat. Working in batches so you don’t crowd the pan, brown the beef pieces on all sides until they have a nice sear, about 6-7 minutes for the brisket and 4-5 minutes for the oxtails. Transfer the browned beef to a plate. Now, it’s time for the blender! Combine the soaked chiles, about 1 1/2 cups of their soaking liquid, the halved tomatoes, garlic cloves, whole cloves, cinnamon stick, white wine vinegar, cumin seeds, and dried oregano. Blend it all up until it forms a smooth, pourable paste – add a little more soaking liquid if needed to get that consistency right. Return the browned beef to your pot, add the quartered onion and bay leaves, and pour that beautiful chile paste all over it. Add just enough water to cover the beef and give it a good pinch of salt. Bring everything to a simmer over medium heat, then cover the pot tightly and pop it into your preheated oven. Let it bake for about 4 to 4 1/2 hours, or until the beef is super tender and shreds easily. This slow cooking is crucial for that amazing melt-in-your-mouth texture! For more simple taco ideas, check out these easy taco recipes.
Shredding the Tender Beef and Consommé
Once the beef is fall-apart tender, it’s time to work some magic! Carefully take the beef out of the pot and set it on a cutting board. Grab two forks and shred it all up. Oh, and don’t you dare throw away that beautiful, rich broth – that’s your consomé! Give it a taste and add a bit more salt and pepper if it needs it. It should be intensely flavorful, a little bit spicy, and have that gorgeous reddish-orange hue from all the chiles. If it seems a little too thick for your liking, just stir in a splash of water or some stock until it’s perfect for dipping. I always like to make sure the consomé is seasoned just right; it makes all the difference! You can even prep the birria up to 5 days ahead and store the shredded beef and consomé separately in the fridge. It tastes even better the next day, if you can wait!
Assembling Your Perfect Birria Tacos
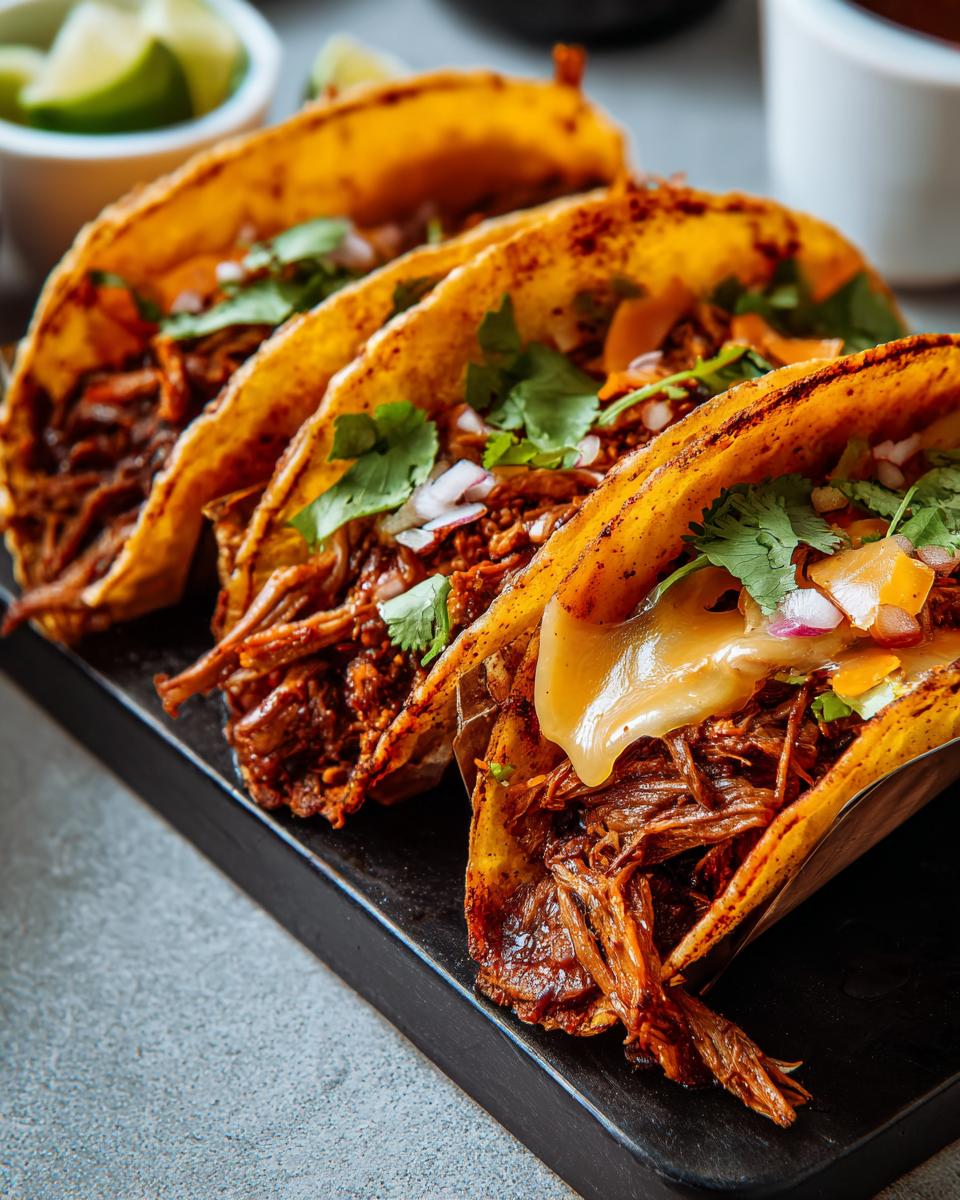
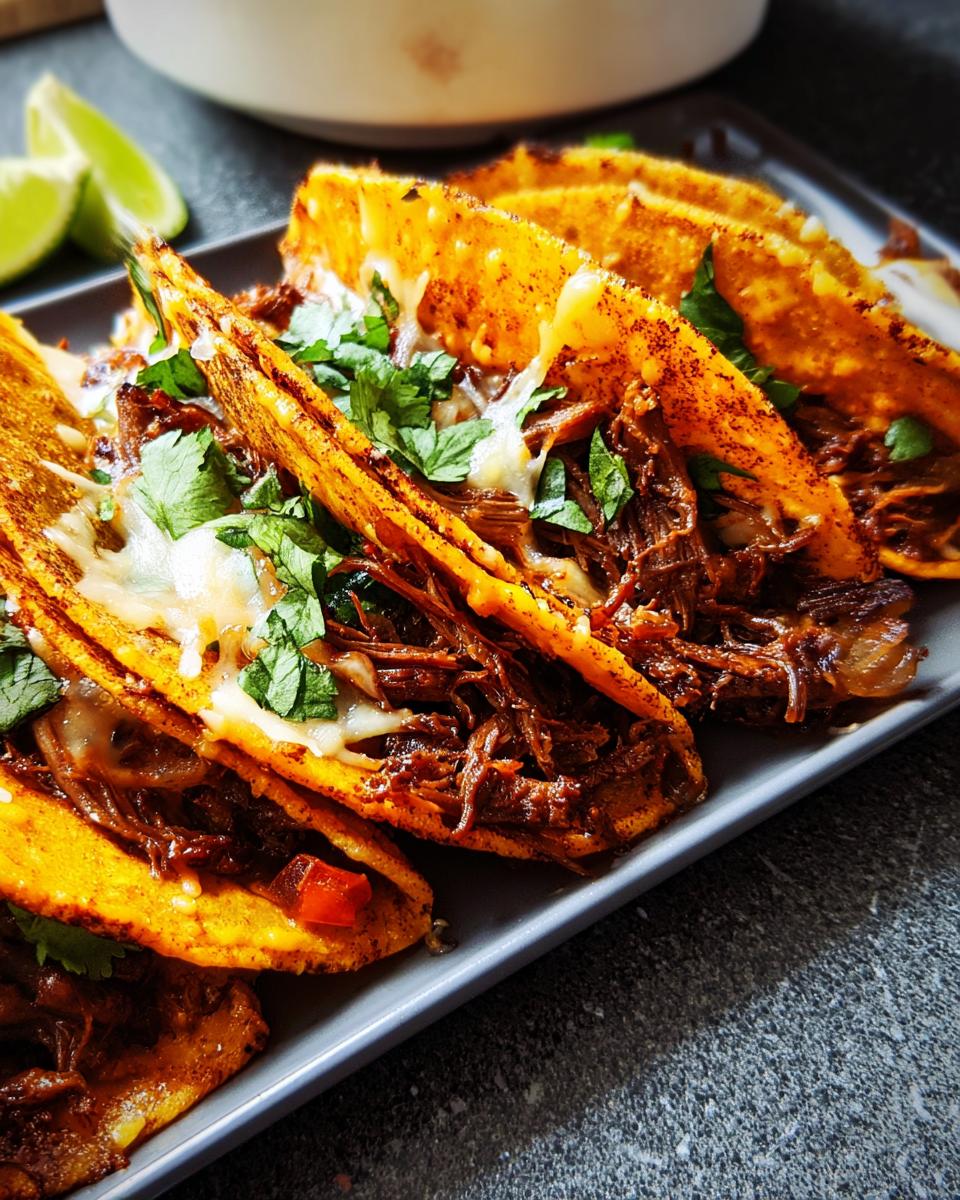
Here’s where your Taco Tuesday dreams really come true! Get your consomé back on a low simmer in that same pot. We want it just warm enough to coat a tortilla in that delicious, flavorful fat that’s probably gathered on top – a little bit of oiliness is a good thing here! Set up your taco station: have the shredded birria beef ready, a stack of your corn tortillas, and bowls of shredded cheese, chopped onion, and cilantro nearby. Grab a tortilla, dip it into the warm consomé, getting both sides nicely coated in that magical red oil. Then, place that dipped tortilla right into a hot cast-iron skillet. Sprinkle a generous amount of cheese on half the tortilla, add some of that seared beef on top of the cheese, and then pile on the onion and cilantro. Fold it in half and let that cheese melt and the tortilla get beautifully crisp on the outside, about 3 minutes total. Repeat until all your tacos are made. The key to getting that perfect crisp is to not overcrowd the pan and to let that cheesy goodness toast up nicely! If you want even more recipe inspiration, be sure to check out our full collection of recipes.
Tips for Success with The Ultimate Taco Tuesday Recipes Guide for Beginners
Alright, my fellow taco lovers, let’s talk about making these birria tacos totally amazing! As your guide, I want to make sure you feel super confident, so here are a few little tips from my kitchen to yours. This is what separates a good taco from an absolutely unforgettable one, and it’s all part of what makes this guide so perfectly suited for beginners! For more easy dinner inspiration, check out these easy dinner recipes.
Ingredient Quality Matters
As an Urban Forager, I’m a firm believer that the best ingredients make all the difference. Even for something as seemingly simple as tacos, using good-quality dried chiles and fresh produce really elevates the flavor. It’s like giving your food a little extra sparkle from the get-go!
Patience for Perfect Birria
I know, I know, we want tacos *now*. But trust me on this one: the slow, low cooking time for the birria is where the magic really happens. That patient simmering lets all those flavors meld and makes the meat so incredibly tender. It’s worth every minute!
Achieving Crispy Tortillas
Want that perfect birria taco crunch? My secret is to not be shy with the consomé – get those tortillas nice and coated in that flavorful oil! Then, let them get a good char in the hot skillet before you even think about folding them. That little bit of crispiness is like the cherry on top!
Frequently Asked Questions About The Ultimate Taco Tuesday Recipes Guide for Beginners
Got questions about whipping up your own Taco Tuesday fiesta? You’re in the right place! We’ve gathered some common queries to help you feel totally prepared. This guide is all about making deliciousness accessible, so let’s break it down. If you need any more help or want to share your own tips, don’t hesitate to reach out!
Can I make the birria ahead of time?
Absolutely! The recipe notes mention you can prep the birria up to 5 days in advance. Store the shredded beef and consomé separately in the fridge. It’s often even tastier the next day!
What if I can’t find specific chiles?
No worries! For guajillo chiles, you can substitute with anchos. If you can’t find moritas, chipotles in adobo sauce are a good alternative. Pasillas can often be traded for poblanos if you’re in a pinch.
How spicy are these tacos?
These tacos have a medium heat level from the dried chiles. If you like it milder, just use fewer chiles or remove the seeds and membranes before soaking. For more kick, add a pinch of cayenne pepper!
What are good sides for birria tacos?
Birria tacos are fantastic on their own, but they pair wonderfully with simple sides like a fresh avocado salad, Mexican rice, or even just some tortilla chips and your favorite salsa. Keep it easy!
Serving Suggestions for Your Taco Tuesday Feast
Okay, so you’ve got these killer birria tacos ready to go – amazing! But what else makes a Taco Tuesday truly legendary? Let’s round out your feast! Since we’re focusing on easy and fun, think simple sides that complement those rich, savory tacos without adding a ton of work. A big, bright salad is always a winner. Imagine a simple chopped salad with crisp romaine, juicy tomatoes, creamy avocado, and maybe a sprinkle of corn – easy peasy!
And you absolutely can’t go wrong with some classic Mexican rice or even just a big bowl of crunchy tortilla chips with your favorite salsa and some guac. We’ve got tons of appetizer ideas you can sneak in if you’re feeling fancy, like these easy appetizer ideas, but honestly, your incredible birria tacos are the star of the show!
Nutritional Information
When you’re whipping up these amazing birria tacos, remember that the exact nutritional details can wiggle around a bit depending on the specific cuts of meat you use, how much oil you end up using, and even the brands of your ingredients. Like most home cooking adventures, think of these as delicious estimates rather than strict science! The joy of making them yourself is all part of the fun, and this guide is all about making that process easy and enjoyable.
Share Your Taco Tuesday Creations!
Have you tried these birria tacos? I’d absolutely LOVE to hear all about it! Snap a pic and tag me on Instagram, or leave a comment below sharing your experience. Your kitchen adventures are what make this all so much fun, and I can’t wait to see what you create! Want to know more about me? Check out my About page!

Birria Tacos
Ingredients
Equipment
Method
- Preheat your oven to 350ºF (175ºC). In a large, heavy pot or Dutch oven over medium heat, toast the guajillo, morita, and pasilla chiles, stirring often, until they soften and become fragrant, about 2 to 3 minutes.
- Transfer the toasted chiles to a medium heatproof bowl. Cover them with boiling water. Use a small plate or bowl to keep the chiles submerged. Let them soak until they are rehydrated and pliable, about 20 minutes.
- While the chiles soak, generously season the brisket and oxtails with salt and pepper. In the same pot used for the chiles, heat the vegetable oil over medium-high heat. Working in batches, brown the beef on all sides, turning occasionally. This should take about 6 to 7 minutes per side for the brisket or chuck roast, and 4 to 5 minutes per side for the bone-in parts. Transfer the browned beef to a plate or cutting board.
- In a blender, combine the soaked chiles, 1 1/2 cups of the chile soaking liquid, tomatoes, garlic, cloves, cinnamon stick, vinegar, cumin seeds, and oregano. Blend until a pourable paste forms, adding more chile liquid if needed. This should take about 1 minute.
- Return the browned beef to the pot. Add the quartered onion and bay leaves. Pour in the chile paste. Add enough water to just cover the beef and season with a generous pinch of salt. Bring the mixture to a simmer over medium heat.
- Remove the pot from the heat, cover it tightly, and bake in the preheated oven until the beef is fork-tender, about 4 to 4 1/2 hours. Once tender, discard the bay leaves and onion. Transfer the beef to a cutting board and reserve the broth (this is your consomé).
- Shred the beef using two forks. Taste the reserved consomé and season with salt and pepper as needed. If you prefer a thinner consomé, add water or chicken or beef stock until it reaches your desired consistency.
- Make Ahead: The birria can be prepared up to 5 days in advance. Store the shredded beef and the consomé in separate airtight containers in the refrigerator.
- For Assembly: In the same large pot over medium-low heat, bring the consomé to a bare simmer. You should see a layer of dark red fat or oil on the surface.
- Set up your taco station. Keep the consomé simmering on one burner. Heat a large cast-iron skillet or plancha over medium heat on another burner. Have a plate of the shredded birria beef and a stack of tortillas ready. Place small bowls of shredded cheese, chopped onion, and cilantro nearby.
- Working in batches, reheat about 1/3 cup of the shredded beef in the cast-iron skillet, leaving space for a tortilla. Toss the beef occasionally until it’s seared and browned. Dip a tortilla into the simmering consomé, coating both sides with the flavorful fat. Place the consomé-dipped tortilla in the skillet next to the beef and sprinkle generously with cheese.
- Cook the tortilla until the cheese is mostly melted and the underside has browned and started to crisp, about 3 minutes. Place the seared beef onto one half of the tortilla. Top with chopped onion and cilantro. Fold the tortilla in half to form a taco. Cook for about 30 seconds per side until crisp. Repeat this process with the remaining beef and tortillas.
- Serve the birria tacos immediately with lime wedges on the side. Offer small bowls of the consomé for dipping.
Notes
Tried this recipe?
Let us know how it was!
Urban Forager & Hyperlocal Ingredient Specialist
My Brooklyn apartment balcony tells my story: vertical gardens packed with wild edibles, fermentation crocks bubbling with city-foraged greens, and the constant hum of dehydrators preserving herbs I’ve collected from unexpected urban corners. What started as weekend escapes to my aunt’s upstate farm during my Columbia botany studies turned into something bigger after I earned my Urban Ecology Master’s from The New School.
Instead of following traditional academic paths, I discovered that cities are actually amazing edible ecosystems—rooftop weeds, park-edge wild greens, vacant lot treasures that perfectly complement keto eating. Who knew that some of the best low-carb foods were growing right under our noses in Manhattan?
My recipe collections celebrate city seasons: spring dandelions and plantains, summer purslane from rooftops, autumn rose hips from community gardens, winter wild onions and cress. I’m certified through the New York Mycological Society and trained by Brooklyn Botanic Garden to forage safely and ethically. Over 180 of my recipes feature at least one urban-foraged ingredient—from sidewalk plantains to sumac berries and wild mint thriving in vacant lots.
My “Metropolitan Wild” column went viral after my dandelion coffee substitute hit social media. Now my weekend “Urban Wild Walks” through Central Park and Prospect Park sell out faster than I can schedule them. I teach city dwellers to spot safe, keto-friendly wild foods hiding in plain sight.
Currently, I’m partnering with local chefs to bring urban foraged elements to restaurant menus and developing an app that maps safe foraging spots across all five boroughs. Evenings find me tending my sourdough starters, pressing flowers for natural dyes, or weaving baskets from willow branches I collect during park maintenance.
Cities are wild food sanctuaries hiding in plain sight—keto eating becomes urban rebellion when you realize how much free, perfect nutrition grows right under our feet.