
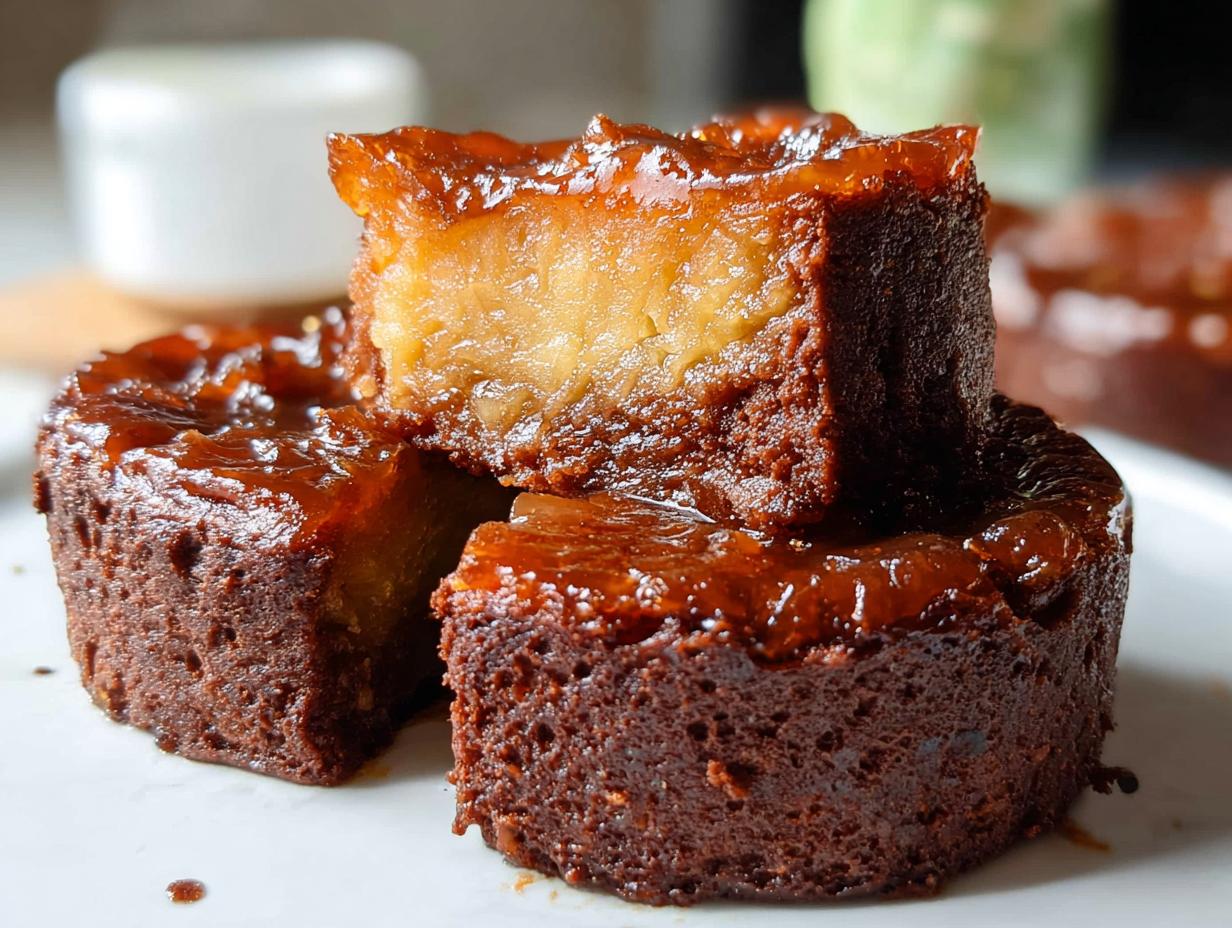
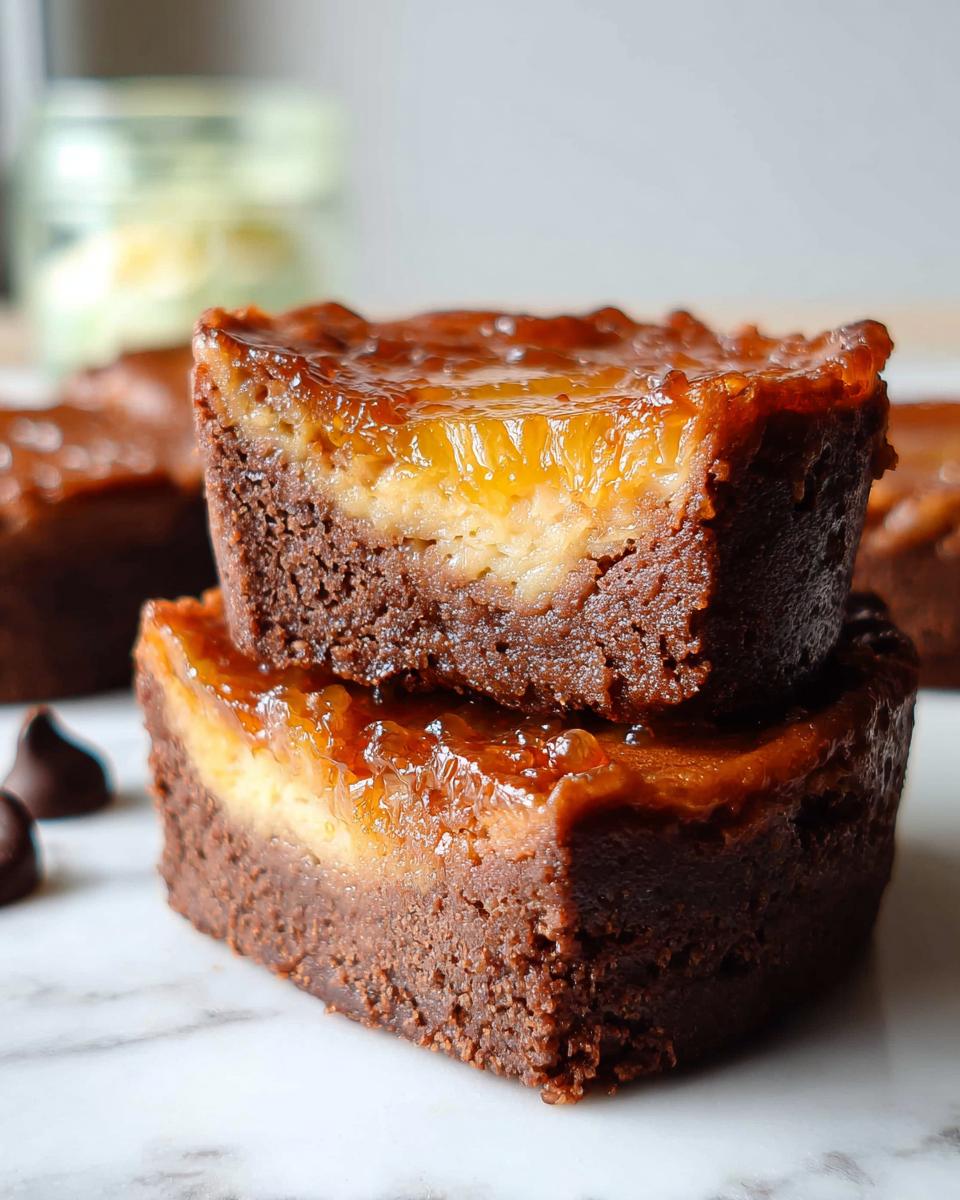
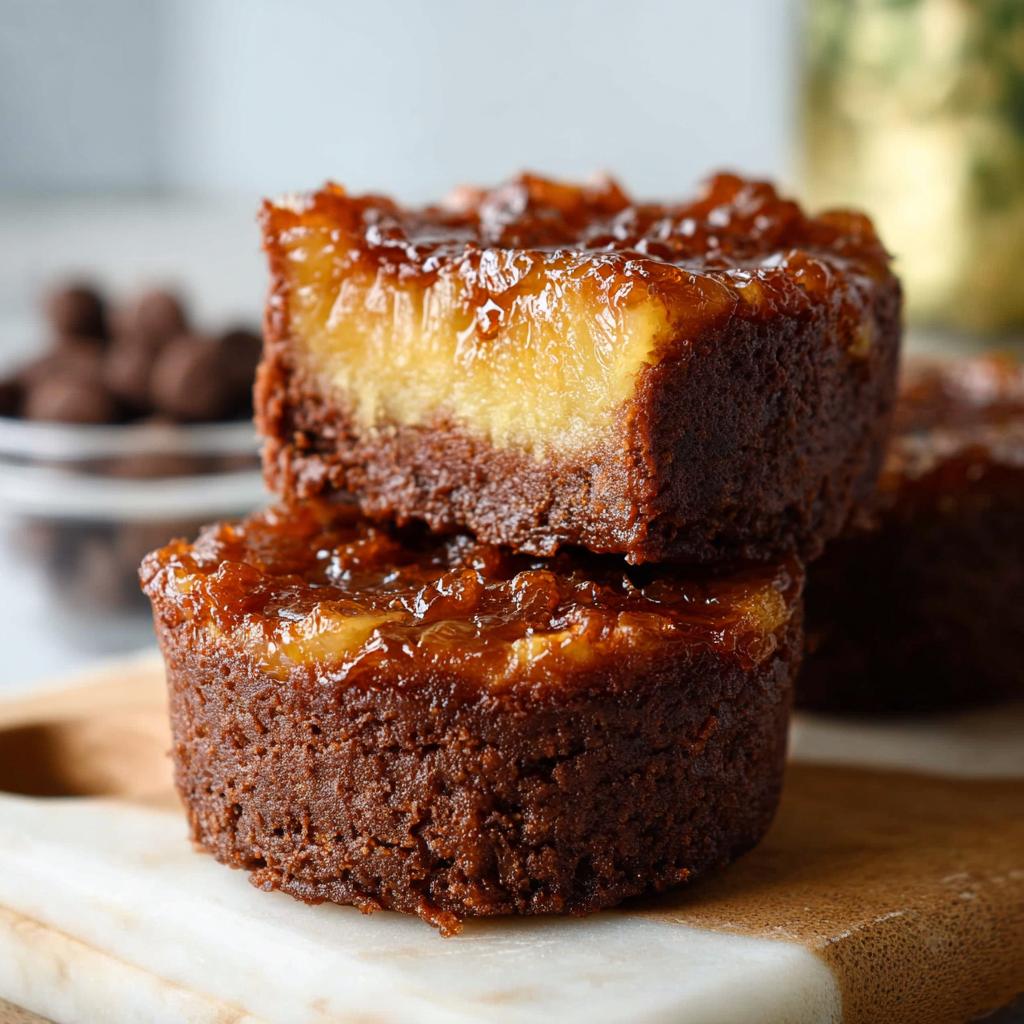
Oh, you are going to LOVE this! Imagine the classic, cozy hug of a pineapple upside-down cake, but with that unbelievably creamy, dreamy texture of cheesecake. That’s exactly what we’ve got here with these Mini Pineapple Upside-Down Cheesecakes. I’m Alexandra Bennet, and whipping up treats like this is my jam – I’m an Urban Forager & Hyperlocal Ingredient Specialist, which basically means I love finding the best flavors right in my own city. My Grandma used to make the most amazing pineapple upside-down cake, all warm caramelized pineapple and that tender crumb. I took that memory and, well, added my own urban foraging twist with some crushed nuts for the crust because, why not? These mini cheesecakes are like a little slice of memory, but totally new and exciting. Trust me, they’ll be a hit!
Why You’ll Love These Mini Pineapple Upside-Down Cheesecakes
Seriously, who can resist these little wonders? They’re a total winner for so many reasons:
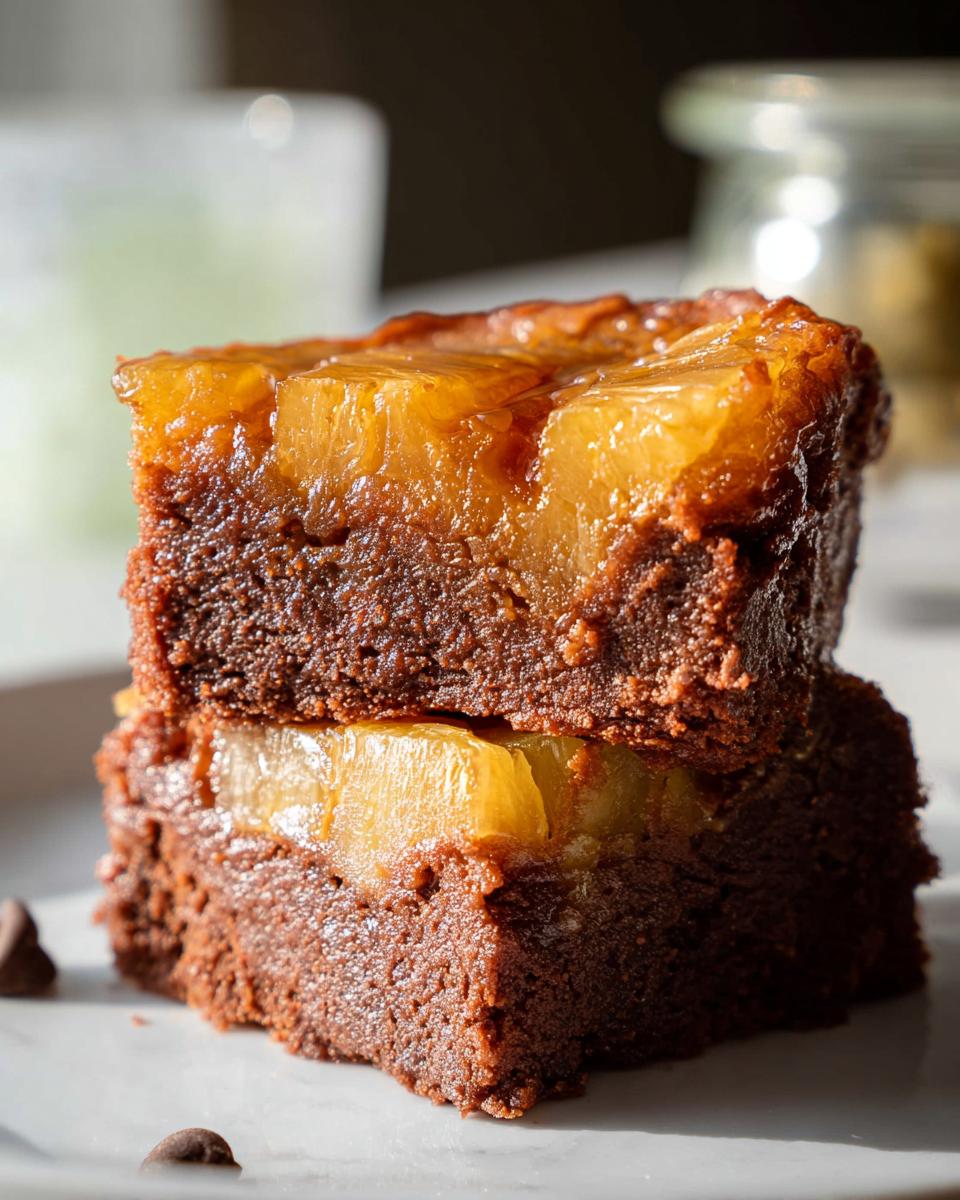
- That Flavor Combo! It’s like a party in your mouth – sweet, tangy pineapple meets rich, creamy cheesecake. Pure bliss!
- Perfectly Portioned: No cutting, no fuss! These individual servings are just right for parties, picnics, or whenever you need a single, delightful treat.
- Super Easy to Make: Even if you *think* you’re not a baker, you’ve got this. They come together faster than you’d expect.
- Always a Crowd-Pleaser: Whether it’s a fancy get-together or just a cozy night in, these little cheesecakes disappear fast!
Gather Your Ingredients for Mini Pineapple Upside-Down Cheesecakes
Alright, let’s get down to business and gather everything we need for these amazing little bites. Having everything ready makes the whole process so much smoother, trust me! We’ve got a few components, but they all come together like magic.
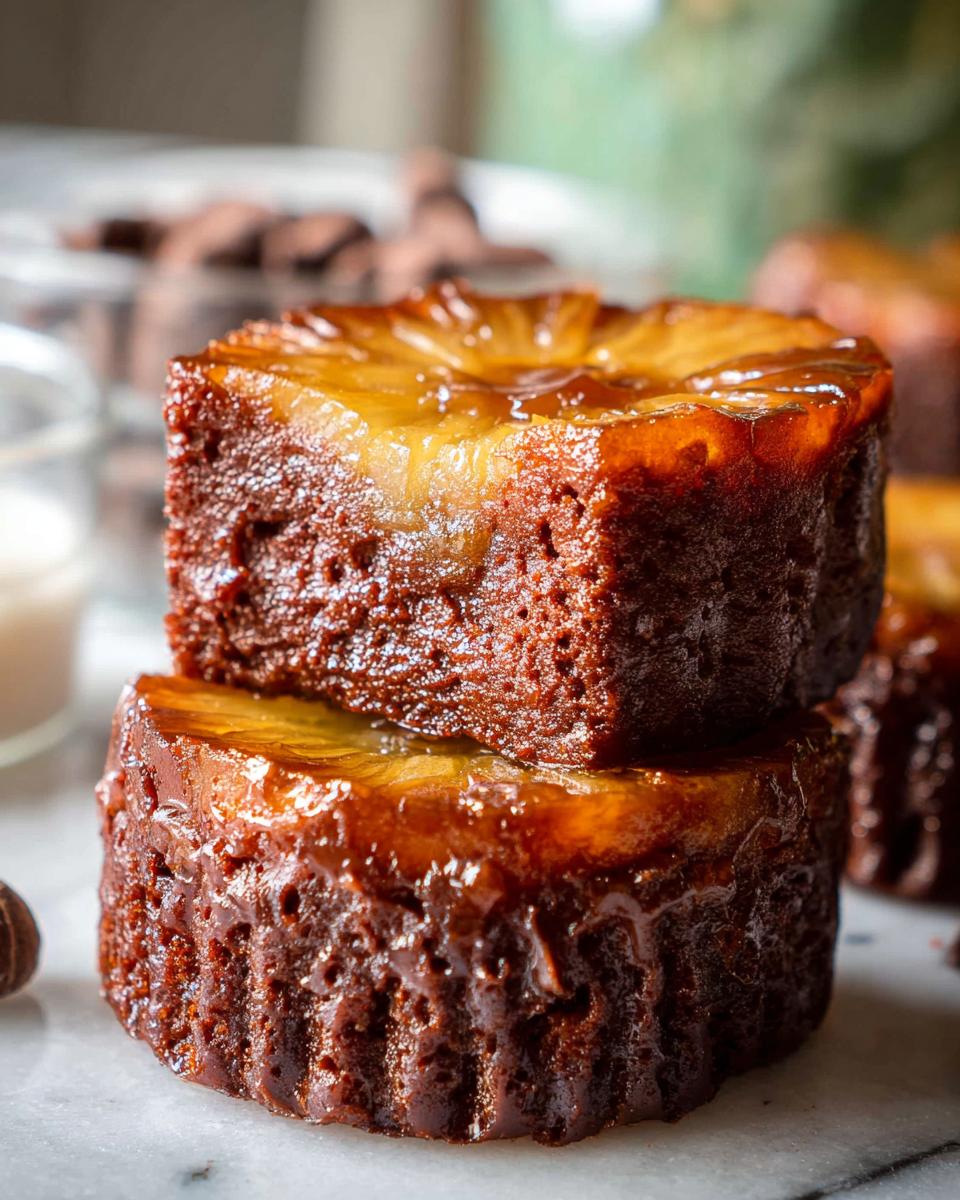
First up, for that gorgeous pineapple topping: you’ll need about 1 cup of pineapple rings, drained really well. And of course, for that buttery, caramelized goodness, grab about 1/4 cup of melted butter and 1/4 cup of packed brown sugar. A little maraschino cherry or two for each spot is always fun, too!
Now for the creamy cheesecake part, which is honestly the star. You’ll want two 8-ounce blocks of cream cheese, left out to get nice and soft – this is super important for a smooth batter! Plus, 1/2 cup of granulated sugar, 2 large eggs, and 1 teaspoon of pure vanilla extract. I also like to use a splash of Greek yogurt in my cheesecake base for an extra smooth texture, so about 1/4 cup of that.
And for the yummy surprise at the bottom—our little crust twist—we’ll need about 1 cup of crushed vanilla wafers or graham crackers. And another 2 tablespoons of melted butter to bring it all together. Oh, and if you want to peek at another delicious cheesecake bite idea, check this one out!
Essential Equipment for Your Mini Pineapple Upside-Down Cheesecakes
Okay, let’s talk tools! To make these little cuties shine, you’ll want a few things handy. Definitely grab a 12-cup muffin tin – that’s our go-to for perfect individual portions. You’ll also need standard muffin liners, the paper kind work great! A medium bowl for mixing the cheesecake batter is a must, and a small saucepan for melting things is always in the kitchen arsenal. Oh, and don’t forget a whisk and a rubber spatula for smooth mixing!
Step-by-Step Guide to Making Mini Pineapple Upside-Down Cheesecakes
Alright, let’s roll up our sleeves and get these adorable little cheesecakes made! It’s totally doable, and the results are SO worth it. Just follow these steps, and you’ll have a tray full of deliciousness! If you’re looking for more brownie inspiration, check out these banana bread brownies or these decadent chocolate mousse brownies.
Preparing the Pineapple Layer
First things first, let’s get that yummy topping ready. Preheat your oven to 350°F (175°C). Grab your muffin tin and line it with paper liners – this is key for easy removal later. In the bottom of each liner, place a slice of well-drained pineapple ring. If your rings are huge, you might want to cut them into smaller, more manageable pieces. Then, plop a maraschino cherry right in the middle of each pineapple slice. Super cute, right?
Crafting the Cheesecake Base
Now for the creamy magic! Make sure your cream cheese is nice and soft at room temperature; this is super important so you don’t end up with lumps. In a medium bowl, beat that softened cream cheese until it’s super smooth and luscious. Then, gradually whisk in the granulated sugar until it’s all combined. Next, add in the eggs, one at a time, beating just until each is incorporated. Don’t go crazy beating it here, or you might introduce too much air! Finally, swirl in the vanilla extract and the Greek yogurt (if you’re using it) until it’s all smooth and creamy. This mixture should be nice and thick, but pourable.
Assembling and Baking Your Mini Pineapple Upside-Down Cheesecakes
Time to bring it all together! Carefully spoon the cheesecake batter over the pineapple and cherry in each muffin cup. Fill them about two-thirds to three-quarters full – they’ll puff up a little. Gently tap the muffin tin on the counter a couple of times to release any big air bubbles. Pop that tin into your preheated oven and bake for about 20-25 minutes. You’ll know they’re ready when the edges look set but the center still has a slight jiggle, like Jell-O. Don’t overbake them, or they might get a bit too firm!
Cooling and Finishing Touches
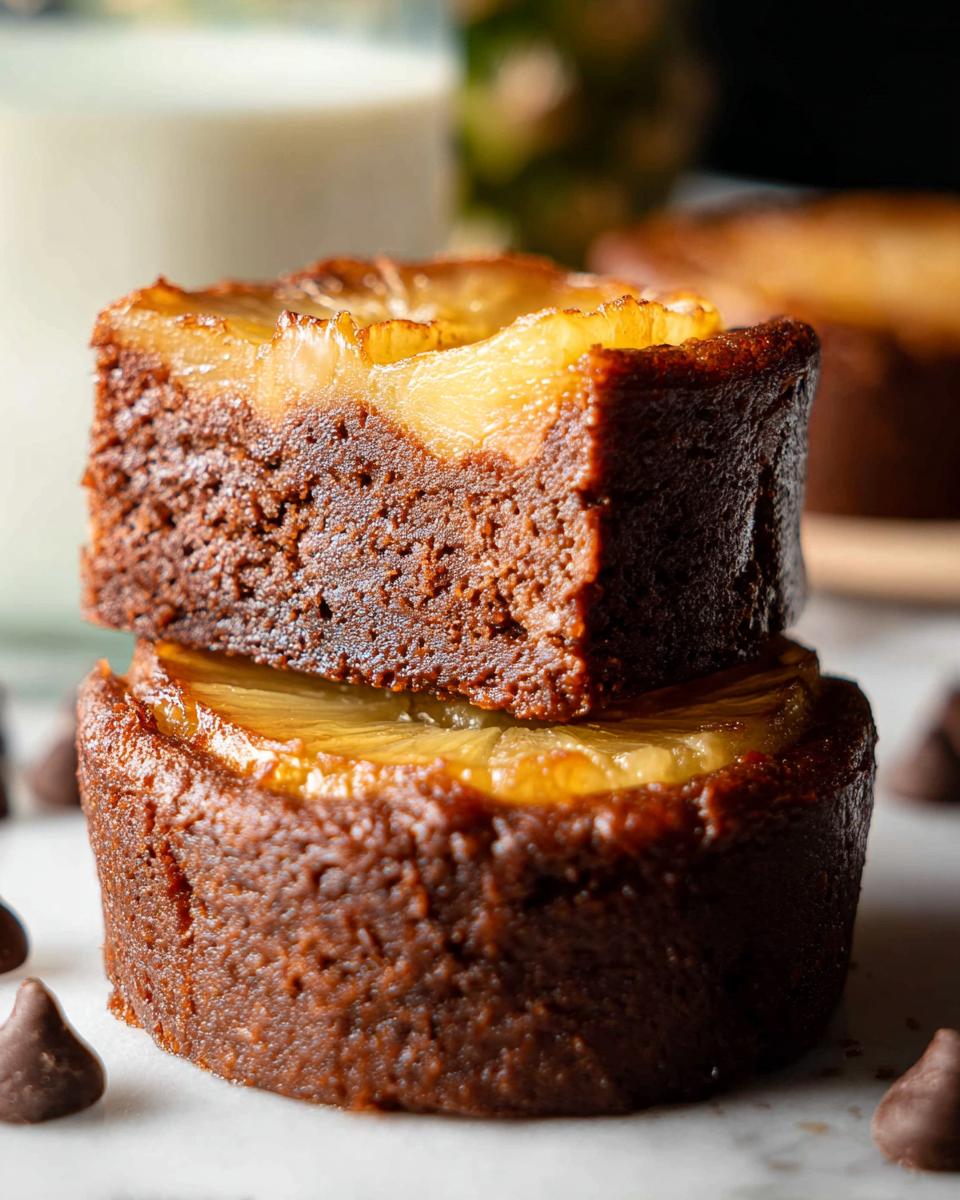
Once they’re baked, take the muffin tin out of the oven and let them cool completely in the tin on a wire rack. This is crucial; trying to move them when they’re hot will just be a disaster! After they’ve cooled down in the tin, you can carefully lift them out using the paper liners. If you made a crust layer underneath (which is totally optional, but delicious!), this is when you’d gently invert them onto a plate or tray. Let them chill in the fridge for at least an hour, or even better, a few hours, so they firm up completely. And there you have it – perfect little pineapple upside-down cheesecakes!
Tips for Perfect Mini Pineapple Upside-Down Cheesecakes
Okay, you’ve got the recipe, but let’s talk about those little secrets that make them *extra* special. For starters, the temperature of your ingredients is a big deal! Make sure that cream cheese is truly soft – room temperature is your friend here. It makes for a silky smooth batter and helps prevent those dreaded lumps. Seriously, don’t skip that step! Also, when you’re mixing the batter, try not to overbeat it once you add the eggs. You want just enough to combine, otherwise, you can end up with cracks when they bake. If you’re using a muffin tin, a gentle tap on the counter after filling really helps get rid of air bubbles. For an even richer crust, try adding a pinch of cinnamon to your crushed graham crackers! You can even make them ahead of time; they’re often even better the next day! For more amazing ideas on creamy treats, check out this recipe for cottage cheese flagels. It’s these little things that make a difference.
Ingredient Notes and Substitutions
Let’s chat about some of those key ingredients and what you can do if you need to swap something out. For those pineapple rings, canned is totally fine, just be sure to drain them really well! If you’re feeling adventurous, you could try fresh pineapple, but you might need to cook it down a bit first to get that nice sweetness. For the crust, graham crackers or vanilla wafers are classic, but if you need a gluten-free option, crushed gluten-free cookies or even some almond flour mixed with a little extra butter can work. And if dairy is a no-go, you can often find dairy-free cream cheese out there, but just be aware the texture might be slightly different. Always taste as you go!
Serving Suggestions for Your Mini Pineapple Upside-Down Cheesecakes
These miniature delights are perfect for so many occasions! Imagine them on a dessert platter at a summer barbecue, as a sweet ending to a fancy dinner party, or even just as a delightful afternoon treat with a cup of coffee. For a little extra flair, a tiny dollop of whipped cream or a sprinkle of toasted coconut flakes looks gorgeous. They’re also amazing alongside a scoop of vanilla bean ice cream! If you’re looking for other fun bite-sized desserts, check out these easy baked churro bites!
Storage and Reheating Instructions
These mini delights are best enjoyed fresh, but leftovers are totally a thing! Once they’ve cooled completely and you’ve had your fill, pop any remaining Mini Pineapple Upside-Down Cheesecakes into an airtight container. They’ll stay happy in the fridge for about 3-4 days. Honestly, they’re often even better the next day once those flavors have really melded together! If you want to freeze them for later, that works too! Just make sure they’re fully cooled, then wrap them well or pop them in a freezer-safe container. They should keep nicely for up to a month, just let them thaw gently in the fridge before you dive back in.
Frequently Asked Questions about Mini Pineapple Upside-Down Cheesecakes
Got questions? I’ve got answers! It’s totally normal to have a few things pop into your head when you’re trying a new recipe like these Mini Pineapple Upside-Down Cheesecakes. Let’s clear things up!
Can I make these ahead of time?
Oh, absolutely! These actually taste even better after they’ve had a chance to chill in the fridge for a few hours. So yes, totally make them the day before your party or event. Just store them in an airtight container and they’ll be perfect!
What’s the secret to preventing cracks?
The biggest thing is not to overmix the batter once you add the eggs, and make sure your cream cheese is totally soft. Also, baking them at the right temperature and not overbaking is key. They should have a little jiggle in the center when they’re done. Letting them cool *slowly* in the pan helps too!
Can I use fresh pineapple instead of canned?
You sure can! If you use fresh pineapple, you’ll want to cut out the tough core and then maybe sauté the rings in a little butter and brown sugar until they caramelize a bit. This helps get rid of some of the extra moisture and brings out that yummy sweetness we love. Just be sure they’re not too wet before they go into the muffin tin!
What if I don’t have muffin liners?
No worries! If you don’t have paper liners, make sure you grease your muffin tin *really* well with butter or non-stick spray. Then, when it’s time to get them out, you might need to carefully run a thin knife or offset spatula around the edges to loosen them before inverting them. They might not look quite as neat as the ones with liners, but they’ll taste just as amazing! For more fun bite-sized treats, check out these churro bites!
Nutritional Information (Estimated)
Now, let’s chat about the good stuff – the numbers! These Mini Pineapple Upside-Down Cheesecakes are a treat, and like most delicious things, they come with a bit of a calorie count. For each little cheesecake, you’re probably looking at around 200-250 calories, with about 15-18 grams of fat, and a good dose of protein thanks to the cream cheese and eggs. Remember, these are just estimates, and the exact amounts can totally change depending on the specific ingredients you use. For another tasty baked treat idea, check out this high-protein triple berry bake!
Mini Pineapple Upside-Down Cheesecakes
Ingredients
Equipment
Method
- Preheat your oven to 350 degrees Fahrenheit (177 degrees Celsius). Grease a 9×9 inch baking pan and set it aside.
- In a small bowl, mix together the oat flour, cocoa powder, and sea salt. Set this mixture aside.
- Melt the semisweet chocolate and butter (or coconut oil) together. You can do this in the microwave. Stir until completely melted and smooth.
- Whisk in the granulated sugar, Greek yogurt, vanilla extract, and eggs until the mixture is smooth.
- Add the dry ingredients to the wet ingredients and whisk until just combined. Do not overmix.
- Stir in the chocolate chips.
- Pour the batter into your prepared baking pan. Bake for 20 to 25 minutes. The brownies are done when the top is barely set and the edges are starting to pull away from the sides of the pan. For gooier brownies, bake for 20 minutes.
- Once baked, place the pan on a wire rack to cool.
- While the brownies are baking, prepare the ganache. Add the heavy cream to a small saucepan and warm it over medium-high heat until it just begins to bubble. Be careful not to let it boil.
- Turn off the heat. Add the chopped semisweet chocolate and vanilla extract to the warm cream. Whisk until the mixture is dark and smooth.
- Remove the saucepan from the heat and let the ganache cool slightly. It will thicken as it cools.
- Once the ganache has cooled slightly, pour it evenly over the cooling brownies.
- Allow the ganache to firm up at room temperature. If you want to speed up the process, you can place the pan in the refrigerator.
- Once the ganache is set, you can remove the brownies from the refrigerator. Cut them into squares and serve at room temperature, or serve them chilled.