
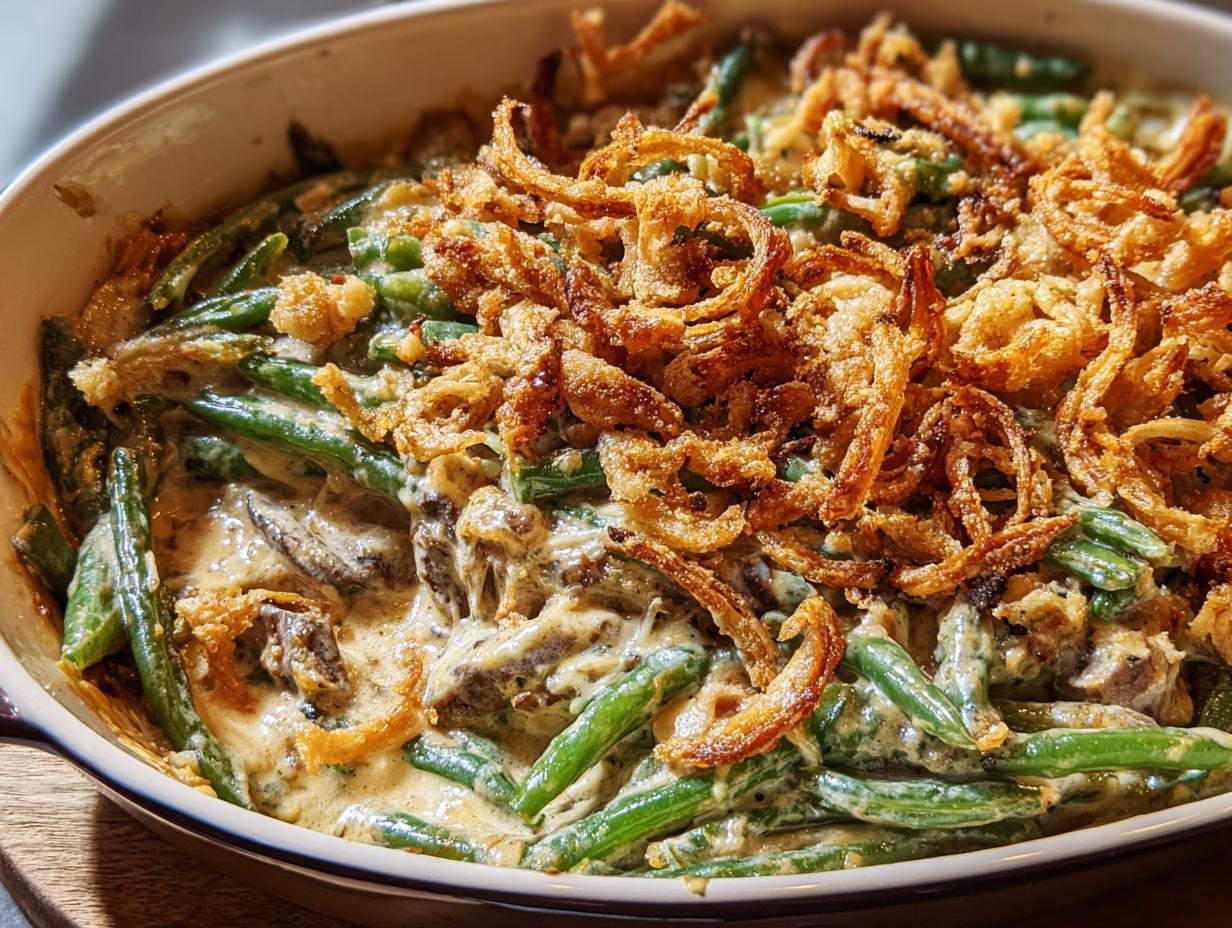
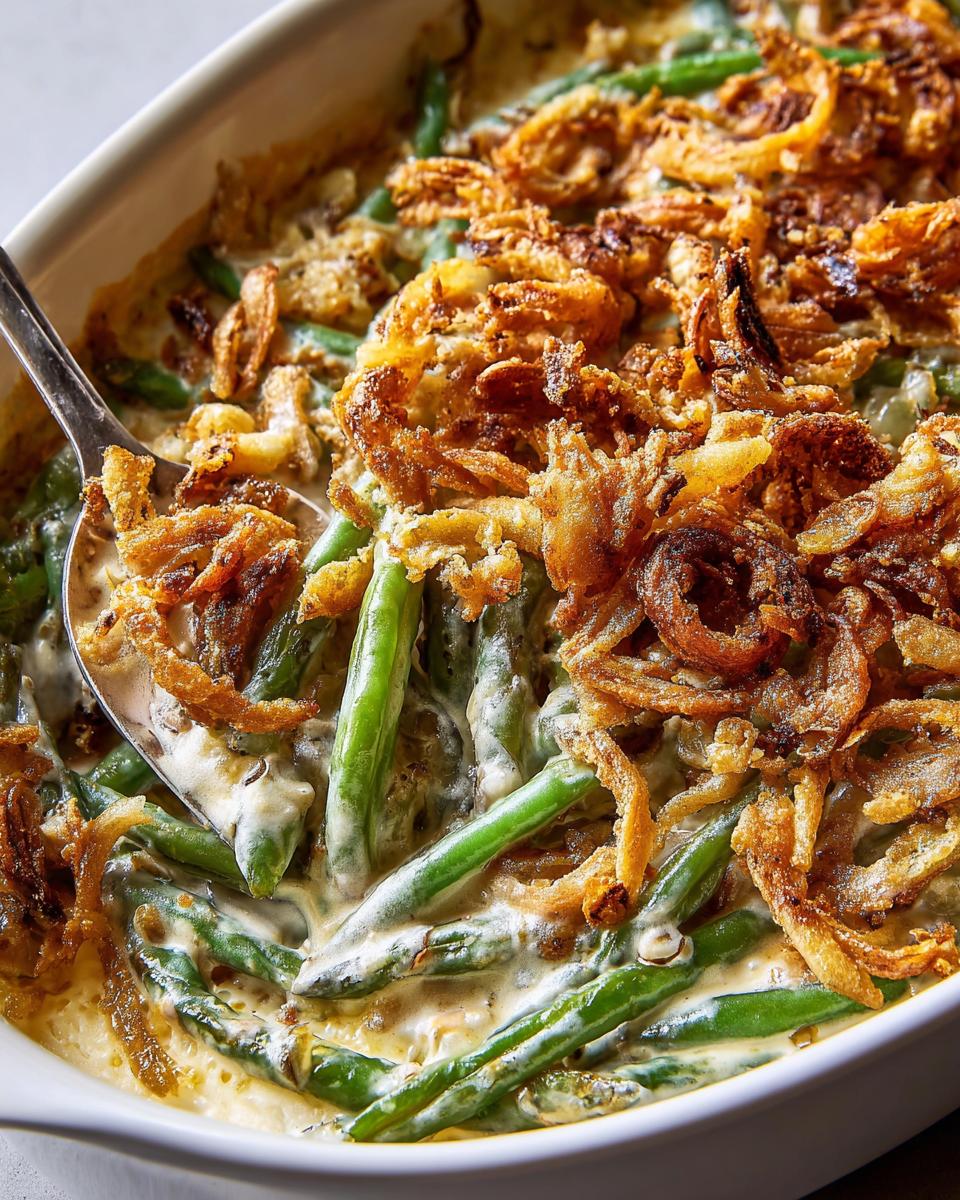
Oh, Thanksgiving! It’s that magical time of year when the air smells like cinnamon and gravy, and my tiny Brooklyn kitchen suddenly feels like the heart of the universe. I’ll never forget my very first Thanksgiving hosting gig. My kitchen was… well, let’s just say it was cozy, and my budget was even cozier! I desperately wanted to wow my family with the perfect green beans. After a few oopsies and a surprising amount of experimentation (hello, lemon juice and sautéed shallots!), I stumbled upon what makes this dish truly sing. It’s more than just a recipe; it’s a whole philosophy about seasonal ingredients. Trust me, this Ultimate Thanksgiving Green Beans Guide: Ingredients, Temps, Tips is your ticket to a side dish that’ll have everyone asking for seconds. It’s all about using the best of what’s fresh!
Why This Ultimate Thanksgiving Green Beans Guide Matters
You know how sometimes the most humble dishes can truly be the stars of the show? That’s exactly what we’re doing here with green beans! This guide isn’t just about making a side dish; it’s about transforming a classic into something spectacular that your family will rave about. As someone who absolutely adores discovering the magic in seasonal ingredients, I’ve learned that a few key tweaks can make all the difference, turning a good green bean casserole into an unforgettable one. It’s about using the best, freshest components and treating them with the love and attention they deserve to really shine on your Thanksgiving table. You’ll impress everyone, trust me!
Fresh Ingredients for Superior Flavor
Seriously, fresh makes all the difference! Forget those sad, mushy green beans from a can. Using bright, crisp, fresh green beans is like giving your casserole a vibrant makeover. They keep their lovely snap and that beautiful green color. And don’t even get me started on sautéing real yellow onions until they’re perfectly sweet and then browning up those earthy cremini mushrooms – it adds so much more depth than anything from a can. Quality ingredients are the bedrock of any great dish, especially during a holiday feast like Thanksgiving.
Perfect Cooking Temperatures for Texture
This is where the magic really happens and why focusing on temps matters so much! Getting the blanching just right means your beans stay tender-crisp, not soggy or tough. Then, baking at the right temperature ensures everything melds together beautifully until it’s bubbly and warm. Too hot, and the top burns before the inside is ready. Too cool, and it’s just… meh. Following these precise temperatures guarantees a glorious texture that’s just perfect, from the tender beans to the creamy sauce and those delightfully crispy onions on top.
Expert Tips for Thanksgiving Success
I’ve learned a thing or two from my kitchen “experiments” (okay, sometimes I just call them happy accidents!), and I want to pass them on to you. For instance, it totally matters how you caramelize those onions – don’t rush it! And making sure your sauce is smooth and rich, not lumpy, is key. Plus, getting those crispy onions just right at the end? It’s all about timing and heat. These little bits of wisdom are what I’ve picked up over the years, and they’re the secret sauce to a Thanksgiving green bean casserole that’s truly sensational.
The Ultimate Thanksgiving Green Beans Guide: Ingredients You’ll Need
Alright, let’s get down to business and talk about what you’ll need to make this Thanksgiving green bean casserole absolutely sing! It’s a pretty straightforward list, but using good quality stuff makes all the difference. Trust me on this one!
For the Green Beans and Topping
- Kosher salt (just for blanching, you know!)
- 3 lb. fresh green beans, trimmed – make sure they’re nice and crisp!
- 12 Tbsp. unsalted butter, divided – we’ll use this in two key places!
- 2 yellow onions, thinly sliced – watch them get all sweet and golden.
- 1 lb. cremini mushrooms, sliced – their earthiness is key.
- Freshly ground black pepper, to taste
- 4 cloves garlic, finely chopped – hello, flavor!
- 1 1/2 cups French’s fried onions – these little guys are magic.
For the Sauce
- 1/2 cup all-purpose flour (about 60 grams)
- 6 cups whole milk – for that lovely creamy texture.
Ingredient Notes and Substitutions
The star here is definitely those fresh green beans, so let’s focus on them! If you can’t find cremini mushrooms, shiitakes would give a really lovely, deep flavor, or even a mix of your favorite wild mushrooms if you’re feeling fancy. For the onions, if you’re not a fan of French’s fried onions (I honestly don’t know anyone who isn’t!), you could totally make your own by thinly slicing and frying some more yellow onions until they’re super crispy. It’s a bit more work, but totally worth it! Another fun twist is to add a sprinkle of smoked paprika to the sauce for a little smoky kick.
Step-by-Step Instructions for Your Ultimate Thanksgiving Green Beans
Alright, kitchen buddies, let’s get this Thanksgiving green bean dream made! Don’t worry, it’s way easier than you think, and the steps are designed to make sure every bite is pure comfort. So grab your apron and let’s dive in!
Blanching and Preparing the Beans
First things first, we need to get those gorgeous fresh green beans prepped. Get a big pot of water boiling – and don’t be shy with the salt! It’s like seasoning the bean from the inside out. While that’s heating up, set up an ice bath – just a big bowl filled with ice and water. Once the water’s rolling, carefully add your trimmed green beans. They only need a super quick dip, like 2 to 3 minutes max, just until they turn bright green and are tender-crisp. Plunge them straight into that ice bath to stop the cooking pronto! This keeps them from getting mushy and maintains that lovely vibrant color. Drain them really well and pop them into your biggest mixing bowl. We’re building flavor layers here!
Creating the Savory Onion and Mushroom Mixture
Now, let’s build some serious flavor! In that same pot (less dishes, woohoo!), melt about 4 tablespoons of butter over medium heat. Throw in your thinly sliced yellow onions and a good pinch of salt. Let them cook down, stirring now and then, until they start looking soft and sweet, about 7 minutes. Then, add your sliced cremini mushrooms. This is where the magic happens – keep stirring! Cook until they’re beautifully browned and have released their moisture, another 7 minutes or so. Finally, stir in your chopped garlic. Oh, that smell! Cook just until you can smell it, about a minute. Season this gorgeous mixture with salt and pepper. Now, scoop this whole savory party into the bowl with your blanched green beans.
Making the Creamy Sauce and Combining
Time for the creamy hug! Back in the same pot, melt the remaining 8 tablespoons of butter. Sprinkle in the flour and whisk it constantly for about 3 minutes. You want it to get little toasty and smell nutty – this is called a roux, and it’s the base of our luscious sauce. Now, slowly, I mean *slowly*, whisk in the milk, a little at a time at first, making sure it’s all smooth before adding more. Keep whisking and bring this to a gentle simmer. Let it bubble away, stirring, for about 4 minutes until it’s nice and thick, like a good gravy. Season it with salt and pepper. Gently pour this dreamy sauce over the green beans and mushroom mixture. Stir everything together so every single bean is coated in creamy goodness. Then, carefully transfer it all into your 13×9 inch baking dish. It should look like a beautiful, green, creamy dream!
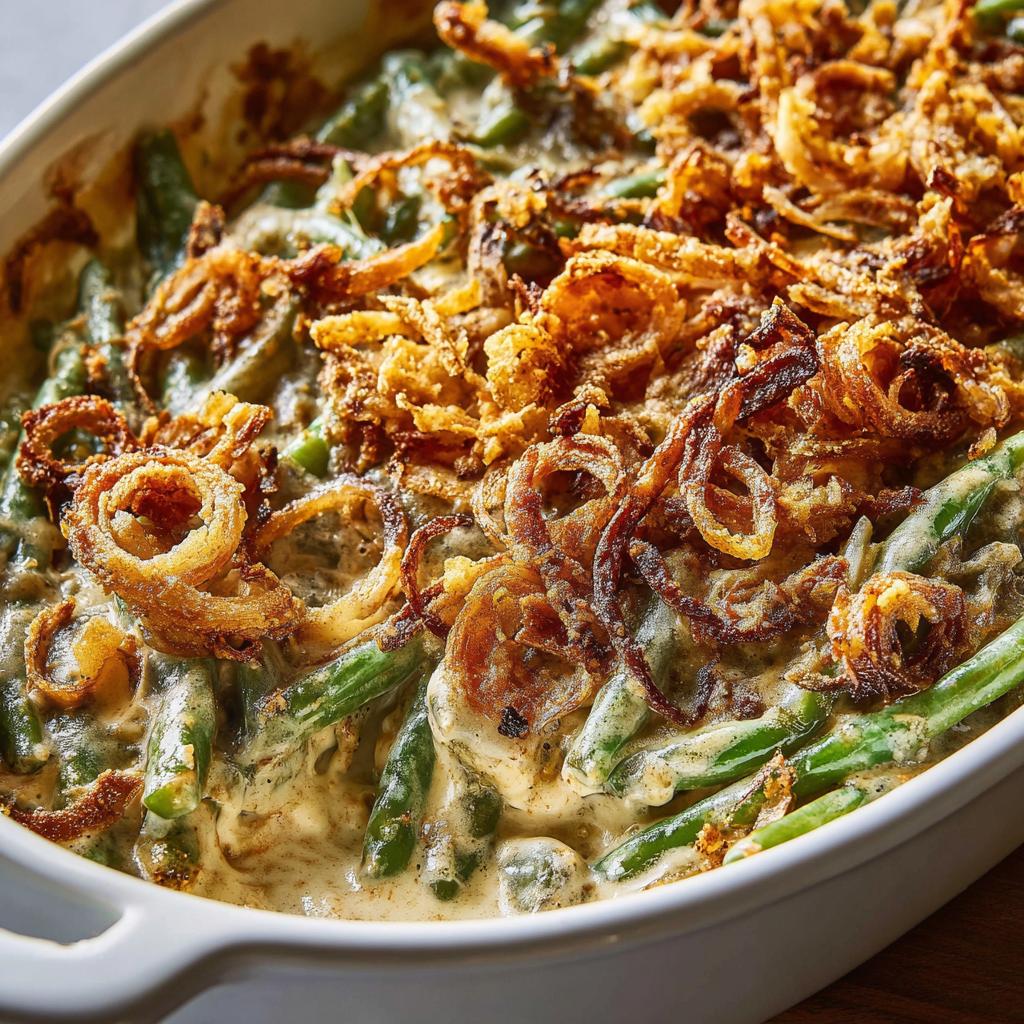
Baking and Adding the Crispy Topping
Into the hot oven it goes! Pop that baking dish into your preheated 350°F (175°C) oven. Let it bake for about 30 minutes, or until you see it all bubbling around the edges. That means it’s heated through and ready for the grand finale. Take it out, and now for the best part: sprinkle those French’s fried onions all over the top. They give us that irresistible crunch! Pop it back into the oven for just 5 more minutes, enough to warm those onions through without letting them get soggy. And voilà! Your masterpiece is ready.
Make-Ahead and Storage Tips for Your Thanksgiving Feast
When Thanksgiving rolls around, any little bit of time we can save on the big day is a lifesaver, right? The great news is this green bean casserole is totally make-ahead friendly! You can blanch your beans and get them all trimmed up a day or two before. And that creamy sauce? Make it ahead of time too and keep it separate in the fridge. Just assemble everything in your baking dish a few hours before you plan to serve, or even the night before. When it’s almost time to eat, just pop it in the oven to warm through and get bubbly. Oh, and if you want to bake it completely ahead? Do that, let it cool, cover it tightly, and then just reheat it gently in a 325°F (160°C) oven until it’s hot and steamy. Just add those crispy onions right at the end so they stay nice and crunchy!
Troubleshooting Common Issues with Green Bean Casserole
Even with the best intentions, sometimes things go a little sideways in the kitchen, right? If your green bean casserole ends up a bit too soupy, don’t panic! Usually, it means the sauce wasn’t quite thick enough. Next time, try cooking the roux (that butter and flour mix) a little longer until it’s golden and toasty, and let the sauce simmer until it’s visibly thicker before you add the beans. Also, make sure you drain those blanched beans really, *really* well! If your onions aren’t as crispy as you’d hoped, they might have been added too early or the oven temp was a tad too low when they went on. And for goodness sake, don’t overcrowd the baking dish; give everything some space to bubble and cook properly. A quick call to my friend Alex over at ketocookjournal.com/contact/ has always helped me sort out those quirky cooking conundrums!
Estimated Nutritional Information
Now, let’s talk numbers! Keep in mind these are just estimates, ’cause the exact counts can wiggle around depending on the brands you use and how generous you are with things like butter (haha!). Based on our delicious recipe, you’re looking at roughly 647 calories per serving. This dish brings a good mix of nutrients, but remember, it’s a holiday treat loaded with deliciousness!
Share Your Ultimate Thanksgiving Green Beans Creation!
Okay, now it’s your turn to shine! I absolutely *love* hearing from you all. Did you try this guide? Did you tweak it, make it your own, or perhaps discover a new secret ingredient? Drop a comment below, slap a rating on this recipe, or share what adventures you had in the kitchen. I can’t wait to hear all about your amazing Thanksgiving green bean creations! For more inspiration, check out my story or browse all my recipes!
Ultimate Thanksgiving Green Beans Guide: Ingredients, Temps, Tips
Ingredients
Equipment
Method
- Preheat your oven to 350°F (175°C). Prepare an ice bath in a large bowl. In a large pot, bring generously salted water to a boil. Cook the green beans until bright green, about 2 to 3 minutes. Transfer the beans to the ice bath to cool. Drain the beans and set them aside in another large bowl.
- In another large pot or saucepan over medium heat, melt 4 tablespoons of butter. Add the sliced onions and a large pinch of salt. Cook, stirring occasionally, until the onions begin to soften, about 7 minutes. Add the mushrooms and cook, stirring often, until they are browned, about 7 more minutes. Stir in the garlic and cook until fragrant, about 1 minute. Season with salt and pepper. Transfer this onion and mushroom mixture to the bowl with the green beans.
- In the same pot over medium heat, melt the remaining 8 tablespoons of butter. Add the flour and cook, whisking frequently, until it turns golden and smells toasty, about 3 minutes. Gradually whisk in the milk. Season with salt and pepper. Bring the mixture to a simmer and cook, stirring occasionally, until it thickens, about 4 minutes. Pour this sauce into the bowl with the green beans and stir to combine everything. Transfer the mixture to a 13″ x 9″ baking dish.
- Bake the green bean casserole until it is warmed through and bubbling, about 30 minutes.
- Top the casserole with the fried onions. Continue to bake until the onions are warmed through, about 5 minutes more.
Nutrition
Notes
Tried this recipe?
Let us know how it was!
Precision Keto Scientist
Numbers don’t lie, and neither do my recipes. I’m a biochemist who fell into keto cooking through my own metabolic research—and I approach recipe development like a lab experiment, complete with macro calculations precise to the tenth of a gram.
My journey started in diabetes research labs at Johns Hopkins, where I spent six years studying how different macronutrient ratios affected insulin sensitivity. Personal experimentation with therapeutic ketosis for cognitive enhancement led me down a rabbit hole of recipe testing that eventually consumed more hours than my actual day job.
While other cookbook authors describe flavors and textures, I quantify ketone elevation curves and glycemic impact data. My recipe database contains 340+ formulations, each tagged with detailed nutritional analysis, predicted ketosis timing, and optimal meal spacing. I measure salt by weight, time cooking processes to the minute, and log ingredient sourcing obsessively for consistent results.
My breakthrough research on fat-protein ratios for sustained ketosis got published in the Journal of Nutritional Biochemistry. My “Macro Math Mastery” workshops have trained over 5,000 people in precision meal planning. I even collaborated with continuous glucose monitor manufacturers to create the first real-time feedback system for recipe optimization.
I left my pharmaceutical research position at Merck three years ago to focus on metabolic nutrition consulting. Now I work with professional athletes, biohackers, and medical professionals seeking therapeutic ketosis protocols. When I’m not in my lab-kitchen, I’m competing in chess tournaments or documenting my daily biomarker measurements with true data scientist obsessiveness.
Cooking is just applied chemistry—and chemistry follows predictable rules. Master the variables, control the outcomes.