If you’ve ever felt that pre-party panic when you realize you need a gorgeous, festive dessert but only have about thirty minutes to bake? Trust me, I have been there! That frantic feeling disappears the moment you remember your secret weapon: the humble, yet mighty, frozen log of ready-to-go dough. These unbelievably charming treats are the ultimate time-saving, festive solution my family relies on. I’ll never forget the first time I made Slice-and-Bake Party Cookies for my daughter’s birthday. We were knee-deep in party preparations, and I wanted something that would impress the guests without devoting a whole day to baking. As we rolled the dough, she giggled and insisted on shaping the logs, which we then sliced and baked just before everyone arrived. The aroma that filled our home was magical, and those cookies instantly became the highlight of the celebration.
Why These Slice-and-Bake Party Cookies Are Your New Go-To Treat
These cookies are a lifesaver when you need wow-factor without the weekly baking commitment. Honestly, they save my sanity during holidays and sudden get-togethers! They look like you slaved over them for hours, but the reality is far simpler.
- Effortless decoration potential using sprinkles and glaze.
- Sturdy enough for transport to school events or potlucks.
- They bake up perfectly every single time—no fuss!
Make Ahead Dough for Stress-Free Baking
This is where the magic of the Make Ahead Dough comes in. You mix everything up, roll it into logs, and forget about it in the fridge! When the party invite pops up last minute, you don’t panic about mixing ingredients. You just slice and bake. It keeps the stress miles away from your kitchen.
Quick Bake Time for Last-Minute Needs
Once that dough is chilled, the actual baking is ridiculously fast. We are talking 12 to 14 minutes in the oven, max! That Quick Bake timing means you can pull a fresh, warm batch out just as your guests start ringing the doorbell. Who doesn’t love that smell?
Gathering Ingredients for Perfect Slice-and-Bake Party Cookies
To ensure these Slice-and-Bake Party Cookies turn out exactly right—the perfect texture, the right amount of sweetness—we need to talk about getting our supplies ready. Trust me, paying attention to detail here makes forming the dough so much smoother later on. It’s all about having everything prepared before you even turn the mixer on!
Essential Components for the Cookie Dough
For the base dough, we need three things to be at the right temperature. Make sure your 3/4 cup of unsalted butter is completely softened to room temperature, which helps it cream up perfectly. You’ll also want your large egg at room temperature. We use light brown sugar, and it needs to be packed down really well into the measuring cup for that rich flavor. When you measure the 2 cups of all-purpose flour, please spoon it into the cup and level it off—don’t just scoop it straight from the bag, or you’ll end up with dry cookies!
Flavor and Decoration Elements
The flavor combo here is really what makes them special; we use both pure vanilla extract and a little kick of almond extract. Then comes the fun part: the sprinkles! You need 2/3 cup mixed right into the dough for that beautiful interior color. If you are rolling the logs in extra sugar before slicing, grab some coarse sugar for garnish! That little bit of crunch on the outside is fantastic.
Optional Chocolate Coating Ingredients
If you decide to dip half the cookie like I did for my daughter’s party, you’ll want 8 ounces of white chocolate. Make sure you buy a bar and coarsely chop it yourself, instead of using chips, because the chips have stabilizers that make melting trickier. That chopped chocolate melts down beautifully smooth!
Step-by-Step Guide to Making Slice-and-Bake Party Cookies
Okay, let’s jump into the fun part! While the dough may look simple, following these steps ensures we get those beautiful, uniform rounds that make these Slice And Bake Cookies so appealing.
Mixing the Slice And Bake Cookies Dough Base
You absolutely have to start with mixing the butter until it’s smooth, then beat in that brown sugar until the mixture looks light and fluffy—it takes a minute or two. Next, toss in your egg and the vanilla and almond extracts. Once that’s happy, switch to low speed and carefully add your flour and salt just until it comes together. Now, for the sparkle! Turn the mixer up to high speed and beat in those 2/3 cup of sprinkles. Don’t overmix once the sprinkles are in there, we just want them evenly distributed.
Forming and Chilling the Logs
When the dough is ready, dump it onto a surface lightly dusted with flour. Divide that mass into exactly two equal halves. You need to work these by hand into two tight, 8-inch logs. Wrap each one up super snug in plastic wrap—think of it like tucking them in for a nap! Pop these into the fridge for a minimum of four hours. If you’re planning ahead, these logs are totally Freezer-Friendly for up to three months, which is such a lifesaver!
Baking Your Party Cookies
When it’s time for the Quick Bake, get your oven warmed up to 350°F (177°C) and line those sheets. Pull the logs out and slice them about half an inch thick—this is key for shape! Lay them out about two inches apart. Bake them for about 12 to 14 minutes. You’re watching for the edges to turn just barely light brown. Let them sit on the hot pan for five minutes before moving them to a cooling rack to chill out completely. Never try to dip a warm cookie, or you’ll have a melted mess!
Applying the Finishing Chocolate Dip
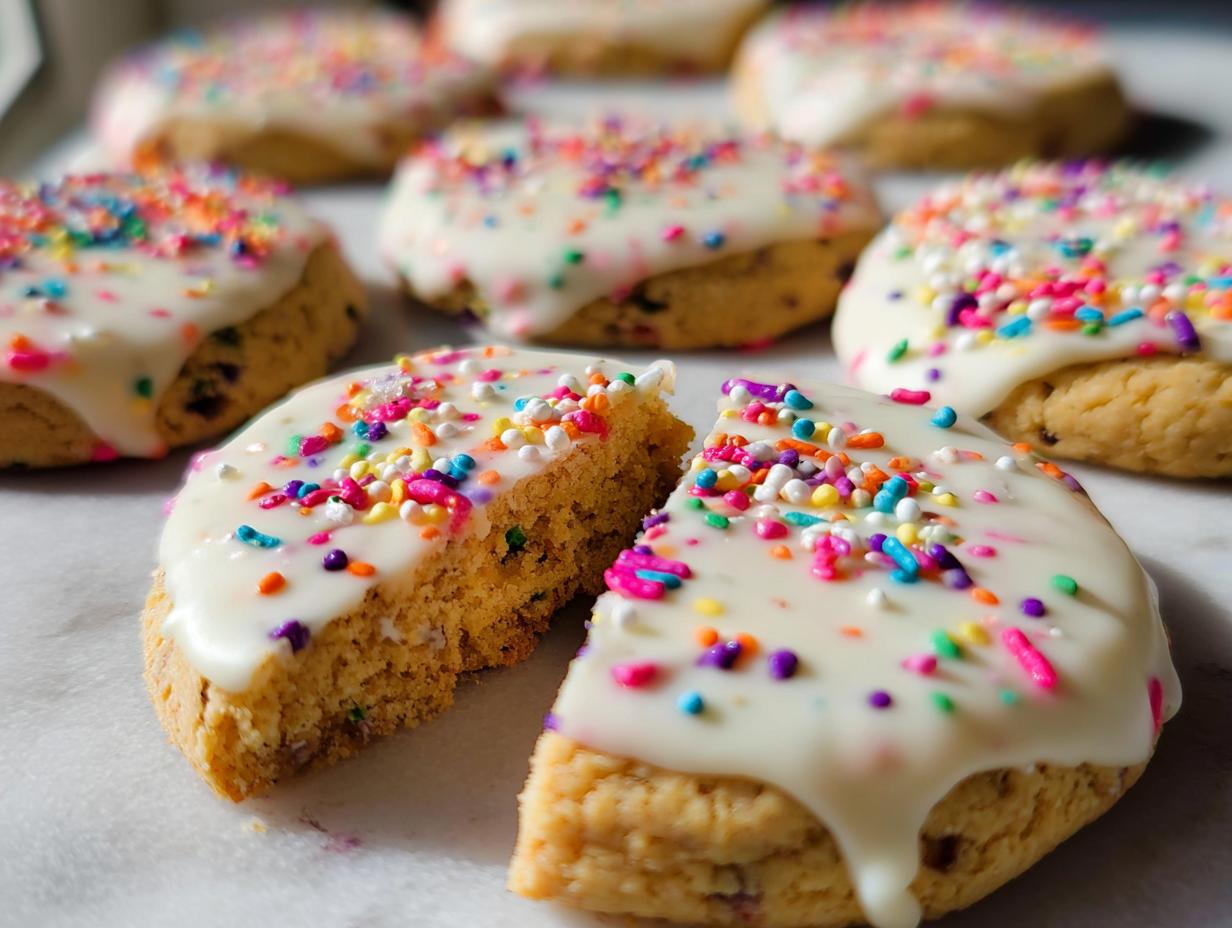
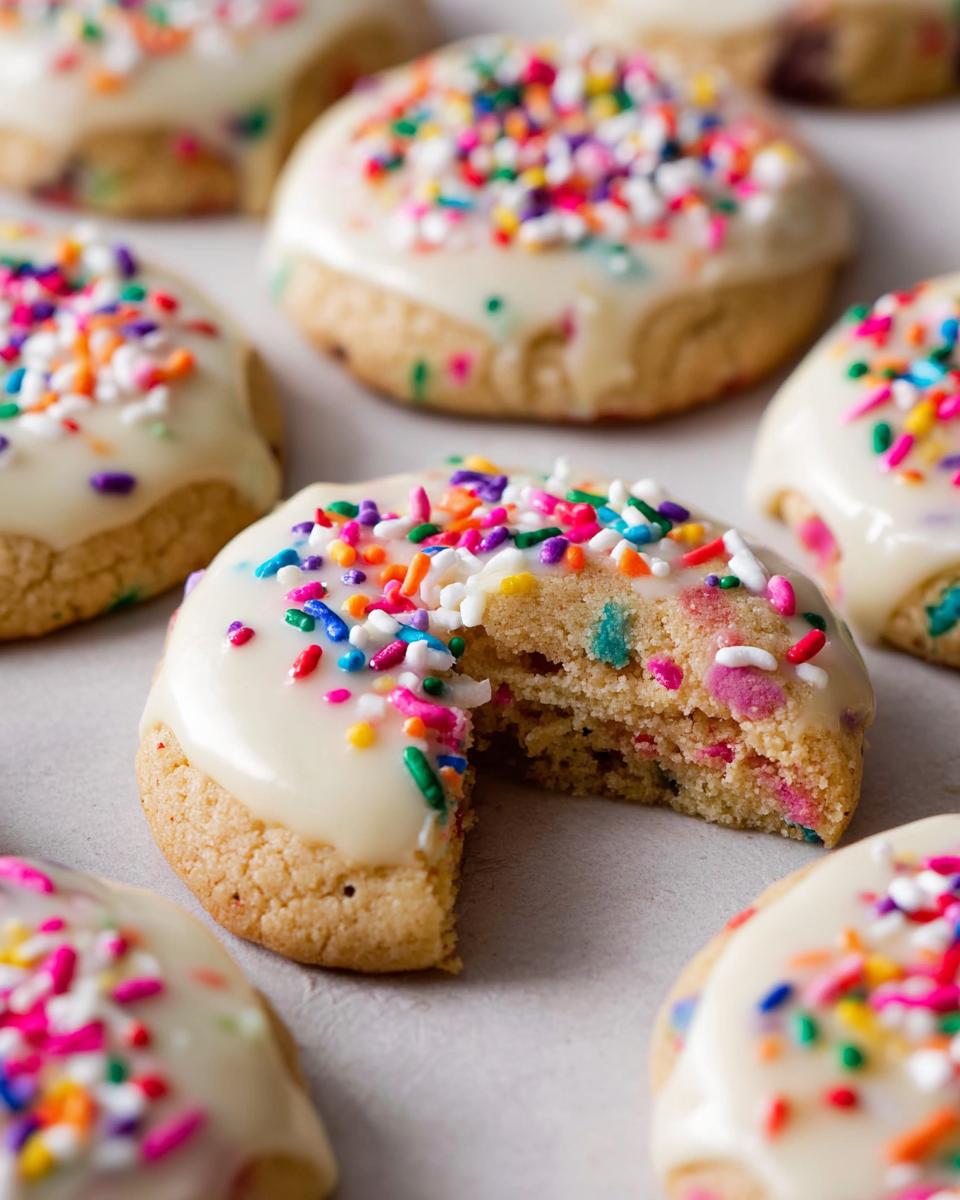
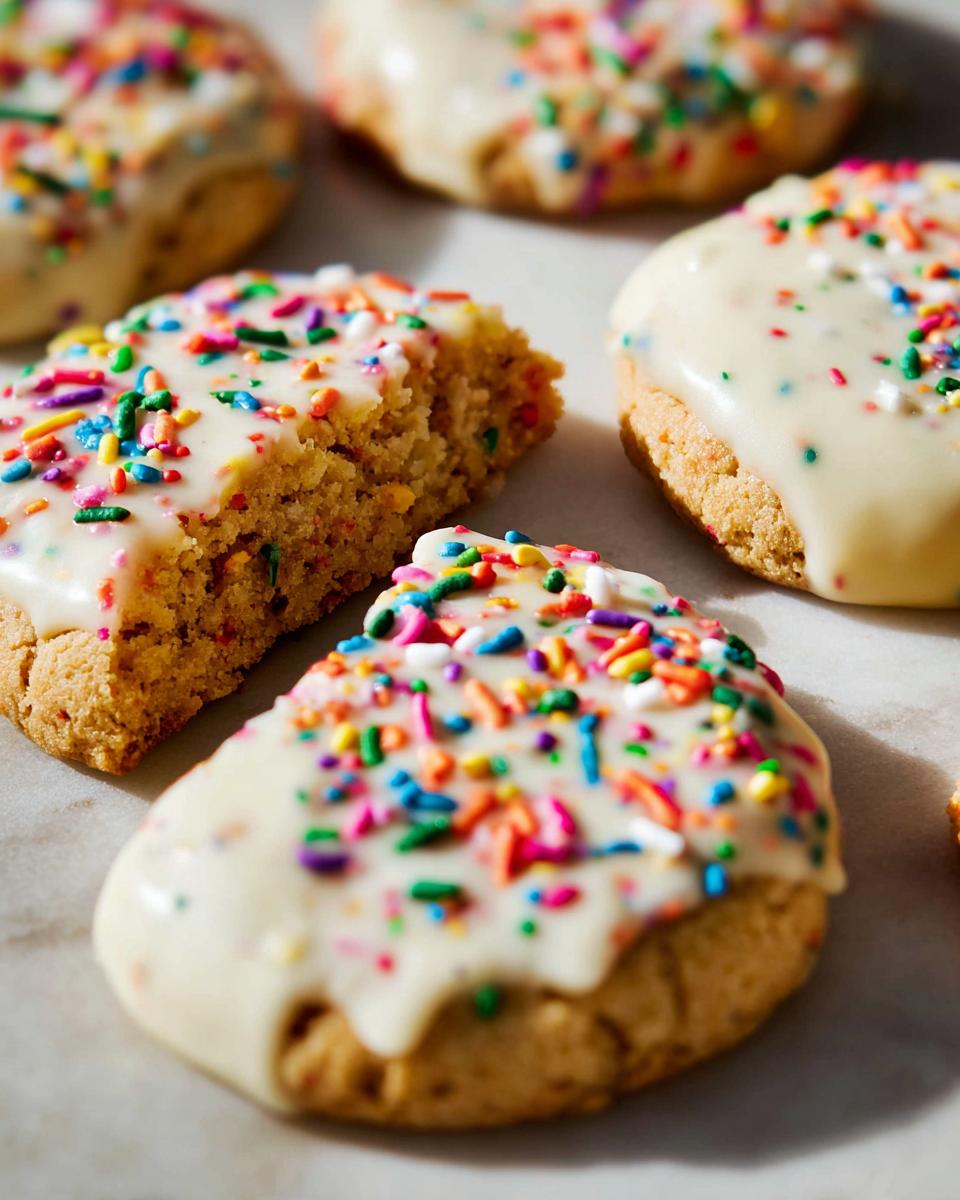
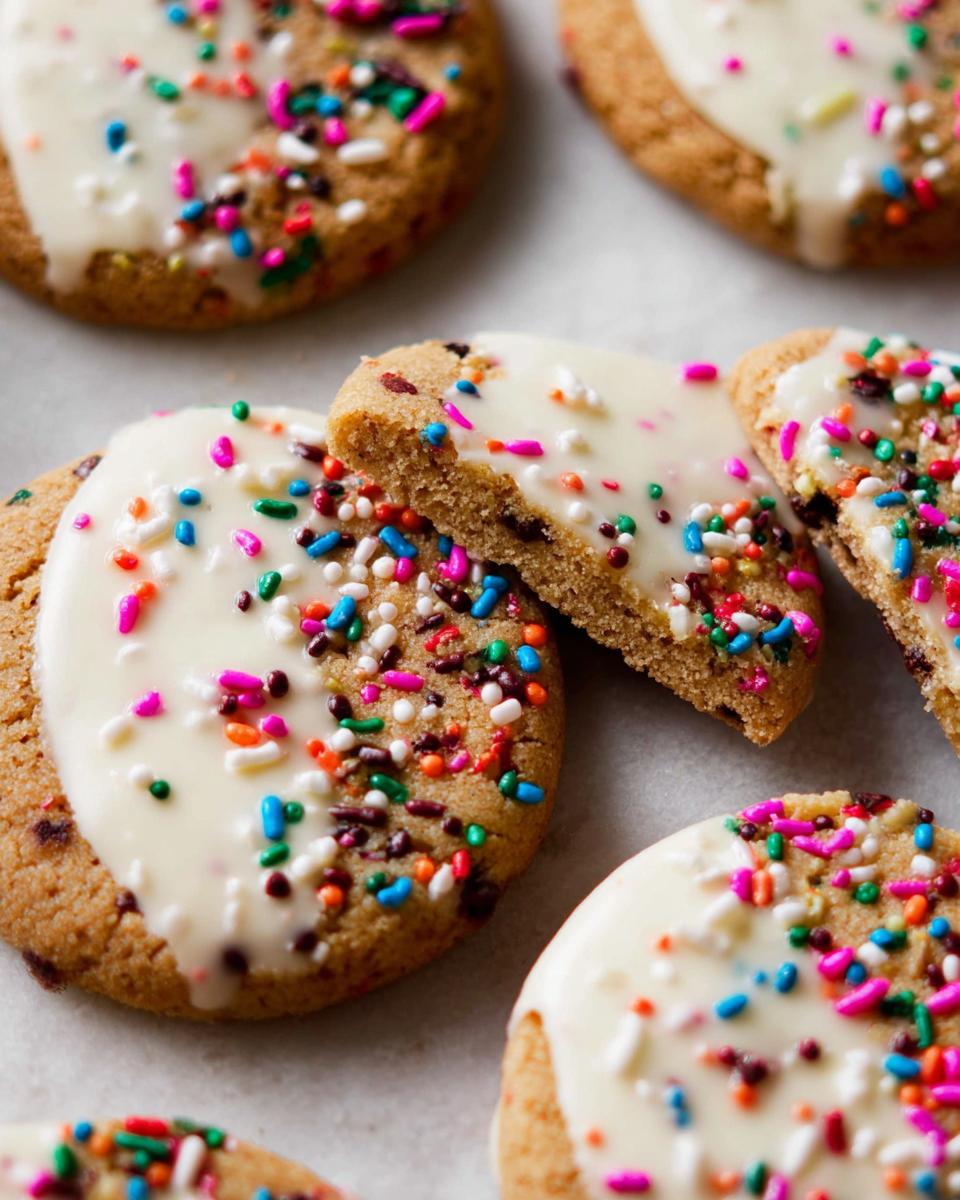
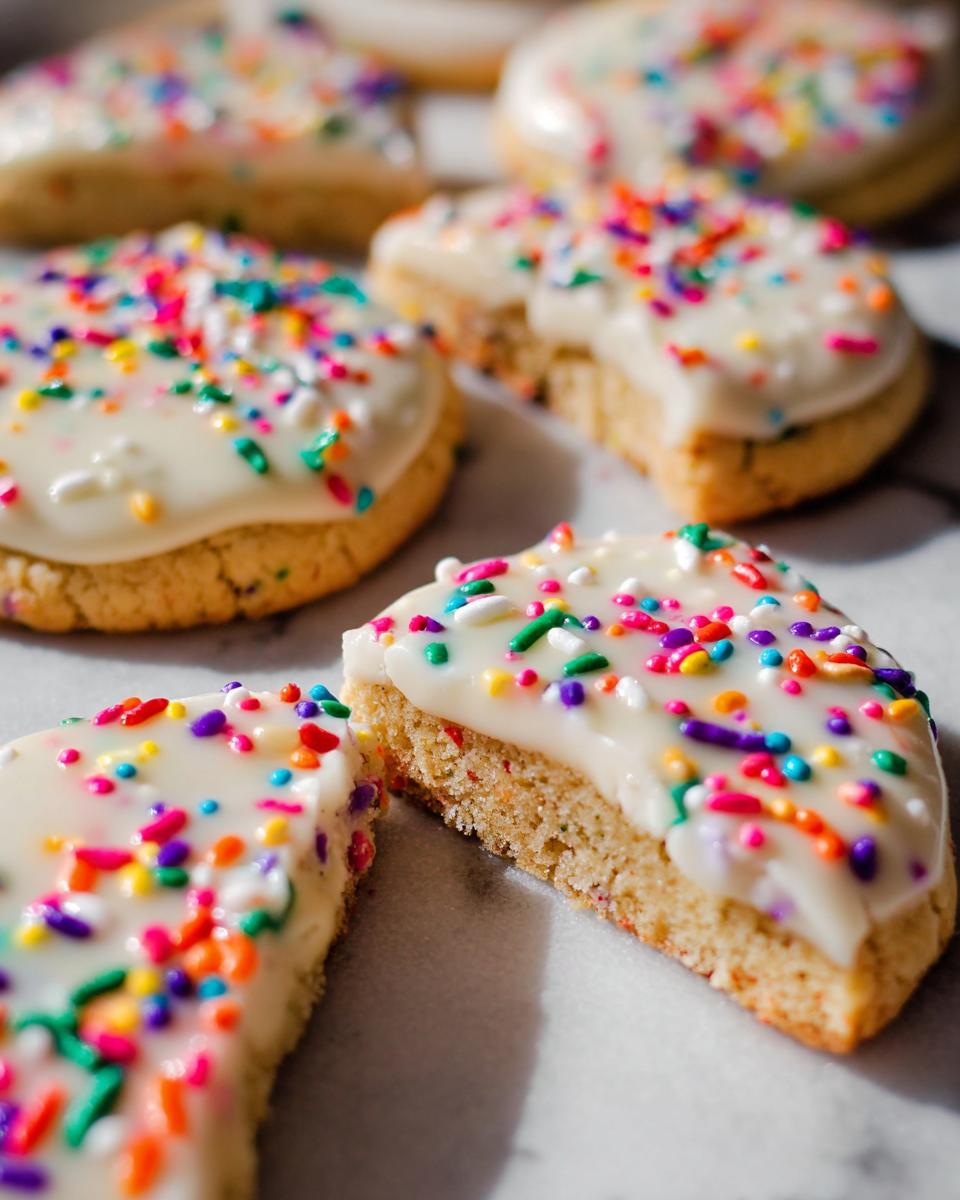
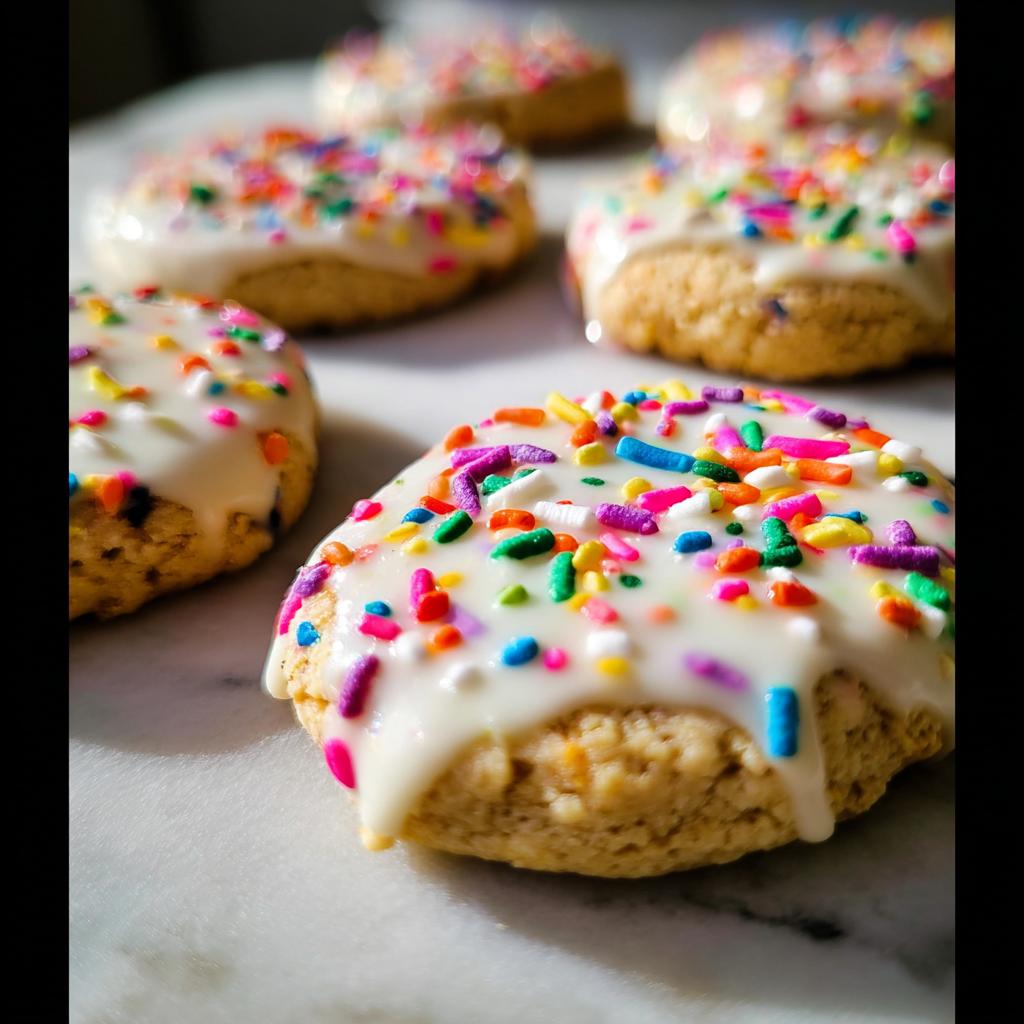
If you are adding that white chocolate coating, you have to melt it slowly. I prefer my double boiler because it’s gentle, but you can microwave it in short 15-second bursts, stirring *every single time*. The chocolate needs to be smooth and liquid, but not scorching hot. Hold the completely cooled cookie and dip just half of it in the nice, melted white chocolate. Set it back down on parchment paper and toss some extra sprinkles on top before that chocolate sets up hard.
Tips for Perfect Slice-and-Bake Party Cookies Every Time
Baking is all about temperature, and these Slice-and-Bake Party Cookies are no exception! If you rush the temperature steps, your beautiful logs turn into oddly shaped puddles. It’s worth taking that extra moment to get things right, even when you’re in a hurry.
Handling Temperature for Slice-and-Bake Party Cookies
Before you start mixing, your butter needs to be soft—you know, it indents when you press it, but it shouldn’t feel greasy or warm. If the butter is too melty, the dough becomes oily, and the cookies will spread way too much. More importantly, chilling the dough completely isn’t optional; it’s non-negotiable! That cold dough is what keeps your slices holding their neat, round shape after they hit the hot oven. Don’t skip that four-hour fridge nap!
Troubleshooting Common Issues
Sometimes life happens, and things don’t cooperate. If you pull the logs out after chilling and they feel too crumbly or hard to slice cleanly, just let them sit on the counter for ten minutes. If you find your dough is soft because your kitchen is warm, wrap those logs even tighter and stick them back in for another hour! If your baked cookies spread out wide and thin, that’s a sure sign the dough was too warm when it hit the sheet. Next time, chill it longer!
Storage and Make-Ahead Options for Your Party Cookies
This is hands-down the best part about these Slice And Bake Cookies—they are built for people who plan ahead! Whether you are prepping for a big holiday event or just stocking your freezer for when the craving hits, this dough is your best friend. It’s wonderfully Freezer-Friendly.
The recipe notes remind us that you can store that perfectly shaped dough log in the refrigerator for up to five days. That means you can mix the dough on Monday and bake a batch fresh for Friday’s school event without lifting a finger in between! I always keep one log wrapped tightly in the freezer, too, for those emergency situations where you need Party Cookies fast.
If you have already baked your Slice-and-Bake Party Cookies, store them in an airtight container at room temperature. They stay fresh and delicious for about four or five days, if they last that long! If you’ve dipped them in chocolate, just make sure they are fully set before stacking them up.
Creative Variations for Your Slice-and-Bake Party Cookies
While the classic sprinkle version in this Slice-and-Bake Party Cookies recipe is fantastic, these logs are totally blank canvases, aren’t they? Once you master the dough, you can switch things up for any holiday or party theme! Instead of almond extract, try using a tiny bit of lemon or peppermint extract.
If you want to skip the white chocolate dip, try rolling the logs in finely chopped nuts for texture, or mix in mini chocolate chips or finely chopped dried bright red cherries into the dough instead of the sprinkles. It’s amazing how easy it is to transform these simple Party Cookies!
Equipment Needed for Making Slice-and-Bake Party Cookies
You don’t need a ton of fancy gadgets for these beauties, which is another point in their favor! Having the right tools just makes slicing and baking those perfect circles easier. Here is what you’ll want ready before you start mixing up that Make Ahead Dough.
- A handheld mixer or stand mixer for creaming the butter and sugar properly.
- A couple of large bowls for mixing the dough components.
- Your trusty baking sheets—you’ll need enough to spread your cookies out!
- Parchment paper or silicone baking mats; don’t skip this for easy cleanup!
- Plastic wrap, because tight wrapping around those dough logs is super important.
- If you’re melting chocolate, you’ll want a double boiler or a microwave-safe bowl.
- And finally, a cooling rack so those Party Cookies stop baking once out of the oven.
Frequently Asked Questions About Slice And Bake Cookies
I get so many questions about these cookies from readers who are planning big events, and honestly, they are great questions! We want every baker to succeed, whether this is your first time making Slice And Bake Cookies or you’re a seasoned pro. Here are the things I hear most often about turning this dough into amazing Party Cookies.
Can I skip the chilling time for the dough?
Oh, please don’t try it! If you skip the chilling time, the dough will be too soft when you try to slice it, turning your nice circles into weird blobs. Even if you manage to slice them, they won’t hold their shape when they hit the oven. The chilling time is crucial for making sure your Slice And Bake Cookies look beautiful!
How long do baked Slice-and-Bake Party Cookies last?
If you have any left over after your gathering—which is rare in my house!—the baked, undecorated cookies store really well. Keep them in a tightly sealed, airtight container at cool room temperature. They stay delightfully fresh for about four or five days. If they have the chocolate coating, they might last a bit longer, but the texture is best in the first few days.
What is the best way to freeze the dough logs?
For the best results in the freezer, you must wrap those logs tightly. After you shape the dough, wrap each log twice in plastic wrap—extra tight! Then, I like to slide that wrapped log into a zip-top freezer bag, making absolutely sure I squeeze every bit of air out before sealing it. This double-layer protection keeps freezer burn away and ensures your Make Ahead Dough tastes fresh when thawed.
Sharing Your Festive Slice-and-Bake Party Cookies
Now that you’ve mastered the Slice-and-Bake Party Cookies, I would absolutely love to hear how they turned out for your next event! Did you use fun colors for the chocolate dip? Tell me about your decorating successes in the comments below! Don’t forget to rate this recipe if it saved your party planning!
Slice-and-Bake Party Cookies
Ingredients
Equipment
Method
- In a large bowl, beat the softened butter for 1 minute until smooth. Add the brown sugar and beat until fluffy. Beat in the egg, vanilla extract, and almond extract until fully combined.
- Beat in the flour and salt until combined. Switch to high speed and beat in the sprinkles. Turn the dough onto a floured surface, divide into two, and shape each half into an 8-inch log. Tightly wrap the logs in plastic wrap and chill in the refrigerator for at least 4 hours, or up to 5 days.
- Preheat your oven to 350°F (177°C). Line two large baking sheets with parchment paper or silicone baking mats.
- Remove the chilled logs from the refrigerator. If desired, roll the logs in coarse sugar. Slice each log into about 12 cookies, approximately 1/2 inch thick. Place the cookies on the prepared baking sheets, about 2 inches apart.
- Bake for 12-14 minutes, or until the edges are lightly browned. Let the cookies cool on the baking sheets for 5 minutes before transferring them to a wire rack to cool completely.
- Melt the white chocolate using a double boiler or in the microwave in 15-second increments, stirring after each, until smooth. Dip each cooled cookie halfway into the melted white chocolate. Place the dipped cookies onto a parchment-lined baking sheet. Sprinkle with additional sprinkles. Refrigerate the baking sheet until the chocolate is set.
Notes
Tried this recipe?
Let us know how it was!