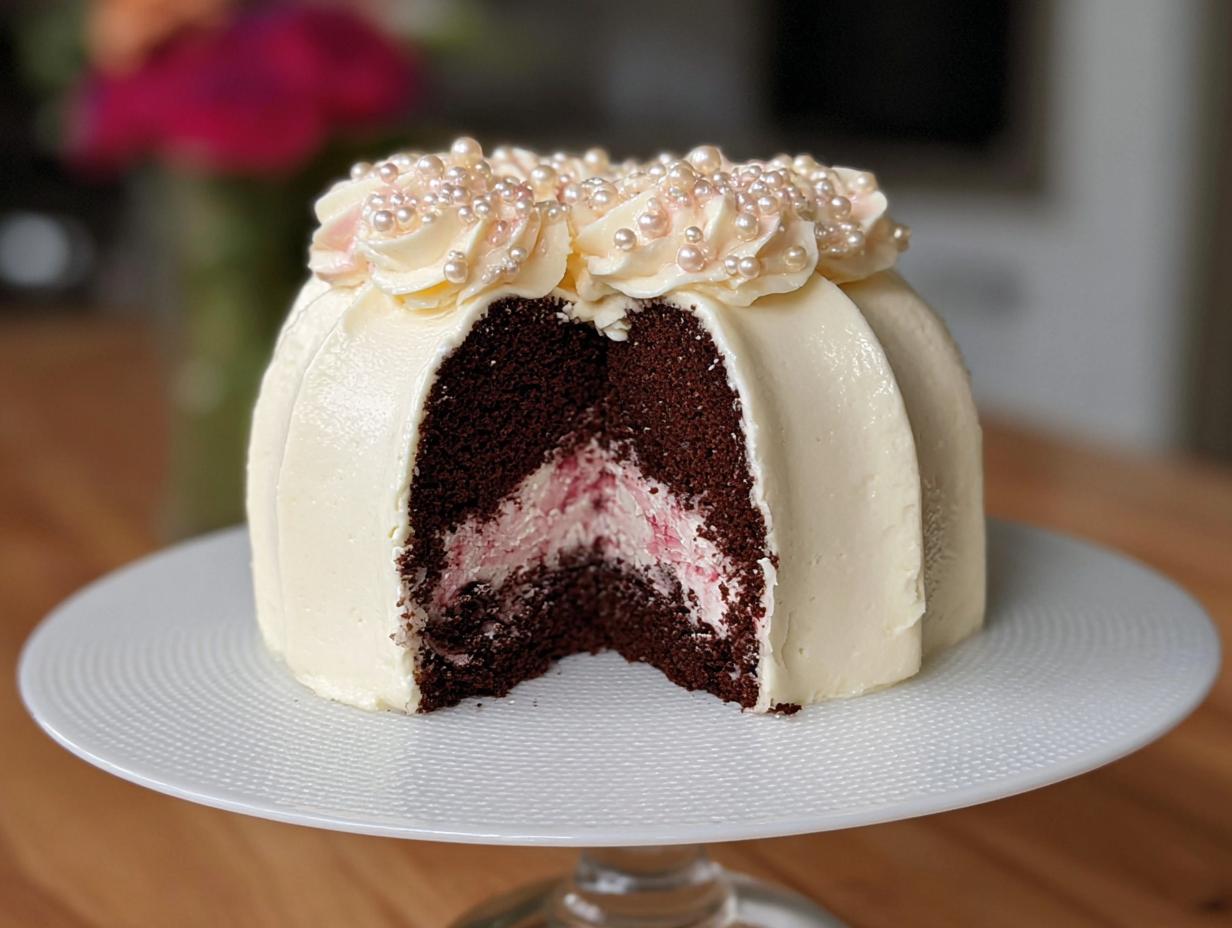
Don’t you just love desserts that feel impossibly luxurious but are secretly easy to pull off at home? I live for that moment when people gasp because your creation looks like it took a week, when really, it just took a little love and the right technique! I remember seeing the most stunning cake at a friend’s wedding—it shimmered with gold dust, and I just knew I had to replicate that drama. That inspiration led me to perfect this gorgeous showstopper: the Gold-Dusted Bundt Cake.
Even though I often play with keto recipes, this one is pure, decadent celebration! Watching my family light up when they tasted this rich, chocolatey beauty, all sparkling under the lights, reminded me why we bake in the first place. It’s about making something special that everyone can truly enjoy. This devil’s food cake with its champagne buttercream is going to be your new go-to for making any Tuesday feel like New Year’s Eve!
Why This Gold-Dusted Bundt Cake Stands Out
Honestly, this cake isn’t just a dessert; it’s an event on a platter. We’re talking about serious visual impact without the high-stress decorating marathon. Why is this one so special? Because it’s sturdy enough for intricate work but tastes unbelievably rich. You’re getting bakery-quality style right out of your home oven.
- Stunning presentation thanks to that shimmer!
- The delicate champagne buttercream is surprisingly light.
- It’s the perfect showstopper for any big celebration or special holiday.
Easy Elegant Presentation
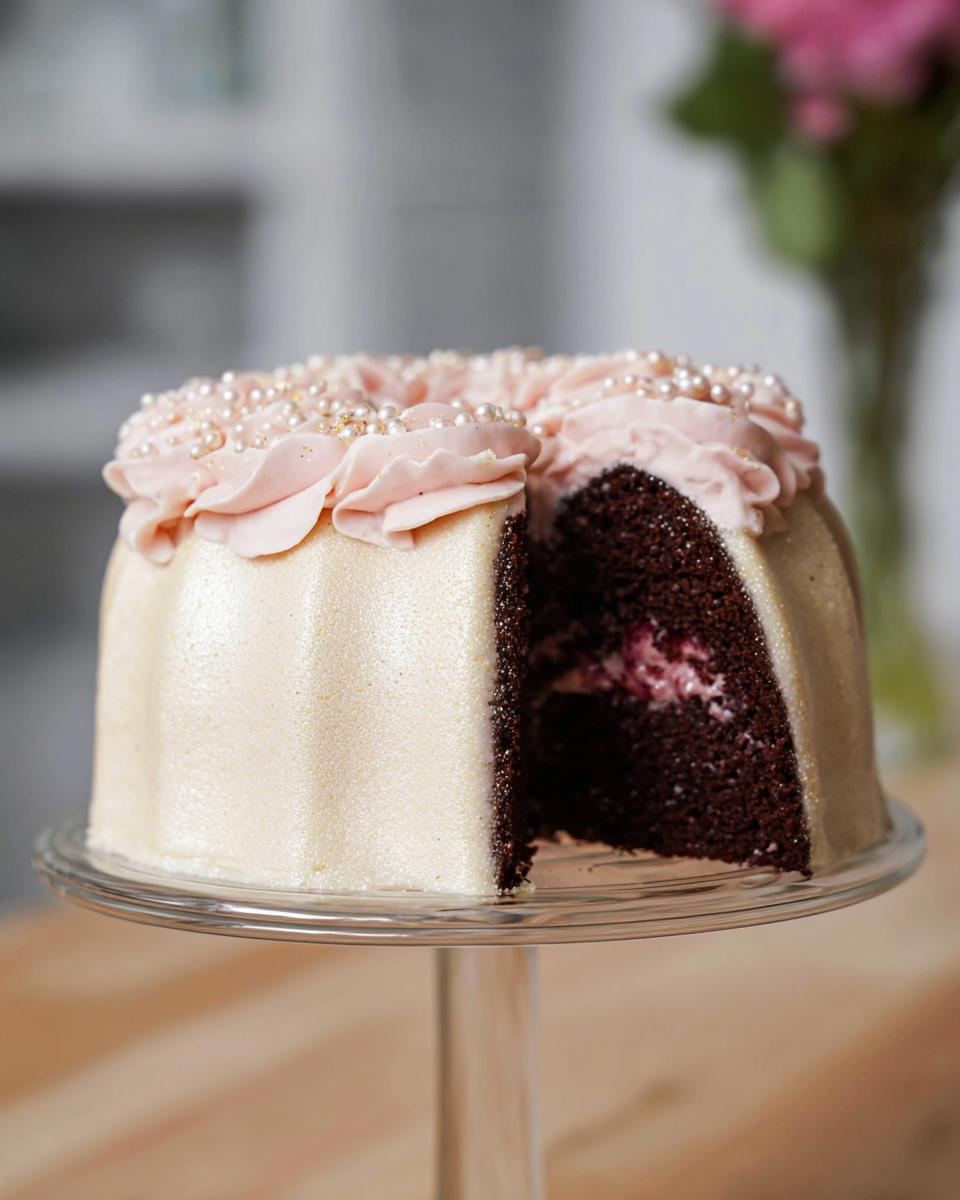
Forget fussy fondant or complicated piping! The trick here is the Edible Gold luster dust. Just a light dusting transforms this chocolate cake into something priceless—it’s the definition of Easy Elegant. It catches the light beautifully, making the whole Bundt Cake look like it was professionally finished.
Rich Devil’s Food Cake Base
That deep, dark chocolate flavor? That’s the devil’s food base shining through. It holds up perfectly to the richness of the buttercream. Because we are using a classic Bundt Cake technique, the texture is dense enough to handle stacking but moist enough to melt in your mouth. It’s chocolate perfection!
Essential Equipment for Your Gold-Dusted Bundt Cake
Okay, so because this cake is aiming for gorgeous elegance, we need to make sure our tools are up to snuff. Don’t panic! I’m not asking you to buy a professional bakery overnight. But having these specific items on hand—especially for dealing with the decadent Champagne Buttercream—makes the whole process way less stressful when you reach the final stages.
Baking and Mixing Tools
First things first, we need the vessel for our beautiful chocolate cake. You absolutely need a good quality Bundt pan. If yours is old or has fiddly details, now is the time to check it for any rough spots!
For mixing, a stand mixer is your best friend here, especially when making that Swiss Meringue buttercream. It takes ages to get the egg whites to the right stiff peak by hand.
You’ll also grab your basic mixing bowls and a whisk, of course. And trust me on this: use parchment paper to line your cake layers. It saves SO much heartache when trying to release those beautiful dark cake rounds.
Decorating Essentials for Edible Gold
This is where we get fancy, and these tools feel like pure magic when you use them! For the professional finish, we’re moving beyond the spatula. You’ll need a dedicated fine paintbrush. This is strictly for the Edible Gold luster dust; don’t use it for anything else!
To make those little, gorgeous roses on top, grab your pastry bag. I use a star tip for the main border and a dedicated rose tip. Some bakers even use a rose nail, which gives you a perfect base to swirl the frosting on before transferring it to the cake.
Finally, you’ll want an offset spatula for smoothing that thick buttercream layer before we start piping the details. It just gives you a cleaner finish than a regular knife, I promise!
Ingredients for the Devil’s Food Gold-Dusted Bundt Cake
Gathering our supplies is my favorite part before I even start mixing! This is where you can really see how rich and fancy this cake is going to be. It’s divided into three main sections: the cake itself, which is deeply chocolatey, the buttercream that tastes like a party, and the sparkle we add at the very end. Don’t skip the notes, because things like sifting the cocoa powder or having your hot coffee ready make a huge difference in the end!
If you’re curious about how other people are making elegant desserts, you can always check out some other amazing inspiration over at keto desserts, but for now, let’s focus on getting these ingredients lined up perfectly for this masterpiece.
For the Devil’s Food Cake Batter
We need a really moist base to support all that gorgeous frosting, and the liquid components here are key for that deep flavor. That hot coffee really blooms the cocoa powder, making the chocolate taste intense!
- 1 tablespoon unsalted butter (just for greasing those pans—I use extra around the fiddly bits!)
- 1 1/2 cups granulated sugar (that’s 300g if you weigh things out, which I totally recommend for consistency!)
- 1 1/2 cups all-purpose flour (150g)
- 1/2 cup Dutch-processed cocoa powder, sifted (Trust me, sift that cocoa! 50g)
- 1 1/4 teaspoon baking soda
- 3/4 teaspoon kosher salt
- 1 large egg
- 3/4 cup buttermilk (180ml)
- 1/3 cup mild-flavored oil, such as vegetable oil (80ml)
- 1 teaspoon pure vanilla extract
- 1/2 cup hot coffee (120ml)—make this strong!
- 1/4 cup rum or brandy (60ml)—this really deepens the chocolate flavor, don’t skip it if you can!
For the Champagne Buttercream
This buttercream is where we hit that luxurious note! We’re using the Swiss Meringue method, which means we need sugar and egg whites heated first. The most crucial thing here? Make absolutely sure your 3 cups of unsalted butter (680g!) are perfectly softened but not melty. If the butter is too soft, the whole thing will look like soup!
- 2 cups granulated sugar (400g)
- 1 cup egg whites
- 3 cups unsalted butter (680g), softened but cool
- 1 teaspoon pure vanilla extract
- 5 drops champagne extract (This gives it that festive pop!)
- 1 pinch kosher salt
For Filling and Decoration
Time for the sparkle! This is where we turn batter into art. You’ll need the cherry preserves for the lovely, slightly tart layer between the cakes, and then we bring out the gold!
- 1/4 cup cherry preserves
- 1 small amount pink gel-paste food coloring (optional, for the roses)
- 1 small amount edible luster dust (optional, this is our Edible Gold!)
- 1 small amount decorating pearls (optional, for that extra bling around the base)
Step-by-Step Instructions for the Gold-Dusted Bundt Cake
This is the grand performance! Don’t rush this, because the difference between a good cake and the stunning cake you came here for is all in the timing. Once you’ve got your ingredients set up, these steps will guide you right through to the beautiful finish. Before you get started, you can peek at some other general baking tips here: my favorite recipes. And just a little side note: I adapted this base from the brilliant Zoë Francois, whose work on this chocolate structure is legendary. You can see her original take right here.
Baking the Perfect Bundt Cake Layers
First, get that oven hot—350°F! We are making three smaller layers here, not one big Bundt, so grab three 6-inch pans and treat them like royalty. Butter them up well, and then don’t forget to dust them generously with cocoa powder. This keeps that dark cake from sticking!
Mix your dry ingredients—sugar, flour, cocoa, soda, salt—in one bowl. Then wet ingredients (egg, buttermilk, oil, vanilla) in another. Combine those two mixtures, and it’s time for the magic trick: slowly whisk in the hot coffee and the rum. Don’t overmix once you combine liquids and solids; stop when it’s just smooth. That batter is going to look thinner than you expect, but trust me!
Divide it evenly, bake for about 35 minutes until a tester comes clean, and then you *must* let them cool completely in the pans before gently inverting them onto their cardboard rounds. Absolute patience needed here!
Creating the Swiss Meringue Champagne Buttercream
This buttercream requires focus, but the result is worth it. We are making a Swiss Meringue, so you put the sugar and egg whites in a bowl over simmering water (a double boiler). Stir constantly until every grain of sugar dissolves. Rub a bit between your fingers—if it feels grainy, keep heating and stirring!
Transfer that warm mixture to your stand mixer right away and whip it until it’s stiff, glossy, and completely cool—like, touch the bowl cool. This cooling step is non-negotiable before adding the butter. Once cool, start adding your soft butter, two tablespoons at a time, on medium speed. Yes, it might look curdled and gross after the first pound of butter goes in—that is totally normal! Keep going. It comes together into something smooth and incredible. Finally, add your vanilla, salt, and that lovely champagne extract.
Assembling and Crumb Coating the Gold-Dusted Bundt Cake
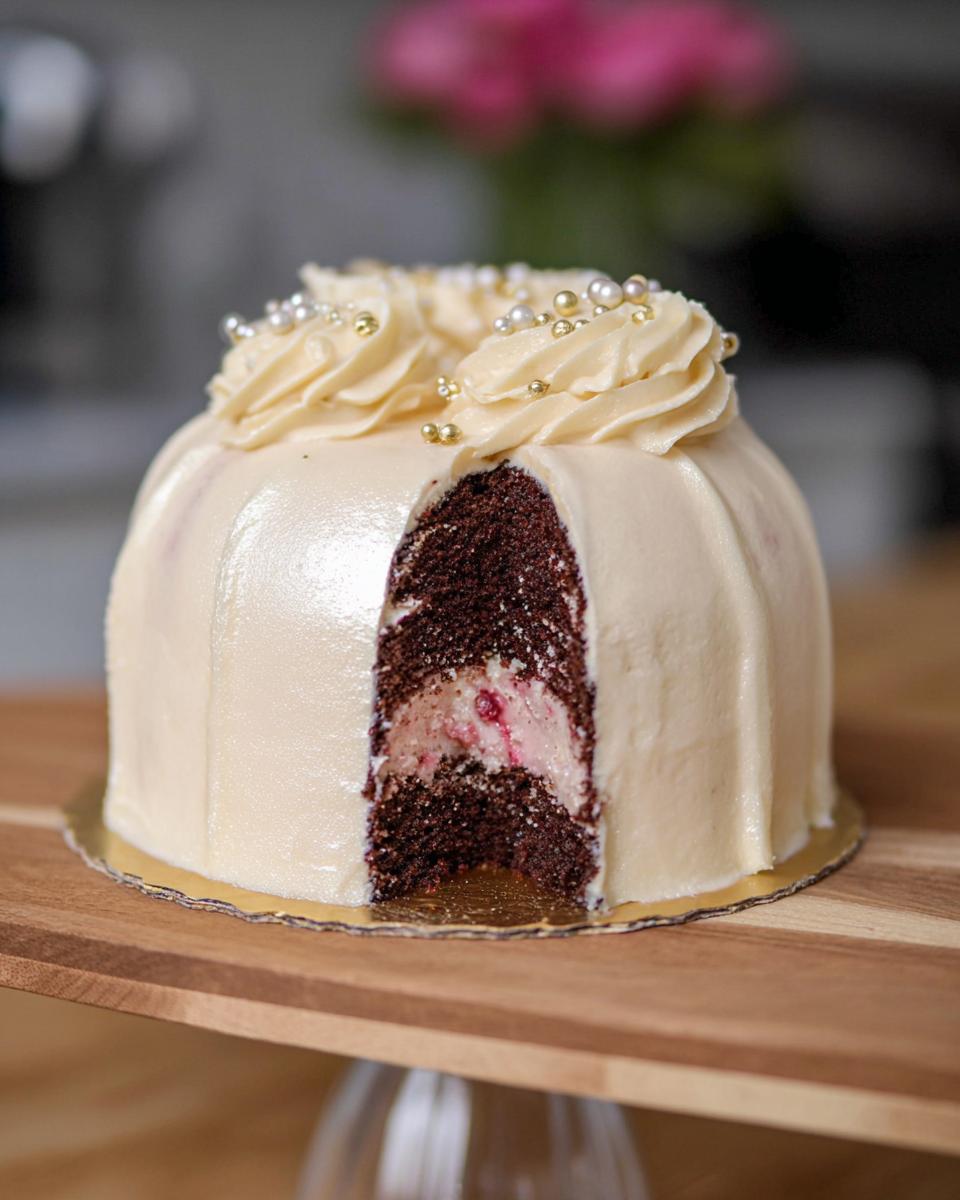
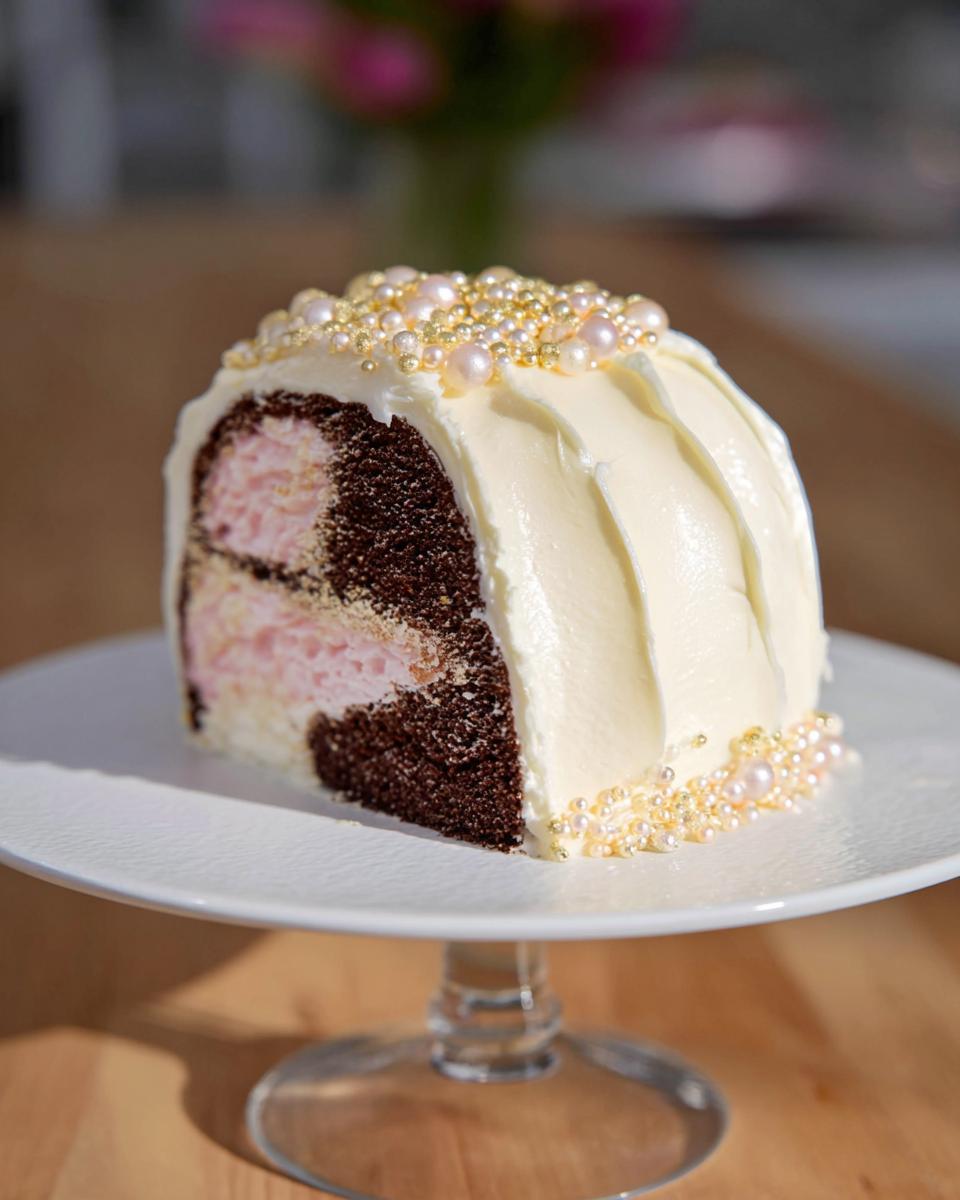
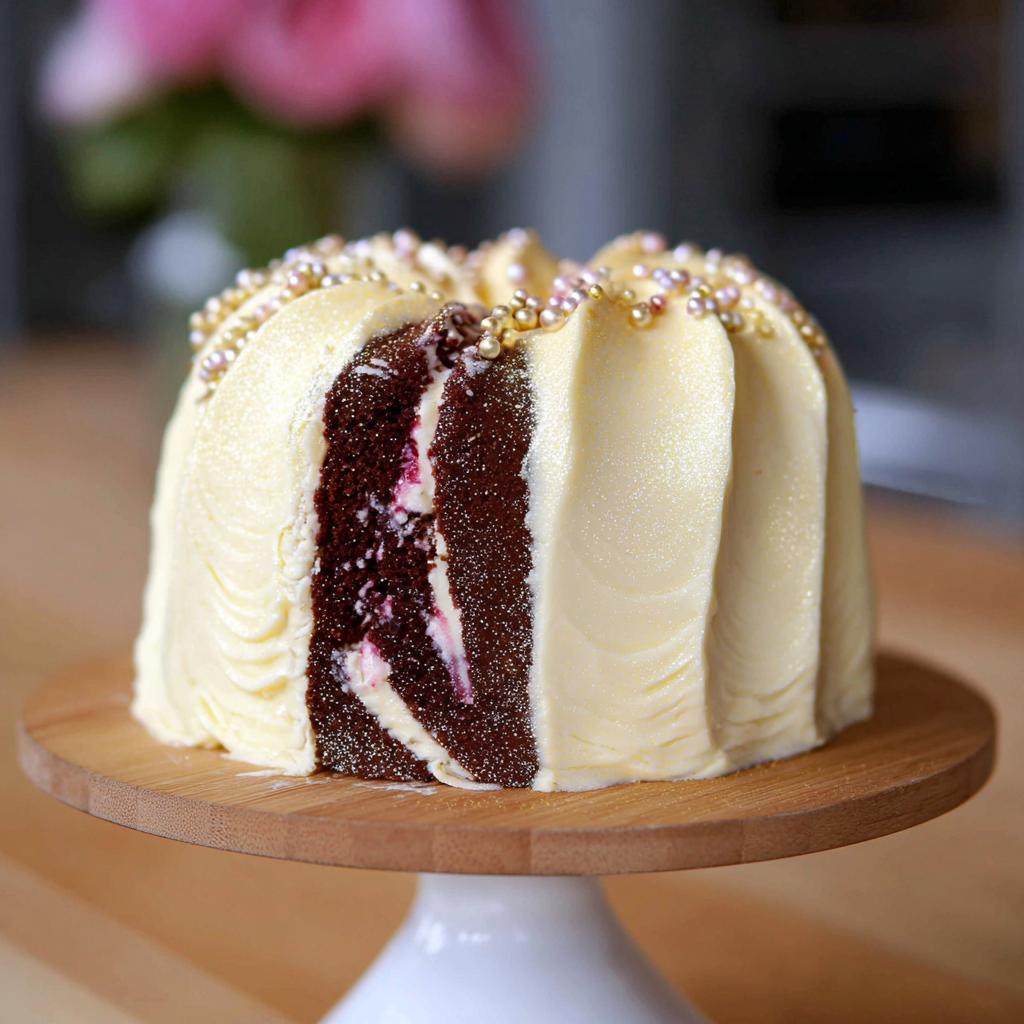
Now we layer this chocolate dream! Take those cooled cake layers and put them onto cardboard rounds. Mix your cherry preserves with just a few drops of pink coloring if you want that gorgeous subtle tint. Spread about a quarter-inch layer of the cherry/pink buttercream on each cake layer before stacking them up like a perfect little tower.
For the crumb coat, use a portion of your *plain* white buttercream to cover the entire cake thinly. This traps all those pesky crumbs. Then, you need to chill it! Pop the whole thing in the freezer or fridge for about 20 minutes. This sets that thin layer so the final coat is flawless. We aren’t using a traditional glaze, we are going for a full buttercream envelope here!
Applying the Final Decoration and Edible Gold
Once that crumb coat is firm, apply the rest of your white buttercream generously. Use your offset spatula to smooth the sides and top until it looks exactly how you envisioned it!
Time for the tiny roses! If you set aside a little buttercream, tint it pink now. Load your pastry bag with a star tip. To get that cool peek-a-boo color, take a tiny paintbrush and swipe the pink color right down the inside seam of the bag before filling it with the white icing. When you pipe, the rose will have that cool, two-toned look!
Pipe a nice, sturdy border around the top edge. Then, take your finest, cleanest paintbrush—the one dedicated only to food!—dip it lightly in your Edible Gold dust, and shimmer away! Dust lightly over the top surface and maybe trail some down the sides for that dramatic effect. Finish with those sweet sugar pearls around the base if you’re feeling extra!
Tips for a Flawless Gold-Dusted Bundt Cake
Listen, I’ve made this recipe enough times to know where things can go sideways, especially when you’re dealing with dark cocoa powder and delicate buttercream. Baking something this elegant should be fun, not frustrating! So, let’s talk about preemptive strikes—the little things that make sure your final product looks exactly like the pictures!
Baking Techniques for Even Layers
Because we are layering these dark chocolate cakes, releasing them cleanly is absolutely vital. If you skip this step, you’ll end up tearing the cooled layers trying to pry them out, and then you have to patch things up, which nobody wants!
My non-negotiable rule for dark cakes, especially in those beautiful detailed pans, is the triple grease method. Butter generously first, then dust heavily with cocoa powder—not flour! Flour leaves a white haze on dark cake. If you are using a traditional Bundt pan for the whole recipe (instead of layers), make sure that cocoa dusting gets into every single crevice. Think of it as coating the pan in soft, dark armor. Let the cakes cool in the pan on a wire rack for at least 15 minutes before you even *think* about turning them over. They firm up just enough in that short time to prevent collapse!
Troubleshooting Your Buttercream
The Champagne Buttercream is going to go through some weird phases, so just stay calm and trust the mixer! Remember how I said it looks curdled after you add half the butter? That is totally normal. Keep mixing! It’s just separating slightly, and it will whip back into beautiful, glossy perfection once all the butter is incorporated and the temperature evens out.
But what if it’s too soft? If your kitchen is warm or you added your butter hastily, it might look soupy after chilling. Don’t panic and add more sugar; that will just make it gritty! Just pop the whole bowl (without the attachment) into the fridge for 15 minutes, scrape down the sides, and try whipping it up again on medium speed. It usually firms right up.
Now, if it’s too stiff—maybe you over-chilled it—it will look crumbly when you try to spread it. That’s easy! Just add a tiny splash (like half a teaspoon at a time!) of room-temperature milk or, if you want to lean into the recipe, a tiny bit of extra champagne extract until it loosens up just enough to spread smoothly with your offset spatula.
Serving Suggestions for Your Elegant Gold-Dusted Bundt Cake
Now that you have this absolute showstopper, the presentation needs to match the glamour, right? I love that this decadent dessert works perfectly for big celebrations, whether it’s a fancy dinner party or a big family get-together. It’s truly the ultimate Holiday Dessert.
Because the cake is so rich with that dark chocolate and the champagne buttercream, you don’t need a lot of fuss on the side. Less is definitely more when the main event is shining this brightly!
If you’re worried about making sure all your guests feel included, even those watching their carbs, I always suggest checking out some inspiration for calorie-smart recipes, but for this cake, let’s focus on beautiful pairings that dress it up!
- A Simple Fruit Bed: Since we have the rich chocolate and the light vanilla/champagne flavors from the frosting, fresh raspberries or thin slices of blood orange look amazing placed around the base of the cake stand. The tartness cuts right through the richness beautifully.
- Coffee Service: This cake is definitely an after-dinner star. Serve thin slices alongside very strong espresso or a chilled glass of bubbly. The champagne buttercream just begs for a celebratory drink counterpart!
- Keep it Warm: If you are serving this in winter, let the slice sit at room temperature for about 15 minutes before serving. It never tastes better than when the chocolate crumb is soft and the buttercream is just barely yielding.

Forget piling on extra sauces or toppings. The Edible Gold is the star, so let that shimmer do all the talking!
Storing Your Gold-Dusted Bundt Cake
This cake is too gorgeous to rush through, so you’ll definitely want leftovers! Luckily, that thick layer of champagne buttercream acts like a fantastic little seal around the devil’s food layers, helping everything stay moist and fresh. But we have to be careful not to smudge that beautiful gold shimmer, right?
Here’s my trick for keeping this beauty looking freshly decorated for days. First, always use a cake dome or a covered cake carrier if you have one. If you don’t have a dome, just tent the cake loosely with plastic wrap, but make sure the wrap doesn’t actually touch the piped edges or the edible gold dust!
This cake is perfectly happy sitting right out on the counter for about two days, covered, as long as your kitchen isn’t super warm or humid. We don’t want the buttercream getting soft and melting off the sides or—worse—the gold dust dissolving into a puddle!
If you need it to last longer than that—say, up to five days—you have to use the fridge. The cold really helps the structure of the buttercream stay firm. Just make absolutely sure it’s covered tightly before it goes in! When you’re ready to serve those leftovers, pull it out about an hour before slicing. That gives the buttercream just enough time to soften back up to that perfect, creamy texture we worked so hard to achieve. Trust me, nobody wants cold, hard frosting!
Frequently Asked Questions About This Bundt Cake
Whenever I share a recipe this detailed, people always have a few brilliant questions about adapting it or making sure those decorative elements stay perfect! It’s tough to mess up the devil’s food cake part—it’s so sturdy—but getting that Champagne Buttercream just right requires a little know-how. Here are the top things I always get asked about when folks are planning their own Holiday Dessert.
Can I substitute the champagne extract?
Oh, absolutely! I love the bubbly lift the champagne extract gives the buttercream, but if you can’t find it, you have options. For a very similar floral, slightly tart note, try almond extract. Use maybe three or four drops, because almond is strong! If you want to lean into a fruitier taste instead, a teaspoon of high-quality raspberry or lemon extract works beautifully with the chocolate.
If you want to keep it strictly non-alcoholic throughout the whole thing, you can just use a little extra vanilla, but honestly, the extract is what gives this Glaze (or frosting, in this case!) its elegant edge!
How do I prevent the edible gold from smudging?
This is a make-or-break detail for that stunning finish! The biggest enemy of Edible Gold luster dust is moisture and handling. My best advice is to only dust the cake once the exterior buttercream has had a good, long chill. If the buttercream is even slightly warm or sticky, the fine powder will immediately bleed into the frosting and turn more into a dull streak than a sparkle.
Wait until the very last possible minute to do the dusting. And when you are using that fine paintbrush? Work quickly, use the dust dry (don’t mix it with alcohol or anything unless you are painting a specific edge), and avoid touching the cake surface with your fingers entirely. If you need to move the cake, always pick it up gently from the base plate, never the sides!
Is this recipe suitable for a large party?
This recipe is designed for 12 hearty slices from the stacked layers, which is great for a good-sized family gathering or medium-sized celebration. If you are hosting a huge bash, though, you might need a bit more volume. Since the layering is a bit involved, the easiest route is to simply double the entire recipe and produce two separate, beautiful tiered cakes!
Alternatively, you could bake the entire double batch into one giant, very deep Bundt Cake pan if you have one that can handle the volume. Just remember that a bigger cake means longer baking time, so keep an eye on that center!
If you have any more questions as you get ready to bake, please don’t hesitate to reach out to me directly via the contact page. Happy baking!
Share Your Gold-Dusted Bundt Cake Creation
Now that you’ve got the recipe, the equipment, and all my little secrets for getting that Edible Gold just right, I am dying to see what you create! Honestly, this cake is an absolute joy to decorate, and I know you’re going to surprise yourself with how amazing your roses and shimmering finish look.
Please, once you’ve served up this incredible showstopper, come right back here and tell me how it went! Did the Champagne Buttercream behave? Which of my tips saved the day? Drop a rating below so other bakers know just how much sparkle this recipe deserves, too!
If you managed to get a great photo of your finished Gold-Dusted Bundt Cake, tag me on social media! I absolutely love seeing the art that happens outside my own kitchen. You can find me, Isabella Moore, and share your culinary triumphs over on my About page where I gather all my latest adventures. Happy baking, truly—I hope this cake brings as much joy to your table as it does to mine!
Gold-Dusted Bundt Cake
Ingredients
Equipment
Method
- Preheat the oven to 350°F. Butter and line three 6-inch round cake pans with parchment paper.
- In a large bowl, whisk together the sugar, flour, cocoa powder, baking soda, and salt. Set aside.
- In a separate bowl, whisk together the egg, buttermilk, oil, and vanilla. Add this to the dry ingredients and mix until smooth. Slowly add the hot coffee and rum, whisking until the batter is smooth, about 2 minutes. The batter will be thin.
- Dust the prepared pans with cocoa powder. Divide the batter evenly among the pans. Bake until a tester comes out clean, about 35 minutes. Let cool completely in the pans.
- Remove the cakes from the pans and invert them onto 6-inch cardboard cake rounds.
- In the bowl of a stand mixer, combine the granulated sugar and egg whites. Place the bowl over a double boiler and stir until the sugar is completely melted. Ensure the sides of the bowl are clean of sugar. Test the mixture between your fingers for graininess; it should feel completely smooth.
- Attach the bowl to the stand mixer and beat with the whisk attachment on medium-high speed until light, fluffy, glossy, and the bowl is at room temperature. This cooling step is important to prevent the butter from melting.
- Add the butter, 2 tablespoons at a time, beating on medium speed. The mixture may look curdled and runny after about half the butter is added; this is normal. Continue adding the butter and mixing until the buttercream is creamy and glossy.
- Add the vanilla extract, champagne extract, and salt. Mix to combine.
- Place about 2 cups of the buttercream in a separate bowl and stir in the cherry preserves. Reserve the remaining buttercream for the exterior.
- Place one cake layer on a cake turntable. Spread a 1/4-inch-thick layer of the cherry buttercream over it. Repeat with the remaining cake layers and cherry buttercream, stacking them.
- For the crumb coat, spread a thin layer of the reserved buttercream over the top and sides of the cake. Freeze for about 20 minutes.
- Ice the cake with a thick layer of buttercream. Use a metal spatula or cake comb to smooth the sides and top.
- Using a pastry bag fitted with a star tip, create a border around the top of the cake.
- To create buttercream roses: Place a small amount of buttercream in a bowl and add pink food coloring, if using. Fit a pastry bag with a rose tip. Paint a line of the colored buttercream down the inside seam of the bag with a fine paintbrush. Fill the bag with plain white buttercream.
- Form each rose on a rose nail, then use kitchen shears to transfer it to the top of the cake. Repeat to create desired number of roses.
- Finish the cake with edible luster dust and a ring of edible sugar pearls around the base, if using.
Notes
Tried this recipe?
Let us know how it was!