
You know those nights, right? When you wander into your tiny city kitchen after battling the crowds all day, and all you need is something that screams comfort but takes zero brainpower? That’s exactly how I discovered my ultimate **Cheesy Beef Quesadillas** recipe. Here in Brooklyn, sometimes finding a full hour to cook is luxurious! I remember throwing some leftover seasoned beef, whatever cheese I had, and a pile of tortillas onto the skillet. The sizzling sound, and honestly, the incredible, bold, spicy smell wafting up the fire escape—wow! It instantly transformed my cramped space into a cozy comfort zone. These aren’t just any quesadillas; they hit that spot between a simple snack and a fulfilling dinner perfectly.
Why You Will Love These Cheesy Beef Quesadillas
These are fast, folks, and they seriously deliver on flavor. If you’re looking for that perfect intersection of speed and satisfying dinner, stop scrolling! Feel free to explore how these fit into simple balanced suppers, too.
- They come together fast—total time is under 45 minutes, easy!
- The seasoned beef filling packs a huge flavor punch thanks to that spice mix.
- They’re incredibly versatile; perfect for a quick lunch or an easy snack dinner.
- Everyone loves them, especially kids who want those extra cheesy pulls.
Essential Equipment for Perfect Cheesy Beef Quesadillas
You can’t just throw things around when you’re cooking something as delicate as a perfect, crispy quesadilla. Trust me, having the right tools means the difference between a beautiful, golden-brown crust and a sad, sticky mess stuck to your burner. That smooth, non-stick frying pan is your absolute MVP here! It lets the tortilla get evenly browned and crispy without grabbing onto it when you try to flip. We wanna cook, not fight the cookware, right?
Required Cooking Gear
Here’s the quick rundown of what you’ll need hanging around your kitchen. Don’t worry, it’s nothing fancy!
- Oven: This is just for keeping the finished ones warm, which is super important if you’re feeding a crowd or just cooking them in batches.
- Large non-stick frying pan: Seriously, make sure this is big enough to handle two quesadillas side-by-side comfortably.
- Bowl: You need a decent-sized mixing bowl to hold all that fantastic cooked beef filling before you load up your tortillas.
- Sheet pan: This acts as your warming station right inside the oven.
Ingredients for Flavorful Cheesy Beef Quesadillas
Okay, let’s talk about what makes this beef filling sing! It’s all about layering those smoky spices. If you’re in a huge rush, totally use a packet of your favorite taco seasoning instead of the individual spices listed below—just check the salt content, because you might need to adjust what I listed here. But honestly, mixing the spices yourself means you get that deep chipotle warmth that store-bought blends sometimes miss. If you’re planning on making one of my other easy meals, like the Turkey Taco Skillet, you’ll see these spices overlap perfectly!
For the Beef Filling
For the beef itself, I always try to grab extra lean ground beef. It saves you the messy step of draining off tons of fat later! If you’re using standard beef, just be ready to blot it really well with a paper towel before you mix in the rest.
- 1/2 tablespoon olive oil
- 1 pound ground beef (extra lean recommended)
- 1 teaspoon chili powder
- 1 teaspoon ground chipotle chili pepper
- 1/2 teaspoon dried oregano
- 1/2 teaspoon ground cumin
- 1/2 teaspoon garlic powder
- 1/2 teaspoon onion powder
- 1/2 teaspoon salt
- 1/2 teaspoon freshly ground black pepper
- 1/4 teaspoon ground cayenne pepper (optional, but it adds a nice little kick!)
- 1 tablespoon tomato paste
- 2 tablespoons unsalted beef stock or broth
For Assembling the Cheesy Beef Quesadillas
This is where the magic glue comes in! We are using a generous amount of cheese here because, well, they are **Cheesy Beef Quesadillas**, right? Don’t skimp!
- 12 ounces shredded cheese blend (about 3 cups total), and remember, you need to divide this—some goes under the meat, some goes on top!
- 6 flour tortillas (aim for 7 to 8 inches in diameter for the best fold)
- 2 tablespoons vegetable oil (just for greasing the pan between batches, about 2 teaspoons per go)
Optional Serving Components
We love to serve ours with something cool and creamy to balance out the spice. This is purely up to your mood!
- Salsa
- Guacamole
- Sour cream
Step-by-Step Instructions for Cheesy Beef Quesadillas
Alright, let’s get cooking! If you’re aiming for that restaurant-quality crispy outside and gooey, deeply flavored inside, method matters. Before you even turn on the stove, we need to get that oven ready. Seriously, don’t skip that first step—it saves your finished quesadillas from turning cold while you’re wrestling with the last batch. We want to keep that cheesy goodness warm!
Since we’re cooking these in batches, warming the oven to 200 degrees Fahrenheit is essential. It’s a game-changer for serving everything hot at once. This recipe is quick, but organization is key to making it feel like a breeze!
Preparing the Seasoned Beef Filling
This is where we build that amazing flavor foundation. Browning the meat well really lets those spices toast up nicely before we add the liquids.
- First things first: Get your oven preheated to 200 degrees Fahrenheit so we have a safe place for the cooked quesadillas.
- Next, grab that large non-stick pan and heat the olive oil over medium heat. Toss in the ground beef. Now, break it up! I mean really chop it down with your spoon until it’s crumbly and cooked through. Add ALL your spices right now—the chili powder, cumin, oregano, and those other flavor boosters. Cook this mixture, stirring constantly, until the ground beef is nicely browned all over. This usually takes about 8 to 10 minutes.
- Once it’s browned, stir in the tomato paste—this adds a richness you can’t skip—and the two tablespoons of beef stock. Let that bubble and cook down for just a minute or two until that liquid mostly evaporates.
- Now, take the pan off the heat! This is important: pour the beef mixture into your waiting bowl and drain off *any* excess grease. We want juicy flavor, not an oily mess, especially if you’re keeping track of things like calorie-smart recipes!
Assembling Your Cheesy Beef Quesadillas
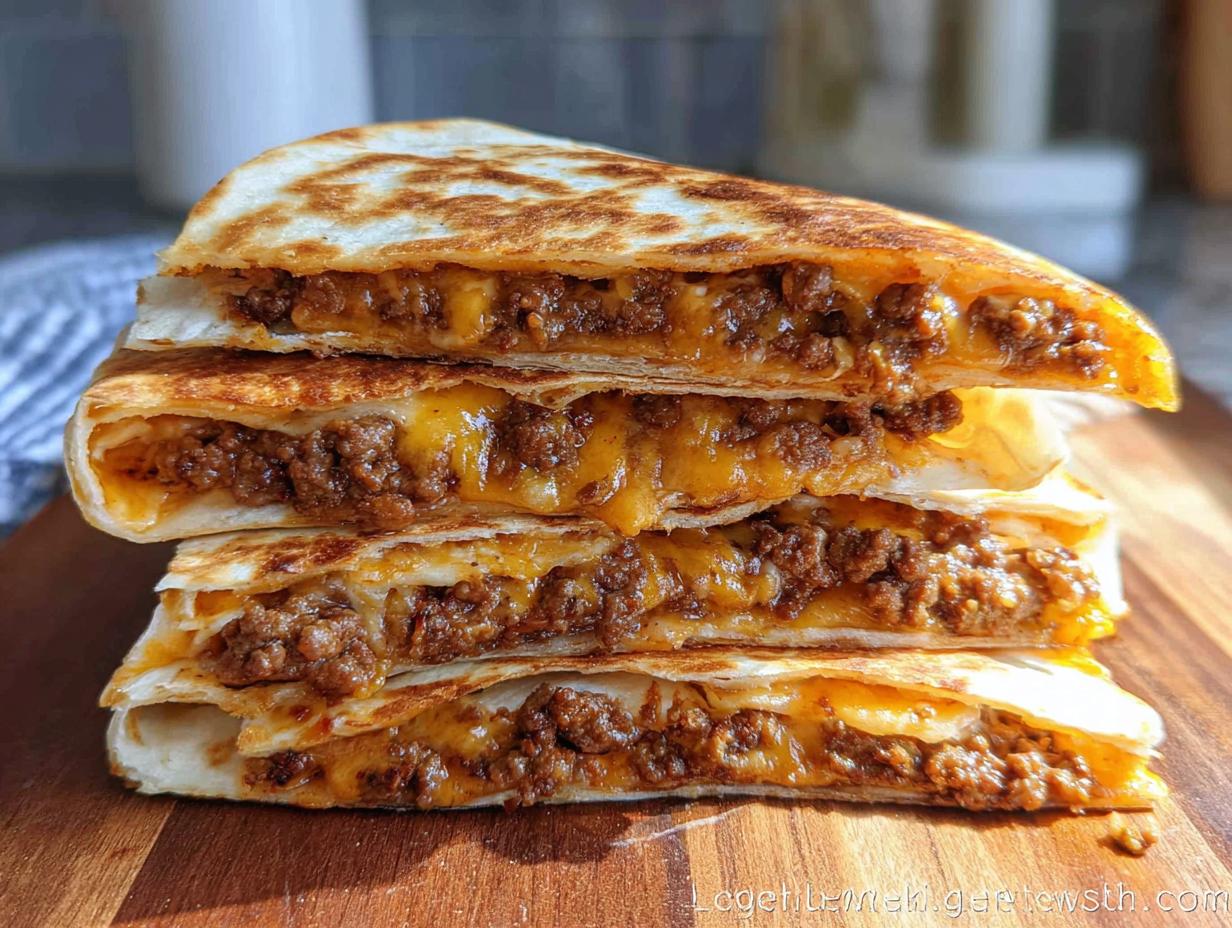
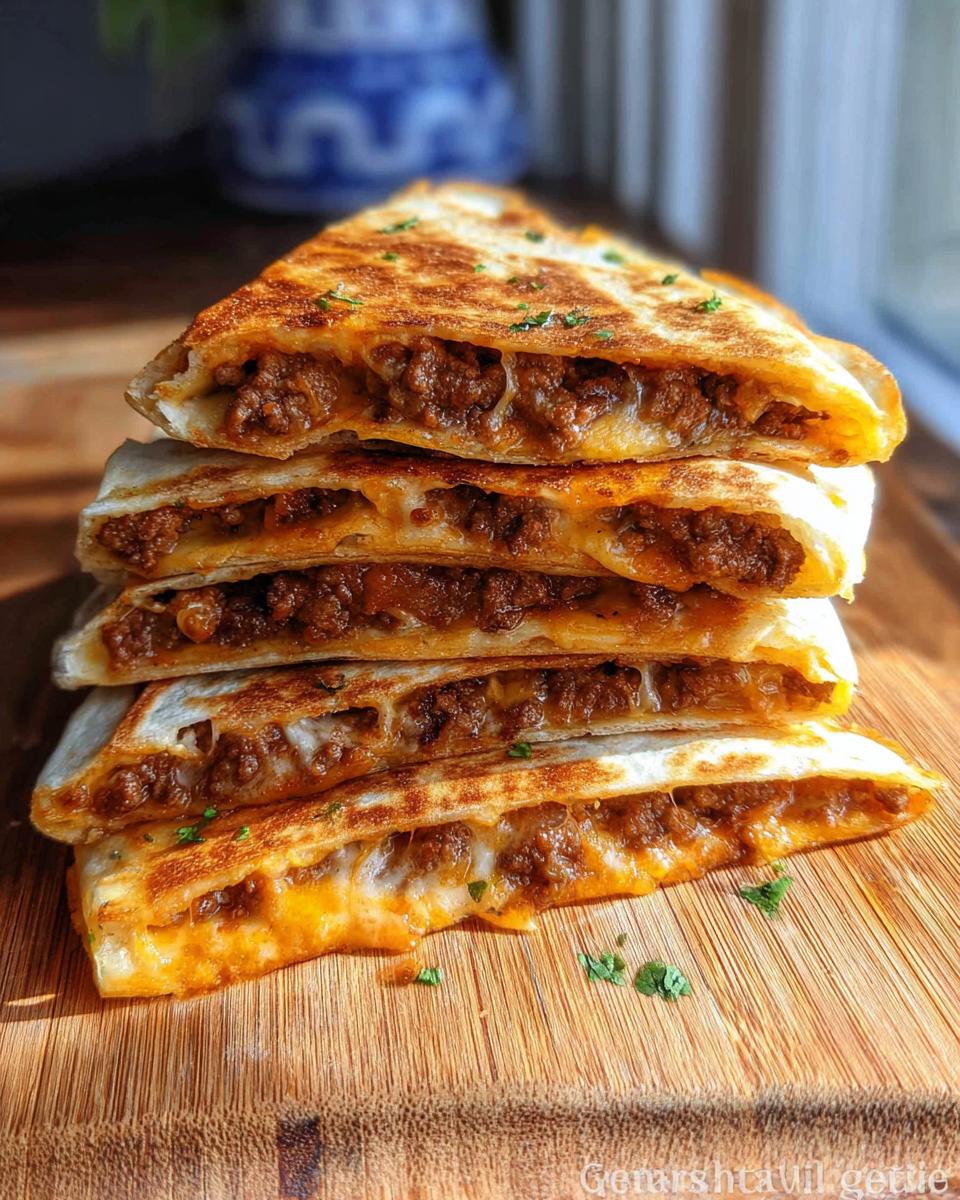
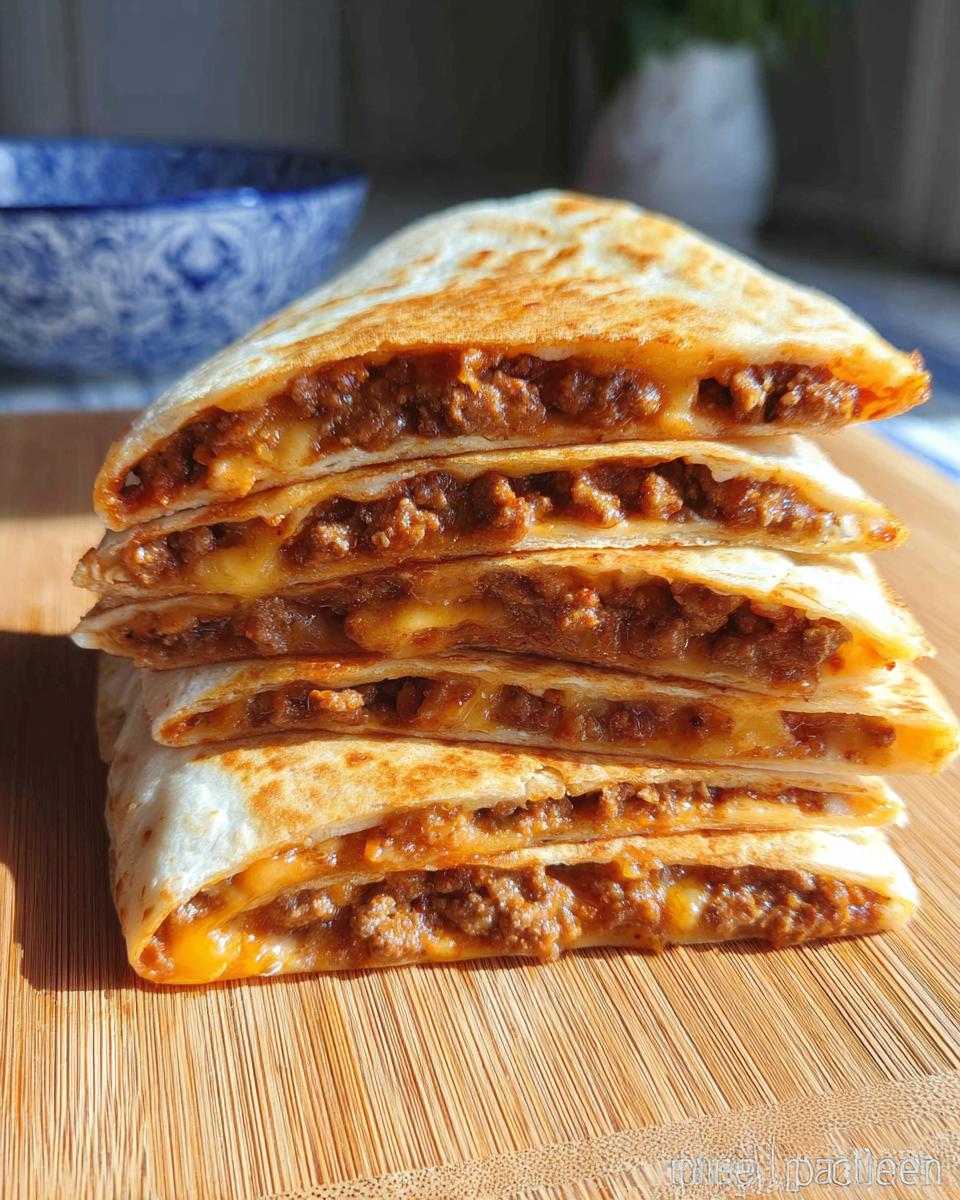
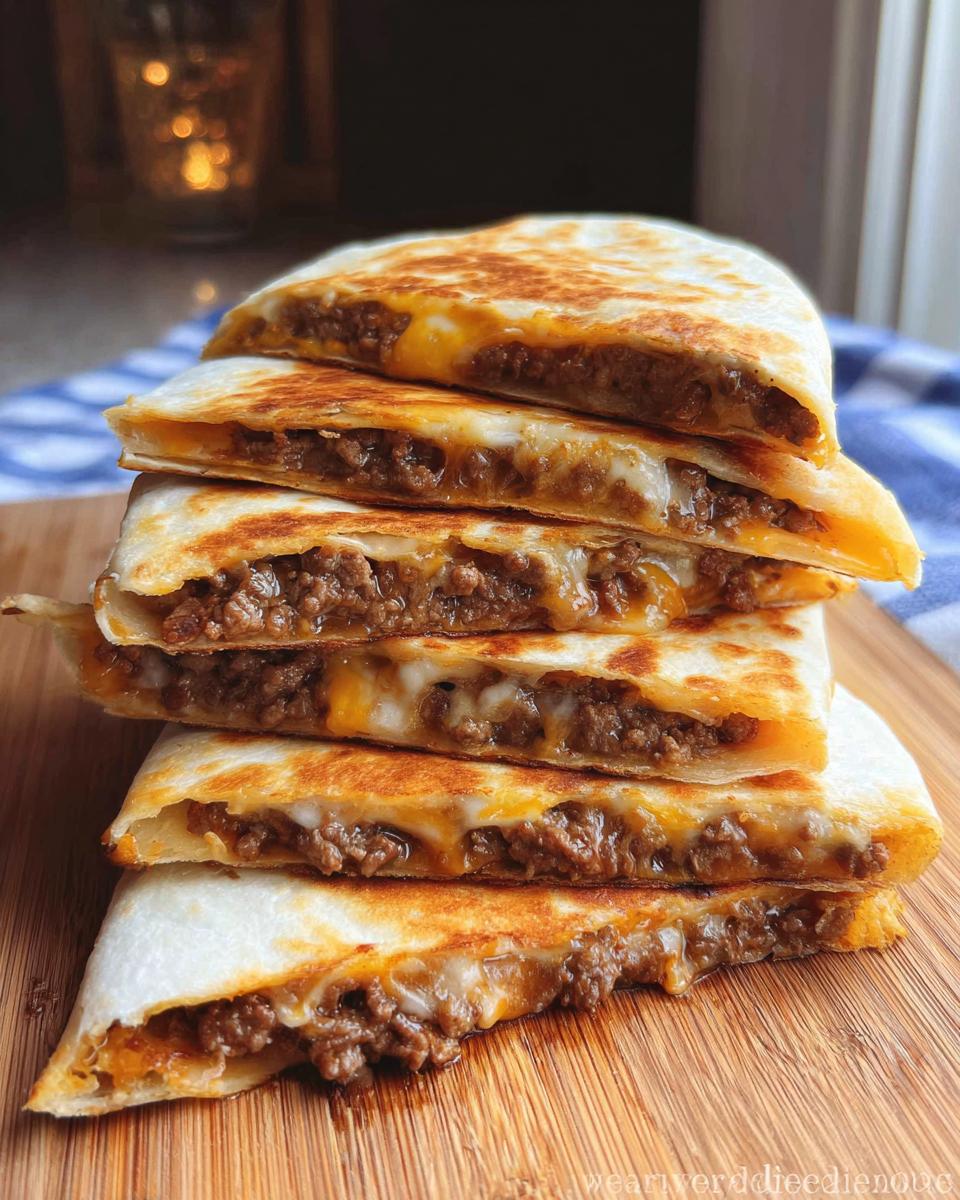
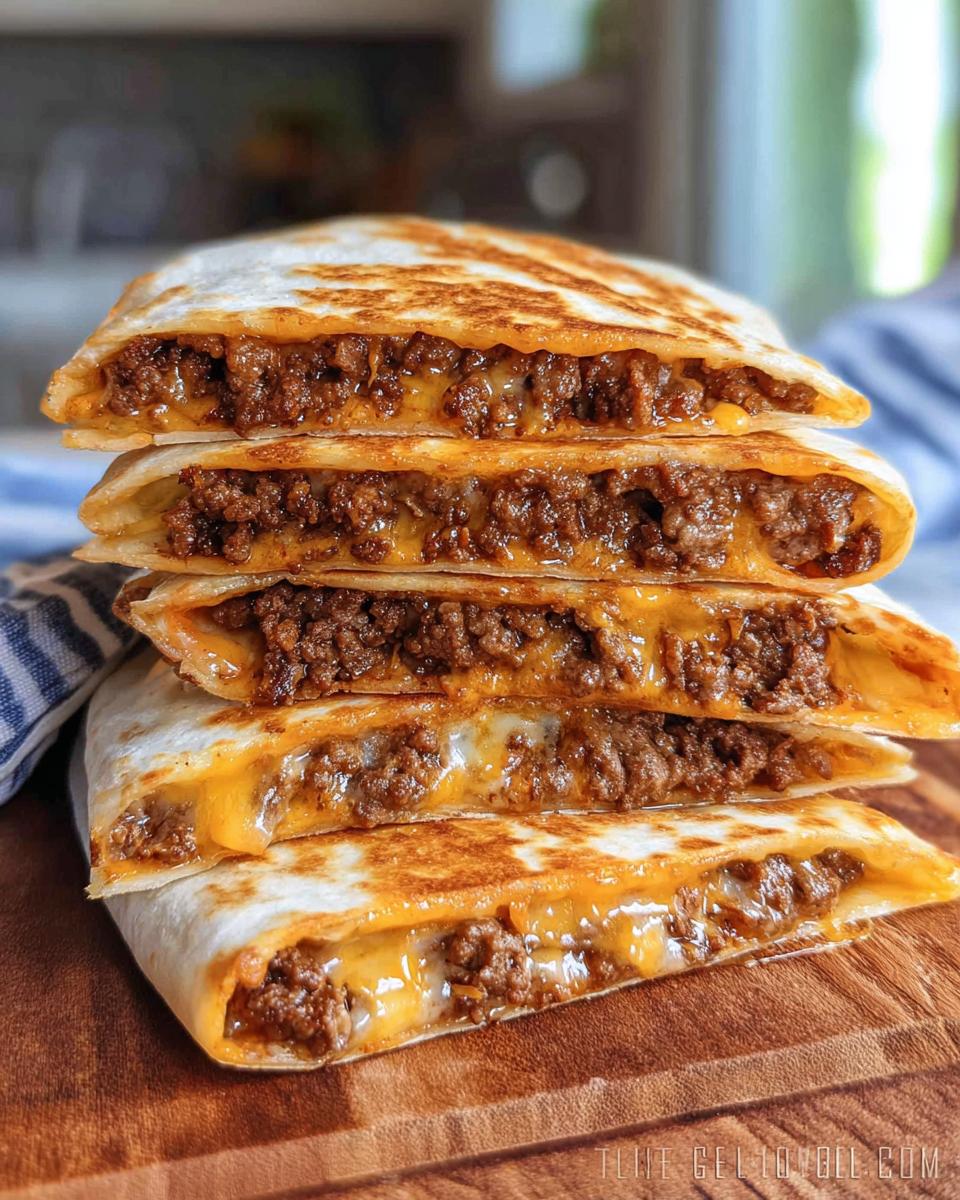
This is my big secret for preventing the meat from falling out when you bite into it. It’s all about creating a cheese barrier! You need to divide that shredded cheese blend into two nearly equal piles.
Take one tortilla and sprinkle one pile of cheese evenly across the *entire* surface. Then, take a spoonful of your cooked beef filling and spread it over that cheese. Now, sprinkle the *rest* of the cheese right on top of the meat. This second layer acts like an edible glue when it melts. Fold the whole thing in half, like a taco, to make that classic half-moon.
Cooking for Crispy Perfection
Lower and slower is the way to gold here. If your heat is too high, the outside burns before the inside cheese melts, and nobody wants a half-melted quesadilla from a hot skillet!
- Get about 2 teaspoons of vegetable oil warming up in your clean non-stick pan over medium-low heat. Give it a swirl so it coats everything nicely.
- Carefully place two folded quesadillas into the pan. Don’t crowd them, or they won’t get crispy! Cook them for about 2 minutes. Peek underneath with your spatula—you are looking for deep golden brown.
- Flip them over with confidence and cook the second side for another 2 minutes until it’s just as gorgeous. If you are making even more, transfer these cooked beauties to your sheet pan in the 200-degree oven to stay toasty warm while you cook the next batch.
Feel free to add a little more oil between batches if the pan looks dry. Repeat until all your amazing quesadillas are cooked!
Tips for Making the Best Cheesy Beef Quesadillas
Even though our recipe is super straightforward, I always have a few little secrets up my sleeve to make sure every single **Cheesy Beef Quesadilla** turns out absolutely restaurant-quality. Since we are busy people, saving time without sacrificing flavor is huge, right?
My biggest recommendation, outside of sticking to the layering method I shared (cheese, meat, cheese!), is how you handle that seasoning. If you are running out the door and your spice rack feels intimidating, don’t panic! You can grab one of those pre-made taco seasoning packets. Seriously, just use the seasoning *and* follow the amount of salt and pepper I listed, or you risk making them too salty—those packets are usually packed with salt. If you use one packet, you might skip the listed salt and cayenne too, just taste as you go!
Also, I think everyone should know about making the beef ahead of time! If you whip up a big batch of that seasoned beef mixture on Sunday, you can store it right in the fridge, just like you would the chili from my Ground Turkey Chili recipe. Then, when lunchtime rolls around on Tuesday, you just heat the beef, grab the tortillas, slap the cheese on, and you’ve got an amazing **Quick Lunch** ready in about ten minutes flat. It turns this dinner into an awesome, satisfying **Easy Snack Dinner**!
A small note on your tortillas: If you find they are being stiff or cracking when you fold them, gently warm them in the microwave for about 10 seconds before you start filling them. It makes them much more pliable so you get a beautiful, smooth half-moon that holds all that goodness inside!
Storage and Reheating Cheesy Beef Quesadillas
Because these **Cheesy Beef Quesadillas** are so good, there is a real chance you won’t eat them all in one sitting. Don’t you just hate when leftovers go soggy? I’ve got the ways to handle them so that your next meal feels almost as good as the first round!
If you find yourself with any extras, the best plan is to store them properly right away. Pop any leftovers into an airtight container—like one of those sturdy glass ones—and tuck them into the refrigerator. They hold up beautifully for about 3 to 4 days that way. If you love making big batches so you always have something on hand, this keeps things really simple for future meals.
Now, for reheating—this is where we fight for that crispiness we worked so hard to achieve on the skillet. Please, put away the microwave! Microwaving is the fast lane to chewy, soft tortillas, and honestly, that’s just a crime against a perfectly good quesadilla.
Your best bet is to bring back that lovely crispiness using dry heat. You can pop the whole quesadilla onto a sheet pan and reheat it in the oven at about 350 degrees Fahrenheit for 8 to 10 minutes. This warms everything through and crisps up the exterior again. If you’re in a super big hurry, you can use the same non-stick pan you cooked them in! Just heat the pan over medium heat (no extra oil needed usually) and warm each side for about two minutes until it feels crispy again. It’s almost as quick as the microwave, but infinitely better. It reminds me of how much care you need with something like a Creamy Tuscan Chicken Skillet—small tweaks make a huge flavor difference!
Frequently Asked Questions About Cheesy Beef Quesadillas
Even after all those steps, I know you might still have a couple of things swirling around in that talented cooking brain of yours! It’s totally normal, especially when you’re trying to fit a delicious **Easy Snack Dinner** into a crazy schedule. Here are the little final details I always get asked about when I share this recipe with friends.
Can I make these Cheesy Beef Quesadillas ahead of time?
That’s a fantastic question for meal planning! I really, really suggest assembling and cooking them fresh. That crispy crunch you get after they come off the skillet is just unbeatable when it’s right off the heat. However, you can totally prep ahead! Cook the entire beef filling mixture—steps 1 through 3—and store it in the fridge for up to four days. When you’re ready to eat, just assemble and cook them quickly. It turns the whole process into a snap!
What is the best cheese for Beef Quesadillas?
Oh, cheese choice is critical for **Beef Quesadillas**! You need serious melt factor here. My favorite mix, and the one that gives you that perfect stretch, is a blend of Monterey Jack and a medium sharp Cheddar. Monterey Jack melts like a dream and stays soft, while the Cheddar brings serious flavor. Avoid super low-moisture, aged cheeses like Parmesan, though—they don’t melt nicely into that gooey binder we need holding everything together. A simple pre-shredded Mexican blend works surprisingly well, too, if you’re looking for speed!
How can I make this a Quick Lunch option?
To make this your go-to **Quick Lunch**, you have to shortcut the cooking time, not the flavor! The absolute best way is to meal prep that seasoned beef filling on Sunday night. You can make a triple batch easily. Store it in separate, labeled containers in the fridge. When lunchtime hits during the week, you skip the 20 minutes of cooking spices and browning meat entirely. You just scoop the pre-cooked beef, add your cheese, and it takes maybe six to eight minutes to pan-fry the whole thing. It’s nearly instant comfort!
For more inspiration on fitting big flavor into smaller windows, check out some of my favorite ideas for lightened-up dinner ideas!
Estimated Nutrition for Cheesy Beef Quesadillas
Now, I know some of you are tracking things closely, and some of you (like me, sometimes!) are cooking purely based on what smells good. Either way, it’s good to have a general idea of what’s in these delicious **Cheesy Beef Quesadillas**. Remember, this recipe makes six whole quesadillas, and these numbers are based on one serving—one whole quesadilla.
I got these numbers from running the recipe ingredients through a standard calculator, but since we all use slightly different brands of tortillas or different fat percentages on our beef, please treat these as strong estimates. If you’re trying to figure out how to balance a tight budget with great food, my post on making cheap keto meals might give you some fantastic ideas for substitutions, though these quesadillas are naturally pretty budget-friendly!
Here’s the breakdown per quesadilla:
- Calories: 227
- Fat: 14g (with about 8g saturated fat)
- Protein: 16g
- Carbohydrates: 9g
- Sodium: 443mg (This is why tasting before adding extra salt is always important!)
See? Not bad at all for something this deliciously satisfying! It packs a decent punch of protein while keeping the carbs relatively low for a tortilla-based meal. Enjoy every bite without guilt!
Share Your Favorite Cheesy Beef Quesadillas Creations
Whew! We made it! You’ve got the spices blended, the cheese melted perfectly, and you’ve conquered the pan without sticking—that deserves a round of applause! Now that you have mastered my recipe for **Cheesy Beef Quesadillas**, I really, truly want to hear all about it. Home cooking is all about sharing what works, right?
Did you end up trying them with sour cream, or did you go wild with hot sauce? Did the kids actually sit still long enough to enjoy the crispy texture, or was it a mad dash for seconds? Don’t be shy! Head down to the comments section below and tell me what tweaks *you* made. Every comment helps other busy folks see just how easy and delicious this **Easy Snack Dinner** can be.
If you snap a picture of your beautiful, golden-brown, cheesy creations, please tag me on social media! Seeing your versions makes my day and reminds me why I spend so much time fiddling with recipes in my little urban kitchen. I love connecting with other home cooks who appreciate a fast, flavor-packed meal.
And if this recipe saved your weeknight, maybe check out a little more about me and what inspires my hyperlocal cooking adventures over on my About Page! Happy cooking, and I can’t wait to read your feedback!

Cheesy Beef Quesadillas
Ingredients
Equipment
Method
- Preheat your oven to 200 degrees Fahrenheit to keep the quesadillas warm as you cook them.
- Heat the olive oil in a large non-stick frying pan over medium heat. Add the ground beef, chili powder, chipotle pepper, oregano, cumin, garlic powder, onion powder, salt, black pepper, and cayenne pepper (if using). Cook, breaking up the beef into small pieces, until it is fully cooked and browned, about 8 to 10 minutes.
- Stir in the tomato paste and beef stock or broth. Cook for 1 to 2 minutes more. Remove the beef mixture from the pan and place it in a bowl. Drain off any excess grease.
- Spread about 8 ounces (2 cups) of the shredded cheese evenly over one side of each tortilla. Top the cheese with the cooked ground beef mixture. Sprinkle the remaining 4 ounces (1 cup) of cheese over the beef. Fold each tortilla in half to create a half-moon shape.
- Heat about 2 teaspoons of vegetable oil in a large non-stick frying pan over medium-low heat. Swirl the oil to coat the pan.
- Cook the quesadillas in batches, two at a time. Add more oil to the pan between batches if needed. Place two folded quesadillas in the pan and cook for about 2 minutes on one side.
- Carefully flip the quesadillas and cook for another 2 minutes, or until they are golden brown and crispy on the outside and the cheese is melted inside. Watch them closely to prevent burning.
- Transfer the cooked quesadillas to a sheet pan and place them in the preheated oven to keep warm while you cook the remaining quesadillas. Repeat the cooking process until all quesadillas are done.
- Once all quesadillas are cooked, cut each one in half. Serve warm with your favorite salsa, guacamole, or sour cream, if desired.
Nutrition
Notes
Tried this recipe?
Let us know how it was!
Urban Forager & Hyperlocal Ingredient Specialist
My Brooklyn apartment balcony tells my story: vertical gardens packed with wild edibles, fermentation crocks bubbling with city-foraged greens, and the constant hum of dehydrators preserving herbs I’ve collected from unexpected urban corners. What started as weekend escapes to my aunt’s upstate farm during my Columbia botany studies turned into something bigger after I earned my Urban Ecology Master’s from The New School.
Instead of following traditional academic paths, I discovered that cities are actually amazing edible ecosystems—rooftop weeds, park-edge wild greens, vacant lot treasures that perfectly complement keto eating. Who knew that some of the best low-carb foods were growing right under our noses in Manhattan?
My recipe collections celebrate city seasons: spring dandelions and plantains, summer purslane from rooftops, autumn rose hips from community gardens, winter wild onions and cress. I’m certified through the New York Mycological Society and trained by Brooklyn Botanic Garden to forage safely and ethically. Over 180 of my recipes feature at least one urban-foraged ingredient—from sidewalk plantains to sumac berries and wild mint thriving in vacant lots.
My “Metropolitan Wild” column went viral after my dandelion coffee substitute hit social media. Now my weekend “Urban Wild Walks” through Central Park and Prospect Park sell out faster than I can schedule them. I teach city dwellers to spot safe, keto-friendly wild foods hiding in plain sight.
Currently, I’m partnering with local chefs to bring urban foraged elements to restaurant menus and developing an app that maps safe foraging spots across all five boroughs. Evenings find me tending my sourdough starters, pressing flowers for natural dyes, or weaving baskets from willow branches I collect during park maintenance.
Cities are wild food sanctuaries hiding in plain sight—keto eating becomes urban rebellion when you realize how much free, perfect nutrition grows right under our feet.