
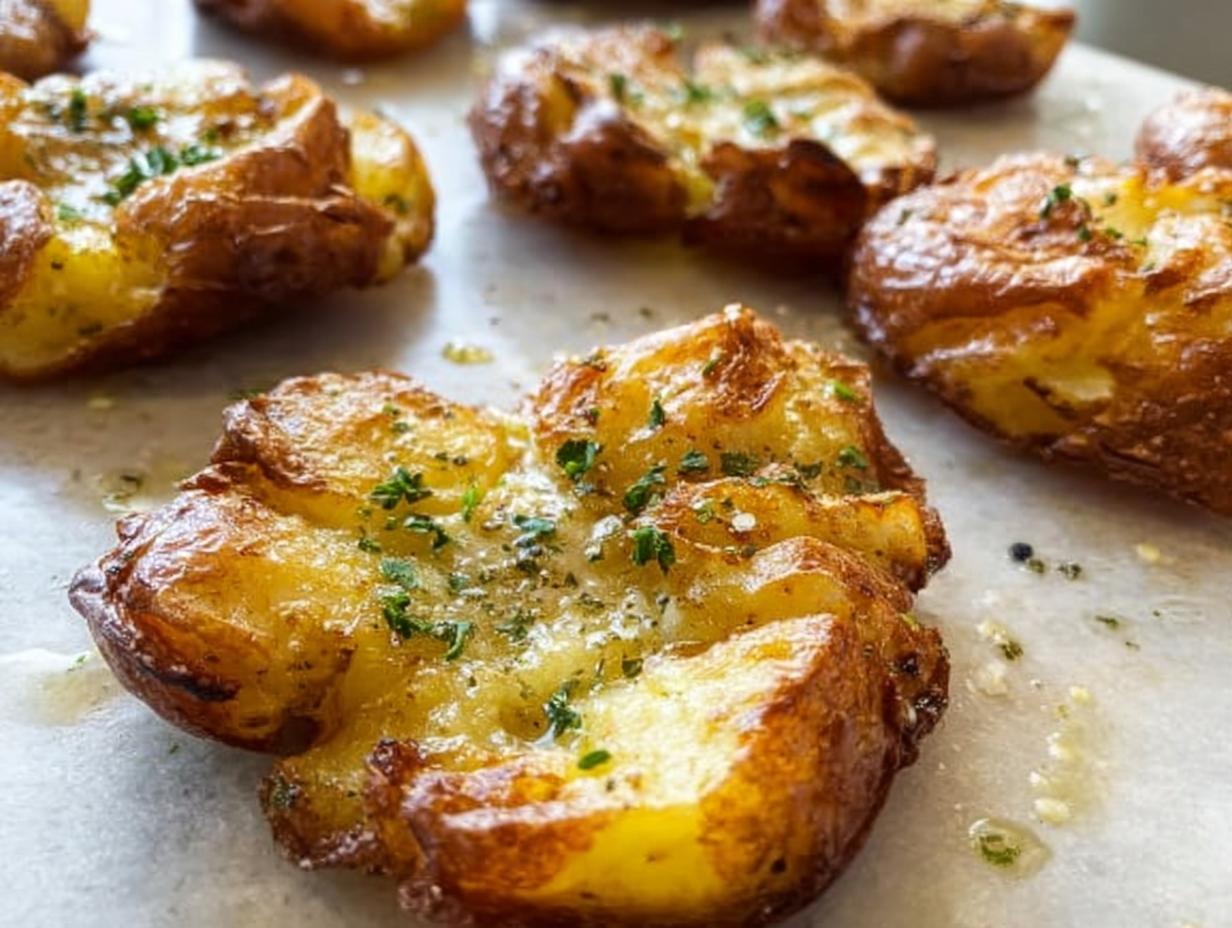
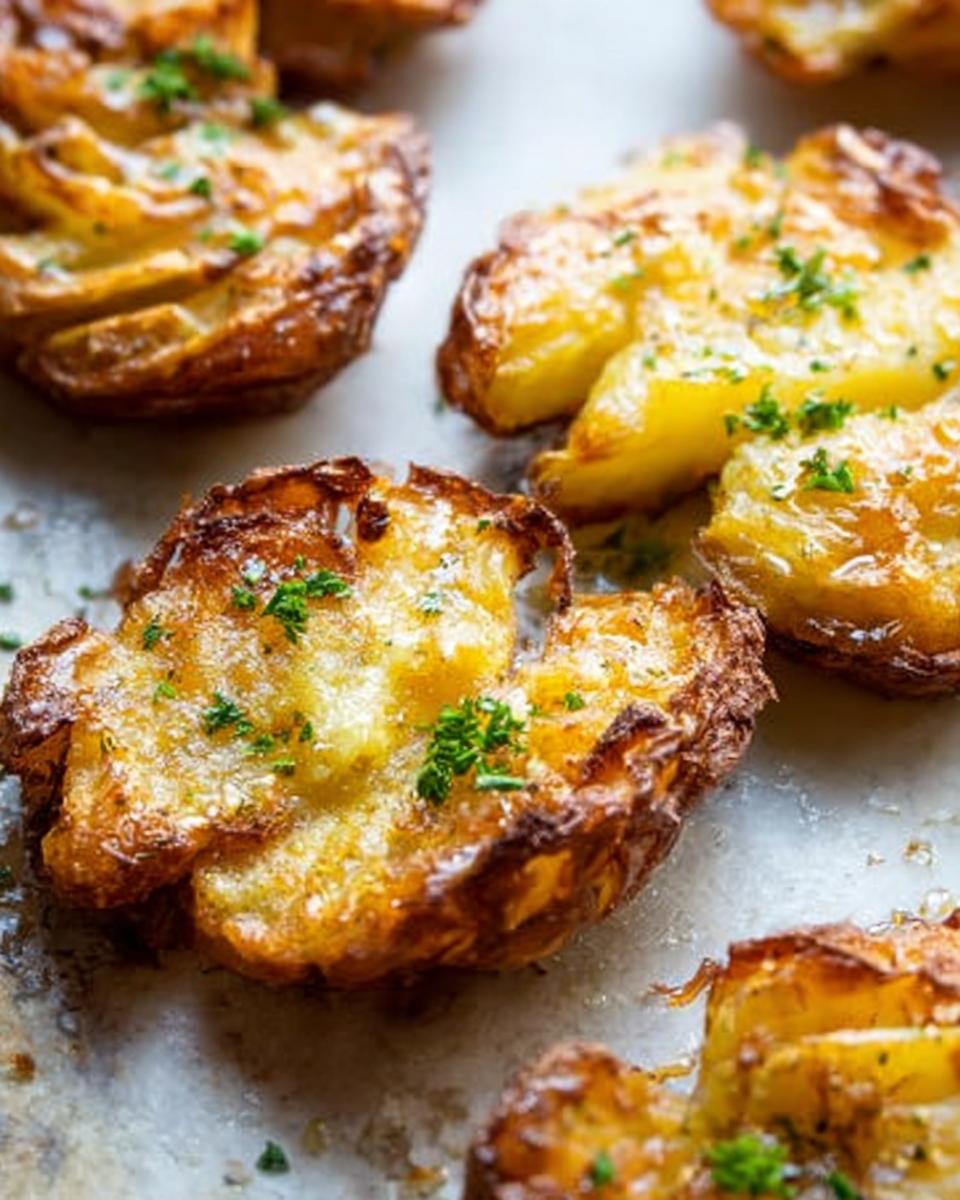
Oh my goodness, are you ready for a side dish that makes everyone stop talking? I’m not kidding! I live for that incredible contrast between a fluffy, steaming inside and an aggressively crunchy, crackly exterior. That’s exactly what we nail with these Crispy Smash Potatoes. They are the showstopper you never thought potatoes could be.
The first time I made these, I was hosting a big barbecue for friends. I needed something unique to go alongside the grilled meats, so I decided to try this technique. I remember gently squishing those boiled little guys, coating them in oil, and when they came out of the oven—golden and sizzling—I knew I’d struck culinary gold. Seriously, they were the highlight of the entire cookout!
As Thomás Anderson, your resident Precision Keto Scientist, I’ve optimized this process, not just for phenomenal texture, but also to keep things delightfully low-carb. Trust me; these are worth every second of waiting. If you love amazing side dishes, you absolutely have to check out all the great recipes we have over at the recipe index!
Why You Will Love These Crispy Smash Potatoes
Honestly, why wouldn’t you love these? This recipe is pure culinary magic because it hits all the right notes. You end up with a potato that does everything you want it to do—and then some! Every single time I pull a tray out of the oven, I have to stop myself from eating them all before dinner.
Here is why these are about to become your go-to comfort food:
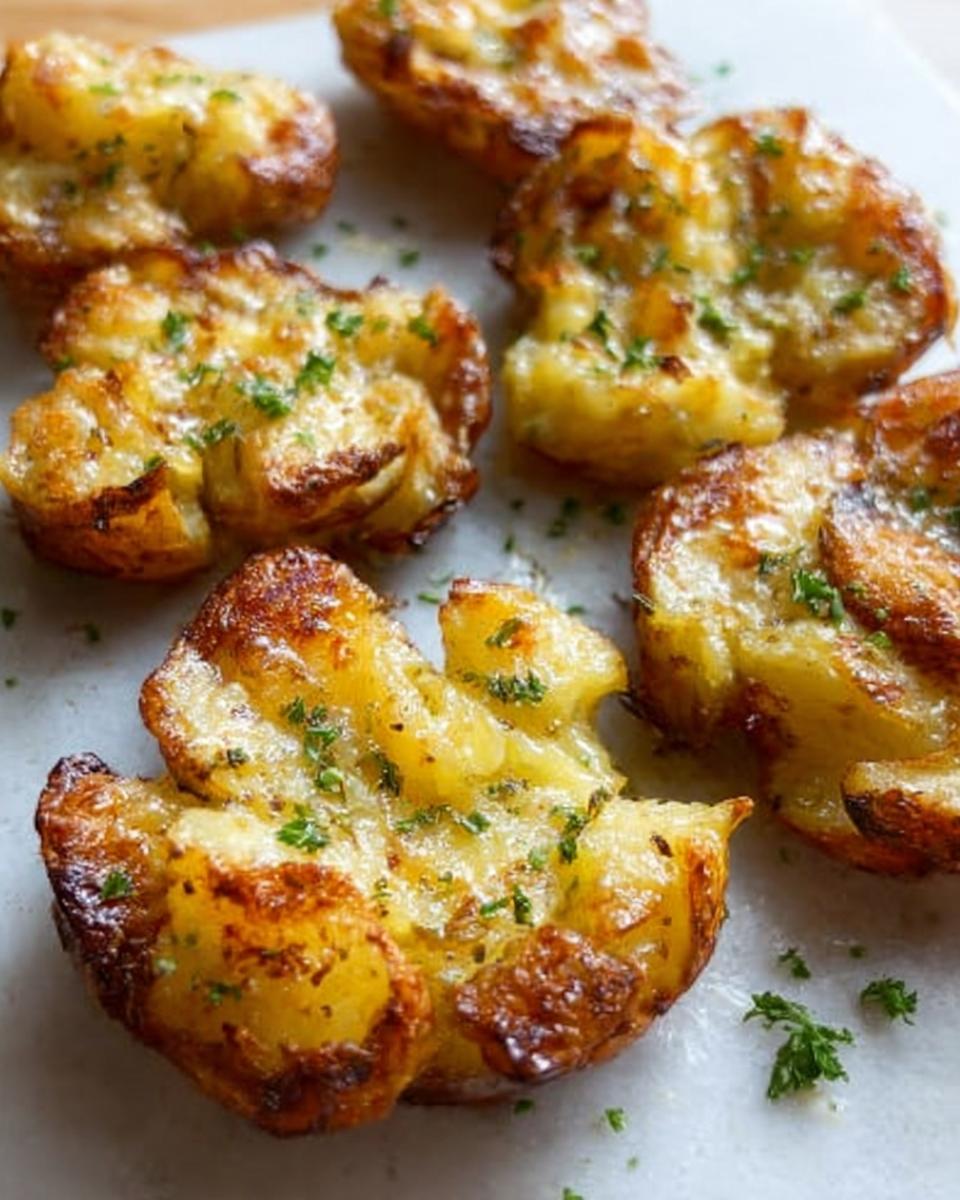
- You get maximum texture! We are talking about beautifully crispy edges that shatter when you bite into them.
- They are surprisingly straightforward to make, proving they are the perfect Easy Side Dish, even for a busy weeknight.
- They absorb butter and oil beautifully, leading to a rich, deeply satisfying, savory flavor profile.
- The crispy exterior ensures they hold up well, making them an absolute Party Favorite that won’t get soggy before everyone gets a chance to try them.
- Because we focus on the natural potato, they fit perfectly into many different dietary frameworks, especially when focusing on low-carb garnishes.
- You can customize them endlessly! Whatever herbs or cheeses you love, this potato base is ready for them.
It’s the ultimate high-reward, low-stress cooking experience, I promise!
Selecting the Best Potatoes For Crispy Smash Potatoes
So, what kind of potato should you grab? You can honestly use just about anything, which is the beauty of this recipe! But, as a scientist of flavor, I can tell you that the starch level really impacts the final texture.
Starchy potatoes, like Russets, tend to fall apart a bit more when you boil and smash them, which gives you a super fluffy inside—we love that! Waxy potatoes, like Yukon Golds, hold their shape better. They give you a slightly creamier texture rather than that fluffy cloud interior that some folks crave. Either way, you win!
Potato Size Matters for Perfect Crispy Edges
This is where we talk about surface area. If you want maximum crunch—those amazing, irresistible crispy edges—go smaller! Think golf ball size, maybe 700g total for about 12 small ones. They mash down thinner, so they bake faster and get crispier all over.
If you prefer more of a fluffy middle with a crispy ring around the outside, go for the medium potatoes. Just remember, the bigger they are, the longer they need in that hot oven to get perfectly done, so adjust your timing accordingly. It’s a trade-off based purely on your texture preference!
Essential Equipment for Perfect Crispy Smash Potatoes
You don’t need a million fancy gadgets for this recipe, thank goodness! Having the right tools just makes my life easier when I’m wrangling potatoes, especially when things get messy. When I made these for my friends that summer, I was so glad I had a sturdy setup, because you do need a little bit of force when you’re smashing them down!
Based on the ingredients and technique, here is what you’ll want pulled out of your cupboard before you even think about boiling the water:
- A Large Pot: This is for the initial boil. You need enough room for the potatoes to move around so they cook evenly. Don’t cram them in!
- A Colander: Essential for draining all that hot water quickly. We need them dry, remember?
- A Baking Sheet: This is where the magic happens in the oven. Make sure it’s large enough so the potatoes aren’t completely overlapping. You want them slightly spread out so the hot air can circulate and build that incredible crunch around the edges.
- A Fork or Potato Masher: This is your smashing tool! I usually grab a sturdy dinner fork. If you use one with deep tines, it helps create those little ridges that get extra crispy when they bake.
- A Small Saucepan: We use this for gently melting the butter so we can drizzle it evenly over the top later on. It’s important that the butter is fully liquid—no clumps allowed!
Having these five things ready means the rest of the process is just smooth sailing. Seriously, prepping your tools first saves so much time later on!
Ingredients Needed to Make Crispy Smash Potatoes
Okay, let’s talk about what you need to pull this off. The best part about this recipe is that the ingredients list is wonderfully short. You don’t need a million obscure items to get a showstopping side dish. Prep work is minimal, which is why this is such an Easy Side Dish for any night of the week.
We’re dividing this up into three simple groups so you know exactly what goes in when. Remember, these quantities are perfect for feeding about 6 people, but honestly, you’ll probably wish you made more!
Potatoes Grouping
This is where you decide the fate of the texture! You need potatoes that are small enough to handle, but big enough to give you that fluffy interior we are aiming for.
- Small Potatoes: You’ll want about 700 grams total. That usually works out to roughly 12 to 14 little guys, about the size of a large olive or small plum.
- Medium Potatoes: If you prefer a fluffier center, aim for about 1 kilogram of medium potatoes, which should give you 6 to 8 pieces.
For Cooking
This is just for the water, but don’t skip the salt! Salting the water means seasoning the potato from the inside out, which is a non-negotiable cooking step in my book.
- Salt: Just 1 tablespoon for the entire pot of boiling water.
Finishing Touches for Maximum Flavor
This is the mixture that goes on top right before baking, and it’s what gives you that irresistible golden color and heavenly crunch. Make sure that butter is fully melted!
- Unsalted Butter: About 30 grams, completely melted.
- Olive Oil: Just 1 tablespoon to mix in with the butter for better browning.
- Salt: We need about 3/4 teaspoon of salt for sprinkling over the top layer before it bakes.
- Black Pepper: A quarter teaspoon of freshly cracked black pepper really wakes up the flavor.
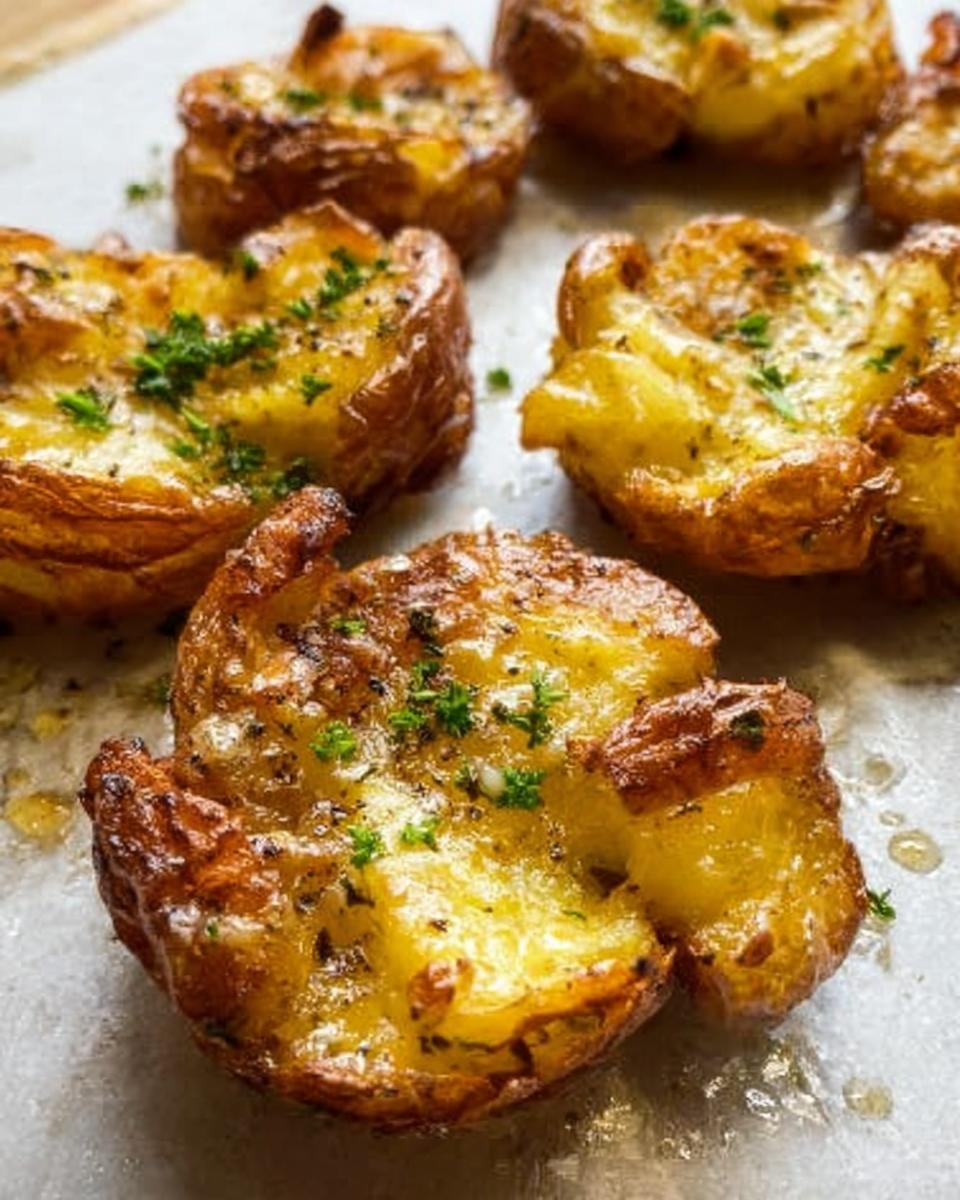
- Finely Chopped Parsley (Optional): If you feel like making them look fancy for your guests, a little sprinkle of fresh parsley as a garnish takes them straight to “Party Favorite” status!
That’s it! See? Simple, humble ingredients creating something truly spectacular. Now, let’s get them cooked!
Step-by-Step Instructions for Oven Baked Crispy Smash Potatoes
This is where the magic truly happens, and honestly, I get a little giddy every time I start this process. We are taking these humble boiled potatoes and turning them into the star of the show using a simple oven baked method. Get ready for a total time commitment of about 75 minutes, but trust me, the payoff is huge.
When I was making these for my friends that summer, I remember looking at the potatoes right after I smashed them with my fork—it felt like I was transforming them! By following these steps precisely, you’re going to get that perfect combination of fluffy interior and crunchy exterior. For more incredible-but-easy recipes, peep over at our main recipe index, but first, let’s perfect these potatoes!
Boiling and Drying: The Key to Fluffy Smashed Potatoes
First things first: get your water boiling in that big pot and add a tablespoon of salt—it’s non-negotiable for flavor! Pop in your small or medium potatoes. If they are small, plan on about 20 to 25 minutes; the bigger ones need closer to 30 minutes until they are completely soft. You’ll know they are ready when the skin looks like it’s ready to pop. Once they are tender, drain them right away in the colander. Now, this next part is critical: let those cooked potatoes sit in the colander and steam dry for a solid 5 minutes. Don’t rush this—we need that moisture to evaporate so they crisp up later!
The Art of Smashing for Crispy Smash Potatoes
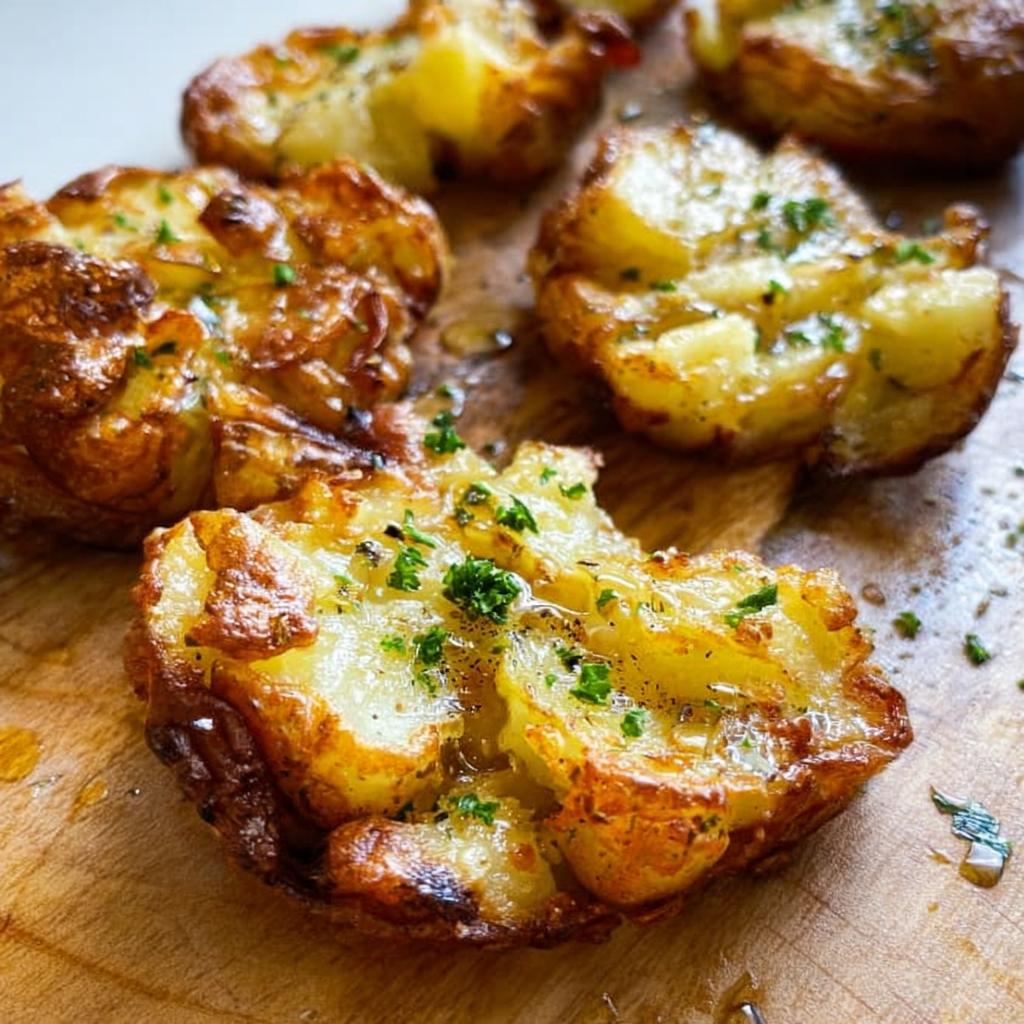
Lay your dried, hot potatoes onto your prepared baking sheet. Now, you use your fork or masher and gently press down on each one until it flattens out. I always tell people to aim for thinness if you want maximum crunch, but if you like that super fluffy center, don’t smash them completely flat. You want those rugged surface bumps! After you’ve smashed them all, let them rest right there on the sheet for another 5 minutes. This second rest period really helps them steam-dry even more before the fat hits them, boosting that final crispiness.
Baking for Golden Crispy Edges
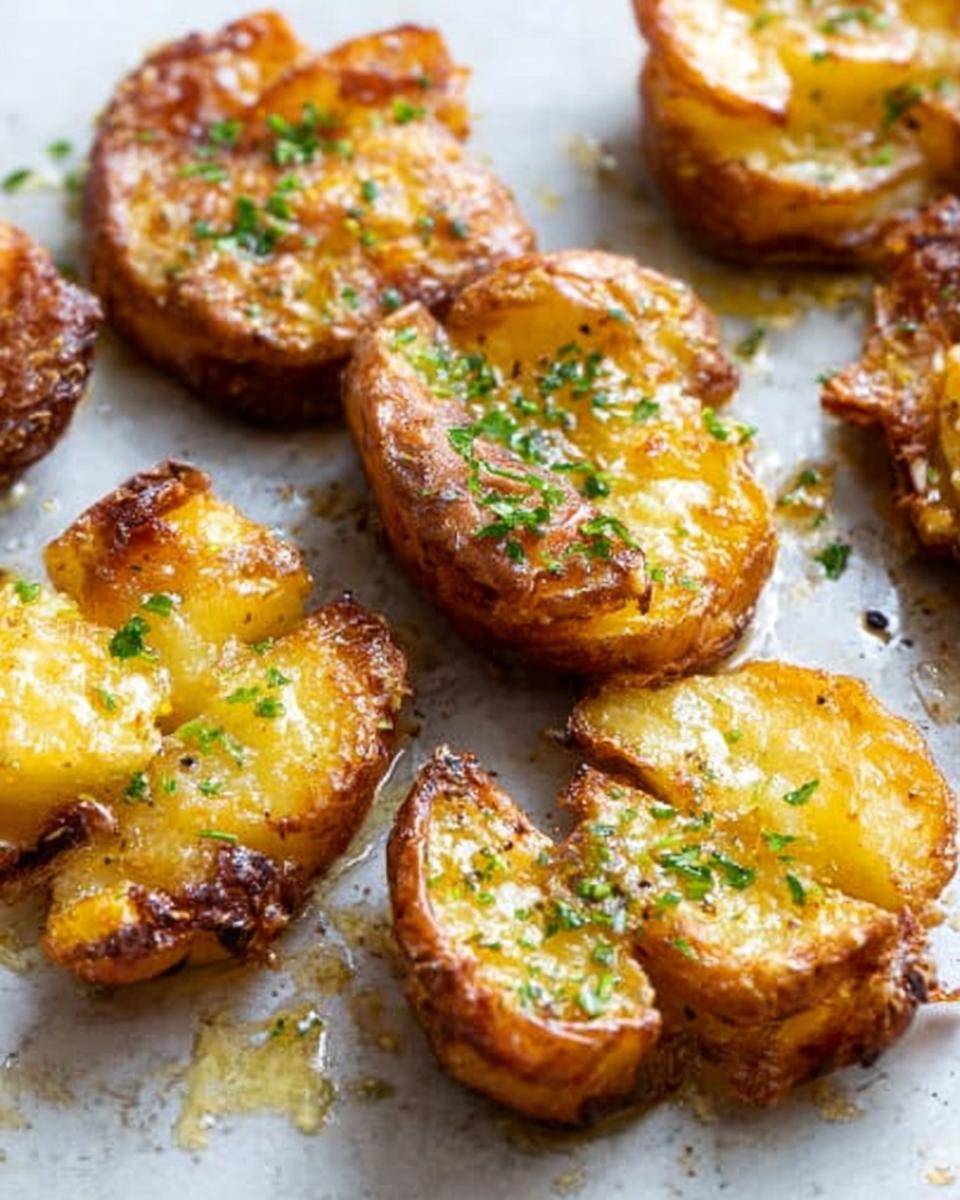
Time for the oven! Get that temperature set to 200°C (390°F). Next, drizzle everything evenly with your melted butter and olive oil mixture, and sprinkle generously with salt and pepper. Place them gently into the hot oven. If you used small potatoes, give them about 45 minutes. The medium ones might need the full 55 minutes to get super golden. Here’s my biggest expert tip: once they are in, do not flip them during baking. We want all that deep browning and those fantastic crispy edges to develop undisturbed on the bottom. You can check out an external guide on smashed potato techniques if you ever want a deep dive, but honestly, stick to my instructions and you’ll be fine!
Tips for Success When Making Crispy Smash Potatoes
Even though this recipe is so much fun and generally forgiving, there are a couple of little tweaks that can take your potatoes from great to absolutely unforgettable. These small bits of knowledge—the kind you only learn after making a batch or two—really help solidify the texture and flavor profile. Don’t worry too much, these little secret methods are easy to incorporate!
The biggest mistake people make is not drying the potatoes enough, or adding too much liquid too late in the game. Remember, no matter how well you oil them, a wet potato steams instead of frying! Keep that drying step sacred.
Flavor Infusions: Butter and Herb Variations
If the idea of adding garlic or herbs is appealing to you—and trust me, it should be—you have a wonderful chance to infuse flavor right into that melted butter mixture. This is a trick I picked up years ago!
For garlic lovers: Grab two cloves of garlic, give them a good smash so they burst open a little, and toss them into a small saucepan with your 30 grams of butter. Melt this slowly together. The butter will soak up that incredible garlic essence. Once it’s infused, just toss those smashed garlic bits out—we don’t want them baking on the potato—and proceed with pouring the garlicky butter over everything.
If you prefer herbs, dried herbs are incredibly concentrated, so they are perfect for boiling. Toss a little dried rosemary or thyme right into the initial boiling water with the potatoes. They’ll soak up the flavor while they soften. Just make sure you drain them out before you start your smashing!
These simple additions mean your basic smashed potatoes suddenly feel like they came from a fancy restaurant. Enjoy the small steps that make the biggest difference!
Toppings And Seasonings Ideas for Your Crispy Smash Potatoes
We have successfully baked these beauties until they are golden brown and perfectly crunchy, but now comes the really fun part: dressing them up! Since I focus heavily on keeping meals exciting yet low-carb, these potatoes are the perfect canvas for savory, high-flavor toppings that won’t load you up on unwanted carbs.
You can really elevate these from a great side dish to an absolute showstopper—a true Party Favorite—with just a few additions once they come out of the oven bubbling hot. Forget just salt and pepper; let’s make them sing!
For anyone who is watching their carbs, these potatoes are the perfect starting point because the base is naturally low-carb. If you are looking for more ideas on keeping your whole meal budget-friendly while staying in the keto zone, you should definitely read my guide on how to make cheap keto meals!
Here are a few of my favorite savory, low-carb topping ideas:
- Cheesy Garlic Lover: While the potatoes are still piping hot, sprinkle them generously with finely grated Parmesan cheese. The heat melts it just enough to form a thin, savory crust. A second drizzle of garlic oil (from that trick we talked about earlier!) makes this irresistible.
- Smoked Paprika Kick: This is simple but packs a punch. After your initial salt and pepper, hit them with a healthy dusting of smoked paprika and a pinch of cayenne pepper right before they go into the oven. The smokiness pairs beautifully with the crispy potato flavor.
- Herbed Sour Cream Drizzle: If you want a cooler, creamy contrast, nix the butter/oil drizzle and instead melt your butter slightly, then mix in a big spoonful of full-fat sour cream (or plain Greek yogurt if you aren’t strictly keto) along with fresh chives and dried dill. Drizzle this *after* baking.
- Everything Bagel Spice: Seriously, this seasoning mix is a miracle worker on everything. Just sprinkle the ‘Everything’ seasoning blend over the hot, oiled potatoes before they enter the oven for incredible texture and crunch from the sesame seeds.
- Sharp Cheddar & Bacon Bits: What doesn’t get better with sharp cheddar and bacon? After they come out, top with shredded sharp cheddar and crumbled, crispy bacon bits. They melt together into pure comfort food!
See? It’s so easy to dress these up based on what you have on hand. These savory, rich toppings ensure every bite of your smashed potatoes is packed with flavor!
Storage and Reheating Instructions for Crispy Smash Potatoes
Look, I hope there are no leftovers, because these potatoes are absolutely best devoured fresh from the oven—that’s when the texture is top-tier! But let’s be real, life happens, and sometimes you pack them away for lunch the next day. Don’t worry; you can absolutely revitalize that perfect crunch!
If you do have extras, the key is keeping them dry. Once they are completely cooled down, transfer the potatoes into an airtight container. Try to avoid stacking too many layers; maybe use a shallow container if you can. They should keep nicely in the fridge for about three days. But listen closely, because microwaving these is a recipe for sad, rubbery disappointment. We are fighting to keep those crispy edges!
To get back that shatteringly crisp exterior, you absolutely need dry heat. Forget the microwave entirely. Your best bet is pulling out that oven or, even better, your air fryer.
Reheating in the Oven
Preheat your oven back up to about 200°C (390°F). Lay the cooled potatoes in a single layer on your baking sheet. You might want to give them a tiny spritz of fresh oil or melted butter—just enough to encourage browning, but not so much that they end up swimming in fat! Pop them in for about 10 to 12 minutes. Keep an eye on them, but this short blast of high heat will dry out the surface moisture they picked up in the fridge and bring back the golden color and crispiness.
Using the Air Fryer for Speedy Crunch
If you have an air fryer, this is my preferred method! It’s faster and honestly results in glorious texture revival. Place the potatoes in the basket in a single layer—you might need to do this in two batches, which is totally fine. Set your air fryer to about 180°C (350°F) and cook them for just 6 to 8 minutes. They come out piping hot, tasting almost as good as the first time around. Seriously, the air fryer is cheating when it comes to bringing crispiness back to life!
Following these reheating steps means you still get to enjoy that wonderful contrast between fluffy and crisp, even on day two!
Frequently Asked Questions About Crispy Smash Potatoes
I know sometimes you just need a quick answer before diving back into the kitchen, or maybe you’re troubleshooting something mid-bake! That’s totally normal. These smashed potatoes are simple, but everyone has their sticking points. As a precision scientist, I love ironing out the details so you have a perfect outcome every single time. Here are the questions I get asked most often about turning out this fantastic, easy side dish.
Can I make these Crispy Smash Potatoes ahead of time?
Yes, absolutely! This is actually a great way to prep for a big dinner party. The step you can do ahead is the boiling. Cook your potatoes until they are soft, drain them well, and let them cool completely. You can store the pre-boiled potatoes in the fridge for up to two days. Then, on the day you want to serve them, just let them sit out on the counter for about 30 minutes to warm up slightly, and then proceed straight to the smashing and baking steps. Just know that because they start chilled, you might need to add about 5 to 10 extra minutes to the baking time!
What is the best way to ensure maximum crispiness?
If crispy perfection is your goal—and hey, it should be—you have to focus on two moments regarding moisture: the initial drying and the second rest. After you drain the cooked potatoes, you must let them sit in the colander for a full 5 minutes so the steam can escape. Then, after you smash them, let them rest on that baking sheet for another 5 minutes before the oil goes on. That resting time is crucial because it lets the tender skins dry out a bit right before they hit the hot fat. High oven heat (we use 200°C/390°F) is your other secret weapon. High heat sets the outside before the inside gets soggy!
Are Smashed Potatoes considered keto-friendly?
That’s a great question, especially coming from me, your resident Keto Scientist! In their base form, potatoes are starchy vegetables, so they do contain carbohydrates, meaning they aren’t inherently keto. However, this recipe is fantastic for those following lower-carb diets for two reasons: portion size and topping control.
The way we smash them, you end up with a thinner surface area compared to a traditional baked potato, so you can manage your portion size easily. Secondly, if you stick strictly to the low-carb toppings I mentioned earlier, like Parmesan, bacon, or those lovely herb drizzles, you keep the overall carb count manageable. It makes them a perfect side dish for pairing with a protein-heavy, keto-compliant main course. If you need ideas for low-carb sides, I always welcome you to reach out to me on my contact page!
Share Your Crispy Smash Potatoes Creations
Wow, we made it! I truly hope you dive into making these! I can’t wait to hear what you think. Please take a second to rate these babies—I’d love to see how you score them, maybe give us 5 stars?
Pop over to social media and share a photo when you make your Crispy Smash Potatoes, and tag me! Let me know in the comments below which topping you chose! You can always learn more about my baking philosophy over on the About page!
Crispy Smash Potatoes
Ingredients
Equipment
Method
- Boil the potatoes: Bring a pot of water to a boil, add 1 tablespoon of salt. Cook the potatoes until they are soft. Small potatoes take about 20 to 25 minutes, and medium potatoes take about 30 minutes. The skin may split, which is okay.
- Preheat your oven to 200°C (390°F), or 180°C (350°F) for a fan oven.
- Drain the potatoes and let them dry in the colander for about 5 minutes.
- Place the dried potatoes on a baking sheet. Use a large fork or potato masher to gently squish each potato, keeping it mostly in one piece. Aim for thinness for crispier results, or slightly thicker for a fluffier inside. More surface bumps will create better crunch.
- Let the potatoes steam dry on the baking sheet for another 5 minutes. This step helps them get crispier.
- Drizzle the potatoes with melted butter, then olive oil. Sprinkle evenly with salt and pepper.
- Bake for 45 minutes for small potatoes, or 55 minutes for medium potatoes, until they are deep golden brown and crispy. Do not flip them during baking.
- Serve the potatoes hot. Sprinkle with fresh parsley if desired.
Nutrition
Notes
Tried this recipe?
Let us know how it was!
Precision Keto Scientist
Numbers don’t lie, and neither do my recipes. I’m a biochemist who fell into keto cooking through my own metabolic research—and I approach recipe development like a lab experiment, complete with macro calculations precise to the tenth of a gram.
My journey started in diabetes research labs at Johns Hopkins, where I spent six years studying how different macronutrient ratios affected insulin sensitivity. Personal experimentation with therapeutic ketosis for cognitive enhancement led me down a rabbit hole of recipe testing that eventually consumed more hours than my actual day job.
While other cookbook authors describe flavors and textures, I quantify ketone elevation curves and glycemic impact data. My recipe database contains 340+ formulations, each tagged with detailed nutritional analysis, predicted ketosis timing, and optimal meal spacing. I measure salt by weight, time cooking processes to the minute, and log ingredient sourcing obsessively for consistent results.
My breakthrough research on fat-protein ratios for sustained ketosis got published in the Journal of Nutritional Biochemistry. My “Macro Math Mastery” workshops have trained over 5,000 people in precision meal planning. I even collaborated with continuous glucose monitor manufacturers to create the first real-time feedback system for recipe optimization.
I left my pharmaceutical research position at Merck three years ago to focus on metabolic nutrition consulting. Now I work with professional athletes, biohackers, and medical professionals seeking therapeutic ketosis protocols. When I’m not in my lab-kitchen, I’m competing in chess tournaments or documenting my daily biomarker measurements with true data scientist obsessiveness.
Cooking is just applied chemistry—and chemistry follows predictable rules. Master the variables, control the outcomes.