
Oh, if there is one thing I crave when the weather turns, it’s the smell of a true comfort bake filling my kitchen. Forget plain old zucchini bread—we’re leveling up today! If you love that classic sweet banana flavor but want something richer and totally satisfying, you are going to adore this ultimate Peanut Butter Banana Bread recipe. It’s the perfect flavor twist that makes everything feel cozy.
I first cracked this recipe when I was baking in my tiny Brooklyn apartment years ago. It was pouring rain outside, and I had three bananas turning brown on my counter, begging for rescue! As I started mixing in that creamy peanut butter, the whole space was instantly transformed by the nutty, sweet aroma. Seriously, this loaf wraps you up like a warm hug. It’s not just delicious; it’s how I build memories now—turning basic ingredients into something truly special for the family.
Why This Peanut Butter Banana Bread Stands Out (Comfort Bake)
If you’ve made banana bread a hundred times, you might think, “Why bother with this new version?” Well, trust me, this twist is worth the effort! This isn’t just another quick loaf; it’s rich, it’s sturdy, and it hits that perfect nostalgic spot. It’s fast to toss together too, which is huge for busy weeknights.
Here’s why you need to make this specific version:
- It combines sweet banana with salty, roasted peanut butter beautifully.
- The process is incredibly straightforward—no fancy equipment needed!
- It stays moist for days, unlike some drier loaves I’ve made.
- It’s the perfect satisfying Snack Bread for an afternoon pick-me-up.
Achieving the Perfect Peanut Butter Banana Bread Texture
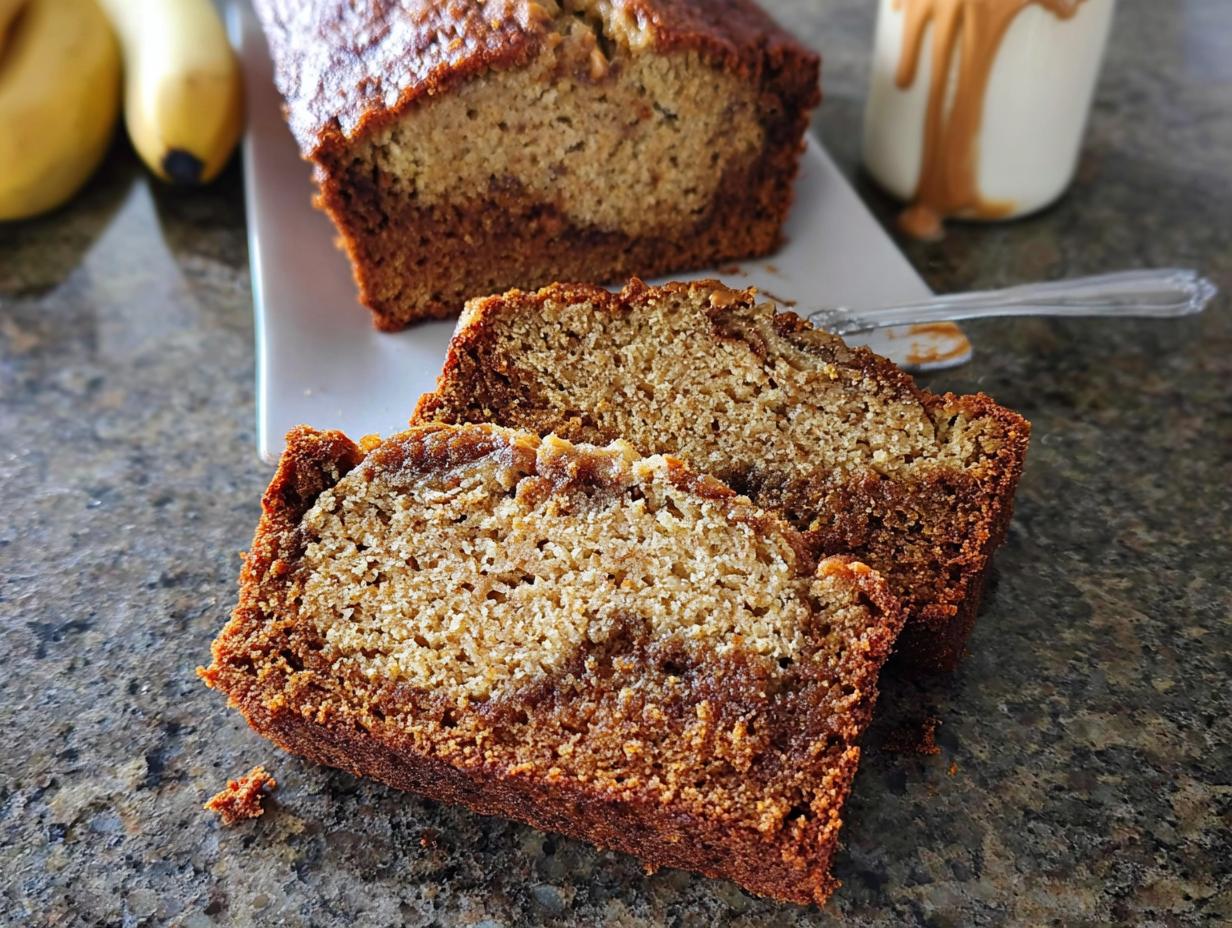
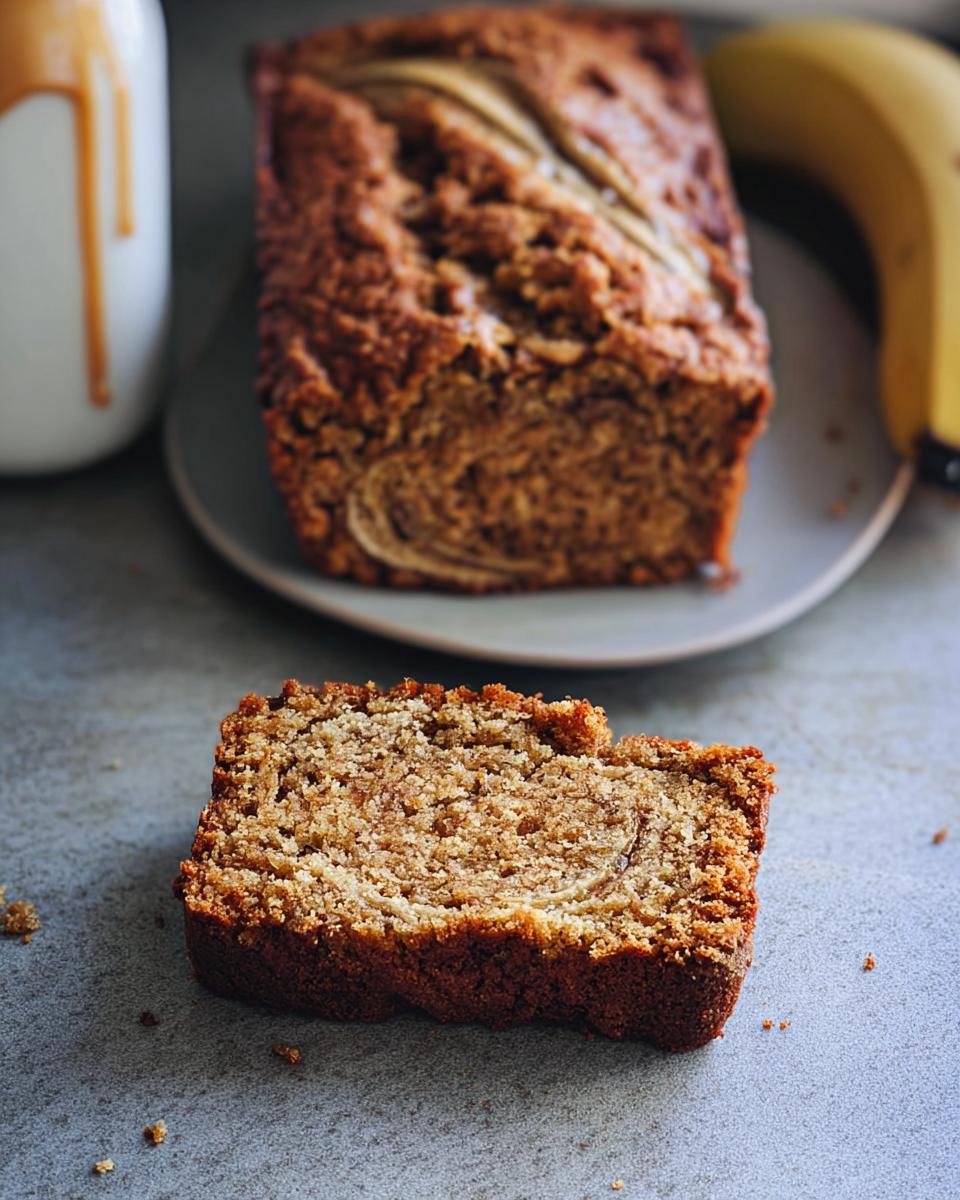
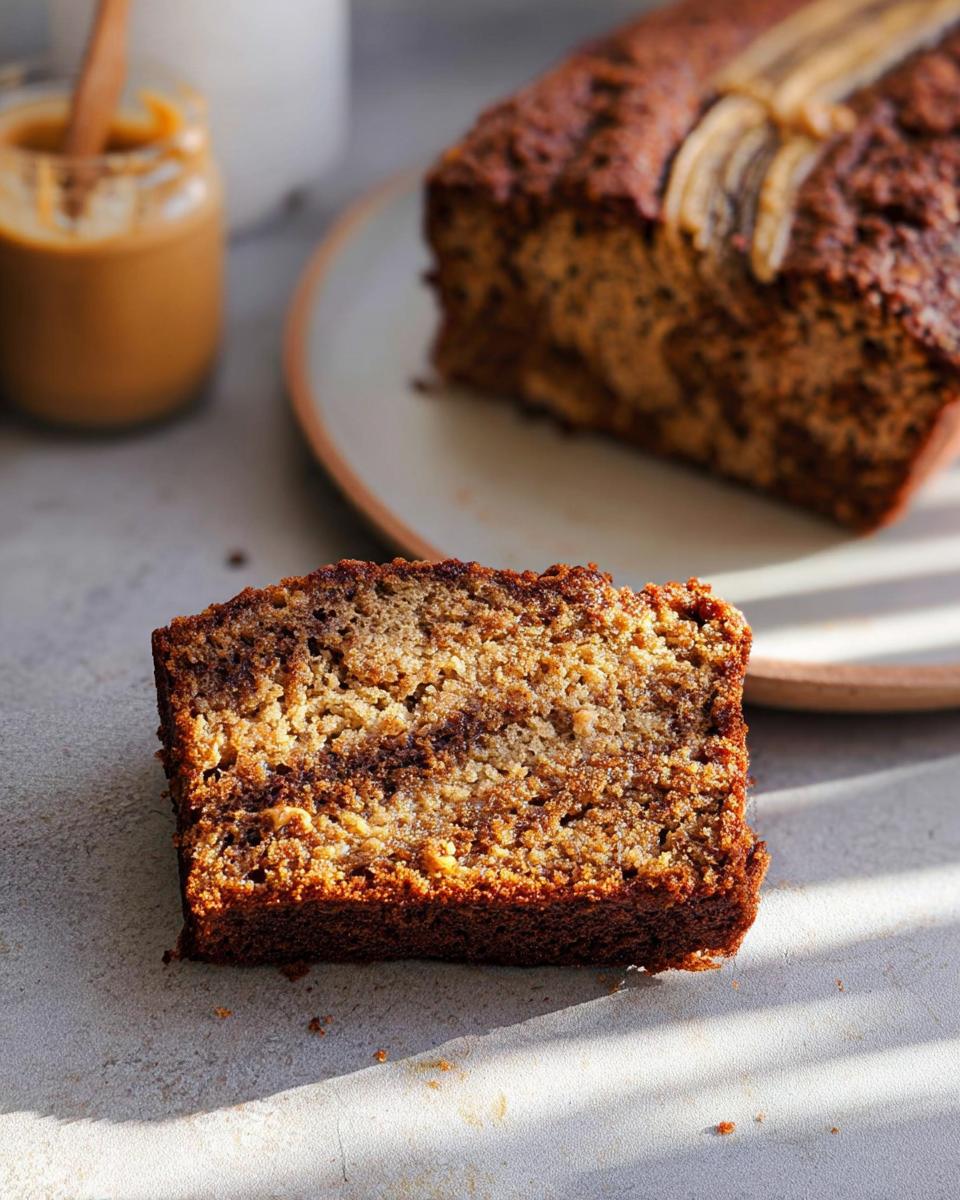
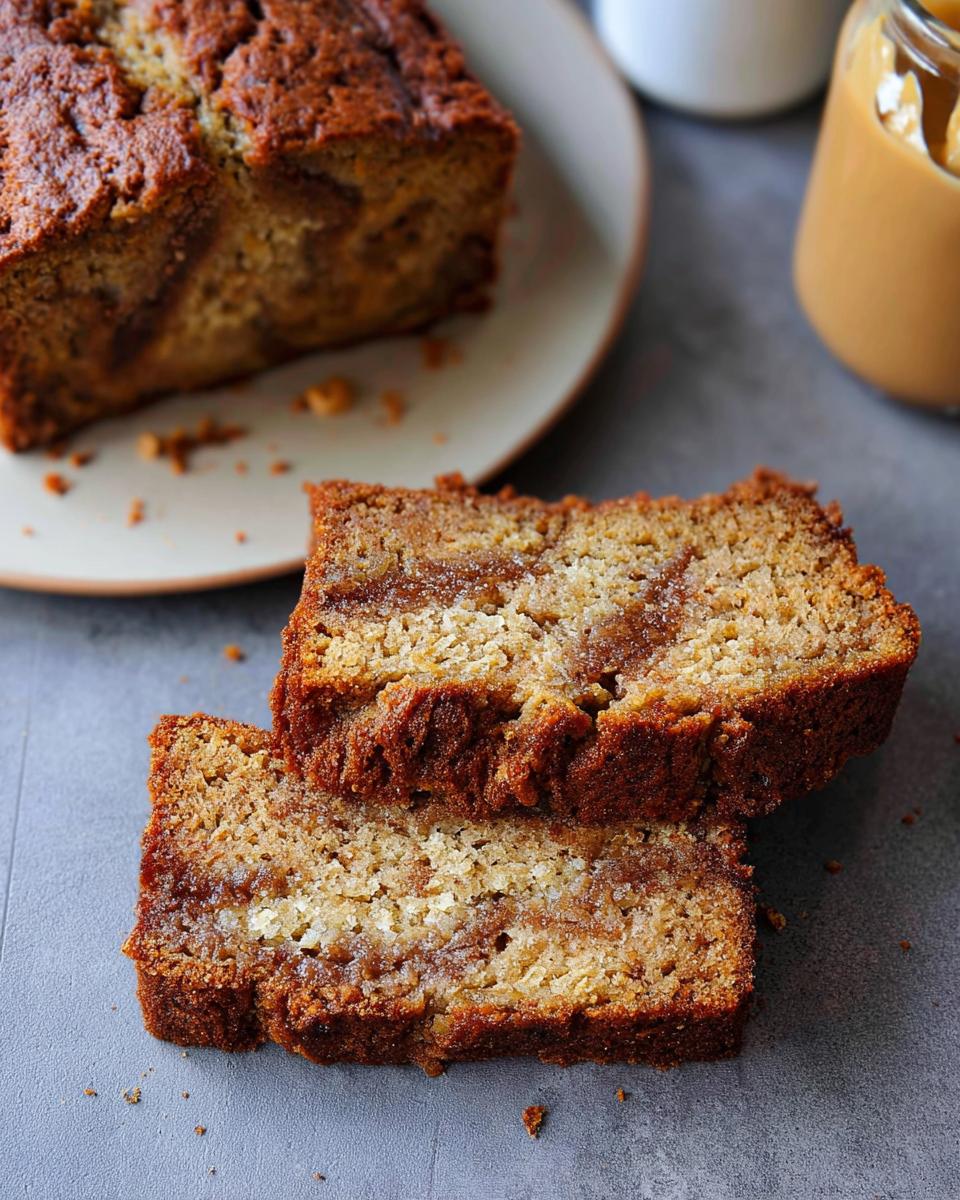
The texture is everything in a quick bread, right? We get amazing moisture here because we use just the right amount of mashed bananas combined with the healthy fats from the melted butter and, of course, the peanut butter! That combination locks in flavor and keeps the crumb dense but never heavy. It cracks beautifully on top, promising that soft interior every time you slice into it.
Essential Ingredients for Your Peanut Butter Banana Bread
Okay, let’s talk about what actually goes into this magic formula. Since this is such a flavor-forward bake—that wonderful Flavor Twist you’ve been waiting for—we need to treat our ingredients with respect! I always lay everything out before I start mixing just so I don’t forget anything critical, like that single room-temperature egg. Remember, the quality of your banana matters here more than almost any other ingredient!
You’ll find the full ingredient list below, ready for you to gather. If you are looking for other amazing recipes as you gather these items, definitely check out some of my other favorites over at my recipe collection!
Here is what you need:
For the Bread
- 1 1/2 cups all-purpose flour
- 1 teaspoon baking soda
- 1/2 teaspoon kosher salt
- 1 cup mashed brown bananas (seriously, you need 3 large brown ones!)
- 1/2 cup creamy peanut butter
- 1/4 cup unsalted butter, melted and slightly cooled
- 3/4 cup packed light brown sugar
- 1 large egg, at room temperature
- 1 teaspoon pure vanilla extract
Ingredient Notes and Substitutions for Peanut Butter Banana Bread
This is where the real expertise comes in, folks. Don’t skip these tips, please! First, we need those bananas nearly black. If they are just yellow with a few spots, they won’t provide enough moisture or sweetness. Trust me when I say mushy, spotty, almost-too-late bananas are your best friend for any banana bread!
Second, for the peanut butter, I insist on creamy, conventional peanut butter. Natural peanut butter often separates or has too much oil, which can really throw off the structure of this bake. We want that uniform texture! Also, make sure your egg is actually at room temperature—it incorporates much better into the wet ingredients when it isn’t cold straight from the fridge.
Step-by-Step Instructions for Perfect Peanut Butter Banana Bread
Alright, time to get our hands dirty! This is where the transformation happens. We move pretty quickly once we start combining things, so having everything ready is key to a great result. I’ve made this loaf so many times I could practically do it in my sleep, but following these steps ensures you get that glorious crumb every single go.
First things first: get that oven heating up to 350ºF! While it warms, spray your 9×5-inch loaf pan really well with nonstick cooking spray. We don’t want this beautiful creation sticking!
- In a medium bowl, grab your flour, baking soda, and salt. Give those a quick whisk together just to marry them up. Set that aside—that’s our dry team!
- Now for the big bowl! Mash those ripe bananas using a fork until they are mostly smooth. Add in your creamy peanut butter and the melted (but slightly cooled!) butter. Stir that until it looks happy and combined. Then, mix in the brown sugar, your room-temperature egg, and the vanilla extract. Keep stirring until it’s nice and smooth—no lumps of sugar allowed!
- This is the most important part for texture: gently fold the dry ingredients into the wet ingredients. I mean gently. Just stir until you barely see any dry flour streaks left, and then stop!
- Pour all that luscious batter right into your prepped pan. Slide it into the oven and let it bake for 50 to 65 minutes.
- Once that toothpick comes out clean when you test the very center, pull it out! Place the pan on a wire cooling rack and just let it sit, undisturbed, for exactly 10 minutes. Seriously, don’t rush this part! After 10 minutes, run a knife gently around the edges, pop it out onto the rack, and let it cool mostly through before slicing. If you slice it too soon, you risk squishing that lovely structure we worked so hard to build. If you are looking for more great baking inspiration, feel free to browse through my full recipe index for ideas! And for more general advice on mixing batters, check out this great post from a fellow baker: Peanut Butter Banana Bread inspiration.
Baking Tips for the Best Peanut Butter Banana Bread
Listen, the number one mistake people make with quick breads is overmixing the batter once the flour goes in. When you mix too much, you develop gluten, and that turns your delicious, tender loaf into something chewy—like tough bread! I always stop mixing the second the flour disappears. A few little lumps are totally fine; they bake out!
Also, oven temperatures are sneaky! That 50 to 65-minute range is large for a reason. Start checking around the 50-minute mark. If the top looks very dark but the toothpick is still wet, tent a piece of foil loosely over the top so the crust doesn’t burn while the middle finishes baking. Trust me, learning your specific oven saves headaches!
Equipment Needed for Your Peanut Butter Banana Bread
Before starting, get your workspace set up! Being organized makes this whole process so much smoother, and honestly, it prevents those moments where you realize you need something crucial halfway through mixing. This recipe is super forgiving, but having the right tools ready means we can focus purely on the fun part—the mixing and smelling!
You won’t need anything crazy fancy here, just your standard baking supplies. Get these ready to go:
- One 9×5-inch loaf pan – this is the standard size we developed the recipe for!
- A medium bowl for the dry stuff.
- A big, sturdy large bowl for all those wet, glorious ingredients.
- A simple fork for mashing those beautiful brown bananas.
- A whisk for quickly combining the flour mixture.
- A wire cooling rack sits ready for when the baking is done and you need to get the pan off that hot surface.
- A reliable knife for checking doneness (and for slicing later, of course!).
Boosting Nutrition: Making This Peanut Butter Banana Bread Healthier (Protein Boost)
I love that you want to sneak some goodness into this delicious bread! While this recipe is already wonderful because of the whole fruit, we can absolutely give it a little Protein Boost to turn it from a dessert into the perfect hearty breakfast or post-workout snack. You don’t have to sacrifice that amazing comforting texture for nutrition, promise!
The easiest way to do this, without making the loaf tough, is to swap out about a quarter cup of the all-purpose flour for vanilla or unflavored protein powder. Because protein powder absorbs liquid differently, you might need to add one extra tablespoon of milk or water to keep the batter perfect—start slow and check the consistency.
Another genius move is using a high-protein, natural peanut butter. That way, you get extra staying power alongside that gorgeous nutty Flavor Twist. Remember, small swaps make a big impact, and you can find some genuinely great swaps in my calorie-smart recipe section if you’re looking to make other adjustments!
Storing and Freezing Your Delicious Peanut Butter Banana Bread
Now that you’ve pulled this gorgeous loaf out of the oven, the next most important thing is keeping it perfect until you eat it all up! Because this Peanut Butter Banana Bread is so incredibly moist thanks to those bananas, it stays fresher longer than standard bread, but we still need to protect that fantastic texture.
I usually wrap leftovers tightly in plastic wrap—two layers works best for me—and keep the loaf right on the counter. It stays perfectly soft like this for about three days. Try to keep it in a somewhat cool spot, away from direct sunlight or heat, so the peanut butter doesn’t get too oily on the surface.
But let’s be real, sometimes you bake a loaf and know you can’t eat it all right away, or maybe you gifted half of it (good for you!). Freezing is your best friend here, and this bread freezes like a dream!
How To Freeze Peanut Butter Banana Bread Like a Pro
You absolutely must let the bread cool completely before you try to wrap it to freeze. If you wrap it warm, you’re just steaming it inside that plastic, and nobody wants soggy bread!
Here is my foolproof method:
- Once it’s totally room temperature, slice the loaf first. This makes it so much easier to thaw just what you need later!
- Wrap each individual slice tightly in plastic wrap. Make sure it’s sealed all the way around.
- Tuck those wrapped slices into a heavy-duty freezer bag. Squeeze out as much air as you can before sealing it up.
- It will keep happily in the freezer for up to one month! When you want a slice, just pull it out while you are making your morning coffee, and it will thaw beautifully on the counter in under an hour. Sometimes I even pop it in the microwave for 10 seconds if I’m impatient!

I’ve found that prepping a double batch and freezing half saves me so much time later. When that craving for a hearty Snack Bread hits next week, I’m already prepared!
Frequently Asked Questions About Peanut Butter Banana Bread
I know sometimes the instructions or ingredient lists bring up a few extra thoughts when you’re standing in your kitchen. That’s totally normal! We’ve all been there, usually wondering if a little substitution will throw the whole thing off. I’ve collected a few questions I get all the time about this loaf, especially when people are trying to achieve that perfect Flavor Twist at home.
I hope this clears up any last-minute doubts so you can get this wonderful comfort bake in the oven!
Can I use natural peanut butter in this Peanut Butter Banana Bread?
This is such a common question! For this specific recipe, I really, really recommend sticking to conventional, creamy peanut butter—the kind where the oil doesn’t separate out because it has stabilizers in it. When you use natural peanut butter, the oil content is higher and it tends to mix differently with the melted butter and egg.
If you absolutely must use natural, here’s my advice: Stir that jar of natural peanut butter vigorously until it looks completely uniform before measuring it out. Then, you might notice your batter has a slightly looser texture. If it seems too thin after combining everything, add just a tiny bit more flour, maybe a teaspoon at a time, until it looks like the consistency we aimed for in the main instructions. It usually still works out, but it’s definitely less predictable!
How long does this Snack Bread stay fresh?
Because this loaf is so loaded with those lovely mashed bananas and peanut butter fats, this Snack Bread stays surprisingly soft! If you wrap it up well in plastic wrap (remember: two layers is my secret hack!) and keep it on your counter at room temperature, it lasts beautifully for three full days. Just keep it out of super humid spots.
If you need it to last longer, jump right over to the freezing section I wrote about earlier. Freezing is truly the best way to preserve that fresh-baked taste for up to a month. Honestly, I try to bake two loaves whenever I make this, because I know one batch won’t last the week around here!
Serving Suggestions for Your Peanut Butter Banana Bread
Okay, so the bread is out, it’s cooled down just enough—you know, that perfect temperature where it’s warm but won’t fall apart in your hands—and now comes the best part: deciding how to eat it! Honestly, this loaf is fantastic all by itself, standing proud as a rich, nutty Comfort Bake. But if you want to elevate that morning snack or treat the family after dinner, I have a few favorite ways to serve it.
You don’t need a whole fancy spread to make this shine; sometimes simplicity is the secret ingredient!
Here are my go-to ways to enjoy a fresh slice:
- Simple Butter Melt: A thin swipe of softened, good-quality salted butter melting into a warm slice is heaven. The saltiness picks up the peanut flavor wonderfully.
- Creamy Dip: If you want something richer, try a dollop of Greek yogurt mixed with a tiny drizzle of maple syrup. It adds a little tang that cuts through the sweetness beautifully.
- The Jam Choice: I know, I know, usually jam goes on plain toast, but a very thin layer of raspberry jam complements the chocolatey notes from the brown sugar perfectly. Be careful not to use too much, though; we don’t want to drown out that fantastic banana flavor!
- Perfect Pairing: Honestly, nothing beats a slice of this alongside a hot, strong cup of coffee or a chilled glass of milk. It’s the ultimate way to end the day or power through the afternoon slump.
No matter how you serve it, make sure you wait until it’s just slightly warm, not piping hot. That tiny bit of cooling time makes all the difference in the crumb structure when you finally take that first big bite!
Share Your Peanut Butter Banana Bread Creations
Whew! I hope you’re getting ready to preheat that oven because once you smell this loaf baking, you won’t be able to stop yourself. This recipe is a true labor of love for me, and seeing it come to life in your kitchens is truly the best part of my day.
I really want to hear about how this wonderful Peanut Butter Banana Bread turned out for you! Did you add chocolate chips? Did someone try the protein boost method? Don’t be shy—come back here and leave a rating and a comment. It helps other bakers know that this recipe is a winner!
If you snap a picture of your perfectly cracked loaf—especially if you’re enjoying it with that big glass of milk I suggested—please tag me on social media! I always check my mentions and I absolutely love seeing your beautiful bakes. Connecting with all of you who share my passion for fuss-free, delicious comfort baking is why I started this blog in the place. If you ever have a question or just want to tell me your favorite way to eat this Snack Bread, you can always reach out through my contact page. Happy baking, everyone!

Peanut Butter Banana Bread
Ingredients
Equipment
Method
- Preheat your oven to 350ºF. Grease a 9×5-inch loaf pan with nonstick cooking spray and set it aside.
- In a medium bowl, whisk together the flour, baking soda, and salt. Set this aside.
- In a large bowl, mash the ripe bananas with a fork. Add the peanut butter and melted butter, and stir until combined. Stir in the brown sugar, egg, and vanilla extract until smooth.
- Stir the dry ingredients into the wet ingredients. Avoid overmixing.
- Pour the batter into the prepared pan. Bake for 50-65 minutes, or until a toothpick inserted into the center of the bread comes out clean. Check the bread at 50 minutes, as oven times vary.
- Remove the pan from the oven and place it on a wire cooling rack. Let the bread cool in the pan for 10 minutes. Run a knife around the edges of the bread and carefully remove it from the pan. Let the bread cool on the wire cooling rack until it is slightly warm. Cut into slices and serve.
Nutrition
Notes
Tried this recipe?
Let us know how it was!
Urban Forager & Hyperlocal Ingredient Specialist
My Brooklyn apartment balcony tells my story: vertical gardens packed with wild edibles, fermentation crocks bubbling with city-foraged greens, and the constant hum of dehydrators preserving herbs I’ve collected from unexpected urban corners. What started as weekend escapes to my aunt’s upstate farm during my Columbia botany studies turned into something bigger after I earned my Urban Ecology Master’s from The New School.
Instead of following traditional academic paths, I discovered that cities are actually amazing edible ecosystems—rooftop weeds, park-edge wild greens, vacant lot treasures that perfectly complement keto eating. Who knew that some of the best low-carb foods were growing right under our noses in Manhattan?
My recipe collections celebrate city seasons: spring dandelions and plantains, summer purslane from rooftops, autumn rose hips from community gardens, winter wild onions and cress. I’m certified through the New York Mycological Society and trained by Brooklyn Botanic Garden to forage safely and ethically. Over 180 of my recipes feature at least one urban-foraged ingredient—from sidewalk plantains to sumac berries and wild mint thriving in vacant lots.
My “Metropolitan Wild” column went viral after my dandelion coffee substitute hit social media. Now my weekend “Urban Wild Walks” through Central Park and Prospect Park sell out faster than I can schedule them. I teach city dwellers to spot safe, keto-friendly wild foods hiding in plain sight.
Currently, I’m partnering with local chefs to bring urban foraged elements to restaurant menus and developing an app that maps safe foraging spots across all five boroughs. Evenings find me tending my sourdough starters, pressing flowers for natural dyes, or weaving baskets from willow branches I collect during park maintenance.
Cities are wild food sanctuaries hiding in plain sight—keto eating becomes urban rebellion when you realize how much free, perfect nutrition grows right under our feet.