
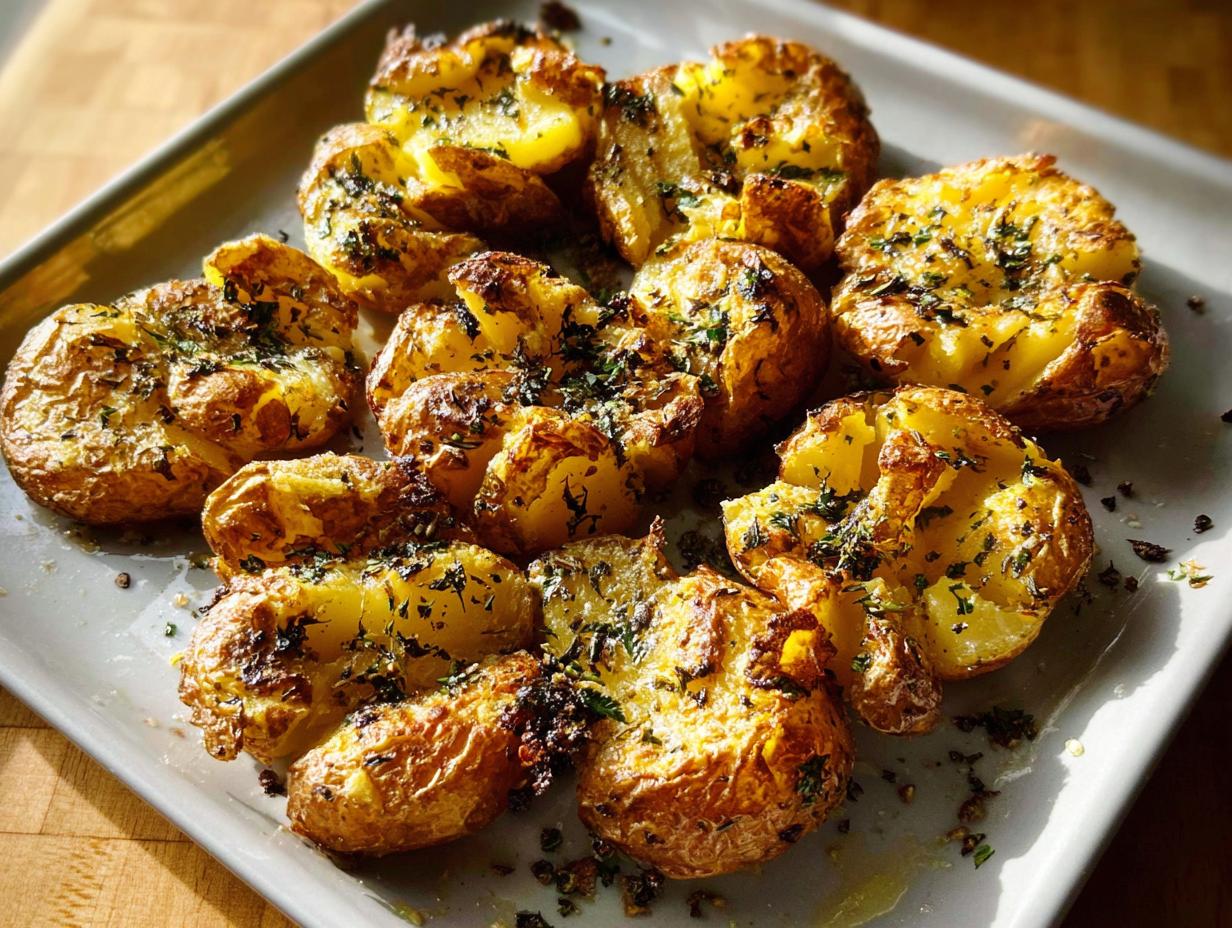
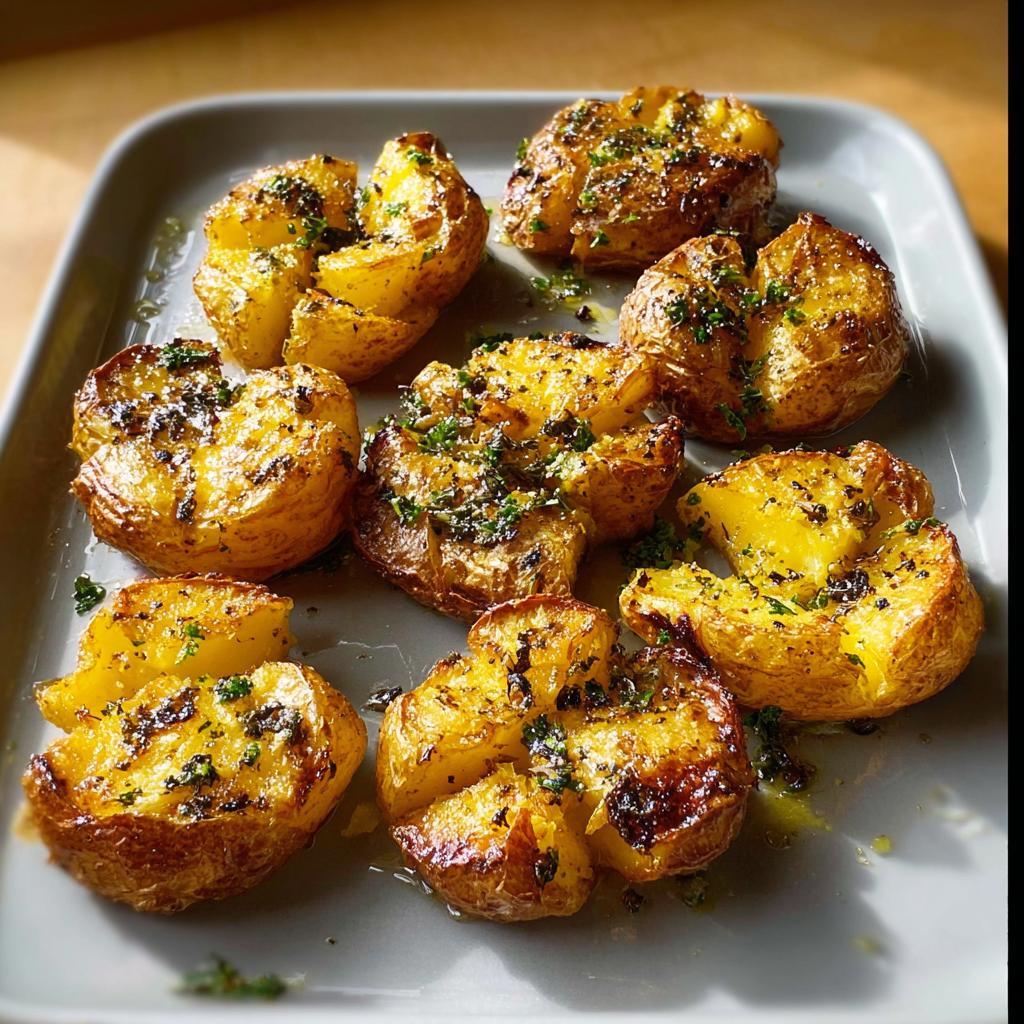
You know how sometimes the side dish ends up stealing the whole show? I live for those moments! We’re done with boring boiled potatoes, friends. We are taking the humble potato and giving it the spotlight it deserves with my favorite Crispy Smashed Potatoes with Herbed Butter. The secret? We boil them until they surrender, then violently (but lovingly!) smash them until they beg for mercy before roasting.
One sunny afternoon, I was wandering through a park over in Brooklyn, and wow, the scent that hit me—wild garlic peeking right out of the soil! I nervously gathered a little bundle. That evening, I turned those foraged finds into the most fragrant herbed butter imaginable, slathered all over these crispy beauties. It was a simple meal that tasted like I harvested a five-star restaurant straight from the city limits! Trust me, making these potatoes connects you to your food in the best way.
Why You Will Love These Crispy Smashed Potatoes with Herbed Butter
Honestly, once you try the smash method, you won’t go back. These are addictive! Here is why this recipe is moving straight to the top of your rotation:
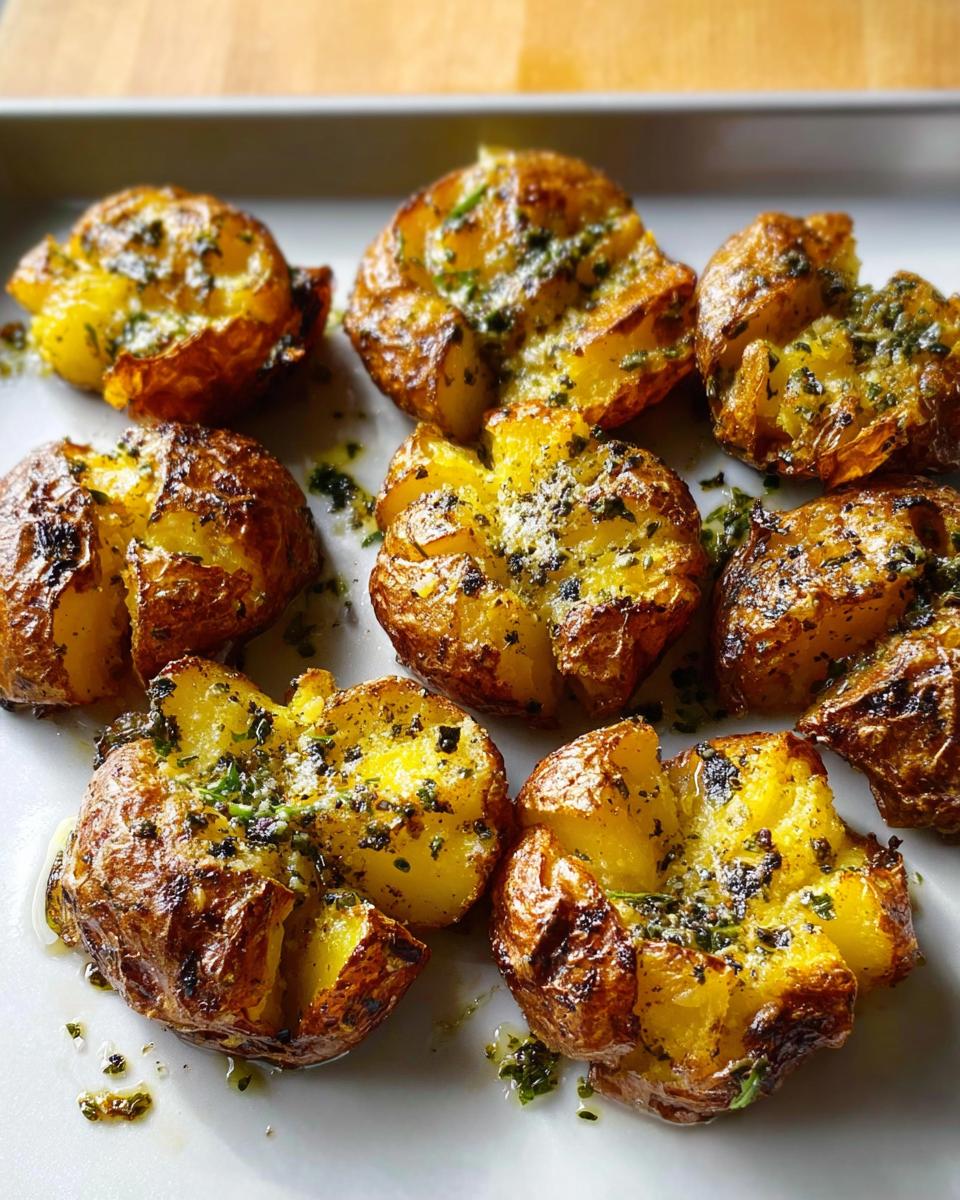
- Total textural triumph! We get ultra-crispy edges that snap when you bite them.
- The herbed butter topping is pure savory magic, especially with fresh herbs.
- They look incredibly impressive, making them perfect for impromptu gatherings.
- This whole process is way easier than it looks—seriously, I’m not kidding!
You’ve got to try this technique soon. If you’re always looking for easy but stunning dinner ideas, check out my guide on foolproof cooking methods—these potatoes fit right in!
Essential Ingredients for Crispy Smashed Potatoes with Herbed Butter
When you’re aiming for that perfect crisp, the potatoes you choose really matter. I insist on baby Yukon Golds for this recipe because they turn creamy inside but hold their shape perfectly when smashed. Don’t stress if you can’t find them; I’ll give you an alternative later! Remember, the magic lives in the butter, so use real ingredients wherever you can.
For six generous servings of this amazing side dish, here is what you need to gather:
- Potatoes: 1 1/2 pounds of baby Yukon gold potatoes (that’s usually about 10 to 14 little guys).
- Salt: 2 tablespoons plus 3/4 teaspoon of kosher salt, divided up for boiling and seasoning.
For the Herbed Butter Topping
This is where my foraging experience really pays off, but don’t worry if you can’t find wild garlic! You need:
- 4 tablespoons of unsalted butter (that’s exactly half a stick, softened a bit).
- 4 cloves of garlic, but you have to grate them—that releases so much more flavor than chopping! It should be about 1 tablespoon.
- 2 tablespoons of fresh parsley leaves, chopped really nicely. The freshness is key!
- 1/4 teaspoon of freshly ground black pepper.
- That remaining 3/4 teaspoon of kosher salt.
Equipment Needed for the Smashed Potatoes Recipe
You don’t need a million fancy gadgets to get these potatoes perfectly crispy, which I love. Keeping the tools simple means less cleanup later—and trust me, after smashing potatoes, you want easy cleanup!
Make sure you have these three things ready before you even start boiling your water:
- A large saucepan for getting those potatoes nice and tender.
- A rimmed baking sheet. This catches all those buttery bits while roasting the bottoms perfectly.
- Something sturdy for smashing! I usually grab a simple drinking glass or a small, heavy measuring cup. Just make sure the bottom is flat enough to get a good press on the potato without having it shatter!
If you want some extra nerdy details on surface area and even cooking, check out this external guide on how to properly smash potatoes.
Step-by-Step Instructions for Perfect Crispy Smashed Potatoes with Herbed Butter
Alright, this is the fun part where all your prep pays off! Getting that incredible texture—creamy on the inside, shattering crisp on the outside—comes down to following this sequence closely. Pay attention to the heat setting; we want these things hot!
First things first: Get your oven roaring! You need those racks positioned to divide the oven into thirds, and crank that temperature way up to 500°F. High heat equals huge crisp, trust me!
Boiling and Seasoning the Potatoes
Step one is always cleaning them up! Give those baby Yukon Golds a good scrub down—don’t even bother peeling them; the skin gets delightful and crusty!
Toss them into your large saucepan. Cover them with cold water, making sure it goes about an inch over the top of the potatoes. Now, for the flavor infusion: stir in 2 tablespoons of that kosher salt. Get that pot boiling hard over high heat, then lower the flame and let them simmer. They need 20 to 25 minutes here. You know they are ready when you can pierce them with a sharp knife and feel absolutely zero resistance. They must be **very tender**! Once they pass the test, drain them completely. Any extra water clinging on will steam your potatoes instead of crisping them, and we absolutely cannot have soggy potatoes!
Preparing the Herbed Butter Topping
While those potatoes are draining, we whip up the topping. Use that same empty pot—we’re washing one less thing—and put 4 tablespoons of unsalted butter in there over low heat until it melts nicely. Pull the pot off the heat right away.
Now, add your flavor bombs: the 4 cloves of freshly grated garlic, the 2 tablespoons of chopped fresh parsley, the black pepper, and the final 3/4 teaspoon of kosher salt. Stir it all up until it smells heavenly!
Gently add all your drained, cooked potatoes to that herbed butter pot. Tip them around carefully—we don’t want to break them yet! Make sure every single potato is well coated in that glorious herby mix.
Smashing and Roasting for Maximum Crispiness
Pour everything—potatoes and any extra melted butter in the bottom of the pot—right onto your prepared rimmed baking sheet. Don’t let any of that herbed butter stay behind!
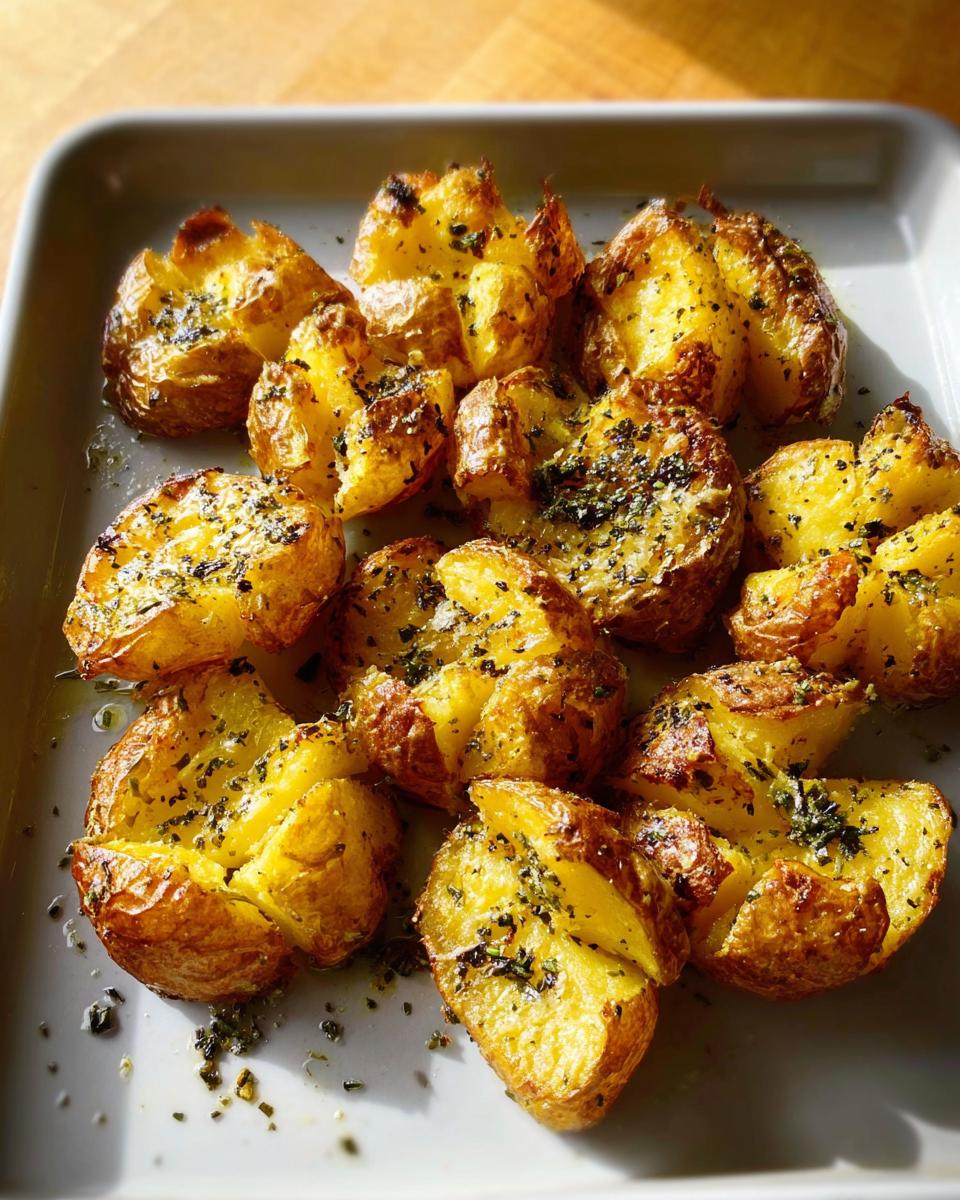
Time for the smashing! Take the bottom of a lightly greased drinking glass or a measuring cup and press down firmly on the center of each potato. You want them split open and flattened to about 3/4-inch thick. They will look fragile, but they can handle it! This wide surface area is what gives you amazing crispy potato sides.
Pop that baking sheet onto the **lower rack** of that blazing hot 500°F oven. Roast them for about 10 minutes until the bottoms turn golden-brown. Then, move the sheet to the **higher rack** for another 10 to 15 minutes. Watch them closely—you want the tops to look deeply browned and completely crispy. If you need help visualizing the best way to get that perfect crunch, I highly recommend checking out this resource on perfect roasting techniques. Serve these immediately!
Tips for Success with Your Crispy Smashed Potatoes with Herbed Butter
Getting this crispy potato sides recipe right is all about managing that transition from soft to shatteringly crisp. Since you guys are adventurous cooks, you’ll appreciate knowing exactly how to avoid breakage!
My biggest tip? Make absolutely certain your potatoes are cooked through before you even *think* about smashing them. If they are even slightly firm in the center, they will break into sad little chunks instead of flattening nicely. When you pierce them, it should feel like poking soft butter.
Also, when you coat them in that herbed butter mixture, use a gentle hand. We want them coated entirely, not mashed prematurely! And for the final crisp—don’t skip the two-rack roasting! That initial high heat on the bottom locks in the color, and the second round hits the tops for that beautiful, browned crust. If you need more genius ways to elevate simple sides for maximum wow factor, swing by this guide on foolproof cooking methods.
Ingredient Notes and Substitutions for Crispy Smashed Potatoes
This recipe shines because it’s flexible, which is perfect for us adventurous types who often work with what we find! You absolutely do not have to stick strictly to Yukon Golds. If small red potatoes are what’s whispering to you from the produce aisle—or what you found growing nearby—go for it! They behave very similarly in the boiling phase.
Now, let’s talk herbs. I used parsley because it’s classic, but when I forage, I use what’s abundant! If you see chives or delicate dill popping up, swap them right in for the parsley in the herbed butter topping. Grated garlic releases the best punch of flavor, but if you only have garlic powder on hand for some reason, cut that down to about a quarter teaspoon. It’s all experimentation, right?
Serving Suggestions for Your Herbed Butter Topping Potatoes
These aren’t just any crispy potato sides; they are practically the star of the show! Because they are so rich and flavorful from that herbed butter, they pair beautifully with simpler main courses. I often make these when I’m serving something that needs a bright, savory counterpart.
They are phenomenal alongside simple roasted chicken where the herby fat complements the poultry perfectly. Or, if you’re entertaining, imagine these little crispy gold mines next to a perfectly seared steak. Seriously, they make any entrée feel special. If you need inspiration on building the whole meal around a great side, check out my guide to ultimate dinner ideas—but definitely bake these first!
Storing and Reheating Crispy Smashed Potatoes with Herbed Butter
Look, if you have leftovers—which is rare in my house for this recipe—you need to store them correctly so you don’t lose that incredible crisp!
Keep any extras in an airtight container in the fridge for up to three days. Do not try to reheat these in the microwave, okay? I know microwaves are tempting for speed, but it steams the crisp right out, turning them soft and sad.
The only way to bring back that shatteringly crunchy texture is using dry heat. Pop them onto a baking sheet in a 400°F oven for about 8 to 10 minutes, or even better, use an air fryer for 5 minutes. That high, dry heat re-crisps the edges beautifully. If you love efficiency in the kitchen, you’ll appreciate knowing the best ways to save leftovers, so take a peek at my guide on 5-ingredient dinner ideas for some quick backup plans!

Frequently Asked Questions About This Smashed Potatoes Recipe
FAQs are the best, right? Because sometimes my instructions feel like I’m talking to myself in the kitchen! Here are a few things people always ask me before they dive into making this amazing smashed potatoes recipe.
Can I use different types of potatoes for this smashed potatoes recipe?
You totally can, but stick to waxy potatoes! Yukon Golds are my favorite because they stay firm enough to smash, but small red potatoes work just as beautifully. Please try to avoid Russets, though. They are too starchy, and they tend to fall apart into mash instead of holding that lovely smashed shape we are after. We want structure in our crispy potato sides!
How do I get the best crisp when making crispy potato sides?
The secret is two things: super high heat and giving them space! Preheating your oven to 500°F is non-negotiable, and when you put them on the baking sheet after smashing, make sure there’s a little breathing room between each one. If they touch, they steam, and steaming kills the crisp factor. We want that glorious crunch!
Can the herbed butter topping be made ahead of time?
Oh yes, and I highly recommend it, especially if you are planning these for a crowd or as party appetizer ideas! You can mix up the herbed butter topping entirely, maybe even skip the butter melting part if you are using softened butter. Store it covered tightly in the fridge for up to two days. When you’re coating the boiled potatoes, just let the butter sit out on the counter for about 30 minutes so it softens up enough to toss without damaging the tender potatoes. For more quick hosting tricks, check out my post on quick weeknight wins!
Estimated Nutritional Snapshot for Crispy Smashed Potatoes with Herbed Butter
Okay, so this is the slightly less thrilling part, but it’s good to know what you’re serving up! Since we’re dealing with butter, salt, and potatoes, these are satisfying, hearty crispy potato sides. I’ve pulled the averages based on the recipe serving 6 people.
Because we are relying on real ingredients—like whole potatoes and actual butter—these numbers reflect honest home cooking, not anything overly processed. Think of this as a general guide, okay? Cooking methods, exact potato size, and how much of that herbed butter you spoon over the final product will definitely change things!
- Calories: Approximately 260 per serving
- Fat: Around 14g (a good chunk of that is from the herbed butter, yum!)
- Protein: About 4g
- Carbohydrates: Roughly 30g
- Fiber: Around 3g
- Sodium: This is higher due to the kosher salt used for seasoning and boiling, usually around 1100mg.
Remember, this is just an estimate for the final product. If you go light on the herbed butter topping, that fat count drops way down. Enjoy them while they’re hot!
Crispy Smashed Potatoes with Herbed Butter
Ingredients
Equipment
Method
- Scrub the baby Yukon gold potatoes clean and place them in a large saucepan.
- Add enough cold water to cover the potatoes by about an inch. Stir in 2 tablespoons of the kosher salt, place the pan over high heat, and bring the water to a boil.
- Reduce the heat and simmer until the potatoes are very tender and you can pierce them easily with a sharp knife with no resistance, 20 to 25 minutes. Drain the potatoes and set them aside.
- Arrange 2 racks to divide the oven into thirds and heat the oven to 500°F. Place 4 tablespoons of unsalted butter in the empty pot and melt it over low heat. Remove the pot from the heat and stir in the 4 grated garlic cloves, 2 tablespoons chopped fresh parsley leaves, 1/4 teaspoon black pepper, and the remaining 3/4 teaspoon kosher salt.
- Add the cooked potatoes to the butter mixture and toss to coat them completely.
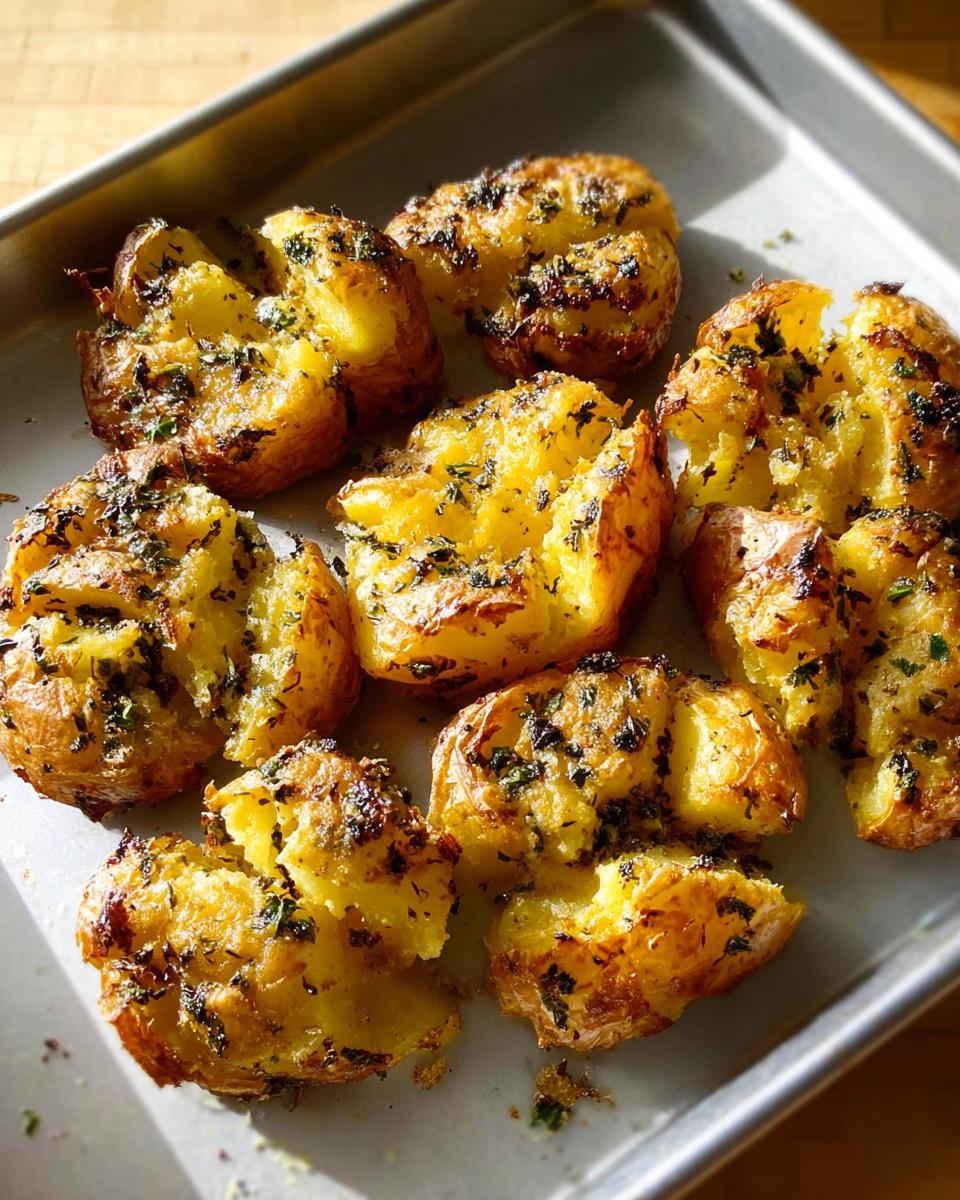
- Pour the potatoes and any extra melted butter mixture onto a rimmed baking sheet. Use the bottom of a lightly greased drinking glass or measuring cup to press down on each potato until it splits open and is flattened to 3/4-inch thick.
- Roast the potatoes on the lower rack until the bottoms are golden-brown, about 10 minutes. Move the baking sheet to the higher rack and roast until the tops are brown and crispy, 10 to 15 minutes more. Serve the potatoes warm.
Nutrition
Notes
Tried this recipe?
Let us know how it was!
Urban Forager & Hyperlocal Ingredient Specialist
My Brooklyn apartment balcony tells my story: vertical gardens packed with wild edibles, fermentation crocks bubbling with city-foraged greens, and the constant hum of dehydrators preserving herbs I’ve collected from unexpected urban corners. What started as weekend escapes to my aunt’s upstate farm during my Columbia botany studies turned into something bigger after I earned my Urban Ecology Master’s from The New School.
Instead of following traditional academic paths, I discovered that cities are actually amazing edible ecosystems—rooftop weeds, park-edge wild greens, vacant lot treasures that perfectly complement keto eating. Who knew that some of the best low-carb foods were growing right under our noses in Manhattan?
My recipe collections celebrate city seasons: spring dandelions and plantains, summer purslane from rooftops, autumn rose hips from community gardens, winter wild onions and cress. I’m certified through the New York Mycological Society and trained by Brooklyn Botanic Garden to forage safely and ethically. Over 180 of my recipes feature at least one urban-foraged ingredient—from sidewalk plantains to sumac berries and wild mint thriving in vacant lots.
My “Metropolitan Wild” column went viral after my dandelion coffee substitute hit social media. Now my weekend “Urban Wild Walks” through Central Park and Prospect Park sell out faster than I can schedule them. I teach city dwellers to spot safe, keto-friendly wild foods hiding in plain sight.
Currently, I’m partnering with local chefs to bring urban foraged elements to restaurant menus and developing an app that maps safe foraging spots across all five boroughs. Evenings find me tending my sourdough starters, pressing flowers for natural dyes, or weaving baskets from willow branches I collect during park maintenance.
Cities are wild food sanctuaries hiding in plain sight—keto eating becomes urban rebellion when you realize how much free, perfect nutrition grows right under our feet.