
Listen, I know what you’re thinking: baked chicken wings? They’ll just be sad, rubbery disappointments. Wrong! I’m Alexandra Bennet, your Urban Forager and Hyperlocal Ingredient Specialist, and I promise you, we are cracking the code on **Extra Crispy Baked Buffalo Chicken Wings** today. The secret isn’t frying; it’s a tiny bit of chemistry involving baking powder that gives these babies a crunch you won’t believe. I remember the first time I served these at a game night back in my Brooklyn apartment—I had just foraged some wild garlic to mix into the spicy sauce, and the smell took over the whole place! When everyone took that first bite, the sheer, snappy crunch combined with the heat was a total hit. Friends actually declared them better than the deep-fried ones! Trust me; this technique is a game-changer for your appetizer rotation.
Why You Will Make These Extra Crispy Baked Buffalo Chicken Wings
You’re going to love making these wings because they completely solve the eternal fried vs. baked dilemma. Why drag out the deep fryer and deal with that greasy cleanup when these beauties deliver 99% of the crunch with zero submerged oil? It’s pure kitchen magic, I tell you!
- You get that legendary, shatteringly crisp skin that stands up to the sauce—no sad, soggy wings here, ever!
- We swap out the deep fryer for a simple oven setup, making this the ultimate easy recipe for your next big gathering.
- These become amazing base recipes; you can switch up the sauce or spice profile next week.
- You’re in total control of the heat level when you mix up your own Buffalo Sauce.
- These are perfect for those epic game day appetizers that disappear before kickoff.
- They deliver all the great flavor of classic buffalo wings recipe favorites but feel a little less heavy.
Honestly, once you nail this baking powder trick, you won’t go back. It’s easy, reliable, and yields incredible results every single time. Seriously, the crunch!
Essential Ingredients for Extra Crispy Baked Buffalo Chicken Wings
Okay, before we dive into the process—which is super fun, I promise—we have to talk about what you need. Getting the right stuff here makes all the difference between a good wing and a legendary wing. I always look at my ingredient list like I’m planning a foraging trip; you need the right spots marked on the map! We’re breaking this recipe down into three essential parts: the base coating for crispiness, the hot-and-tangy sauce, and the cooling dip that really makes you feel like you’re at the best party ever. If you’re looking to keep things simple later on, check out some of my favorites from my 5-ingredient dinner ideas for inspiration!
You’ll want a few things handy. Don’t worry, you probably have most of this in your pantry already. We’re keeping it focused so we don’t overwhelm you with choices. Check out the breakdown below so you can shop smart!
For the Crispy Baked Wings Base
This section is non-negotiable if you want that incredible texture. You absolutely must have the four-pounds of wings—wingettes and drumettes are what we’re using—but the real magic ingredients are right here. First, get your **baking powder**; and I mean baking powder, not baking soda. Seriously, do not substitute the soda; it’ll make everything taste metallic, trust me on that one! We also need kosher salt specifically, not just any salt, because it has better absorption qualities than table salt. These two things, rubbed onto dry chicken, change the whole crust game.
Making the Classic Buffalo Sauce
This is where we get that signature heat and tang we talked about in Brooklyn! Good wings need a balanced sauce, not just pure fire. You’ll need your Frank’s Red Hot—it’s classic for a reason! Mix that with some melted unsalted butter, which gives it that perfect velvety mouthfeel when it coats the hot skin. And this is key when you’re making any good **buffalo wings recipe**: don’t skip the little bit of **brown sugar**. It melts right in and cuts that sharp vinegar bite just enough so you can eat five wings instead of two. It really balances the heat perfectly.
Whipping Up the Blue Cheese Dip
You can’t have Buffalo wings without a cool counterpoint, right? This dip has to be fresh. We start with real, softened, **crumbled blue cheese**—don’t skimp on a good pungent one, Gorgonzola is a fantastic substitute if you prefer something milder. Then we mix it into sour cream and your favorite mayonnaise for that perfect creamy base. You have to start tasting as you go here. If it seems too thick, just drizzle in a tiny bit of milk until it’s perfectly dippable. We finish it off with fresh lemon juice for brightness, which really wakes up the cheese flavor!
Step-by-Step Guide to Extra Crispy Baked Buffalo Chicken Wings
Alright, this is where the magic happens! Putting together a truly great **buffalo wings recipe** in the oven requires patience, especially in the beginning. You need your equipment ready to go: that large bowl for coating, and most importantly, a rimmed baking tray with an oven rack set up on it. Airflow is your best friend when you want those wings crispy! If you’re ever struggling with cooking times and mastering temperatures, check out my guide on how to make dinner ideas basically foolproof. Some people swear by other methods too, and if you are curious, one of my favorite bloggers wrote extensively on wing crispiness over at this link.
Preparing the Wings for Maximum Crispness
First things first: dry, dry, dry! Moisture is the absolute enemy of crispiness. If you can, lay those chicken wings out on the rack in the fridge overnight uncovered. Trust me, that dry skin is the secret weapon. If you’re in a rush, just pat them down really aggressively with paper towels until they feel dry to the touch. Now, grab your large bowl, dump the wings in, and sprinkle generously with the baking powder and salt. You need to toss these until every little piece is evenly dusted. Don’t be shy here; get that powder everywhere!
The Two-Stage Baking Method for Extra Crispy Baked Buffalo Chicken Wings
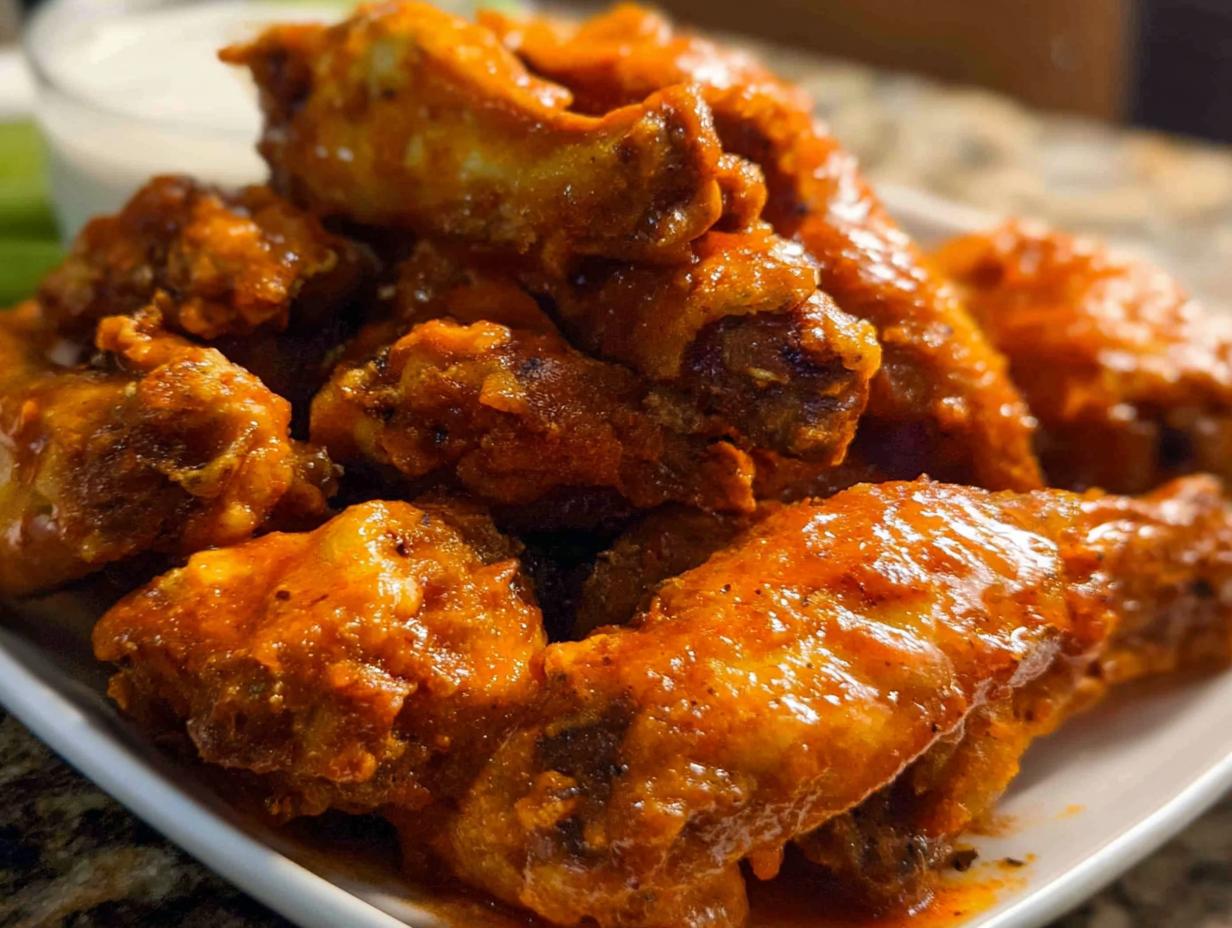
We are going low, then high. Preheat your oven to a very low 250°F / 120°C. Get your rack on the prepped, rimmed tray, and arrange the wings on that rack, making sure they aren’t touching at all—they should look lonely! Bake them on the lower shelf for about 30 minutes. This low heat is just melting out all that fat from under the skin, which is why the wings shrink a bit, but it keeps the meat juicy. Once those 30 minutes are up, crank that oven way up to 425°F / 220°C and move the tray to the higher shelf. Bake for another 40 to 50 minutes. Here’s a pro tip from my notebook: Do NOT flip them! Let that top heat work its magic until they are dark golden and super sturdy.
Saucing and Finishing Your Baked Party Wings
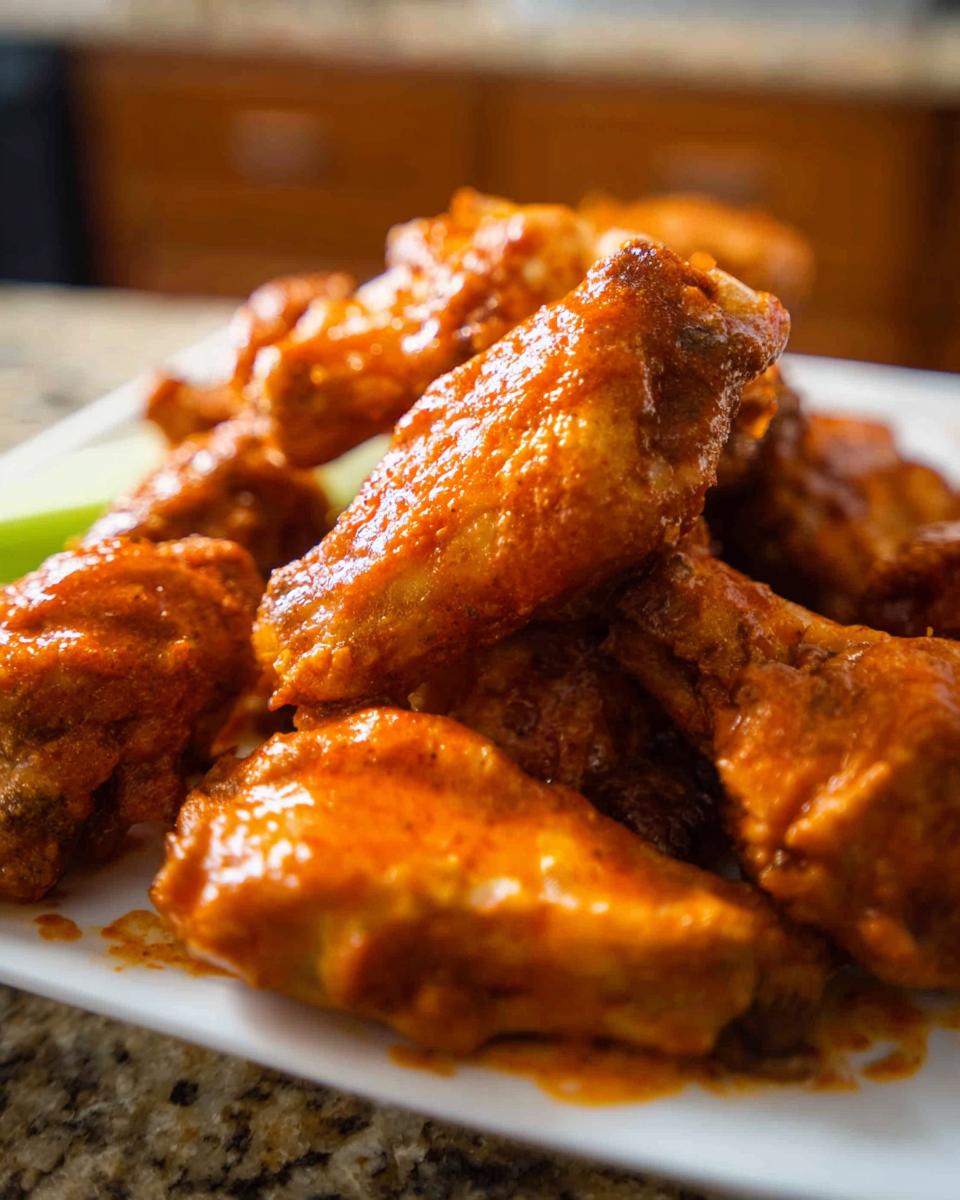
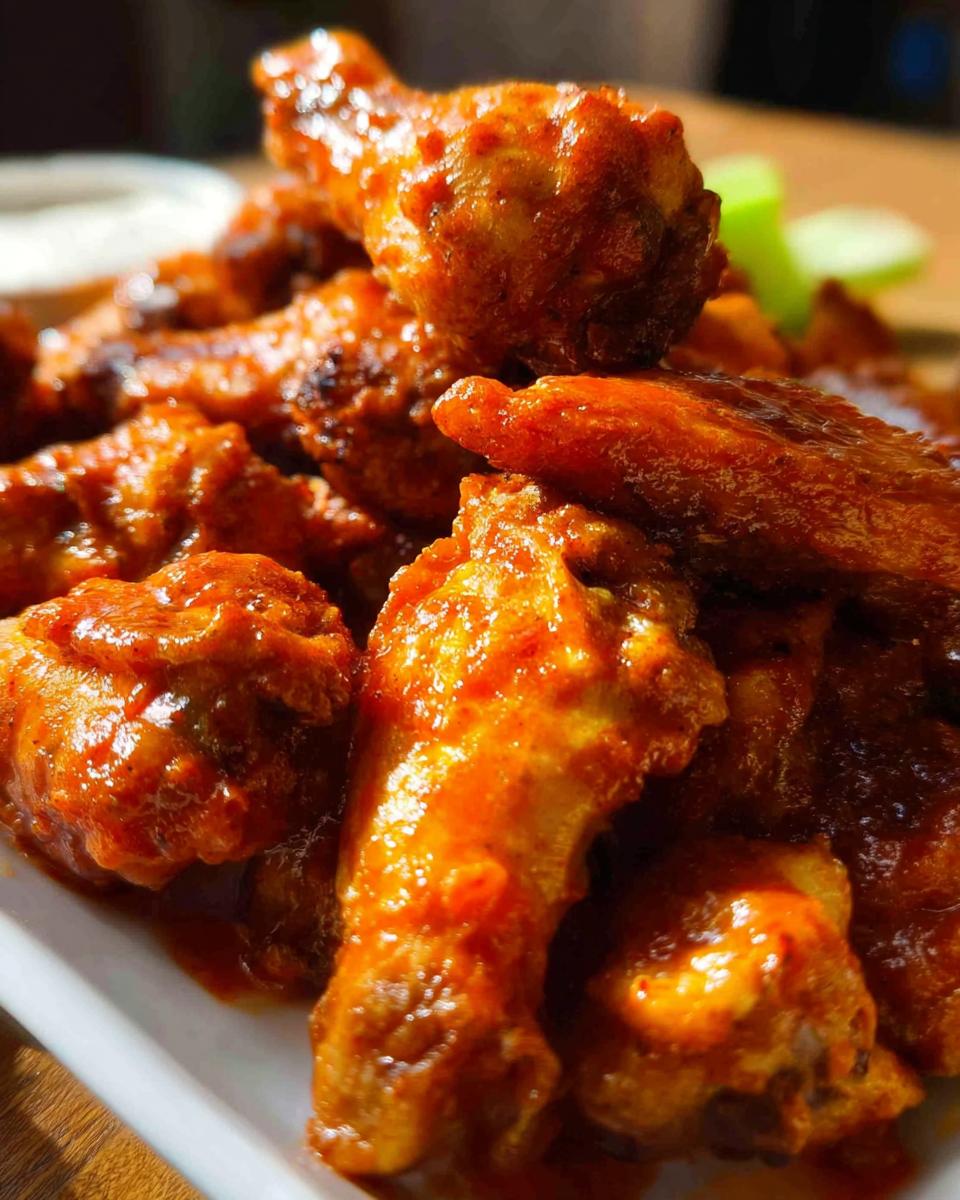
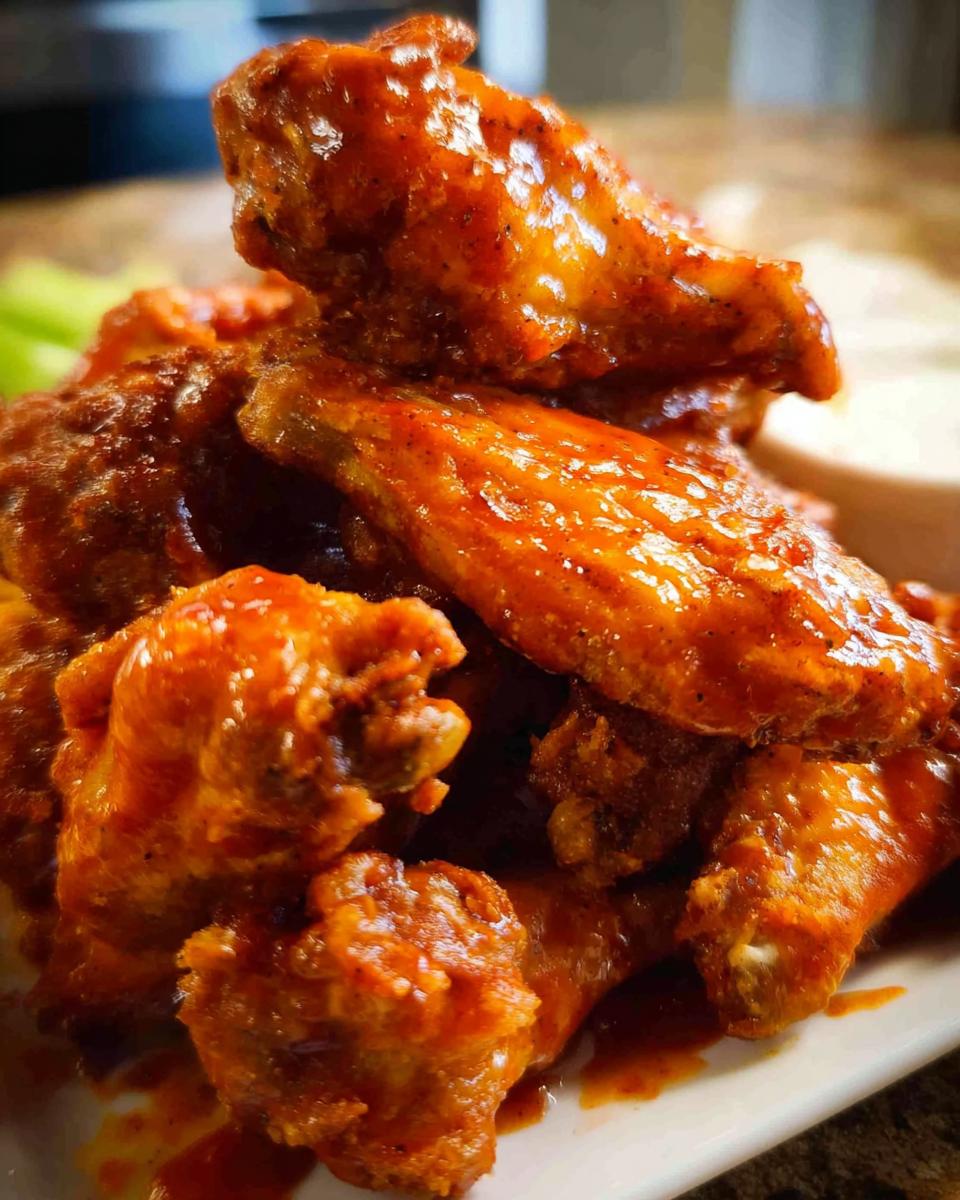
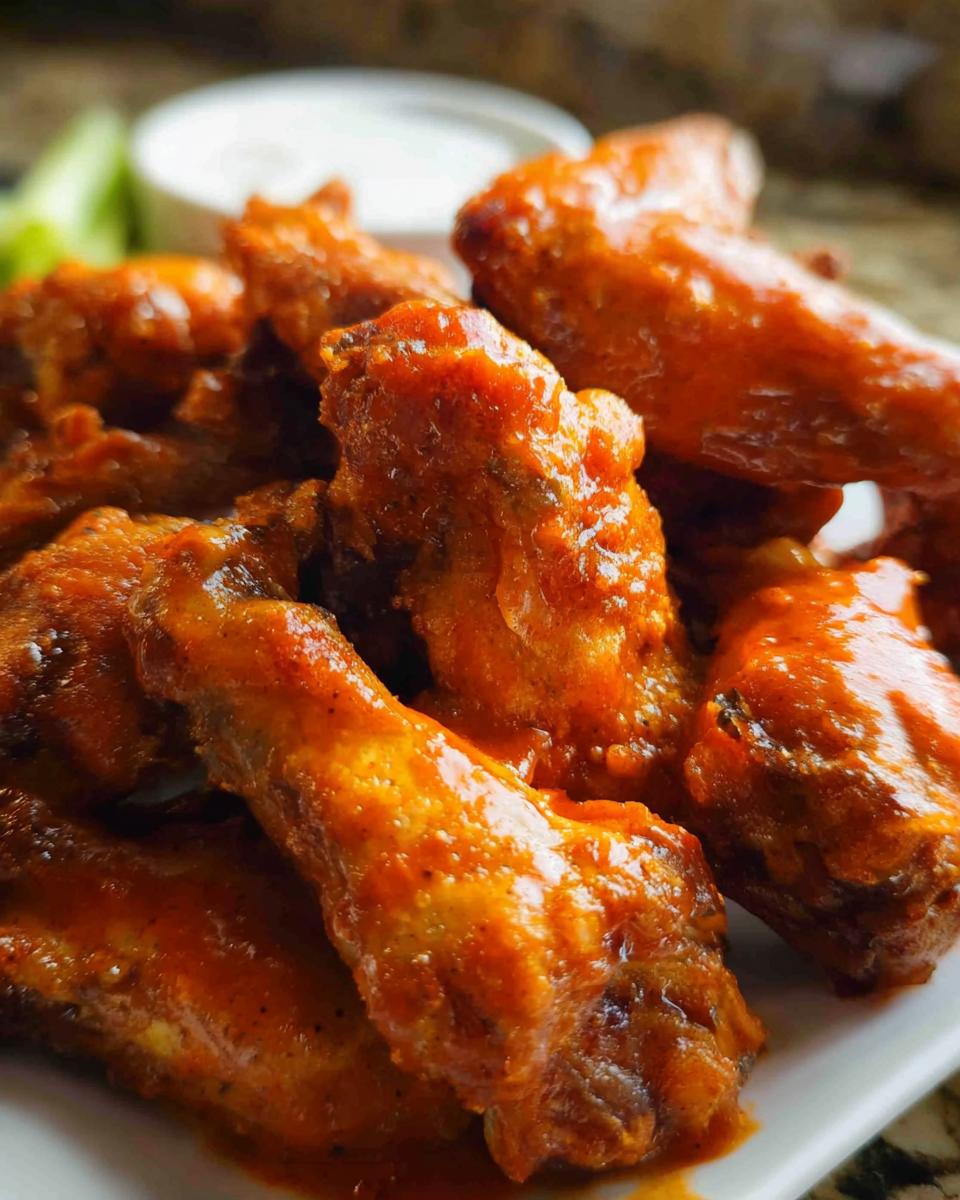
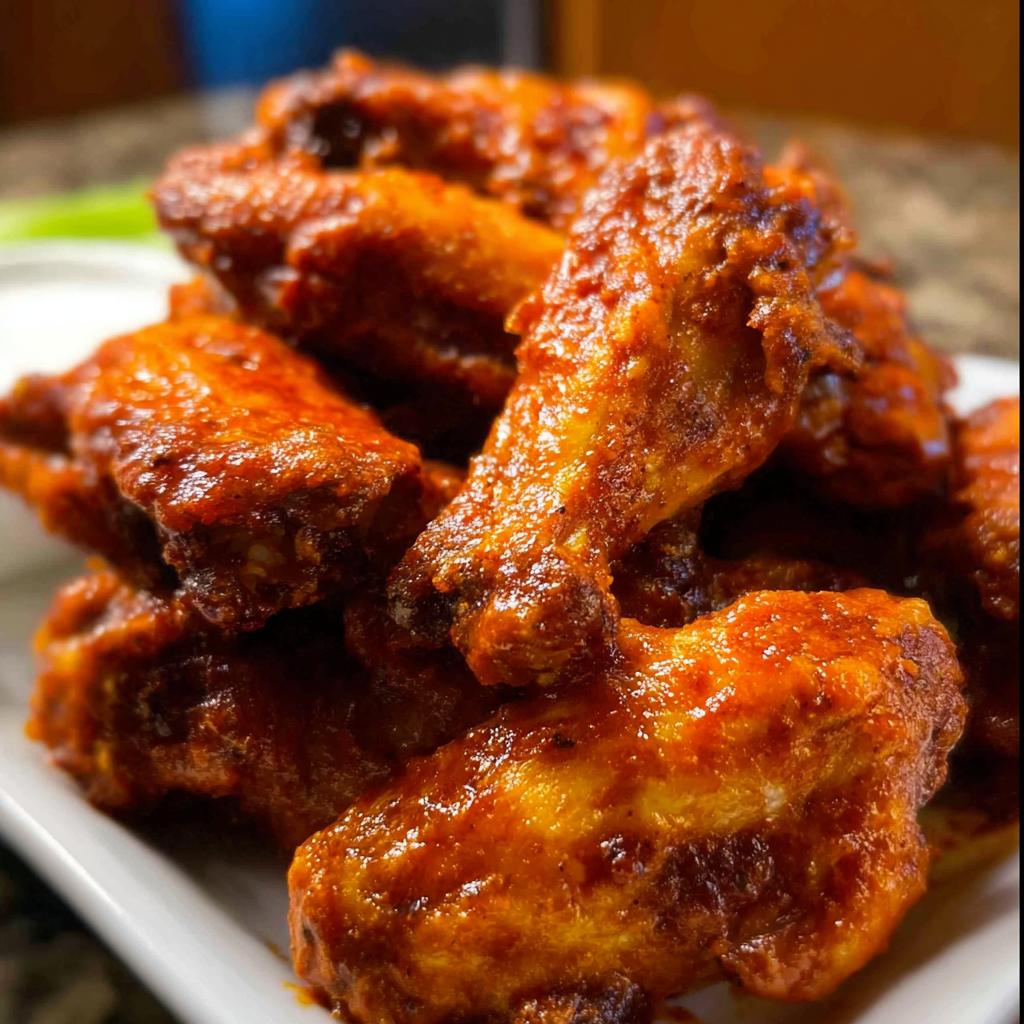
Once they are done—when they feel totally crispy when you tap them—pull them out immediately. Have your warm Buffalo Sauce ready in a big bowl. Quickly transfer the wings into the sauce and toss them around until everything is coated beautifully. You can serve them tossed like this, or, if you prefer, serve the sauce on the side for dipping. Either way, these **baked party wings** go straight from the oven to the serving platter. Serve these puppies up right away while they still have that incredible temperature contrast!
Expert Tips for Perfect Extra Crispy Baked Buffalo Chicken Wings
I’ve made these wings so many times that I’ve got a few extra secrets tucked away that take them from great to absolutely unforgettable. Since I’m all about making sure you get the best results out of your home kitchen, here are a couple of extra things you need to know about managing moisture and heat for that perfect crunch. If you’re ever feeling unsure about temperatures or timing in general, I put together a whole guide just for that, so you can check out my ultimate dinner ideas guide.
Baking Powder Science: Why It Works
So, why are we bothering with baking powder? It’s not just for fluffiness in cakes, believe it or not! When you toss those dry chicken wings in it, the powder raises the pH level on the skin. Think of it like this: a higher pH makes the skin brown faster and darker—that’s Maillard reaction kicking into high gear! Plus, that slight alkalinity helps dry out the surface tension of the skin, which is what creates that wonderful, crackly crust when the high heat hits it. And a quick reminder, because this is crucial: Do *not* swap in baking soda. Baking soda is way too alkaline, and you’ll end up with a weird, metallic taste that just ruins the whole effort.
Achieving the Best Texture for Game Day Appetizers
This is where I learned the hard way—you cannot overcrowd the pan! When you’re making these amazing **game day appetizers**, you have to give every wing its personal space. If they are touching even slightly, the steam gets trapped between them, and boom—you have soft spots. That’s why using that wire rack is non-negotiable. It lets the hot air circulate completely around the chicken. It’s also cool to remember that those wings shrink a bit as they bake because the fat under the skin melts out entirely; that melted fat drips away, leaving behind only crispness. It’s a little gross when you picture it, but it’s the whole reason they taste so amazing!
Serving Suggestions for Your Spicy Chicken Snacks
Now that you’ve conquered the crispiness science, we have to talk about the big reveal—how to serve these incredible **spicy chicken snacks**! Presentation matters, even if you’re just kicking back for a casual game night. The goal here is contrast: hot, spicy wings balanced by fresh, cooling elements. I always serve them piled high on a big platter, maybe garnished with some finely chopped fresh parsley or chives if I’m feeling fancy (and if I’ve managed to forage some!).
First off, you absolutely need to serve them with celery sticks. I know, I know, it sounds boring, but those crisp, cold sticks are the perfect palate cleanser between bites of that fiery sauce. Trust me, everyone grabs those celery sticks when they need a break from the heat. For the dip, while our homemade blue cheese is the champion, sometimes you need options! If you’re feeding a crowd with diverse tastes, having a side of ranch is never a bad idea. It’s less tangy than blue cheese, which some people prefer.
And what do you drink with phenomenal **spicy chicken snacks**? Well, if you’re following the standard game day playbook, a cold, crisp lager or pale ale works wonders to cut through the richness and spice. If you want to keep the cleanup minimal, you can always create great veggie trays right alongside the wings! The key is making sure everything is cold and fresh to counteract that Buffalo heat. Enjoy watching them disappear!
Storage and Reheating Instructions for Extra Crispy Baked Buffalo Chicken Wings
So, you managed to have leftovers? Wow, that’s impressive; usually, my **Extra Crispy Baked Buffalo Chicken Wings** disappear before I can even wipe down the tray! But hey, good for you for planning ahead. Dealing with leftover wings is a little tricky because the sauce tends to soften that beautiful crunch we worked so hard to achieve. Don’t panic, though; we can bring that crisp texture right back!
If you have any sauce left over, you can store the wings either already tossed in the sauce or plain. I find they hold up slightly better if the sauce is stored separately, but if they are already sauced, just make sure you use them quickly. Everything should go into an airtight container and into the fridge. They are perfectly fine to eat for about three to four days max.
Now, let’s talk reheating. Please, please, for the love of crispy skin, do NOT use the microwave. A microwave is the enemy of crispiness; it just steams the wings back into rubber band territory, and that’s a tragedy we can avoid easily. My preferred method for reviving these beauties is heading back into the oven, just like we did the first time!
Reviving Crispness in the Oven
This is the best way to restore that original crackle. You want to use the same setup: a rimmed baking tray with an oven rack set on top. This ensures heat circulates underneath. Set your oven to about 375°F / 190°C. You don’t need to go low and slow this time; we just need to dry out the surface again. Lay the wings out on the rack, again making sure they aren’t crowded, and bake them for about 10 to 15 minutes. You should hear them start to sizzle again, which is the sound of crispy returning!
If your wings were sauced when you stored them, keep an eye on them toward the end; the sauce might start to burn a little since it’s high in sugar. If you are worried about that, you can give them a quick toss in a tablespoon of fresh hot sauce halfway through reheating.
The Air Fryer Shortcut
If you happen to have an air fryer—and honestly, who doesn’t these days?—that’s my second favorite option for leftovers. It reheats faster and does a fantastic job bringing back that texture. Set your air fryer to about 350°F / 175°C. If you’re reheating wings that were tossed in sauce, you might want to use a small piece of parchment paper designed for the air fryer basket just to make cleanup easier. Air fry for about 5 to 7 minutes, shaking the basket halfway through. They come out piping hot and amazingly crispy!
Leftovers are great for meal prep, too! You can grab a quick, satisfying snack for lunches later in the week. If you’re interested in other ways to prep food ahead of time for busy weeks, you might want to check out my thoughts on meal prep strategies!
Frequently Asked Questions About This Buffalo Wings Recipe
I always get so many questions after people try making these **buffalo wings recipe** at home because the result is just so different from what they expect from baked wings! It’s great that you’re asking questions; it means you’re ready to truly master the technique. Here are some of the most common things folks want to know before they hit that bake button, especially when planning for those big appetizer spreads.
Can I use baking soda instead of baking powder in this buffalo wings recipe?
Oh, honey, please don’t! This is the most common mistake people make, and it ruins the whole batch. You absolutely must use baking powder here. Baking soda is way too strong and has a very distinct, sort of metallic, soapy aftertaste when applied directly to meat like this. Baking powder is chemically designed to create a milder lift and help the skin brown beautifully without leaving a harsh flavor. If you use baking soda, you’ll end up with wings that taste bitter, and trust me, you want the flavor to be pure spicy goodness, not chemical weirdness!
What temperature should I set my oven to reheat these wings?
If you’re reheating leftovers, you have to bring the temperature up to dry out that sauce and re-crisp the skin. Never use the microwave; it’s a textural disaster waiting to happen! You want to pop those wings back into a 375°F / 190°C oven. Make sure you are using a wire rack set on a baking sheet, just like when you baked them the first time. This allows air to circulate and lets any residual moisture escape. Give them about 10 to 15 minutes, and they’ll be almost as good as new. That glorious crisp means they’re perfect **spicy chicken snacks** all over again!
Can I use frozen wings for this recipe?
Yes, you absolutely can start with frozen wings, but you need to plan ahead! You cannot use them straight from the freezer to the spice mix; they will just steam, and you’ll end up with soggy disappointments. If you start frozen, you must thaw them completely first. I suggest putting them in the fridge overnight to thaw slowly. Once they are fully thawed, you need to dry them even more thoroughly than fresh ones before you toss them in the baking powder mixture. That initial drying step is doubly important when dealing with frozen products!
What if I want them milder? Can I still get them crispy?
That’s an easy fix! The crisping powder mixture we use is completely separate from the Buffalo Sauce, so you can control the spice level independently. To make milder **game day appetizers**, simply cut back on the amount of hot sauce you use when mixing your final sauce, or swap half the hot sauce for a melted, unsalted butter mixture with maybe a little squeeze of honey. You can still toss those wonderfully crispy wings in a milder sauce and get that same amazing crunch!
Estimated Nutritional Information for Extra Crispy Baked Buffalo Chicken Wings
Okay, let’s talk numbers for a second. I try not to obsess too much over calories when I’m making something this fun, especially when we’ve already made the healthier choice by baking them instead of deep frying! But I know some of you are tracking macros or just curious about what you’re digging into, especially when planning out your calorie-smart recipes for the week. So, here is what the math works out to for this recipe, based on the 8 servings suggested.
Keep in mind, since we are using a full four pounds of wings and relying on fat rendering during the bake, the numbers reflect that the chicken does shrink and change composition during the process. This is a rough guide based on the average ingredients listed, so brands and exact measurements can shift these slightly!
- Calories: Around 476 per serving
- Protein: A powerhouse at about 63.3 grams! That’s going to keep you full.
- Fat: Around 22 grams total fat. Remember, a lot of that rendered out during the low-and-slow bake!
- Carbohydrates: Nicely low at about 3.1 grams. That tiny bit of brown sugar in the sauce adds most of that.
- Sodium: At about 1195mg. This is the one to watch, as salt and hot sauce both contribute significantly.
Just a reminder, this calculation covers the wing itself coated in the sauce, but not an extra big dollop of the blue cheese dip you might be piling on tableside! If you are monitoring your sodium intake, that’s where you can easily trim back—maybe just serve the sauce on the side.
But honestly, for wings this crispy, I think that protein and flavor punch is totally worth it for your next big event. Who cares about carbs when you’re crushing the competition during game night, right?
Share Your Game Day Appetizers Experience
So, there you have it! You’ve conquered the low-and-slow bake, mastered that two-temp technique, and produced a batch of **Extra Crispy Baked Buffalo Chicken Wings** that are ready to steal the show at any gathering. I sincerely hope your apartment smelled just as incredible as mine did that night in Brooklyn!
Now, I’m dying to know what you think! Did the baking powder really deliver the crunch you were hoping for? Did your friends stop asking for deep-fried wings after this batch? Don’t keep these triumphs to yourself!
Please, leave a rating right below this section—five stars if they blew your mind! And if you made the wings and maybe tweaked my sauce recipe or experimented with different spices (like those wild garlic adventures I take!), tell me all about it in the comments. We seasoned cooks love hearing how everyone adapts a recipe to their own kitchen.
- Did you use the overnight drying method? Tell me how that worked out for you!
- What was your favorite addition to the blue cheese dip?
- Did they last long enough to need reheating? (Doubtful, but I have to ask!)
And hey, snap a picture! I absolutely love seeing these spicy chicken snacks dominating your tables. Tag me on social media so I can cheer you on. If you have any final questions or just want to chat more about sourcing the best hyperlocal ingredients (or just which beer pairs best!), you can always reach out to me directly through my contact page. Happy crunching, everyone!
Extra Crispy Baked Buffalo Chicken Wings
Ingredients
Equipment
Method
- If you plan ahead, lay the wings on a rack set on a rimmed baking tray. Let them dry uncovered in the fridge overnight. Otherwise, pat them dry with paper towels.
- Preheat the oven to 250°F/120°C. Place one oven shelf in the lower quarter of the oven and one in the top quarter.
- Line the tray with foil. Put a rack on the tray, then spray the rack with oil.
- Place the wings in a large bowl. Sprinkle the baking powder and salt over them. Toss well with your hands or shake in a ziplock bag to coat the wings evenly.
- Place the wings skin side up on the rack. Bake on the lower shelf in the oven for 30 minutes.
- Move the tray up to the higher shelf and turn the oven up to 425°F / 220°C. Bake for another 40 to 50 minutes, rotating the tray halfway through. Do not turn the wings over. They are ready when they are dark golden brown and the skin is very crispy.
- Transfer the wings into a large bowl. Pour the sauce over them and toss to coat. You can also serve the wings plain with the Buffalo Sauce for dipping.
- Serve immediately with the Blue Cheese Dip for dipping the wings and celery sticks.
- For the Buffalo Sauce: Whisk together the sauce ingredients until the sugar melts. Keep it warm or reheat it just before using.
- For the Blue Cheese Dip: Mash the blue cheese with sour cream until smooth or to your preferred texture. Add the remaining ingredients and mix well until combined, using milk to reach your desired consistency. Store the dip in the fridge until needed, and remove it 15 minutes before serving.
Nutrition
Notes
Tried this recipe?
Let us know how it was!
Urban Forager & Hyperlocal Ingredient Specialist
My Brooklyn apartment balcony tells my story: vertical gardens packed with wild edibles, fermentation crocks bubbling with city-foraged greens, and the constant hum of dehydrators preserving herbs I’ve collected from unexpected urban corners. What started as weekend escapes to my aunt’s upstate farm during my Columbia botany studies turned into something bigger after I earned my Urban Ecology Master’s from The New School.
Instead of following traditional academic paths, I discovered that cities are actually amazing edible ecosystems—rooftop weeds, park-edge wild greens, vacant lot treasures that perfectly complement keto eating. Who knew that some of the best low-carb foods were growing right under our noses in Manhattan?
My recipe collections celebrate city seasons: spring dandelions and plantains, summer purslane from rooftops, autumn rose hips from community gardens, winter wild onions and cress. I’m certified through the New York Mycological Society and trained by Brooklyn Botanic Garden to forage safely and ethically. Over 180 of my recipes feature at least one urban-foraged ingredient—from sidewalk plantains to sumac berries and wild mint thriving in vacant lots.
My “Metropolitan Wild” column went viral after my dandelion coffee substitute hit social media. Now my weekend “Urban Wild Walks” through Central Park and Prospect Park sell out faster than I can schedule them. I teach city dwellers to spot safe, keto-friendly wild foods hiding in plain sight.
Currently, I’m partnering with local chefs to bring urban foraged elements to restaurant menus and developing an app that maps safe foraging spots across all five boroughs. Evenings find me tending my sourdough starters, pressing flowers for natural dyes, or weaving baskets from willow branches I collect during park maintenance.
Cities are wild food sanctuaries hiding in plain sight—keto eating becomes urban rebellion when you realize how much free, perfect nutrition grows right under our feet.