
Oh, you know those nights, right? It’s chilly outside, you need something that hugs you back, and you desperately crave that gooey, cheesy goodness? That’s exactly when I reach for my favorite comfort dish: Baked Cheesy Beef Enchiladas. This isn’t your typical quick fix; it’s a hearty, cheesy twist on a classic that feels like a weekend project but comes together super fast. I remember the first time I made these for a group of friends—I’d tossed in some wild onions I’d foraged that morning, just for a little kick. The aroma alone, baking away, was incredible! That night proved that good food truly creates the best memories around the table.

Why You Will Love These Baked Cheesy Beef Enchiladas
Seriously, these are a weeknight lifesaver! You get that incredible, hearty Mexican dinner flavor profile without spending half the evening in the kitchen. Trust me, they are worth the little bit of effort for the payoff.
- Total Time is Your Friend: Ready in under 45 minutes, so they fit perfectly into busy schedules. Check out more quick inspiration at dinner ideas in 20 minutes!
- Pure Comfort Food: They are jam-packed with seasoned beef and blanketed in melted cheese. Maximum cheesy oven meals satisfaction guaranteed!
- Room for Fun: This recipe is the perfect base for adding your own twists—like those wild onions I mentioned—to make it uniquely yours.
Essential Ingredients for Perfect Baked Cheesy Beef Enchiladas
Okay, this is where we lay the foundation for those incredible, restaurant-quality results at home. Honestly, the quality of your cheese really makes or breaks these cheesy oven meals. I want you to promise me something right now: use block cheese and grate it yourself! Those pre-shredded bags have anti-caking agents that just make the final melt grainy. Don’t let that happen to this beautiful dish! We want foolproof results, and for that, you need the best ingredients. You can find more tips on making dinner ideas foolproof over at foolproof guide.
For the Beef Filling and Assembly of Baked Cheesy Beef Enchiladas
You’ll need the heart of the flavor here. I always like to have the cheese measured out and ready to go before I even start cooking the beef. Remember to divide that two-pound mountain of cheese because some goes *in* the filling and some goes *on top*!
- 1.5 lbs ground beef
- 2 oz taco seasoning (that’s usually two packets, check the box!)
- 1 small onion, chopped fine
- 1 small red bell pepper, chopped (this is where you could toss in those wild onions!)
- 1 lb cheddar cheese, hand grated and divided
- 1 lb Monterey Jack cheese, hand grated and divided
- 6 to 8 medium tortillas (I usually aim for 8 if I’m really hungry)
- 20 oz red enchilada sauce (don’t skimp on the sauce!)
Optional Toppings for Your Cheesy Oven Meals
These are the little extras that make your Mexican dinner recipes look professionally styled. Grab these if you want that extra pop of color and freshness after they come out of the oven.
- Fresh parsley or cilantro, chopped finely for garnish
- Sour cream, for swirling on top when serving
Step-by-Step Instructions for Baked Cheesy Beef Enchiladas
Alright, let’s get cooking! You’ll want to start by setting your oven to 350 degrees Fahrenheit. Having everything prepped makes this assembly line process a breeze. If you need a refresher on prep timing, this guide on foolproof dinner ideas might help, but honestly, just trust your instincts here! Check out how to make dinner ideas foolproof right here.
Preparing the Beef Filling for Your Mexican Dinner Recipes
Grab that big skillet and get a little oil warm over medium heat. Toss in your chopped onion and red bell pepper and let them soften up—about five minutes is perfect. Next, add your ground beef. Use a spatula to break it up into nice, small crumbles as it browns. Once it’s looking good and browned, you absolutely have to drain off that excess grease! After that, follow the packet instructions for your taco seasoning, usually splashing in a little water right onto the meat. When everything is combined and cooked through, turn the heat OFF. This is important! Now stir in the red enchilada sauce and about half of your mixed shredded cheese until it’s all melty and gorgeous.
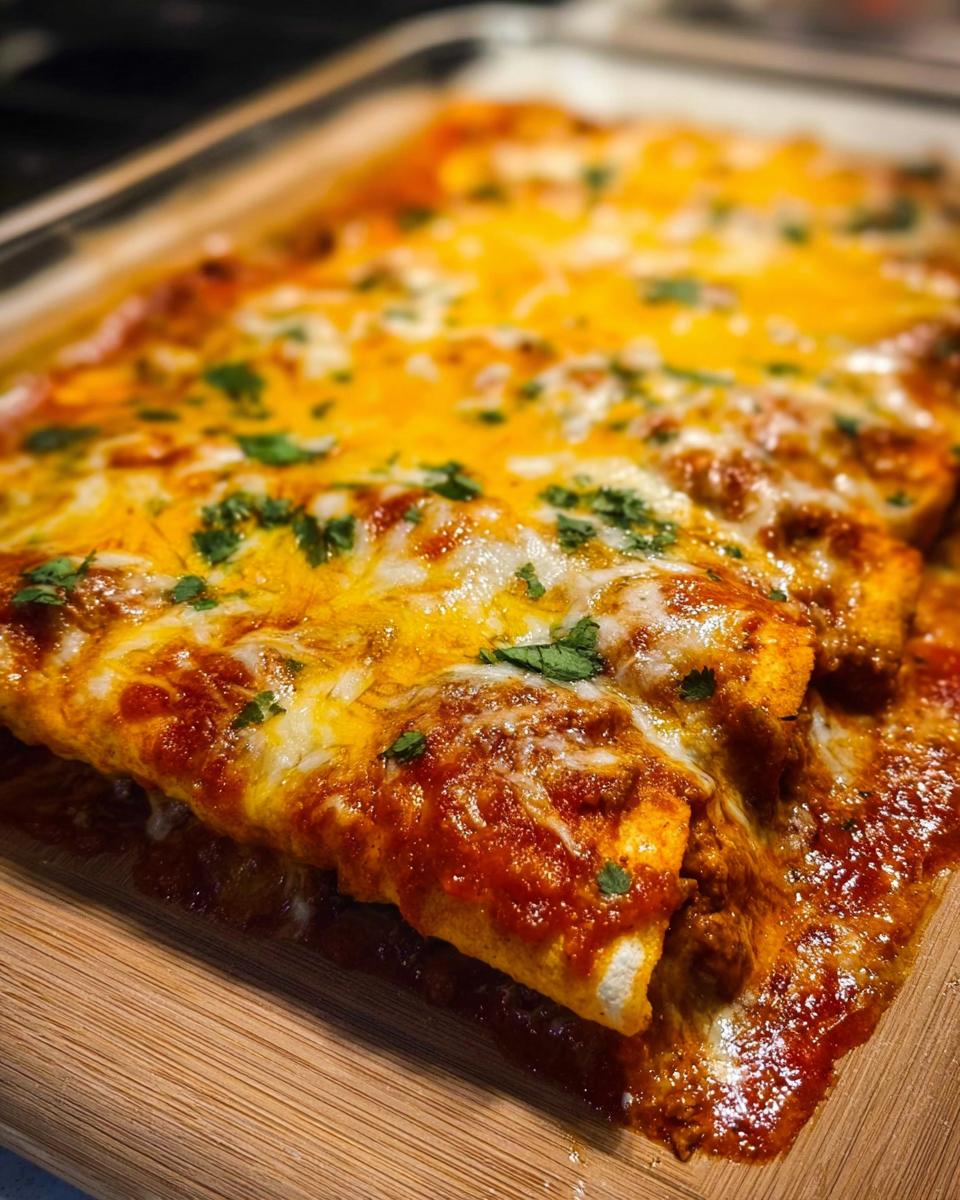
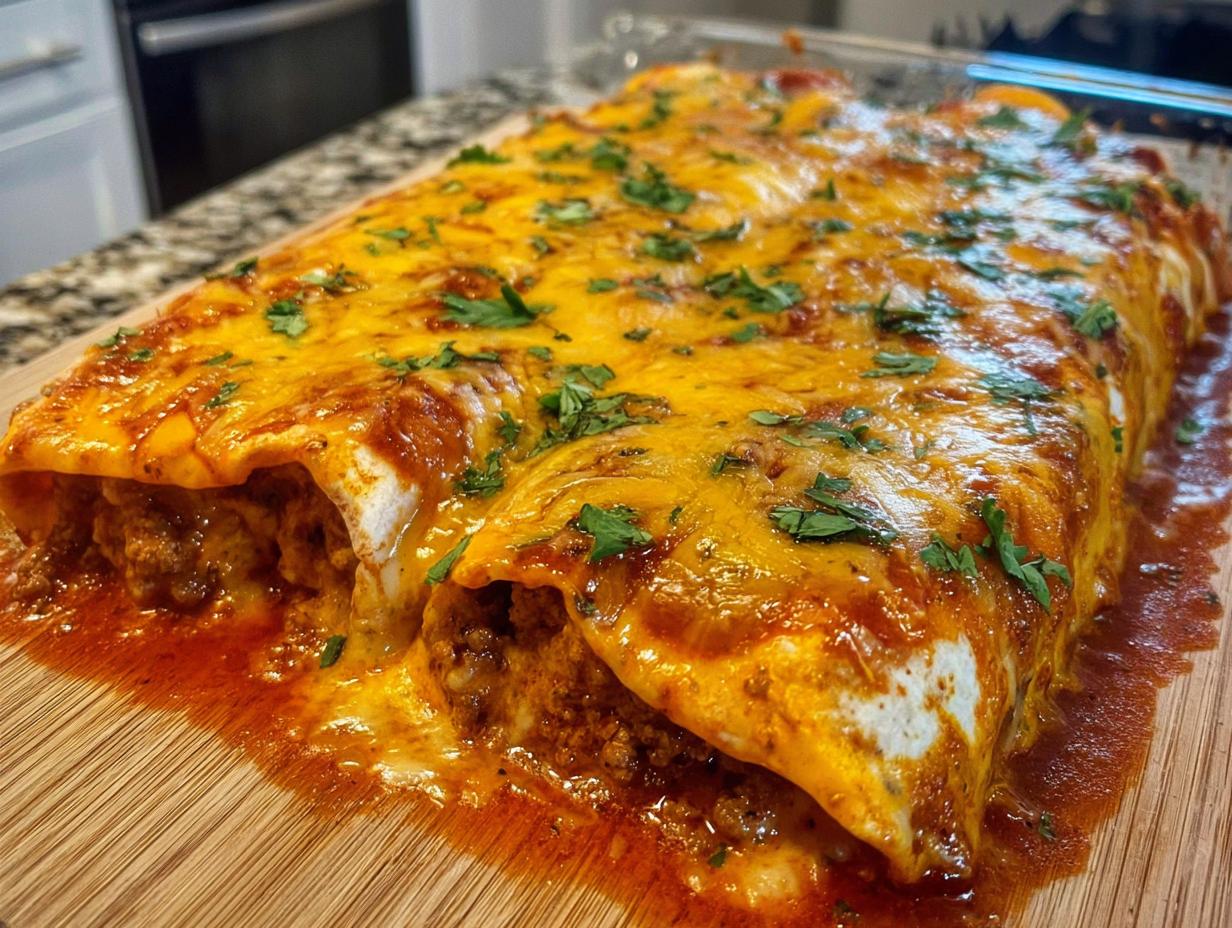
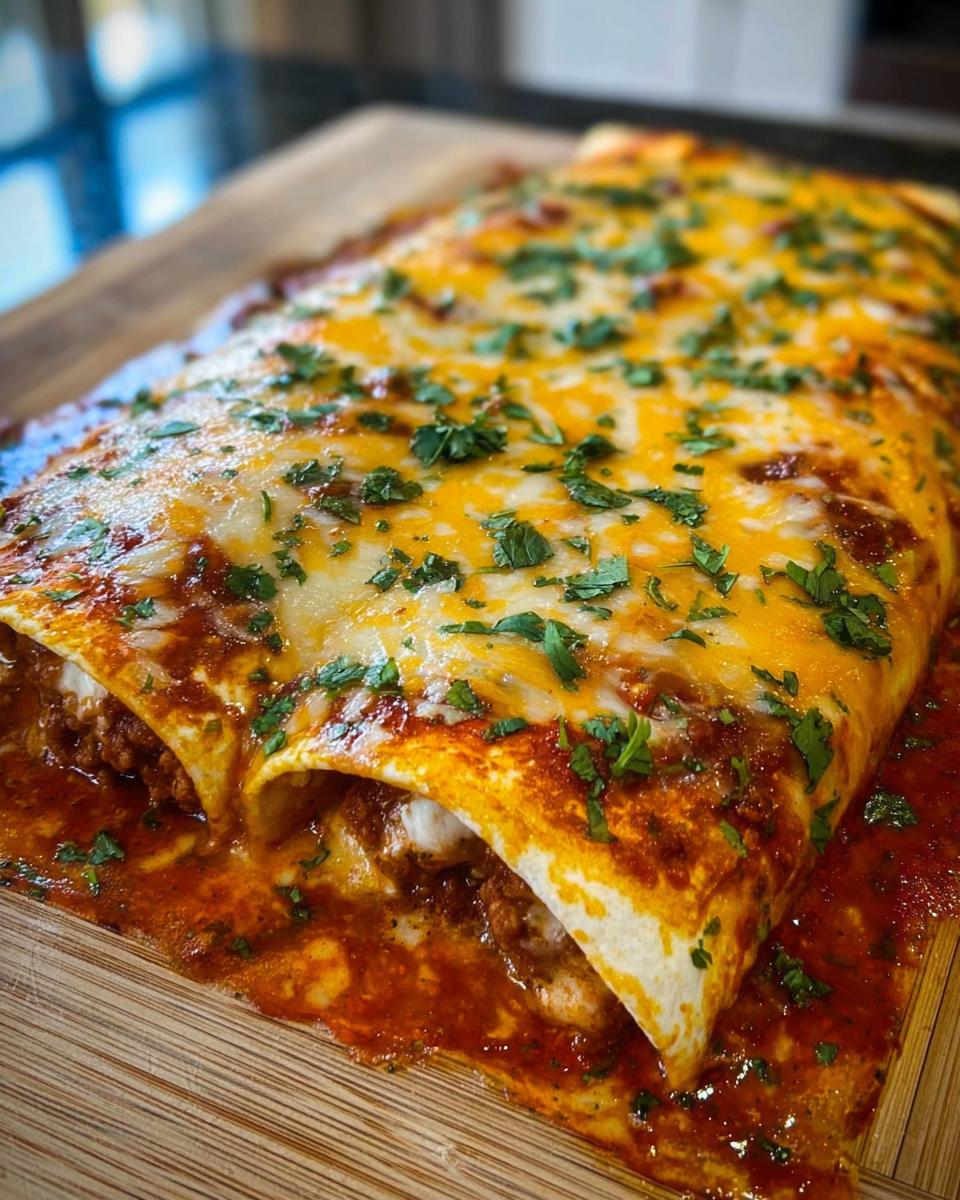
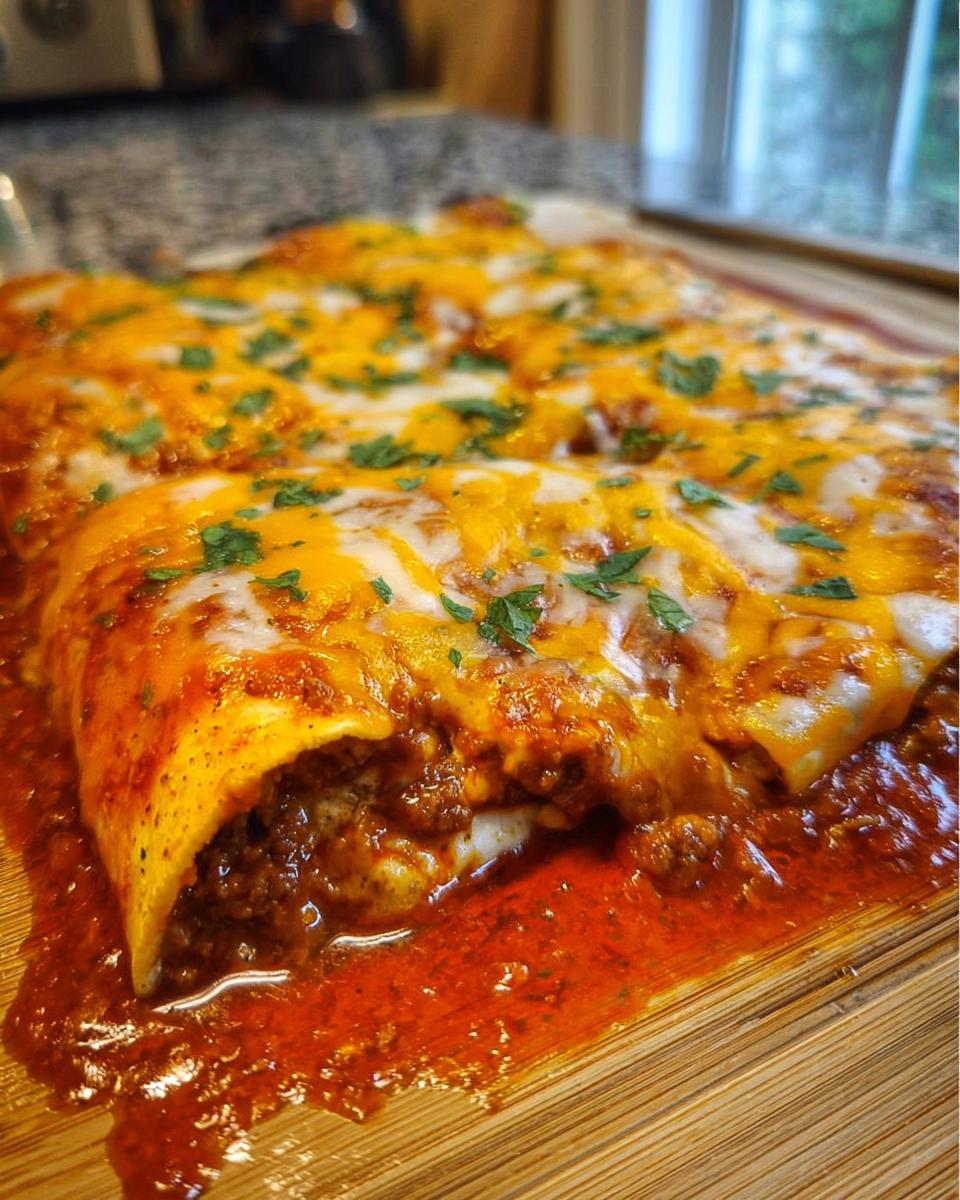
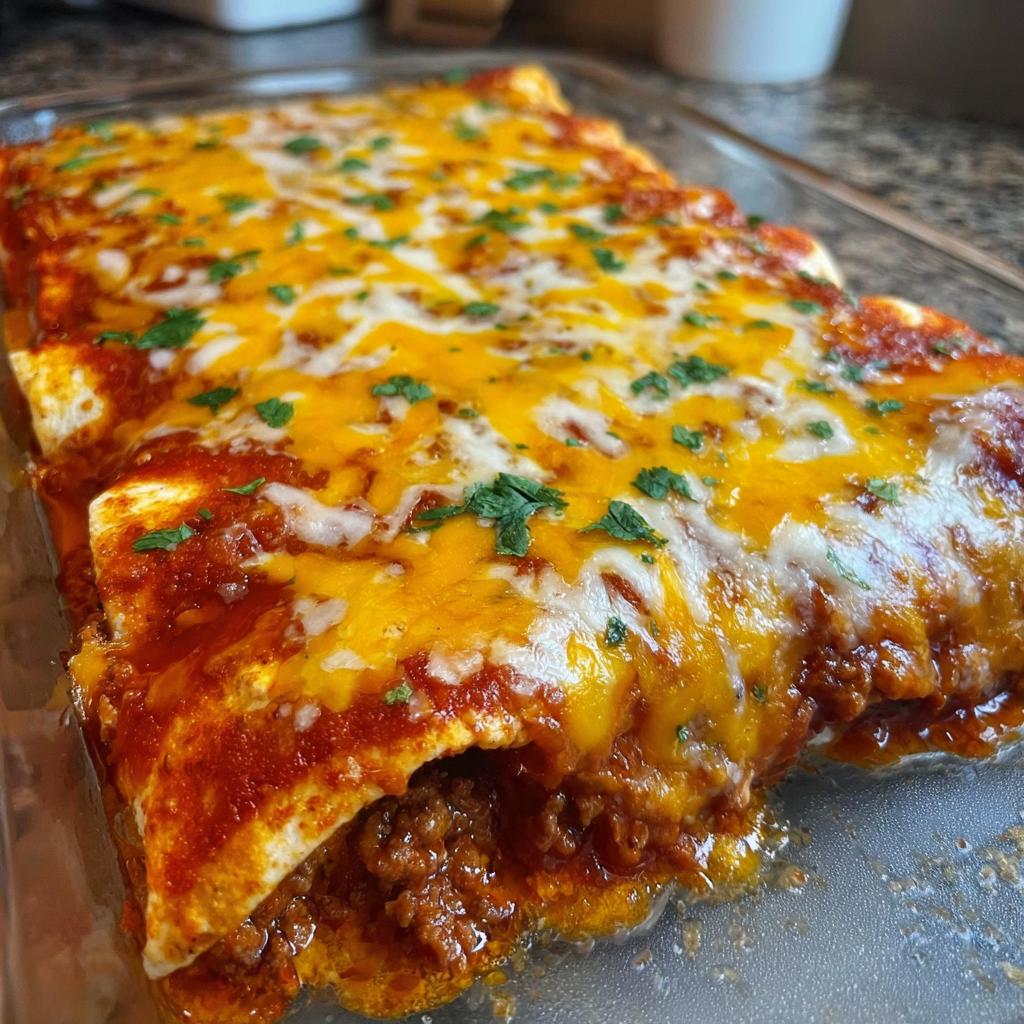
Assembling and Baking the Baked Cheesy Beef Enchiladas
Time to roll! Spoon a good amount of that seasoned beef filling right down the center of each tortilla. Roll them up snugly and place them seam side down, packed together, in your greased baking dish. Don’t let them sit too long before they hit the oven! Pour the remaining enchilada sauce right over the top of those rolled beauties. Finish them off by sprinkling the rest of that glorious cheese mixture over everything. Pop the whole dish into the 350°F oven for about 20 to 25 minutes. You’re waiting for those sides to get bubbly hot and the cheese on top to look beautifully melted and golden in spots. You can see a great example of layered enchiladas over at Al Dente Diva for inspiration!
Tips for Making the Best Baked Cheesy Beef Enchiladas
If you want these to be the best Mexican dinner recipes your friends have ever tasted, you have to treat the ingredients right. We already talked about grating your own cheese—seriously, don’t skip that step! That hand-grated texture is what gives us that amazing pull when you lift a portion out. Also, make sure you drain *all* the grease after browning the beef. Too much fat steams the tortillas instead of letting them bake nicely, and we definitely don’t want soggy ones.
To get maximum bubbling heat for the perfect cheesy oven meals experience, make sure your sauce is warm-ish when you pour it over the top layer of cheese. And speaking of flavor—I mentioned those wild onions earlier? If you can find anything fresh like that, chop it super fine and mix it right into your beef filling with the seasoning. It elevates the whole plate! You can find some great ideas on getting a crispy outside, juicy inside over at best crispy dinner ideas.
Variations for Your Beef Enchiladas
Now that you’ve mastered the classic, let’s talk about shaking things up a bit! It’s all about making these fit whatever mood your fiesta night calls for, right? I love experimenting, especially when it means I don’t have to go to the store for five different ingredients. Here are two easy changes that mix things up nicely.
First, if you aren’t feeling beef this week—and hey, sometimes you just crave something else—try swapping it out! Ground chicken or even shredded dark meat turkey work wonderfully. You just need to cook them the same way, breaking them down in the skillet. You might need a splash more liquid or sauce since poultry doesn’t release as much fat as beef, so keep an eye on that during the mixing stage. It’s a simple way to get a different texture while keeping that amazing cheesy profile. You can find some fun inspiration for simple suppers over at Simple Balanced Suppers.
Second, let’s tackle the spice. The standard taco seasoning is great, but what if you want smokier or warmer? Before you add your two packets of seasoning, try stirring in about a teaspoon of smoked paprika and a quarter teaspoon of ground cumin directly into the browning beef. That smoked paprika gives the whole dish a much deeper, almost campfire flavor that is fantastic when paired with the melted cheddar. Suddenly, you’ve got a whole new flavor journey starting with the same ingredients!
Storage and Reheating Instructions for Baked Cheesy Beef Enchiladas
Nobody wants to waste these amazing baked cheesy beef enchiladas, right? Luckily, they hang around for a few days, though I promise you, the first batch disappears fast! Knowing how to store and reheat them properly is key to keeping that cheese looking good and the tortillas from getting gummy later on. It’s all about preserving that gooey goodness we worked so hard for during the initial bake.
When you’re done enjoying them (or if you manage to save some!), let the dish cool down on the counter just until it’s not steaming hot anymore—maybe 30 minutes. Then, you wrap it up tight! Cover the baking dish securely with plastic wrap first, and then foil over that. If you’re only saving a couple, just transfer them into an airtight container. They’ll keep happily in the fridge for about three to four days. Check out some other great no-fail recipes you can store easily over at 5 ingredient dinner ideas!
Reheating is where you need to be careful, especially if you want a nice chewy edge instead of a soggy mush. I strongly suggest using the oven if you have the time. Pop the portion you want onto an oven-safe plate (you might want to add a tiny splash of extra enchilada sauce on top to bring back moisture!) and bake them at about 350 degrees Fahrenheit for 15 to 20 minutes, covered lightly with foil at first. Take the foil off for the last five minutes so the cheese can get nice and melty again.
If you’re in a super big rush, the microwave works, but it’s a trade-off. It heats fast, but the tortillas can get a little soft and chewy in a weird way. If you must microwave, keep the power level at 50% power and heat in short bursts—like 45 seconds at a time—turning the plate frequently until it’s hot all the way through. Garnish with fresh cilantro right before serving, no matter how you reheated them, and they taste almost brand new!
Frequently Asked Questions About Baked Cheesy Beef Enchiladas
I always get questions about this recipe, especially when folks are planning their big fiesta night or trying to convert regulars to beef enchiladas lovers! Don’t hesitate to ask; we’re all learning together here. Here are some of the most common things people wonder about when making these amazing cheesy oven meals.
Can I use corn tortillas instead of flour for these beef enchiladas?
Oh, that’s a great question! You absolutely can swap flour for corn tortillas if that’s what your heart desires, but you have to treat corn tortillas gently. Flour tortillas have flexibility, but corn tortillas will crack if you try to roll them cold and dry. If you’re going the corn route, you need to soften them first! You can either wrap them in a damp paper towel and microwave them for about 30 seconds, or briefly dip each tortilla into the warm enchilada sauce before filling. That little bit of warmth and moisture is the secret to rolling them up without them tearing apart on you.
What is the best way to make these cheesy oven meals ahead of time?
I love making these ahead! It’s the ultimate prep trick for any dinner party. Once you have the tortillas rolled and placed snugly in the baking dish, here is the key: cover the whole thing tightly—plastic wrap and then foil!—and put it in the fridge. They are perfectly safe and ready to go for up to 24 hours, ready for the oven when company shows up. Just remember that if they are ice cold from the fridge, you might need to add an extra 5 to 10 minutes to the total baking time so they heat all the way through to the center. You still want them piping hot and bubbly!
How can I make these mexican dinner recipes spicier?
If you like a little fire in your food like I do, ramping up the heat in these Mexican dinner recipes is super easy, especially during that first sauté step. You could dice up a fresh jalapeño or even a serrano pepper and cook it right alongside those onions and bell peppers. That way, the heat infuses into the oil and flavors the whole beef filling. My absolute favorite way, though, is to switch out the mild red enchilada sauce for a spicy or ‘hot’ variety. That sauce coats everything, so a hotter sauce makes the entire dish punchier, cheesy goodness and all! Don’t forget to check out more great recipes guaranteed to get asked for again over at recipes everyone asks for again.
Estimated Nutritional Information for Baked Cheesy Beef Enchiladas
Look, when you’re making comfort food this spectacular, you’re not exactly aiming for a salad, right? These are hearty servings designed to satisfy, so keep that in mind! The following information is just an estimate based on the main ingredients listed above, before you add any sour cream or extra garnishes. Your actual numbers might look different depending on the brand of cheese or sauce you grab. For more ideas on calorie-conscious cooking, pop over to calorie-smart recipe ideas!
- Estimated Calories: 480-550 per enchilada (based on 6 servings)
- Total Fat: 28g – 35g
- Protein: 28g
- Carbohydrates: 30g
This nutritional breakdown really shows you how much bang for your buck you get in terms of protein and fat with these cheesy oven meals. Amazing!
Share Your Fiesta Night Ideas
Whew! I really hope you’re heading to the kitchen right now because making these baked cheesy beef enchiladas is half the fun. I absolutely love seeing how you all customize these recipes—that’s what makes home cooking so special!
Once you sit down to your piping hot, cheesy masterpiece, please come back here and let me know how it went! Did you love the Monterey Jack and Cheddar combo, or did you try an even wilder cheese blend? Drop a rating below so other cooks can see how amazing this dish is. And if you tried my little trick of adding foraged onions or swapping out the beef, snap a picture and tag me on social media! I’m always looking for new fiesta night ideas to try next time I’m hosting friends.
If you ever have questions while you’re cooking, or if you just want to say hi, don’t hesitate to reach out through my contact page. Happy cooking, and enjoy that delicious, hearty comfort food!
Baked Cheesy Beef Enchiladas
Ingredients
Equipment
Method
- Heat oil in a large skillet and sauté the bell pepper and onion for 5 minutes.
- Add the ground beef. Break it into small pieces and cook until the beef is brown. Drain the grease and follow the cooking directions on the back of the taco seasoning packets, using 2 packets for 1.5 lbs of beef.
- Turn the heat off and add enchilada sauce and shredded cheese. Stir everything together until it is evenly combined.
- Evenly distribute the beef filling into the center of each tortilla. Roll each tortilla up and place them seam side down into a greased baking dish.
- Pour more enchilada sauce over the rolled tortillas and top with the rest of the shredded cheeses.
- Bake them at 350 degrees Fahrenheit for about 20 to 25 minutes, or until the cheese is melted and the sides are hot and bubbly.
- Let them cool slightly, garnish with either parsley or cilantro, and serve with sour cream.
Notes
Tried this recipe?
Let us know how it was!
Urban Forager & Hyperlocal Ingredient Specialist
My Brooklyn apartment balcony tells my story: vertical gardens packed with wild edibles, fermentation crocks bubbling with city-foraged greens, and the constant hum of dehydrators preserving herbs I’ve collected from unexpected urban corners. What started as weekend escapes to my aunt’s upstate farm during my Columbia botany studies turned into something bigger after I earned my Urban Ecology Master’s from The New School.
Instead of following traditional academic paths, I discovered that cities are actually amazing edible ecosystems—rooftop weeds, park-edge wild greens, vacant lot treasures that perfectly complement keto eating. Who knew that some of the best low-carb foods were growing right under our noses in Manhattan?
My recipe collections celebrate city seasons: spring dandelions and plantains, summer purslane from rooftops, autumn rose hips from community gardens, winter wild onions and cress. I’m certified through the New York Mycological Society and trained by Brooklyn Botanic Garden to forage safely and ethically. Over 180 of my recipes feature at least one urban-foraged ingredient—from sidewalk plantains to sumac berries and wild mint thriving in vacant lots.
My “Metropolitan Wild” column went viral after my dandelion coffee substitute hit social media. Now my weekend “Urban Wild Walks” through Central Park and Prospect Park sell out faster than I can schedule them. I teach city dwellers to spot safe, keto-friendly wild foods hiding in plain sight.
Currently, I’m partnering with local chefs to bring urban foraged elements to restaurant menus and developing an app that maps safe foraging spots across all five boroughs. Evenings find me tending my sourdough starters, pressing flowers for natural dyes, or weaving baskets from willow branches I collect during park maintenance.
Cities are wild food sanctuaries hiding in plain sight—keto eating becomes urban rebellion when you realize how much free, perfect nutrition grows right under our feet.