
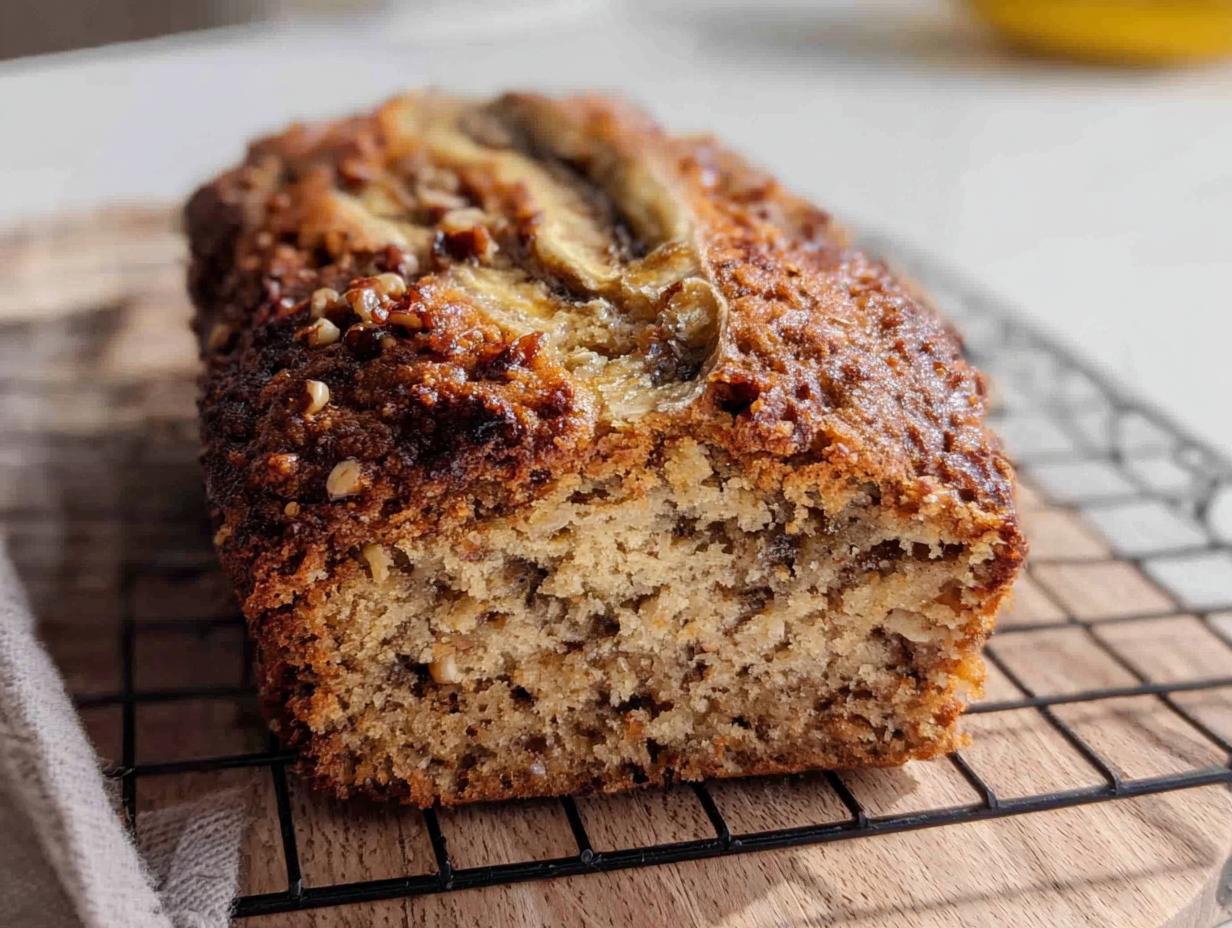
Oh, I just love finding ways to turn the everyday into something wonderfully comforting, don’t you? When you need a satisfying bite that’s ready in minutes, nothing beats fresh banana bread. But let’s be real, sometimes a whole loaf is just too much commitment, or frankly, too tempting to leave alone! That’s why I perfected the recipe for Banana Bread Minis (Snack-Size). I remember baking these first in my tiny Brooklyn kitchen on a rainy Saturday after staring at some very brown bananas. The sweet, cozy smell took over—it made the whole place feel bright!
Scaling them down into these little ‘snack-size’ portions was a game-changer for quick mornings and sending things off in lunchboxes. I’m Alexandra Bennet, and as someone who specializes in using the best hyperlocal ingredients, I can tell you that these little loaves are pure gold. They hit that perfect spot between wholesome and utterly delightful. Trust me, these minis are about to become your new favorite treat!
Why You Will Love These Banana Bread Minis (Snack-Size)
Honestly, once you start making these little guys, you won’t go back to the big loaf, I promise! They just fit into busy life so much better. They are genuinely amazing for everyone who needs quick, comforting food.
Here’s why I absolutely insist you try these mini versions:
- Perfect Portion Control: Because they’re snack-size, you can grab just one without stressing about leftover loaf ends going stale. Portioning felt easier for me when I was busy!
- Lunchbox Superstars: These are ideal for tucking into kids’ school bags or your own desk drawer. They stay neat, unlike a slice that might crumble everywhere.
- Incredibly Quick to Bake: Forget waiting an hour for a full loaf to bake through. These are ready much faster, making them a real lifesaver for last-minute baking inspiration.
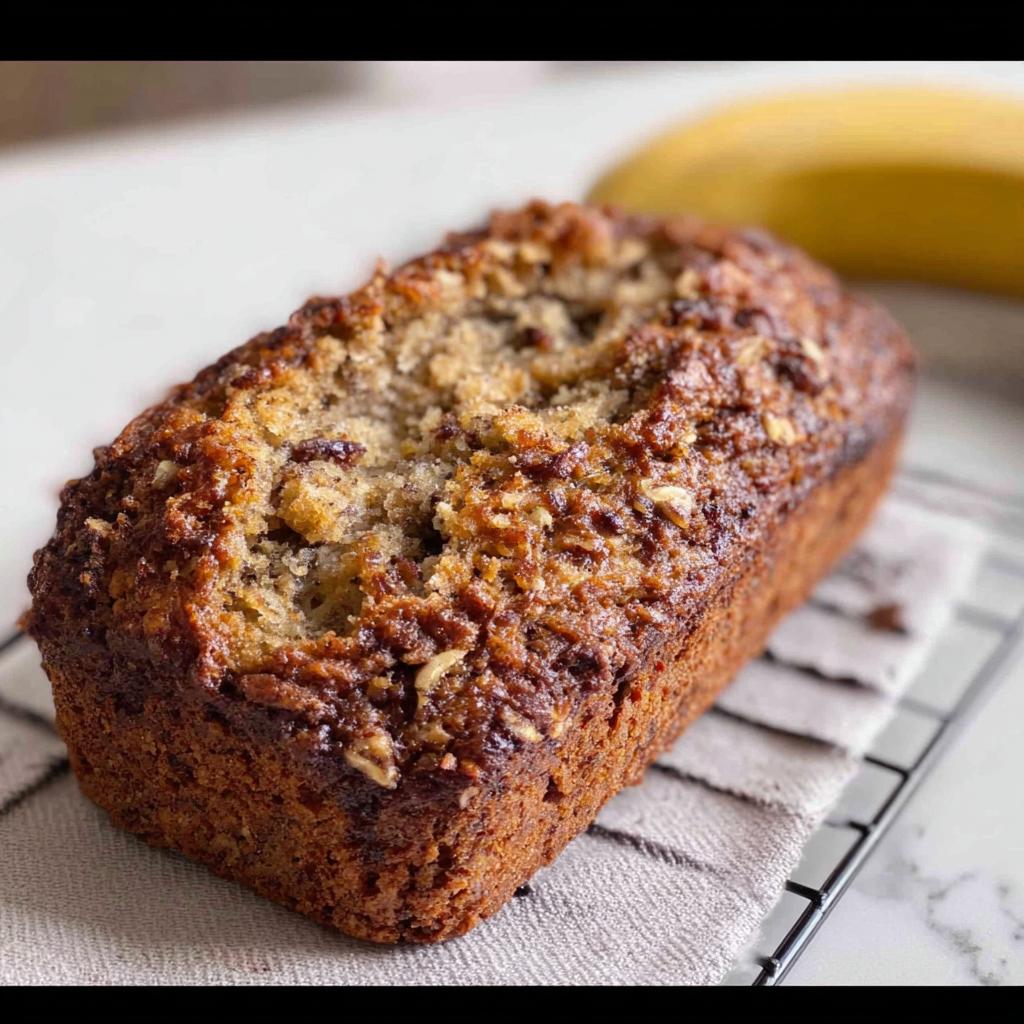
- Naturally Sweetened Focus: We rely heavily on those ripe bananas and a bit of honey here, which helps keep the processed sugar lower than in a huge, traditional loaf.
- Make Ahead Masters: Honestly, they taste even better the second day, which means you can whip up a batch and have grab-and-go snacks sorted for the entire week!
- Cozy Flavor Profile: Even in miniature form, you get that deep, comforting banana flavor blend we all crave in the traditional bread. It’s pure comfort in a tiny package.
They truly make life easier when you’re running out the door but still want something homemade!
Essential Equipment for Perfect Banana Bread Minis (Snack-Size)
You don’t need a huge kitchen or fancy gadgets to pull off these perfectly portioned Banana Bread Minis (Snack-Size). Luckily, the list of required tools is super short, which is another reason I love this recipe for quick baking sessions!
Here is what you’ll need readily standing by:
- A sturdy mini loaf pan.
- Your reliable oven, of course!
- A medium bowl—nothing too fancy required here.
- A simple fork for the mashing work.
- A wire rack for cooling everything down properly.
Now, here’s my expert tip, and please listen up because this saves so much heartbreak! Before you even think about adding batter, you have to treat that mini loaf pan right. Don’t just spray it. I take extra time to generously coat every nook and cranny with softened butter, and then I dust it lightly with flour, making sure to tap out the excess. This grease-and-flour method beats any sprayed release agent for these sticky, moist cakes, guaranteeing they slide out beautifully later.
Specific Pan Size Guidance
This part is super important for getting the timing right! Since we are making snack size loaves, we need that specific pan dimension. You are looking for a mini loaf pan that measures approximately 5 3/4 inches long by 3 inches wide by 2 inches deep. If your pan is much deeper than that, you’ll definitely need to add 5 to 10 minutes onto the baking time, so be sure to check with that toothpick!
Ingredients for Your Banana Bread Minis (Snack-Size)
The quality of your ingredients is what elevates a simple, quick bake into something you’ll want to repeat every week. Since I spend so much time sourcing the best flavors, I’m very particular about what goes into these little guys. Don’t skimp on the ripeness of your banana—that’s the secret foundation for all the flavor and sweetness we build upon here!
For the Banana Bread component, you’ll need this exact list:
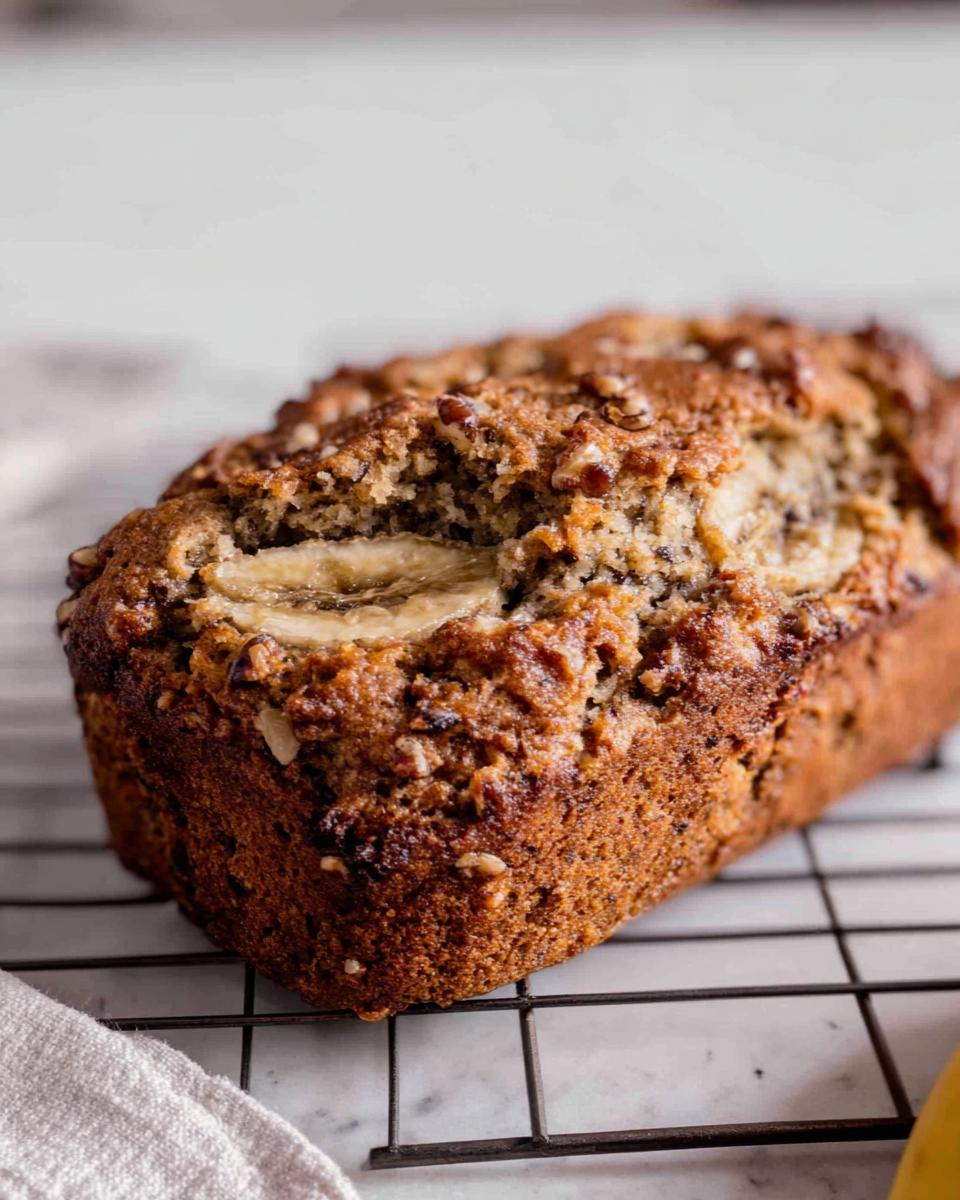
- 1 small over-ripe banana (I mean it, aim for 6-7 inches long and practically black on the peel!).
- 3 tablespoons unsalted butter (it must be room temperature or very soft; plus, set aside extra for greasing the pan).
- 3 tablespoons sugar.
- 2 tablespoons honey.
- 1 large egg yolk only.
- 1/2 cup flour.
- 1 tablespoon wheat germ (this is optional, but I love the tiny nutty boost it gives).
- 1/4 plus 1/8 teaspoon baking soda.
- A pinch of salt.
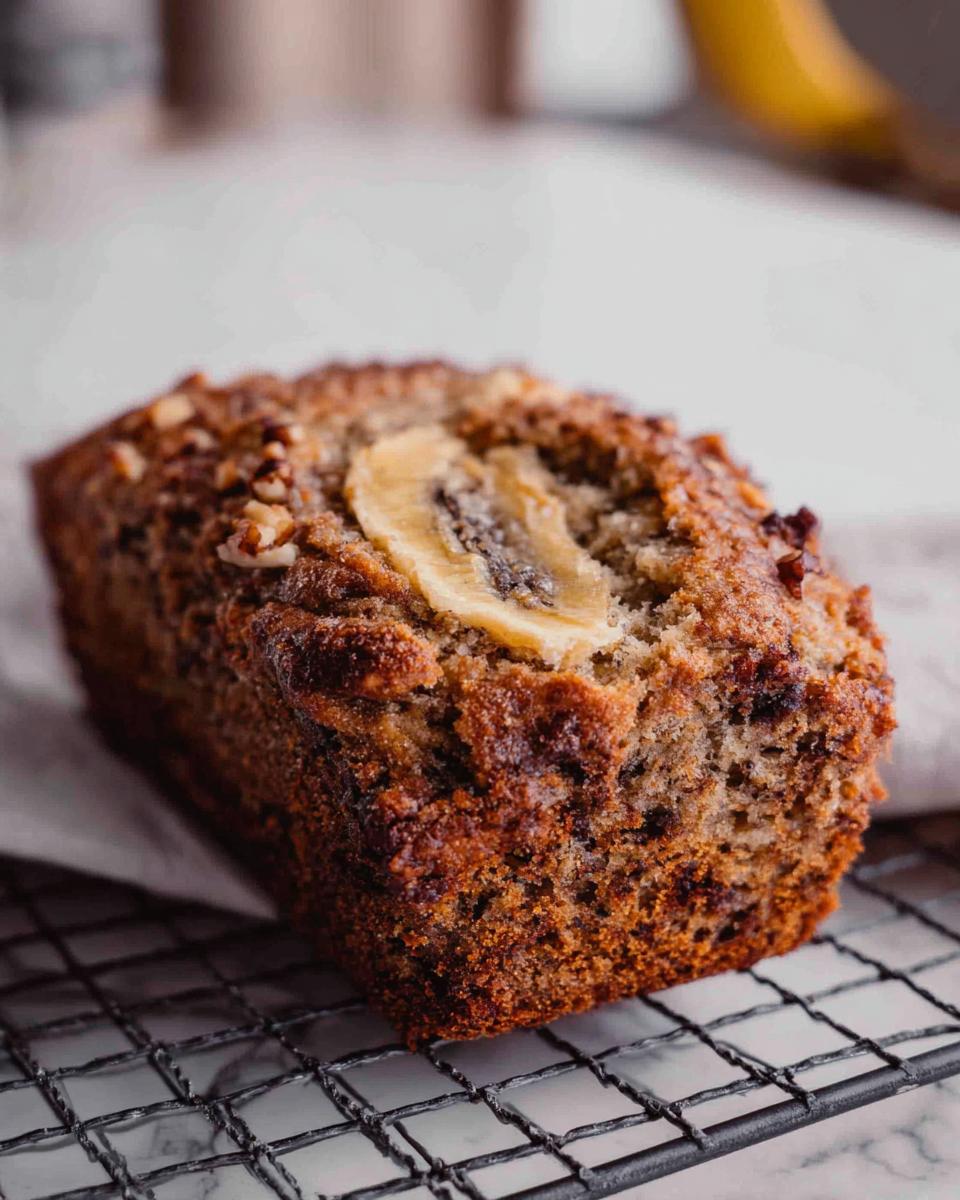
- 2 tablespoons finely chopped pecans (totally optional, but they add a nice crunch!).
When you look at this list, you can see we aren’t using a lot of bulk ingredients, which is why the quality of the ones we do use—like that ultra-ripe banana—makes such a difference. If you want to use these for your Make Ahead meal prep, having these simple ingredients on hand means you can whip up a fresh batch whenever you need them!
Plus, you can check out some of my favorite ways to use wholesome ingredients in other recipes over on my main site right here!
Ingredient Notes and Substitutions
Let’s talk specifics, because I want everyone who tries this to have the best result possible, even if you need to swap something out!
First, my biggest plea: that banana needs to be *seriously* over-ripe. If the peel is bright yellow, put it on the counter for three more days! You want those natural sugars to be concentrated, resulting in maximum moisture and that deep banana flavor that sets these apart.
What if you don’t have wheat germ? That’s totally fine! You can skip it, or if you want that tiny texture contribution, you can substitute it with an extra tablespoon of oat flour, though the flavor changes slightly. As for the nuts, pecans are classic, but feel free to swap them for walnuts or skip them entirely if you are packing these up as a **Lunchbox Treat** for someone with an allergy.
One thing you absolutely cannot skip, though, is the room temperature butter. Cold butter won’t cream correctly, and that’s the first step to ensuring your Snack Size breads are tender and not dense bricks!
Simple Steps to Make Banana Bread Minis (Snack-Size)
If you’re looking for a truly satisfying **Quick Bake** that delivers amazing results, this process is incredibly streamlined. We want to move fast but gentle to keep the texture light. First things first: get that oven warmed up to 350°F (175°C). While it’s heating, make sure you’ve generously buttered that mini loaf pan—remember my tip about flouring it too? Don’t skip that part!
Next, grab a medium bowl and get busy mashing that banana until it’s completely smooth. It’s crucial that you get rid of any big lumps now! Then, blend in your very soft butter, the sugar, and the honey until it looks nicely combined. Stir in just the egg yolk until everything is incorporated.
Now for the dry stuff! Gently sprinkle in your flour, the optional wheat germ, baking soda, and salt. Fold this until you just barely see the flour disappear. If you’re using pecans, fold those in last—just a couple of quick turns are all they need. Pour that lovely batter right into the waiting pan.
Into the oven they go for about 35 to 40 minutes. You’re looking for that toothpick test to be your guide, not just the clock! Once they look done, pull them out. You can see some of my favorite non-banana recipes over here, but trust me, these minis are worth the waiting time!
Achieving the Perfect Bake Time
This is where so many people rush things, and the result is a sticky center, which is no good for a **Snack Size** treat! The clock only gets you close. You absolutely must use the toothpick test. Slide one right into the dead center of the thickest mini loaf. If there is still wet batter, give it another five minutes and check again.
What you are aiming for when it pulls out clean are moist crumbs clinging to the wood—not wet batter blobs! My instruction notes mention a 5-minute cooling time *in the pan*, and that’s non-negotiable. Let them sit gently in that hot pan for exactly five minutes. This lets them firm up just enough so when you flip them onto the wire rack, they hold their beautiful little shape. If you try to rush them out before those five minutes are up, they *will* crack or crumble on you, so practice a little patience here!
For more amazing, simple baking ideas, sometimes I check out blogs like Dessert For Two for inspiration, but my base measurement is always this classic, tested recipe!
Tips for Success with Your Banana Bread Minis (Snack-Size)
Alright, you’ve got the ingredients and you’ve followed the main steps, but if you want your Banana Bread Minis (Snack-Size) to go from “good” to “OMG, you have to give me the recipe,” you need a few insider tricks. I learned these the hard way, especially when I was trying to pack them into little containers for work trips!
Here are the little bits of wisdom that take these from my kitchen to yours:
- Don’t Overmix the Flour—Seriously! This is my biggest mistake from early days when I thought mixing longer meant it was better combined. It doesn’t! Overmixing develops the gluten in the flour, and that gives you tough, rubbery little bricks instead of tender Snack Size treats. Mix the flour in until you *just* see the last few streaks disappear, then stop. Fold in your nuts gently after that.
- Use the Yolk Only for Richness: You noticed I only asked for the egg yolk, right? That’s intentional! The yolk has all the fat and richness we want, which keeps these mini loaves luxurious and moist. If you add the white, you introduce too much liquid and lean protein, which can make them a little spongy. Stick to the yolk for that perfect dense crumb.
- The Glaze Hack for Extra Shelf Life: If you want these to look amazing and stay fresh even longer, skip the powdered sugar topping and lightly brush the tops with melted butter right when they come out of the oven, before they hit the rack. The butter soaks in immediately and seals in moisture, making them look glossy and taste spectacular the next day.
I used to try to boost the flavor by adding too much spice, thinking more cinnamon meant more cozy, but boy, was I wrong! Too much spice totally overpowers the delicate sweetness of the banana. Now, I keep the spice blend precisely measured because the banana is the star here. If you’re looking for other surprisingly flavorful, easy meals, check out my thoughts on making Garlic Mushroom Chicken—it’s another winner for busy folks!

Storage and Make Ahead Instructions for Banana Bread Minis (Snack-Size)
This is where the magic of Banana Bread Minis (Snack-Size) really shines for us busy people! Because these are already perfectly portioned, they are phenomenal for planning ahead. You never have to face a sad, dried-out leftover slice again. Knowing you have a grab-and-go snack ready when life gets hectic is such a relief, isn’t it?
If you manage to resist eating them all immediately—which I rarely do—storing them is super simple. For the best flavor for up to three days, keep your cooled minis wrapped snugly in plastic wrap or tucked into an airtight container at room temperature. I like to wrap each one individually if I know I’m grabbing them for the week ahead. They stay wonderfully moist this way!
But the real secret weapon for our audience of busy professionals and parents is freezing. These freeze like a dream, which really maximizes that ‘make ahead’ benefit. Once they are completely cool—I mean stone cold, never rush the cooling part for freezing—wrap each mini loaf tightly in plastic wrap first. Then, place all your wrapped minis into one large freezer-safe zip-top bag. This double-layer wrapping prevents freezer burn better than anything else I’ve tried!
When you need a quick breakfast or an after-school surprise, you can take one out the night before and let it thaw on the counter. Or, if you’re desperate like I often am, you can microwave the wrapped mini for about 10 to 15 seconds, just until it’s thawed and warm. It tastes freshly baked, I swear!
For more details on my favorite freezer-friendly recipes, especially things like my Blender Pumpkin Waffles, you can dive into those tips right here on the journal!
Serving Suggestions for These Snack Size Treats
What do I do with these adorable little loaves once they come off the cooling rack? Well, honestly, most of mine disappear still warm, tucked right into my hand on the way out the door! But when I do manage to save a few, presenting them beautifully makes snack time feel way more special, don’t you think? These little gems are so versatile because they’re already perfectly sized for anything from a quick energy boost to a lovely little addition to a packed meal.
Here are some of my favorite ways to dress up or utilize these small baked goods:
- The Coffee Companion: They are the absolute perfect partner for your morning coffee or afternoon tea. They are sturdy enough to sit beside a warm mug without crumbling away, providing just a hint of sweetness to balance the bitterness.
- Yogurt Parfait Helper: Try crumbling one of the minis right over a bowl of plain Greek yogurt mixed with a spoonful of berries. It adds texture and the banana flavor perfectly complements the tart yogurt. It turns a standard breakfast into something much cheerier!
- The Ultimate Lunchbox Treat: This is where their snack size really shines! They fit perfectly next to a sandwich or some veggies in a bento box. For extra fun, I sometimes wrap a tiny bit of string cheese around one end—kids think it’s a hilarious little breakfast kebab. If you enjoy creative lunch packing, you might love seeing some inspiration I put together for bento style boxes!
- Warm & Gooey Upgrade: If you want to make one feel extra decadent without adding a thick glaze, just slice one horizontally and toast it lightly in a pan with a tiny pat of butter. The edges get slightly crispy, and the middle gets melty. Oh my goodness, they are incredible that way!
- Cream Cheese Dollop: Even if you don’t follow the tradition of making a full glaze, a small tablespoon dollop of plain cream cheese right on top, maybe sprinkled with a few flakes of sea salt, adds a wonderful creamy texture that just melts right in.
Since they are already perfectly portioned, you never have to worry about cutting messy slices for serving later. It’s just pure, ready-to-eat comfort!
Frequently Asked Questions About Banana Bread Minis (Snack-Size)
I know you’ve got questions! Trust me, when I first started experimenting with scaling down recipes, I had a million doubts. It takes a little practice to get the timing right when changing pan sizes, but these quick bake recipes are so forgiving. Here are some of the things I get asked most often about making these perfect little Mini Banana Breads!
Can I make these without an oven?
Oh, I totally get the oven aversion, especially in the summer when you don’t want to heat up the kitchen! Unfortunately, for this specific recipe, the answer is no, not really. Because we are aiming for a denser, slightly moist texture using a low amount of leavening agent (baking soda), the consistency needs the dry, steady heat of an oven to set correctly.
A stovetop method like steaming or pan-frying just won’t replicate that even baking needed for a true quick bake banana bread. You’d end up with a sort of gummy or overly crisp exterior before the center was done. Stick with the 350°F oven for the best results in that mini loaf pan!
How do I keep my Banana Bread Minis (Snack-Size) moist?
Moisture is the name of the game, and honestly, that’s why I developed this recipe the way I did! If you want these Snack Size treats to stay tender for days, you need to focus on two things: the banana and the wrap-up.
First, make sure you are using the ripest banana possible. That mushy, almost black banana holds more water and sugar, which translates directly into moisture you can taste. Second, once they are completely cool, wrap them tightly! I mentioned this before, but it bears repeating: wrap each one individually in plastic wrap before putting them in an airtight container. Air is the enemy of moisture in bread, so give them a tight hug before storing them away!
Also, don’t forget that little bit of honey we add; that helps draw and keep moisture in compared to using only granulated sugar. It really makes a difference when they are packed as a **Lunchbox Treat** a day or two later!
If you’re also interested in other simple food science tips and general kitchen knowledge, I share a lot of my philosophy over on my About Page!
Nutritional Information Estimate
Okay, let’s talk about the numbers for a second. As a baker focused on using wonderful, whole ingredients, I tend to look more at the *feel* and the *immediate satisfaction* these provide rather than getting bogged down in spreadsheets. Because we’re using a small banana, honey instead of all white sugar, and skipping lots of heavy fats typical in huge loaves, these Banana Bread Minis (Snack-Size) are naturally portion-controlled for snacking!
But here is my standard disclaimer, because I have to say it: I am not a certified nutritionist! This recipe uses very specific amounts of butter, sugar, and optional nuts, and every measurement change you make will affect the final count. The wheat germ or pecans you add in, for example, will shift the macros immediately.
So, think of this recipe as being built for joyful, measured consumption rather than strict counting. They are designed to be that perfect, satisfying little bite—a conscious treat! They are fantastic for balancing out a busy day because the small size naturally discourages overindulgence. If you are tracking closely, I always recommend plugging your *exact* ingredients into your favorite tracking app, but you can rest easy knowing these are made with simpler components than most store-bought muffins or loaves.

Share Your Snack Creations
That’s it! You’ve successfully mixed, baked, and cooled the perfect batch of Banana Bread Minis (Snack-Size). Now comes the best part—enjoying them! I sincerely hope that cozy, sweet aroma fills your kitchen just like it did mine that rainy day in Brooklyn many moons ago. Seeing these little beauties come out of the oven always makes me smile, and I just know they’ll bring a bit of happy comfort to your day too.
But seriously, I love seeing what you all create! Baking becomes so much more fun when we can share the results, right? If you’ve given this recipe a try—whether you stuck strictly to the base or added your own fun mix-ins—please come back and let me know how they turned out!
Take a minute to rate the recipe right here on the page. Your feedback helps other busy folks decide if this quick bake is right for them. And absolutely snap a photo of your little masterpieces—they are just too cute not to share! Tag me on social media when you post them! I always love seeing where these snack size treats end up, whether they are headed into a lunchbox or just being demolished immediately on the sofa.
Happy baking, my friends. Enjoy every tiny, perfect bite!
Banana Bread Minis (Snack-Size)
Ingredients
Equipment
Method
- Preheat your oven to 350°F (175°C). Grease a mini loaf pan (approximately 5 3/4” x 3” x 2”) with extra butter.
- In a medium bowl, mash the banana into a puree using a fork.
- Add the butter, sugar, and honey to the mashed banana and stir well. Stir in the egg yolk until combined.
- Sprinkle in the flour, wheat germ (if using), baking soda, and salt. Stir until just combined. Fold in the chopped pecans, if using.
- Pour the batter into the prepared mini loaf pan. Bake for 35-40 minutes, or until a toothpick inserted into the center comes out clean.
- Let the banana bread mini cool in the pan for a few minutes before carefully transferring it to a wire rack to cool completely.
Notes
Tried this recipe?
Let us know how it was!
Urban Forager & Hyperlocal Ingredient Specialist
My Brooklyn apartment balcony tells my story: vertical gardens packed with wild edibles, fermentation crocks bubbling with city-foraged greens, and the constant hum of dehydrators preserving herbs I’ve collected from unexpected urban corners. What started as weekend escapes to my aunt’s upstate farm during my Columbia botany studies turned into something bigger after I earned my Urban Ecology Master’s from The New School.
Instead of following traditional academic paths, I discovered that cities are actually amazing edible ecosystems—rooftop weeds, park-edge wild greens, vacant lot treasures that perfectly complement keto eating. Who knew that some of the best low-carb foods were growing right under our noses in Manhattan?
My recipe collections celebrate city seasons: spring dandelions and plantains, summer purslane from rooftops, autumn rose hips from community gardens, winter wild onions and cress. I’m certified through the New York Mycological Society and trained by Brooklyn Botanic Garden to forage safely and ethically. Over 180 of my recipes feature at least one urban-foraged ingredient—from sidewalk plantains to sumac berries and wild mint thriving in vacant lots.
My “Metropolitan Wild” column went viral after my dandelion coffee substitute hit social media. Now my weekend “Urban Wild Walks” through Central Park and Prospect Park sell out faster than I can schedule them. I teach city dwellers to spot safe, keto-friendly wild foods hiding in plain sight.
Currently, I’m partnering with local chefs to bring urban foraged elements to restaurant menus and developing an app that maps safe foraging spots across all five boroughs. Evenings find me tending my sourdough starters, pressing flowers for natural dyes, or weaving baskets from willow branches I collect during park maintenance.
Cities are wild food sanctuaries hiding in plain sight—keto eating becomes urban rebellion when you realize how much free, perfect nutrition grows right under our feet.