
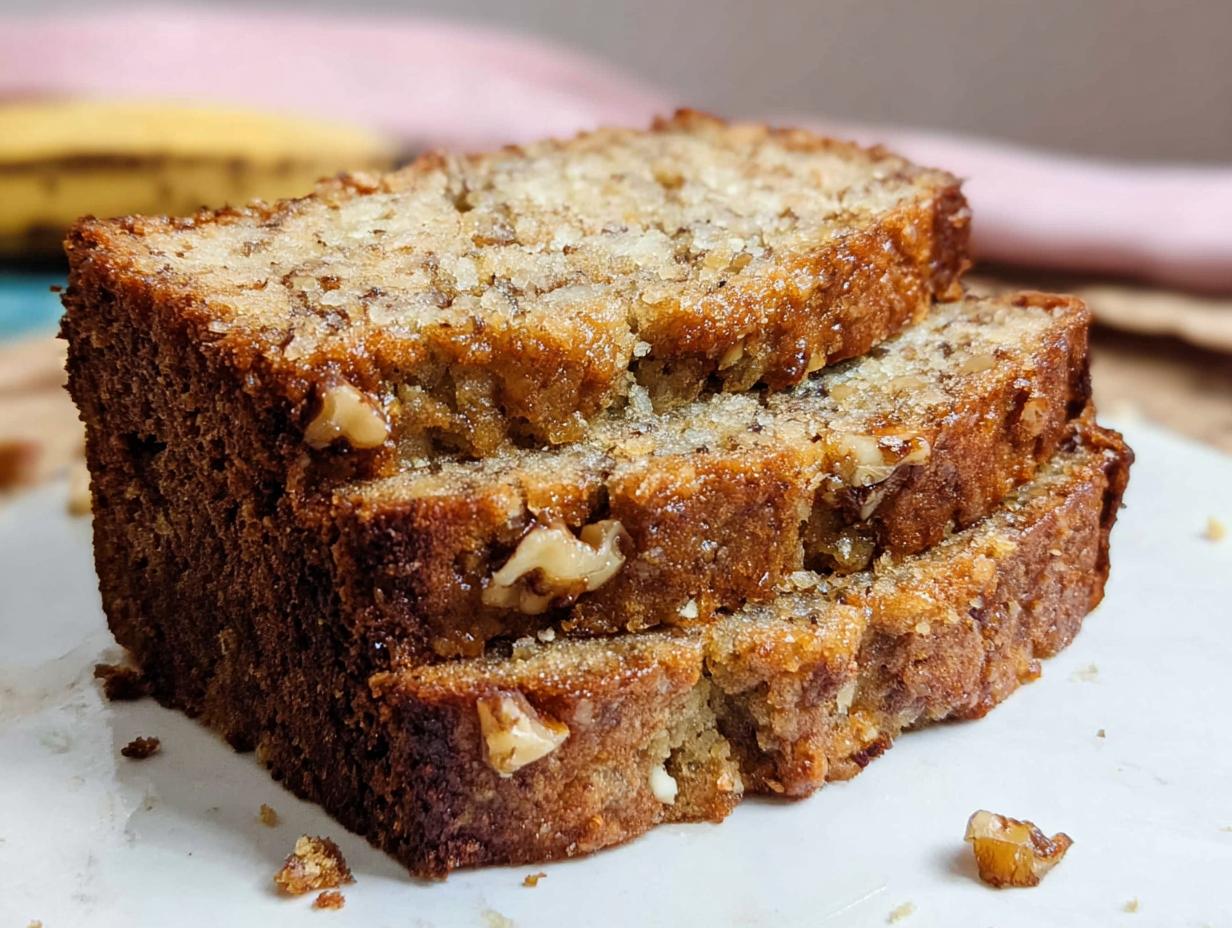
Oh, you just can’t beat that feeling when the oven starts warming up and that sweet, comforting smell starts to drift through the house, can you? That’s why I keep this Banana Nut Bread with Walnuts recipe taped right next to my spice rack. I first nailed this down when I was living in that tiny Brooklyn apartment a few years back. It was this rainy Saturday, and the smell of almost-too-ripe bananas mixed with toasting walnuts was so strong it actually pulled my neighbors right to my tiny door! I was actually thinking about all the cool wild herbs I’d been finding nearby—that cozy aroma just makes you want to connect, you know? This recipe is my go-to for a loaf that stays unbelievably moist and is just begging to be sliced up and shared.
Why This Banana Nut Bread with Walnuts Recipe Stands Out
Honestly, there are a million banana bread recipes out there, but this one nails that perfect balance every single time. It’s why I always turn back to it, especially when I need something quick for my city friends.
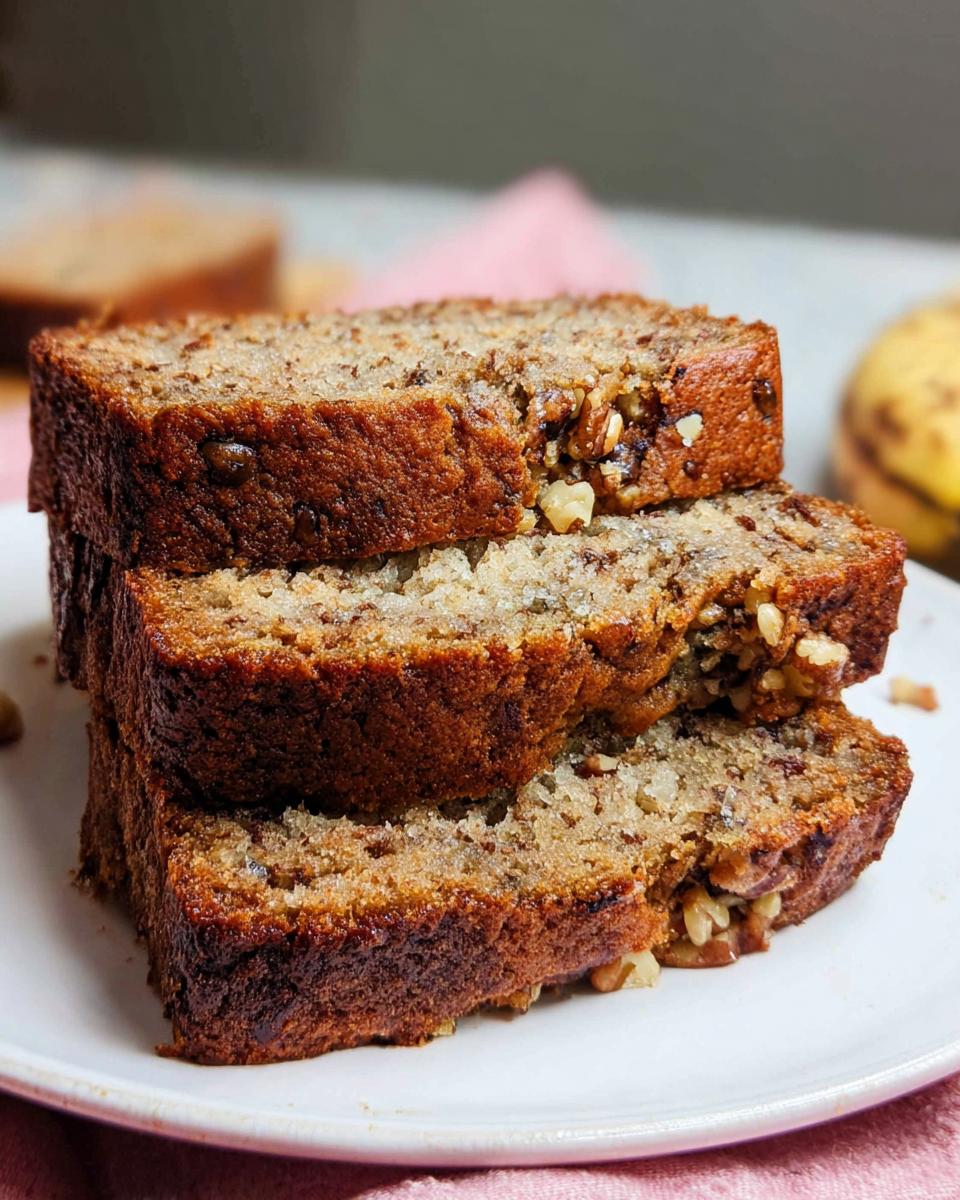
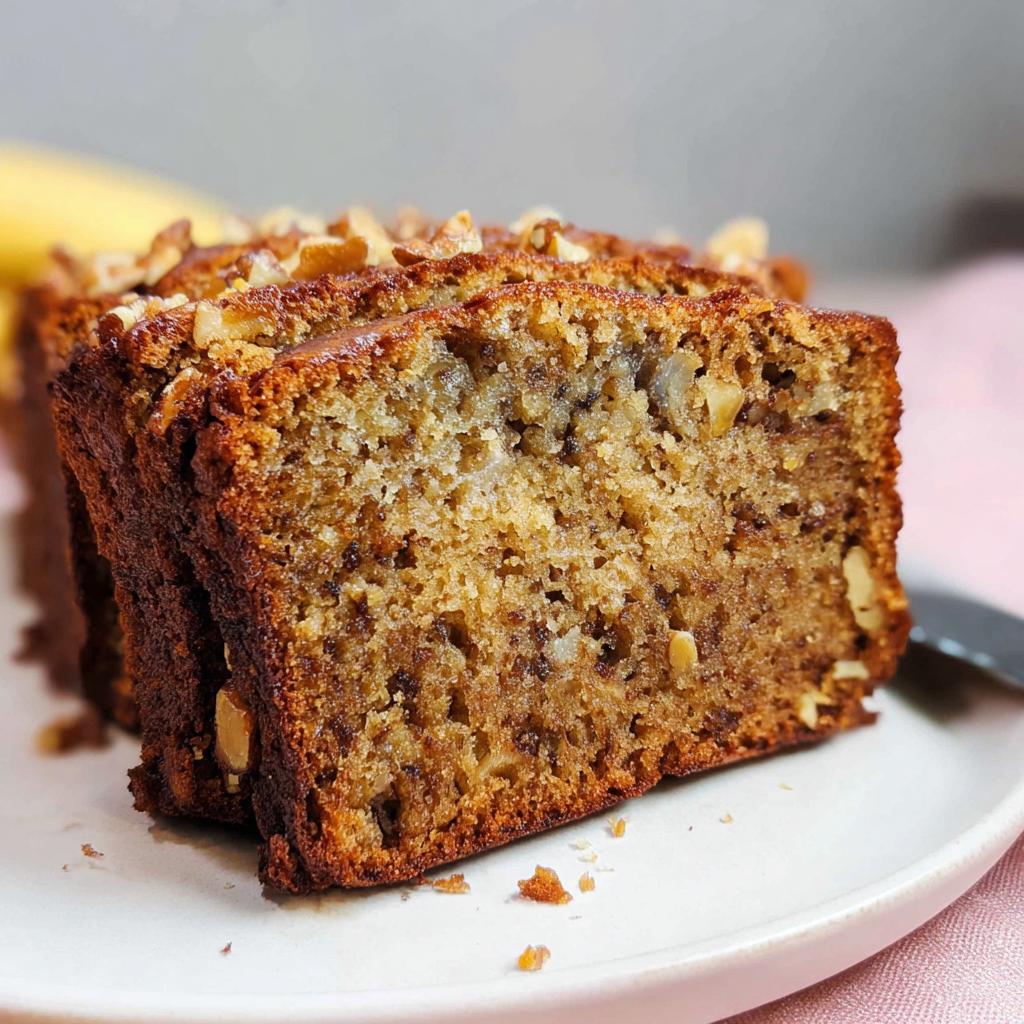
- It’s unbelievably moist—seriously, it stays soft for days.
- That perfect, satisfying crunch from the walnuts is non-negotiable for me.
- It comes together fast, making it the ultimate coffee time treat.
Achieving Maximum Moisture in Your Banana Nut Bread
The secret sauce here is using oil instead of just butter. Oil coats the flour particles better than solid fat, locking in all that moisture from the super-ripe bananas. Trust me, skipping the butter in the batter keeps this loaf from getting dry!
Gathering Ingredients for Perfect Banana Nut Bread with Walnuts
Okay, let’s talk essentials! You absolutely need to measure carefully here, but don’t stress—we’re keeping this straightforward. The biggest thing? Make sure those bananas look like they’ve had a rough life, brown spots everywhere! The riper they are, the sweeter and moister your bread will be. When you’re ready to bake, check out these handy tips on what to look for in great banana bread.
Here is exactly what you need for two beautiful loaves:
Dry Ingredients
- 2 cups all-purpose flour (that’s about 240 grams)
- 1.5 teaspoons baking soda
- 1 pinch salt
Wet Ingredients and Add-ins
- 1 cup granulated sugar (198 g)
- 0.5 cup vegetable oil (99 g)
- 2 large eggs
- 1 teaspoon vanilla extract
- 4 medium ripe bananas, mashed (aim for about 1⅓ cups total)
- 1 cup coarsely chopped walnuts (113 g)
Essential Equipment for Your Banana Nut Bread with Walnuts
You don’t need a fancy stand mixer or professional gadgets for this recipe, which is another reason I love it! We’re keeping things simple so you can get that delicious banana nut bread into the oven without any fuss. Having the right tools just makes the process smoother, meaning less chance of spills and easier cleanup later.
Here’s the short list of what you’ll need to pull off these two fantastic loaves:
- A medium bowl for your dry stuff.
- One large bowl—this is where the magic happens with the wet ingredients.
- Two 8×4-inch loaf pans. If you only have one, that’s fine, we adjust the time later!
- A wire rack for cooling. You have to let them cool properly, otherwise, they steam themselves soggy.
Step-by-Step Instructions for Your Crunchy Walnut Loaf
Alright, time to bring this batter together! You’re looking to create a wonderfully moist loaf, and the order of operations is super important here—we don’t want tough bread! Follow these steps exactly, and you’ll easily get two gorgeous, crunchy walnut loaf beauties ready for slicing.
- First thing’s first: Get that oven cranked up to 350 degrees F. Now, grab your two 8×4-inch loaf pans, grease them up really well, and set them aside. Preparation is half the battle! If you need more general tips on foolproof cooking timelines, check out my guide on how to make dinner ideas foolproof!
- Grab your medium bowl and give the dry stuff a good, vigorous whisk: flour, baking soda, and that little pinch of salt. Whisking them knocks out any lumps.
- In your big bowl, whisk the sugar, oil, eggs, and vanilla until they look happy and combined. Then, gently stir in those mashed-up bananas.
- Time to combine! Dump your dry flour mixture into the wet banana mixture. Stir it *just* until everything blends together—stop mixing right when the streaks disappear! We don’t want to overwork this.
- Now, using a rubber spatula (this is key!), gently fold in those chopped walnuts. We want them distributed, not beaten into the batter.
- Divide that beautiful batter right down the middle between your two prepared pans.
- Bake these loaves for about 35 to 45 minutes. Here’s a pro tip: If the tops start looking too dark before the center is set, just loosely drape a piece of aluminum foil over them. That keeps things from burning while the inside finishes cooking.
- When a thin knife comes out clean from the center, they are done! Let them chill out in the pans for a full 10 minutes before carefully turning them out onto a wire rack to completely cool down.
Tips for Mixing the Banana Nut Bread with Walnuts Batter
Listen, this is where a lot of people accidentally make their bread tough! When you add the dry ingredients to the wet—even though we are already using oil to help—you have to be disciplined. Mix only until the flour vanishes. Seriously, if you see a few tiny lumps, leave them! Overmixing develops the gluten in the flour way too much, and that gives you a chewy or rubbery quick bread instead of that light, tender crumb we are aiming for.
Baking Tips for the Best Banana Nut Bread with Walnuts
Baking is more science than art sometimes, especially when you’re trying to get that perfect texture in a quick bread. The key to avoiding a dry loaf is all about watching the oven like a hawk and knowing exactly when to pull it out. You definitely don’t want to cook it a minute too long! If you’re looking for general oven wisdom that applies everywhere, I wrote down some great settings and temperature secrets over in my guide on ultimate dinner ideas guide.
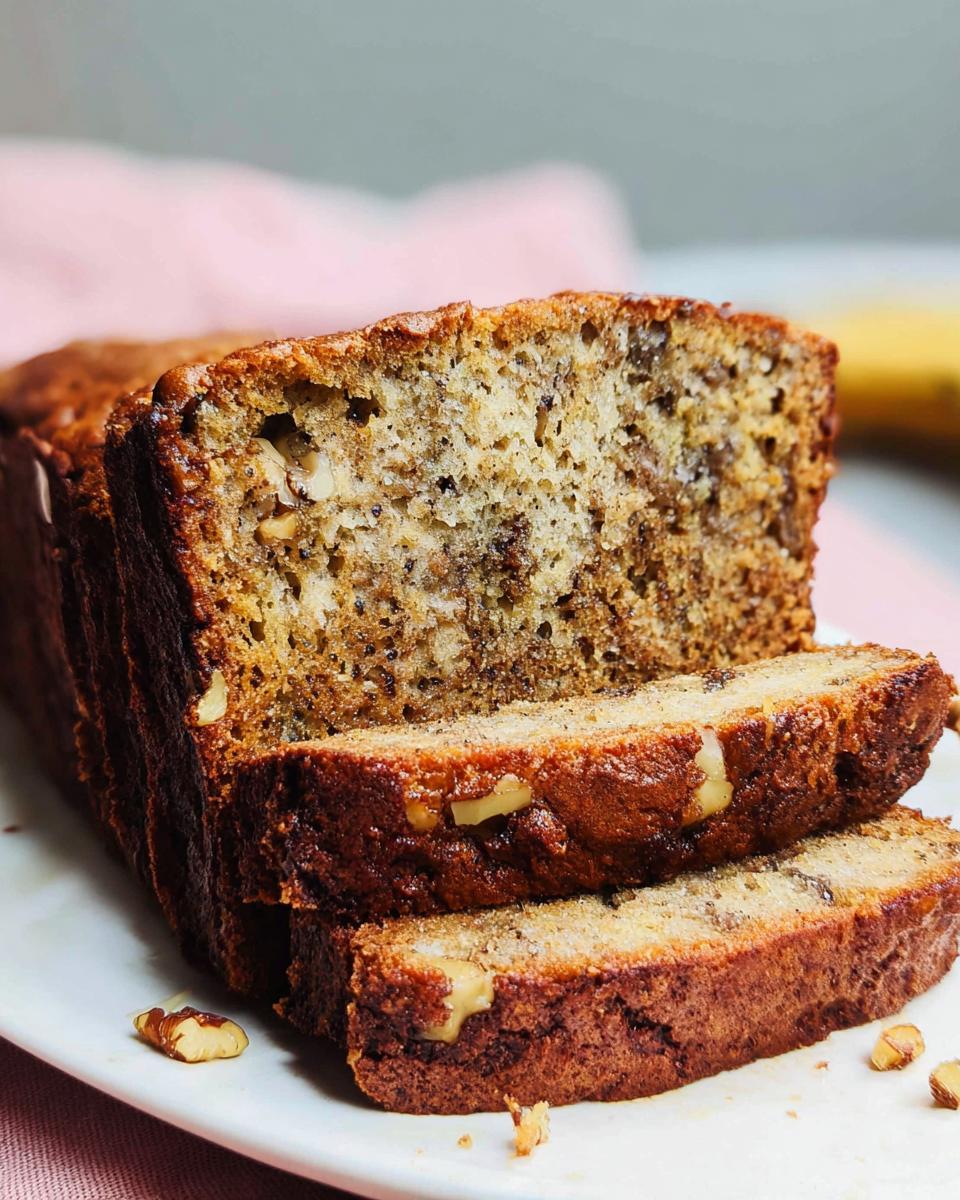
Always rely on your thin knife test, not just the visual appearance. The knife needs to come out with just a few moist crumbs clinging to it—that means you hit the sweet spot right before it dries out!

Adjusting Baking Time for Different Pan Sizes
If you only have that classic single 9-inch loaf pan, no sweat, but you have to adjust! Since the batter is piled higher, the heat struggles a bit more to reach the center safely. You’ll need to tack on extra time—I’d start checking around the 55-minute mark, but honestly, it might need closer to an hour depending on your oven. Just remember that aluminum foil trick if the top is getting too dark before the middle is safe to eat!
Ingredient Notes and Substitutions for Banana Nut Bread with Walnuts
I know sometimes we look in the pantry and realize we are short on one thing or another. That’s why I always keep detailed notes about swapping ingredients for my quick breads! Walnuts are traditional, yes, but use whatever you have. Pecans make an amazing, slightly smoother flavor, or you could even use almonds or hazelnuts if that’s what you prefer. If you just skip the nuts entirely, that’s fine too!
Now, about those bananas—this is critical for the ‘Ingredient Substitute’ aspect of sweetness. You simply cannot rush the ripeness here. If your bananas are still yellow, they won’t give you the sugar or the moisture you need. You are looking for bananas that are heavily spotted with brown, maybe even nearly black! I’ve even used bananas that I froze last week after they got too ripe; just let them thaw completely before you mash them up.
Serving Your Banana Nut Bread with Walnuts as Cozy Fall Baking
This bread is the absolute definition of cozy fall baking, even if you make it in the middle of summer! The aroma alone is worth the effort, instantly making your house feel warm and inviting. I love slicing a thick piece while it’s still slightly warm—don’t forget a smear of salted butter melting right into the crumb.

It’s the perfect companion for your morning coffee or your afternoon break. These slices are fantastic for grabbing on your way out the door, making them the ultimate grab-and-go coffee time treats. Truly, nothing beats watching the steam curl off a fresh slice!
Storage and Make-Ahead Tips for Banana Nut Bread with Walnuts
The best part about quick breads like this is that they actually get better over the next day or two—if you can keep them around that long! Since this recipe makes two loaves, you’ll definitely want to know how to stash one away for later. I’ve got my tried-and-true methods for keeping these loaves fresh, whether you plan to eat them tomorrow or next month.
If you are eating it within a few days, just let the bread cool *completely* first. That’s super important; if you wrap it warm, it steams itself and gets gummy. Once it’s totally cool, wrap it tightly in plastic wrap. I like a double layer just to be safe! Keep it on your counter at room temperature, and it should stay delicious for about 5 days. Honestly, they rarely last that long around here.
If you are planning ahead—which I totally recommend, because who doesn’t love finding a ready-made treat—you absolutely have to freeze them! For successful freezing, follow my two-step wrap system, which is great for locking out freezer burn. Check out my tips on meal prep for keeping things fresh long-term!
First, wrap the cooled loaf tightly in plastic wrap. Then, wrap that plastic-wrapped loaf again, this time completely in aluminum foil. This double barrier is your best defense. You can freeze them like this for up to three months. When you’re ready to eat one, just pull it out and let it thaw on the counter for a few hours!
Frequently Asked Questions About Banana Nut Bread with Walnuts
I get so many messages from bakers asking for just a little extra clarification on this recipe, especially when they’re serving it up! It’s the perfect scenario for quick fixes and advice so your loaf comes out exactly how you picture it—moist, tender, and fantastic with your tea. For more general baking advice and troubleshooting, always feel free to browse my posts on how to make salad recipes; a lot of the heat guidance applies to quick breads too!
Can I make this banana nut bread without walnuts?
Oh, absolutely! You definitely don’t have to stick to just walnuts, and you can certainly skip the nuts altogether if you need a nut-free treat. In the ingredient notes, I mention that pecans are a wonderful swap, and almonds or even cashews work great if you like a different crunch. If you have any nut allergies or nobody likes them, just leave them out. The bread is still wonderfully moist and sweet just on its own!
What is the best way to ripen bananas quickly for the best flavor?
This is one of my favorite tricks, especially when I’m craving that great flavor but my bananas look too green! If you need ripe bananas for this bread ASAP, you can cheat Mother Nature a little. Put your unpeeled bananas directly onto a baking sheet and pop them in a 300-degree oven for about 20 minutes. You’ll see their skins turn totally black, but inside they become super soft and sweet. Let them cool down before you peel and mash them in! This concentrates the sugar, which is great for maximum flavor.
How do I prevent my banana nut bread from sinking in the middle?
Sinking bread is usually a sign of one of two things, and it’s an easy fix once you know why! Nine times out of ten, it means the bread wasn’t done baking when you pulled it out. Remember how I said the knife should come out with *moist crumbs*? If it’s wet, it will collapse as it cools. Another sneaky culprit is opening the oven door too early, say before the 30-minute mark. That sudden drop in temperature makes the structure fall before it’s set. If you keep that oven shut until the time is nearly up, you’ll get that perfect rise!
Sharing Your Banana Nut Bread with Walnuts Creations
Now that you’ve got this incredible, comforting loaf cooling on the rack, the best part is sharing the joy! I love hearing about how you folks put your own twist on this classic. Seriously, did you add a little spice? Did you try those pecans instead of walnuts? Tell me everything!
If you get a chance to whip up this banana nut bread, please snap a picture and tag me! I’m always looking for fresh ideas, especially if you decide to bring in some of your own hyperlocal finds!
Drop a comment below and let me know how the baking went, or if you have any brilliant ideas for pairing this wonderful bread, maybe with some specialty coffee? I love connecting with fellow bakers, so don’t hesitate to reach out via my contact page. Happy baking, friends!
Banana Nut Bread with Walnuts
Ingredients
Equipment
Method
- Preheat your oven to 350 degrees F. Grease two 8×4-inch loaf pans and set them aside.
- In a medium bowl, whisk together the flour, baking soda, and salt. Set this mixture aside.
- In a large bowl, whisk together the sugar, oil, eggs, and vanilla extract. Add the mashed bananas and stir gently to combine them with the wet ingredients.
- Add the flour mixture to the wet ingredients and stir until everything is completely blended. Use a rubber spatula to fold in the chopped walnuts.
- Divide the batter evenly into the two prepared loaf pans.
- Bake for 35 to 45 minutes, or until a thin knife inserted into the center of the loaves comes out clean. If the tops of the loaves start to get too dark before the center is done, cover them loosely with aluminum foil.
- Allow the bread to cool in the pans for 10 minutes. Then, turn the loaves out onto a wire rack to cool completely.
Nutrition
Notes
Tried this recipe?
Let us know how it was!
Urban Forager & Hyperlocal Ingredient Specialist
My Brooklyn apartment balcony tells my story: vertical gardens packed with wild edibles, fermentation crocks bubbling with city-foraged greens, and the constant hum of dehydrators preserving herbs I’ve collected from unexpected urban corners. What started as weekend escapes to my aunt’s upstate farm during my Columbia botany studies turned into something bigger after I earned my Urban Ecology Master’s from The New School.
Instead of following traditional academic paths, I discovered that cities are actually amazing edible ecosystems—rooftop weeds, park-edge wild greens, vacant lot treasures that perfectly complement keto eating. Who knew that some of the best low-carb foods were growing right under our noses in Manhattan?
My recipe collections celebrate city seasons: spring dandelions and plantains, summer purslane from rooftops, autumn rose hips from community gardens, winter wild onions and cress. I’m certified through the New York Mycological Society and trained by Brooklyn Botanic Garden to forage safely and ethically. Over 180 of my recipes feature at least one urban-foraged ingredient—from sidewalk plantains to sumac berries and wild mint thriving in vacant lots.
My “Metropolitan Wild” column went viral after my dandelion coffee substitute hit social media. Now my weekend “Urban Wild Walks” through Central Park and Prospect Park sell out faster than I can schedule them. I teach city dwellers to spot safe, keto-friendly wild foods hiding in plain sight.
Currently, I’m partnering with local chefs to bring urban foraged elements to restaurant menus and developing an app that maps safe foraging spots across all five boroughs. Evenings find me tending my sourdough starters, pressing flowers for natural dyes, or weaving baskets from willow branches I collect during park maintenance.
Cities are wild food sanctuaries hiding in plain sight—keto eating becomes urban rebellion when you realize how much free, perfect nutrition grows right under our feet.