
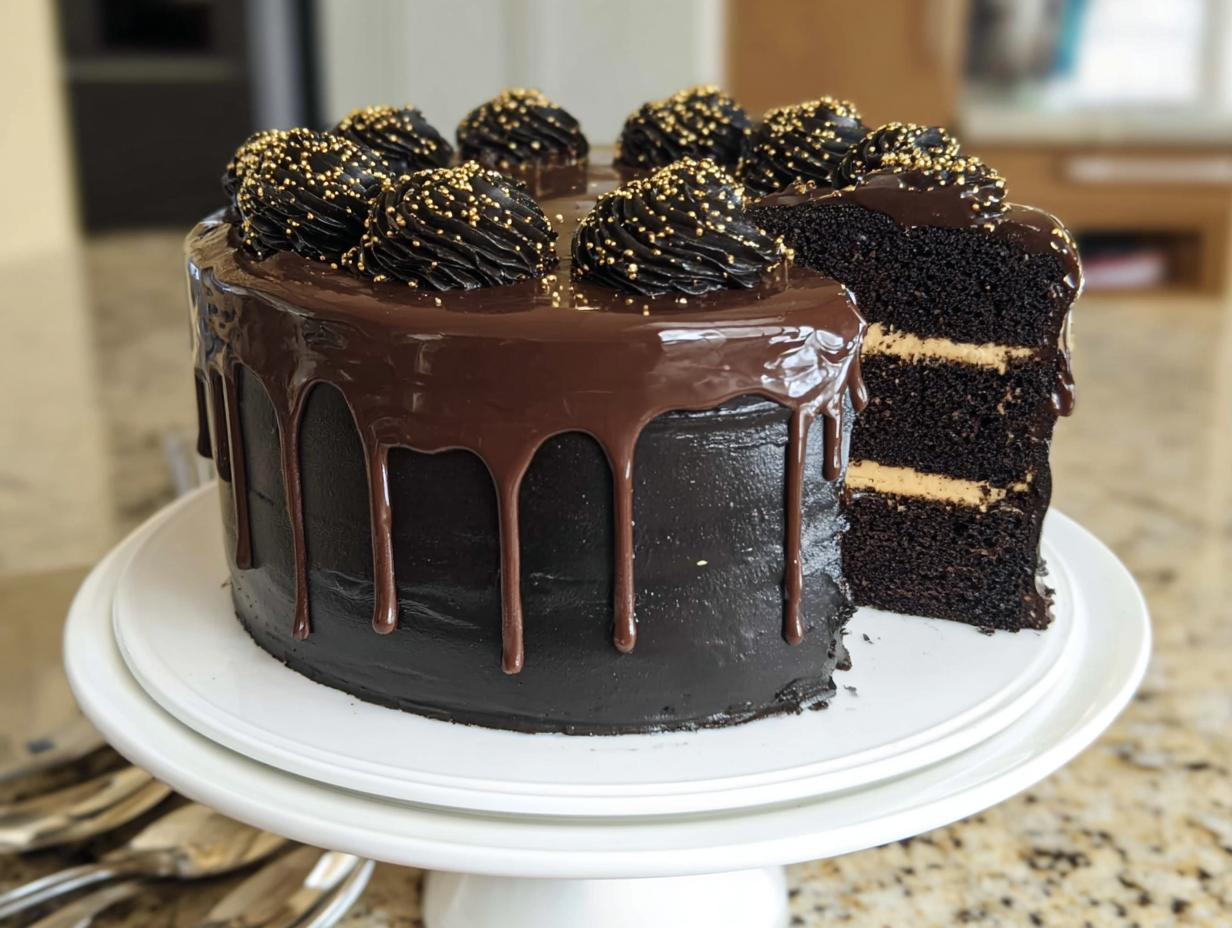
If you’re looking to truly wow a crowd, you can’t beat a show-stopping dessert, right? Forget boring sheet cakes! I’m here to tell you that creating an incredibly elegant Black and Gold Drip Cake right in your own kitchen is totally achievable. I remember the first time I tried one for my best friend’s birthday—carefully crafting that velvety chocolate ganache and making it cascade down the sides? I felt like a real artist! When I revealed that cake, black layers gleaming with gold accents, her eyes lit up. It wasn’t just dessert; it was a moment. Now, every time I bake this, I get that same rush of happy celebration.
Why This Black and Gold Drip Cake Recipe Stands Out
You might think a cake this stunning requires professional magic, but trust me, it doesn’t! This recipe gives you a real showstopper without needing a pastry degree. We focus on flavor just as much as the looks. You can check out loads of visual ideas over at my recipe index if you need a boost!
- Incredible flavor from deep, dark black cocoa.
- That show-stopping drip effect is easier than you think.
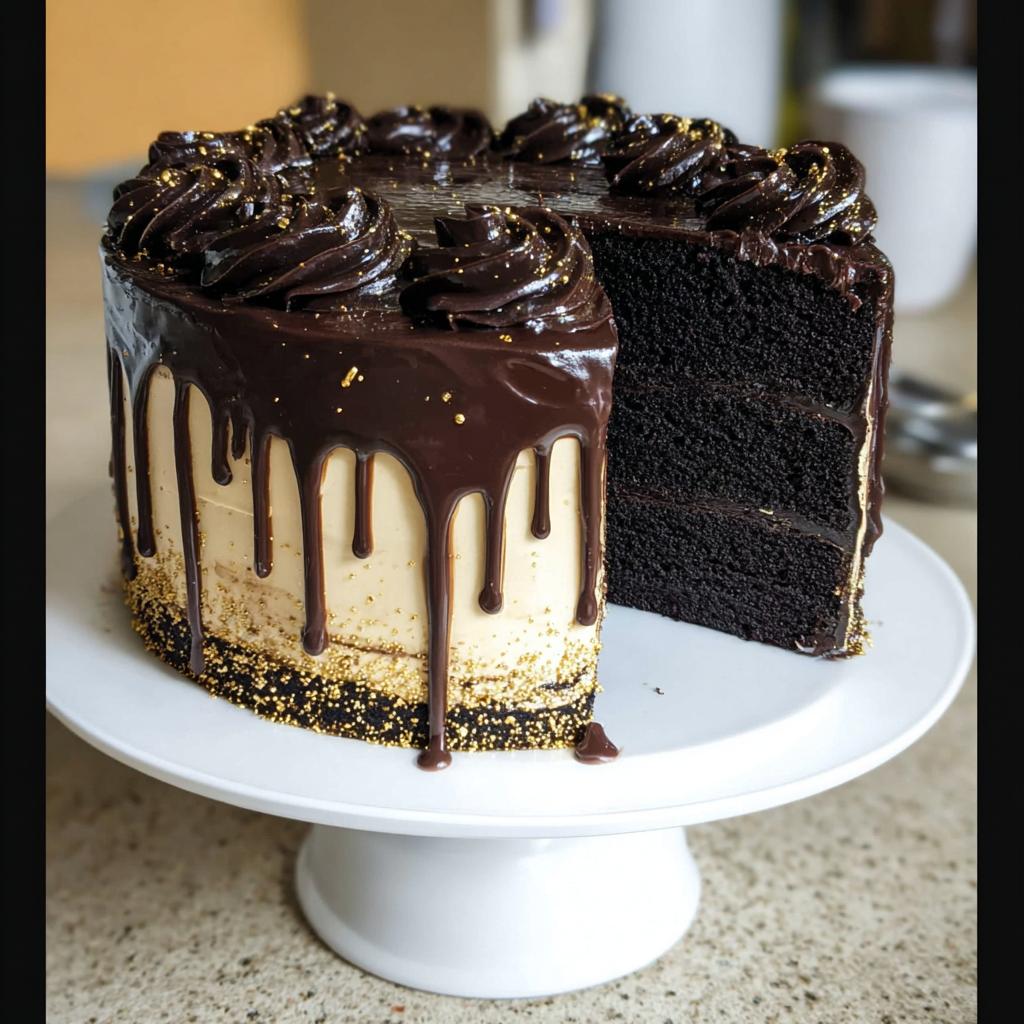
- Perfect layers that stack up beautifully for stability.
Achieving the Perfect Black and Gold Drip Cake Aesthetic
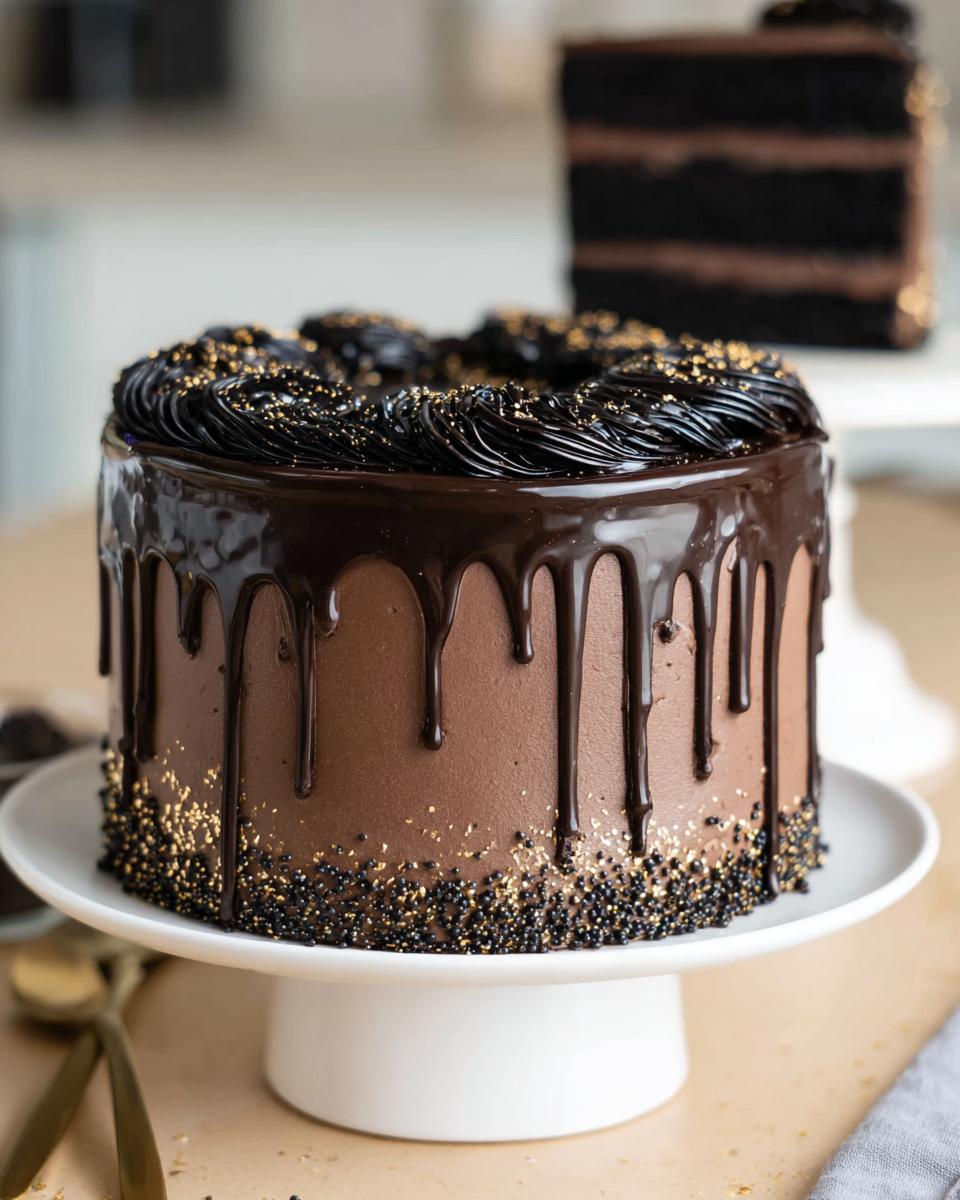
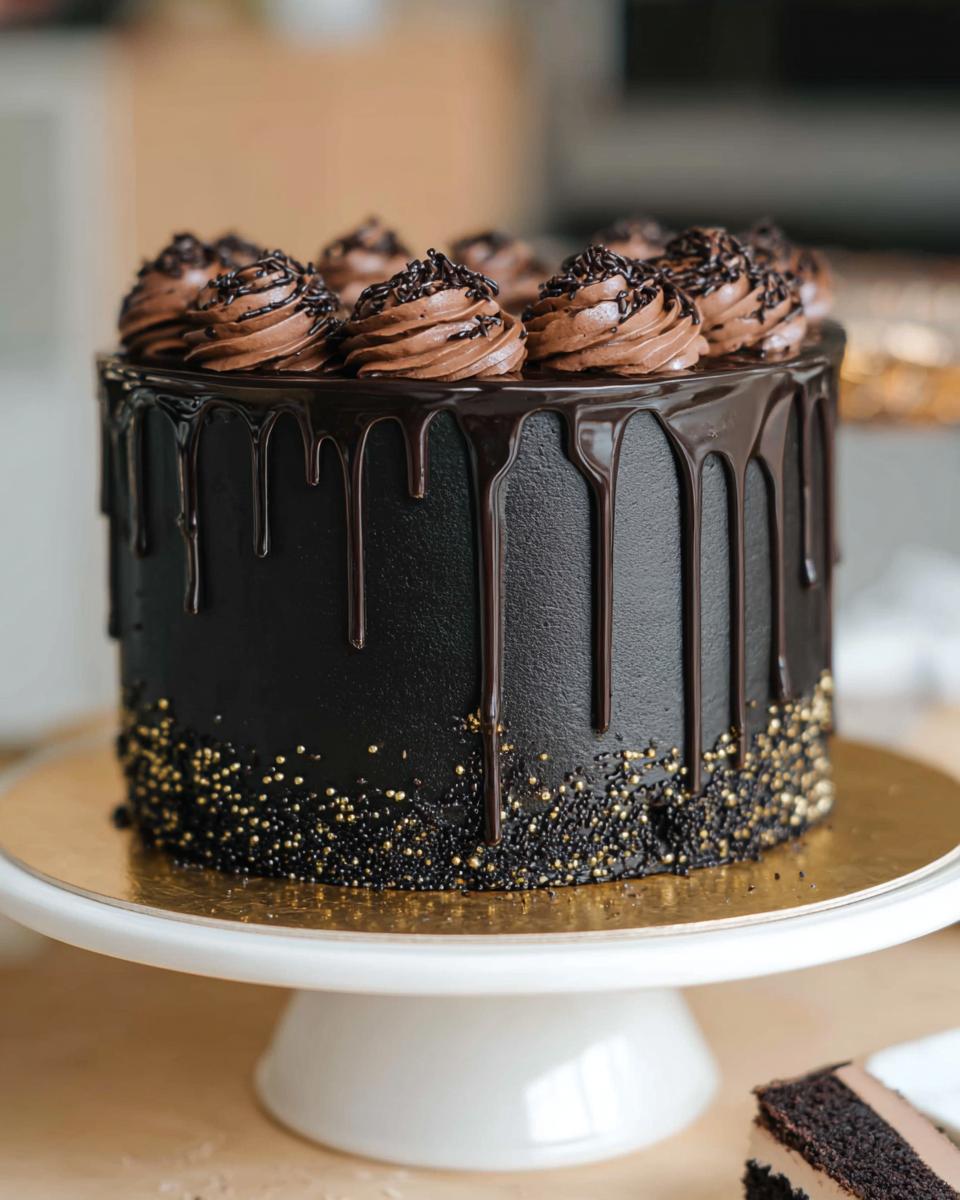
Listen, the look of this cake is half the fun! That deep, almost inky black from the black cocoa powder is the perfect canvas. It makes the gold drip just pop off the sides, creating so much drama and elegance. It’s rich, it’s moody, and it screams celebration. You’ll feel like you’re putting the finishing touches on a jewel!
Essential Equipment for Your Black and Gold Drip Cake
Okay, before we start mixing, let’s chat about gearing up. Having the right tools makes this less about struggling and more about just having fun! You technically don’t need a ton of fancy stuff, but a few key items will make all the difference when you’re trying to get those sharp edges and smooth finishes. Make sure you have your trusty mixer ready to go!
Special Tools for Buttercream Drip Application
This is where you stop fighting your ingredients and start controlling the art! A spinning cake stand is absolutely your best friend—seriously, it lets you crank that spatula around without bumping the cake. Also, grab a bench scraper. It’s that flat metal or plastic tool that smooths the outside buttercream perfectly flat. If you want that clean, sharp look before the drip goes on, these two tools are non-negotiable for me!
Ingredients for the Black and Gold Drip Cake Components
Now we get to the fun part—gathering our treasures! Just like baking any great dessert, the quality of what you start with really determines the final outcome. I’ve broken down everything you need into three main groups: the super rich cake layers, that decadent buttercream, and finally, the shiny black drip that makes the whole thing sing. Make sure your butter and eggs for the frosting are actually at room temperature; it makes creaming them so much easier later on!
Black Cocoa Cake Layers Ingredients
These ingredients guarantee an intensely dark, moist cake that stands up perfectly to stacking and frosting. Don’t substitute that black cocoa; it’s what gives us that signature, dark base!
- 2 cups (260g) all-purpose flour
- 2 cups (400g) granulated sugar
- 3/4 cup (75g) black cocoa powder
- 2 tsp baking powder (8g)
- 1 1/2 tsp baking soda (9g)
- 1 tsp fine salt (6g)
- 1 cup (240g) warm water
- 1 cup (240g) buttermilk (room temperature)
- 1/2 cup (110g) vegetable or canola oil
- 2 large eggs (room temperature, 112g)
- 2 tsp vanilla extract or vanilla bean paste (8g)
Black Dark Chocolate Buttercream Frosting Ingredients
We want this frosting smooth as silk under the drip, so make sure that melted chocolate is fully cooled before you toss it in! Also, please, please sift that powdered sugar—it saves so much heartache later when you’re trying to beat out lumps.
- 2 cups (454g) unsalted butter (room temperature)
- 1 cup (100g) black cocoa powder
- 1 tsp vanilla extract or vanilla bean paste (4g)
- 1/2 tsp fine salt (3g)
- 4 cups (500g) powdered sugar
- 1/2 cup (120g) heavy whipping cream (room temperature)
- 1 cup (180g) semi-sweet chocolate chips (melted and cooled)
Black Chocolate Drip Ingredients
This is our star player! You need a nice, fluid ganache here so it drips beautifully but also sets up firm enough to hold decorations. The key is heating that cream until it’s steaming hot—just shy of boiling.
- 1/2 cup (95g) semi-sweet chocolate chips
- 1/3 cup (80g) heavy whipping cream (room temperature)
- 1 squirt black gel food coloring
Step-by-Step Instructions to Bake the Black and Gold Drip Cake
Alright, time to actually bake this thing! I know looking at the ingredient list seems like a project, but once you get going, the cake layers come together shockingly fast. Don’t forget to check out some amazing frosting inspiration I found over at my keto dessert section while you’re waiting for things to bake. We mix wet into dry, and suddenly, you have incredibly dark cake layers ready for the oven!
Baking and Preparing the Black and Gold Drip Cake Layers
First up, get that oven hot—350 F/175 C. Prep those 8-inch pans really well! Whisk your dry stuff (flour, sugar, cocoa) in one bowl, and mix your wet stuff (buttermilk, oil, warm water) in another. Then, pour the dry into the wet, and mix just until you don’t see any streaks. If you have a kitchen scale, weigh your pans as you pour the batter in—it’s my secret trick for layers that bake totally flat! Bake about 25 minutes, and cool completely before slicing. For even more insight on getting that perfect drip texture, check out the tips on this great resource!
Making the Black Dark Chocolate Buttercream Frosting
This frosting needs some muscle, so stand mixer on medium speed to start, beating that room-temp butter until it’s smooth. Add your cocoa, vanilla, and salt next. Here’s the crucial part: add your powdered sugar and cream slowly, on the absolute lowest speed, so you don’t end up wearing half of it! Mix that cooled melted chocolate in last. Once it’s perfect, slap plastic wrap right down onto the surface of the frosting—this keeps that black color from getting crusty while you chill the cake.
Assembling and Crumb Coating Your Black and Gold Drip Cake
This is where all that baking pays off! Stacking the layers is so satisfying, especially when they’re perfectly flat cakes. Remember to put a small dab of frosting down on your cake board first so that bottom layer doesn’t go sliding off when you start working—that’s a rookie mistake I only made once! We’re building this beauty up slowly, making sure it’s strong enough to hold this dramatic look.
Achieving Smooth Sides on Your Black and Gold Drip Cake
To get those sharp, professional sides before applying the drip, you must embrace the chill! First, put on a very thin crumb coat of buttercream and stick it in the fridge for about 30 minutes until it’s totally firm. This locks in all those loose crumbs. Then, apply your final, thicker layer of frosting. Once that’s on, chill it again until the buttercream is hard to the touch. This firmness is what lets you use that bench scraper to get those sleek, flat walls. It’s the secret to any great Drip Cake!
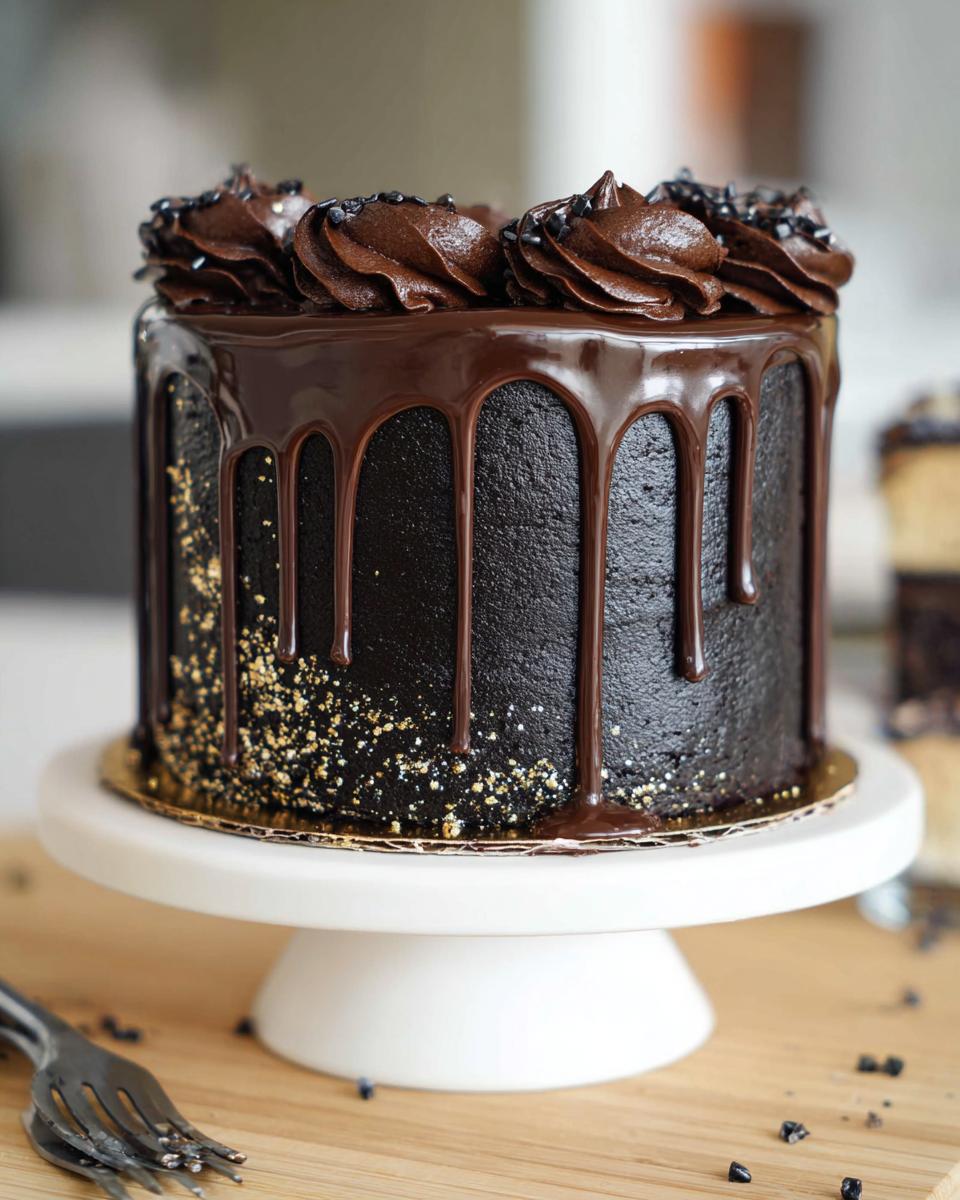
Mastering the Chocolate Drip for Your Black and Gold Drip Cake
Okay, now for the moment everyone waits for: the drip! Getting our chocolate ganache just right is everything here. You heat that heavy cream until it’s steaming hot—definitely just starting to bubble—and pour it right over those black chocolate chips. Let it sit for a minute, then stir slowly until it’s perfectly smooth and add that black gel coloring. The absolute key is the temperature check before application. You want the ganache to be slightly warm, not piping hot! If it’s too hot, it just runs right down to the cake board, and we don’t want a puddle!
Once it’s cooled down just a bit, grab a spoon or, if you’re feeling brave, a small squirt bottle. Start spooning tiny amounts right on the edge of the top layer, gently guiding it until it starts to fall. Don’t rush it! You can see some of my best drip attempts—and failures!—over in my trend spotting section. With practice, you’ll get that perfect, controlled cascade, which is the signature look of a gorgeous Buttercream Drip cake!
Decorating Your Black and Gold Drip Cake for a Party Theme
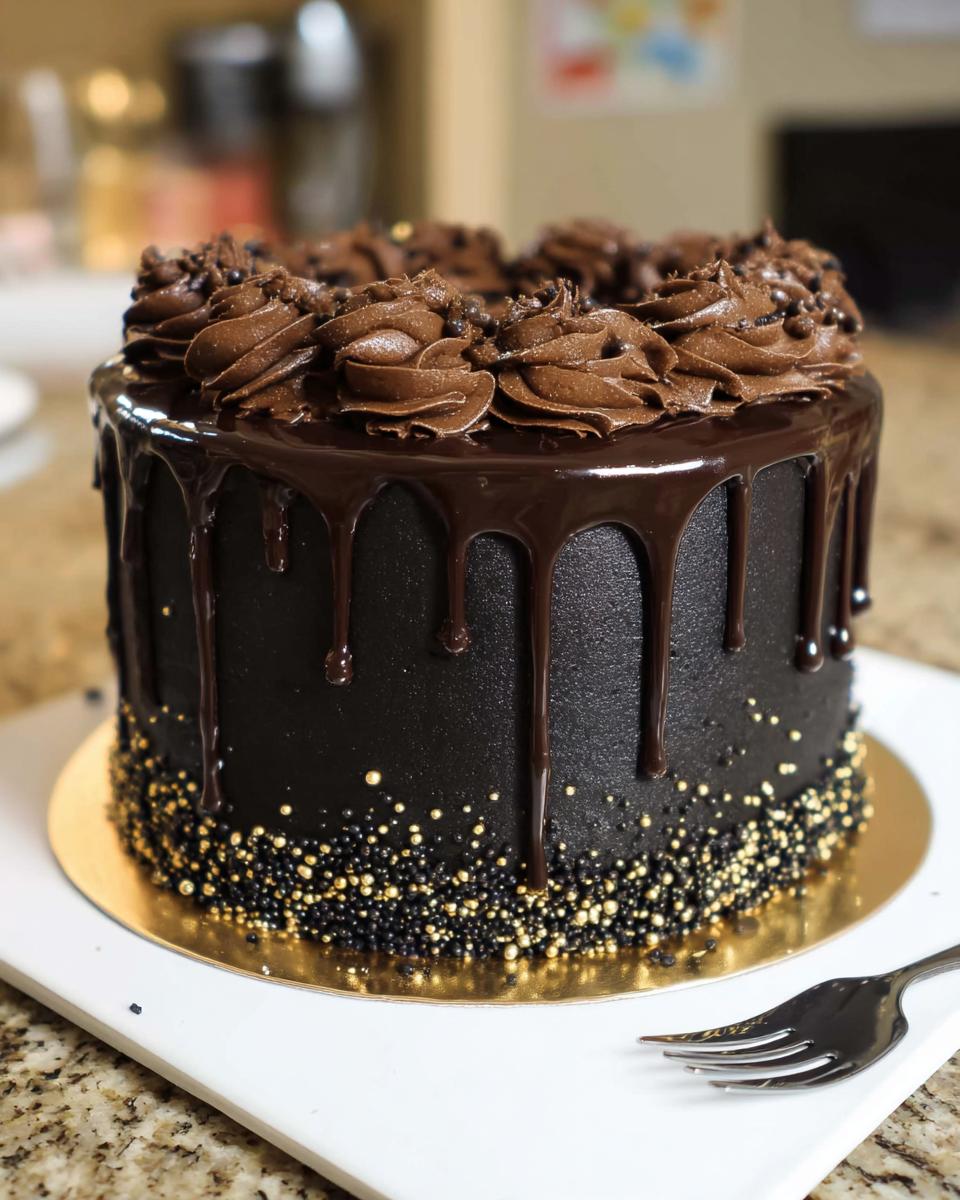
Phew! The chilling and the dripping are done, so now we make this masterpiece *sparkle*! This is where you lean into that glamorous Party Theme. Grab that open star tip and pipe some beautiful swirls right on top of the cake where the drip stops meeting the top surface. Don’t be shy!
Next, scatter on your black and gold sprinkles—make sure you have some metallic gold ones! Here’s the real magic: take edible gold paint or some gold luster dust mixed with a tiny bit of clear liquor, like vodka. Use a small brush to gently dab and paint those piped swirls. It catches the light perfectly. When you step back, you’ll see that deep black base dressed up beautifully in shimmering gold. It’s stunning, trust me!
Tips for a Perfect Black and Gold Drip Cake Every Time
I’ve made this stunning cake so many times now, and I’ve learned exactly where things can go sideways if you aren’t careful! These little secrets are what keep the process smooth for me, so you don’t have to waste time fixing mistakes. Before you even pull out the mixer, run through this checklist. For more general baking wisdom, I drop plenty of tips over at my about page!
First, make sure all your cold ingredients—especially the butter for the buttercream—are truly soft, but not melty. If your butter is too warm, the frosting gets soupy fast, and we need that body for a clean drip line. Second, always double-check the temperature of your chocolate drip right before you use it. If it’s too hot, it’ll melt your beautiful chilled buttercream, turning your sharp edges into a sad, melted mess!
Making This Black and Gold Drip Cake for New Year Cake Ideas
This dark and glamorous look is absolutely iconic for New Year Cake Ideas! If you are scaling this up for a big crowd, just bake more layers and use a larger cake board. Be sure you have heavier supports if you stack more than three layers high. For New Year’s Eve particularly, I love kicking up the gold even more by painting edible gold flakes onto the piped border instead of just using sprinkles—it looks like champagne bubbles freezing on the cake!
Storing and Serving Your Celebration Cake
Whew, the hard part is over, but we need to make sure this beauty lasts! Since this beauty has a rich buttercream and a chocolate ganache drip, it definitely needs a home in the fridge. Pop your finished cake into an airtight container—this keeps the frosting from absorbing fridge smells and protects those gorgeous gold decorations. You can keep it tucked away safely for about four days. When it’s party time, though, you MUST remember to pull it out about an hour beforehand.
That hour lets the buttercream soften up again just enough so it tastes creamy and luxurious, not hard and cold. If you need quick guidance on how to get in touch with me about any last-minute questions, check out my contact page! Enjoy every single slice!
Frequently Asked Questions About the Black and Gold Drip Cake
I know you must have questions! Anytime you’re working with such intense colors and drips, little worries pop up. Don’t stress! Most issues are easy fixes once you know the trick. Let’s knock out a few common ones so you can serve up that perfect Black and Gold dessert without a hitch.
Can I use regular cocoa powder instead of black cocoa in this Black and Gold Drip Cake?
You totally *can*, but here’s the heads-up: your cake won’t be that dramatic, inky black! Regular cocoa powder will give you a lovely dark brown cake, but you’ll lose the bold, striking contrast needed for that iconic Black and Gold Drip Cake look. Keep that black cocoa for the best aesthetic!
How do I keep the gold accents from running?
If you want those beautiful gold touches to stay put, ditch the water-based paint! Mix your edible gold luster dust with just a few drops of clear alcohol, like vodka. It evaporates super fast, bonding the gold to the frosting without making the surface wet, which stops any running or smearing.
What is the best way to store leftover Drip Cake?
This rich Drip Cake does best in the fridge. Keep any leftovers tucked away in an airtight container for up to four days. Just remember to take it out an hour before serving so the buttercream isn’t too firm!
Share Your Stunning Black and Gold Creations
Seriously, now it’s your turn to shine! I absolutely love seeing all the incredible desserts you all create in your kitchens inspired by these recipes. Once you’ve finished that final gold touch, please, please come on back here and drop a comment below telling me how it went!
Did you think the buttercream was easier than expected? Did decorating feel artistic? Let me know! And if you happen to snap a photo of that glamorous finished product—the dark layers paired with the shimmer—tag me on social media! I can’t wait to cheer you on and admire your artistry. Every successful bake deserves a little applause, so don’t be shy about rating the recipe using the five stars right underneath this section too. Happy baking, friend!
Black and Gold Drip Cake
Ingredients
Equipment
Method
- Preheat your oven to 350 F/ 175 C. Line and grease three, eight-inch cake pans, or four, seven-inch pans.
- Combine flour, sugar, black cocoa powder, baking powder, baking soda, and salt in a large bowl. Whisk together until combined.
- In a separate, large bowl, add warm water, buttermilk, oil, eggs, and vanilla extract. Stir to combine.
- Pour the dry ingredients into the wet ingredients. Mix by hand until fully incorporated. The batter will be thin.
- Divide the batter evenly between the cake pans and bake for 24-27 minutes. Use a kitchen scale to weigh the pans for even layers.
- Remove cake layers from the oven and let them cool in the pans for 10 minutes. Loosen the edges with an offset spatula and flip onto wire racks to finish cooling.
- Once cooled, level the top of each cake layer with a serrated knife. Wrap and freeze if making in advance.
- Beat butter on medium speed for 30 seconds until smooth.
- Add sifted black cocoa, vanilla extract, and salt. Mix on low until incorporated.
- Slowly mix in powdered sugar and heavy cream on low speed until combined.
- Mix in cooled, melted semi-sweet chocolate on low speed until desired consistency is reached.
- Add black gel food coloring for a deeper black shade. Cover frosting flush with plastic wrap to prevent crusting.
- Place semi-sweet chocolate chips in a heatproof bowl.
- Heat heavy cream in a heatproof bowl until steaming and just starting to bubble. Pour over chocolate chips.
- Let the mixture sit for 1-2 minutes. Add black gel food coloring, then stir slowly until smooth.
- Set aside and cool for about 10 minutes, until slightly warm to the touch.
- Stack and frost the cake layers on a cake board using a dab of frosting to secure the first layer.
- Add an even layer of buttercream between each cake layer with a large offset spatula.
- Spread a thin coat of frosting around the cake, covering the layers. Smooth with a bench scraper.
- Chill the cake until the frosting is firm to the touch (30 minutes in the fridge or 10 minutes in the freezer).
- Add a second, thicker layer of frosting and smooth with a bench scraper.
- Chill the cake again until the buttercream is firm (20 minutes in the fridge or 10 minutes in the freezer).
- Test the ganache consistency. Gently heat in the microwave for a few seconds if needed.
- Add drips to the chilled cake using a squirt bottle or spoon.
- Decorate as desired. Pipe swirls on top with an open star tip, and add gold and black sprinkles. Paint swirls with edible gold paint or a mixture of gold luster dust and clear liquor.
Notes
Tried this recipe?
Let us know how it was!
Urban Forager & Hyperlocal Ingredient Specialist
My Brooklyn apartment balcony tells my story: vertical gardens packed with wild edibles, fermentation crocks bubbling with city-foraged greens, and the constant hum of dehydrators preserving herbs I’ve collected from unexpected urban corners. What started as weekend escapes to my aunt’s upstate farm during my Columbia botany studies turned into something bigger after I earned my Urban Ecology Master’s from The New School.
Instead of following traditional academic paths, I discovered that cities are actually amazing edible ecosystems—rooftop weeds, park-edge wild greens, vacant lot treasures that perfectly complement keto eating. Who knew that some of the best low-carb foods were growing right under our noses in Manhattan?
My recipe collections celebrate city seasons: spring dandelions and plantains, summer purslane from rooftops, autumn rose hips from community gardens, winter wild onions and cress. I’m certified through the New York Mycological Society and trained by Brooklyn Botanic Garden to forage safely and ethically. Over 180 of my recipes feature at least one urban-foraged ingredient—from sidewalk plantains to sumac berries and wild mint thriving in vacant lots.
My “Metropolitan Wild” column went viral after my dandelion coffee substitute hit social media. Now my weekend “Urban Wild Walks” through Central Park and Prospect Park sell out faster than I can schedule them. I teach city dwellers to spot safe, keto-friendly wild foods hiding in plain sight.
Currently, I’m partnering with local chefs to bring urban foraged elements to restaurant menus and developing an app that maps safe foraging spots across all five boroughs. Evenings find me tending my sourdough starters, pressing flowers for natural dyes, or weaving baskets from willow branches I collect during park maintenance.
Cities are wild food sanctuaries hiding in plain sight—keto eating becomes urban rebellion when you realize how much free, perfect nutrition grows right under our feet.