
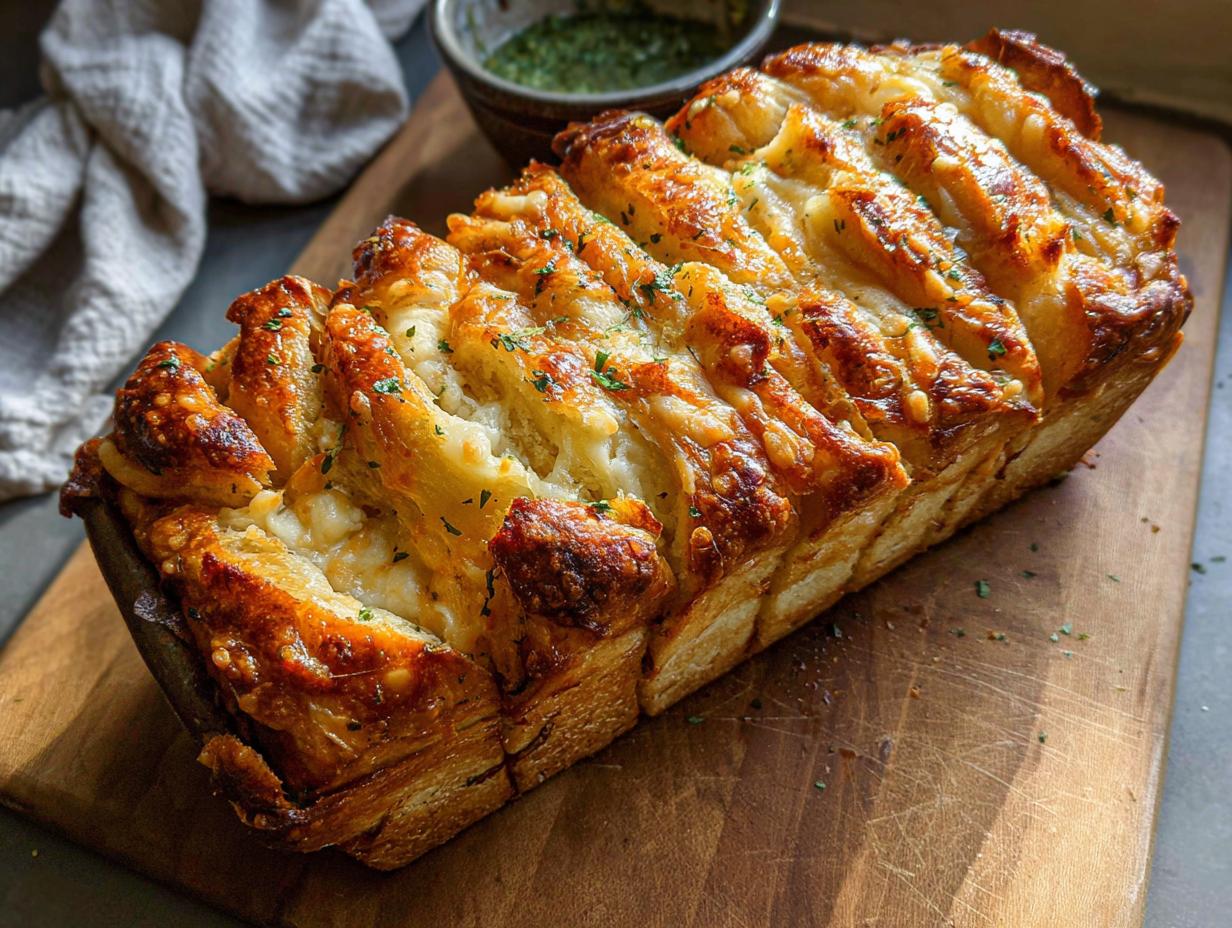
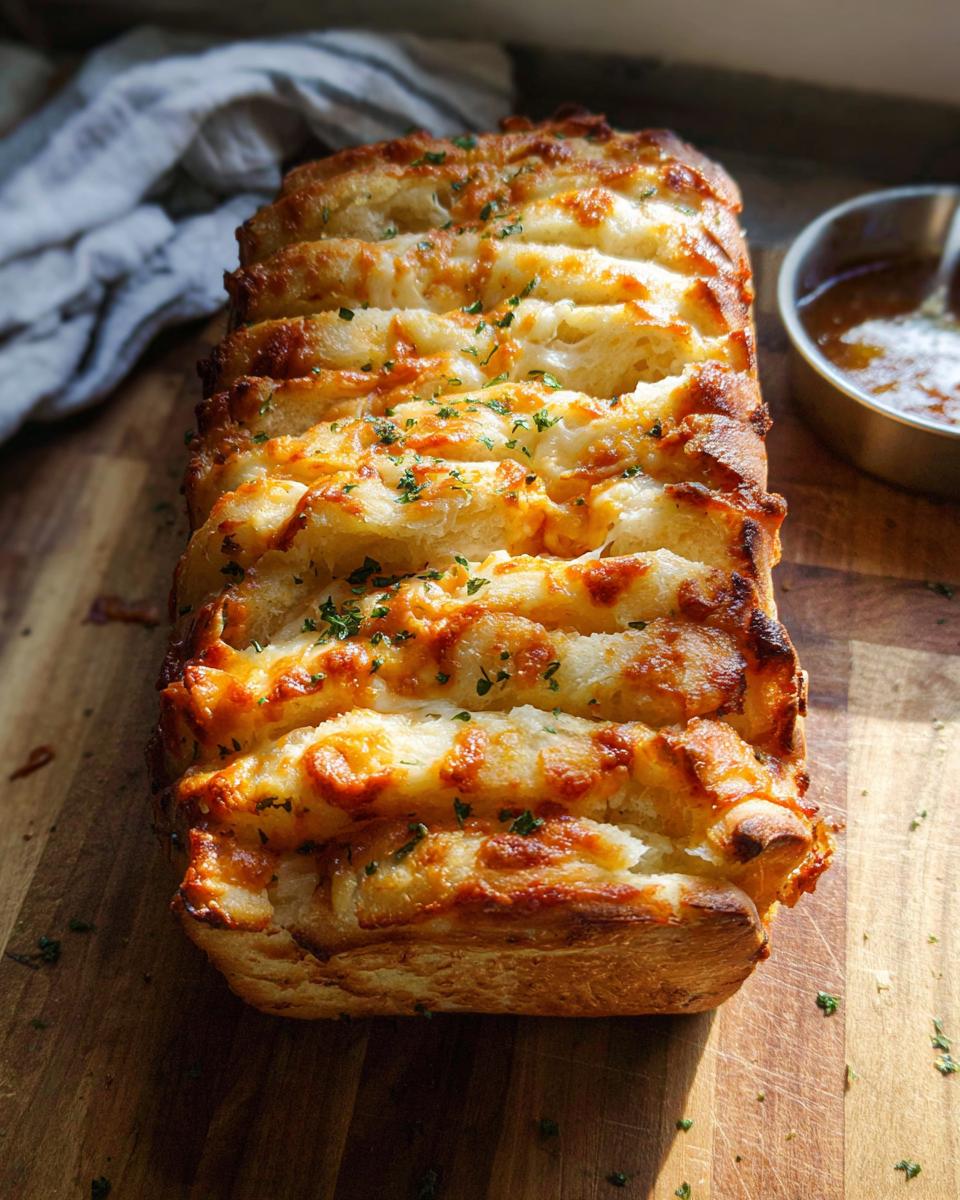
There is something truly magical about food you *have* to share. Forget individual plates; interactive dishes are the best way to bring a group together, and believe me when I say nothing beats tearing into a steaming, homemade loaf. That’s why I absolutely insist you try this recipe for Cheesy Pull-Apart Bread. It has become my absolute go-to for every single get-together we host.
I still remember the first time I made this for a family gathering. It was a chilly autumn evening, and I wanted to create something that would bring everyone together, both in flavor and experience. As the bread baked, the aroma filled our home, inviting everyone right into the kitchen. When I pulled it out of the oven, golden and bubbling with cheese, I watched as my family eagerly dug in, pulling apart the soft, cheesy pieces and savoring the deliciousness. That moment turned into a cherished tradition, and now it’s a go-to for every holiday, reminding me that the best recipes are the ones that create memories shared around the table.
This isn’t just good bread; it’s the ultimate comforting centerpiece that requires very little actual *work* from you, even with homemade dough. You trust me on this one!
Why You Will Love This Cheesy Pull-Apart Bread (The Ultimate Shareable Appetizer)
Honestly, this bread checks every single box for a perfect snack. It’s so much more fun than a regular bread basket, and everyone gets involved!
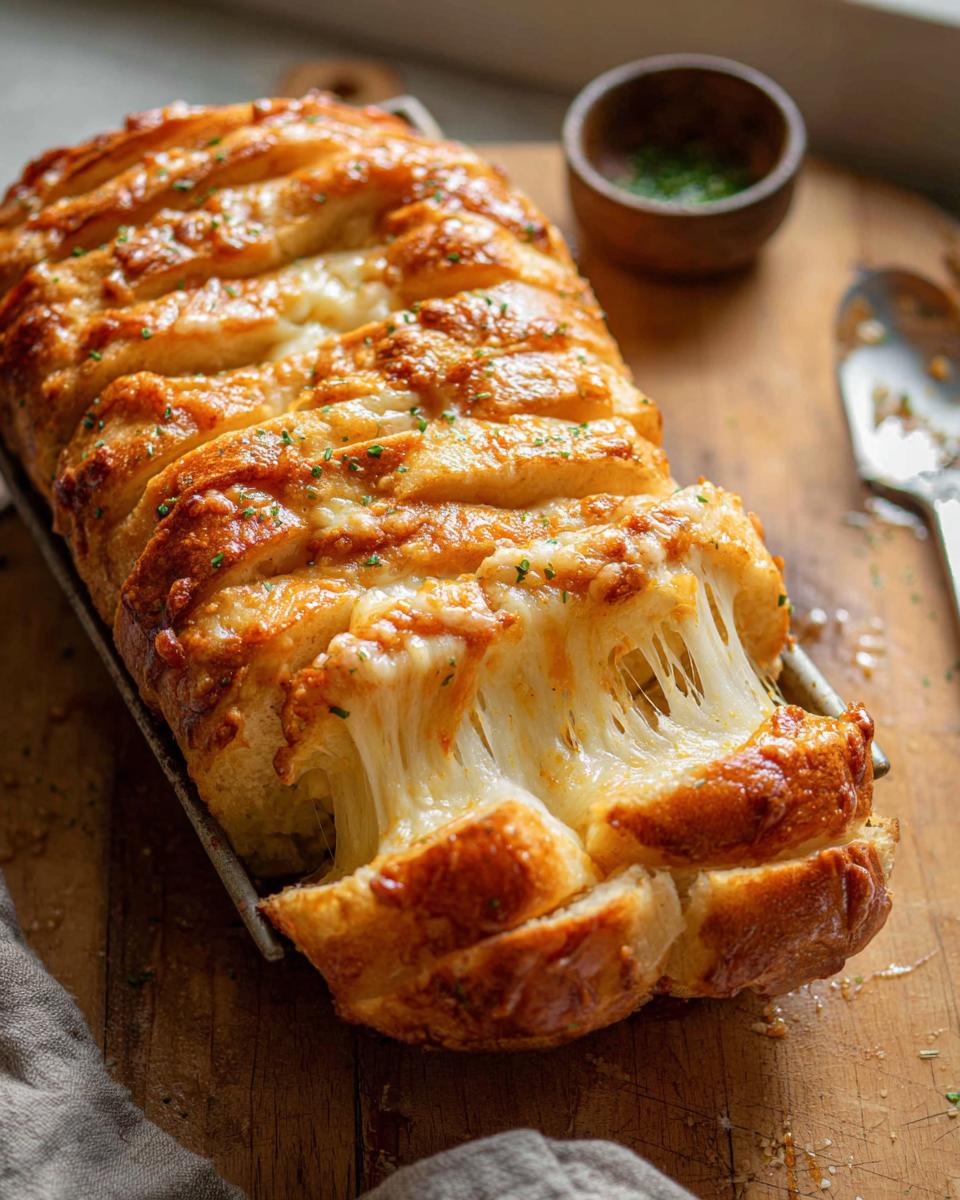
- It delivers that amazing, gooey cheese factor; it stretches for miles!
- It’s easily the best shareable appetizer you can whip up for a crowd.
- The combination of soft, tender dough and savory garlic butter is pure comfort.
- Even though we make the dough from scratch, the assembly is surprisingly fast.
You absolutely have to try this for your next big game night or just because you need something warm and satisfying. Think about the fun you can have pulling it apart before diving into similar Halloween party snacks!
Essential Equipment for Making Cheesy Pull-Apart Bread
When you’re dealing with yeast dough, having the right tools makes the whole process—and I mean the *whole* process—so much less stressful. Don’t worry, most of this stuff you probably already have lying around! A little preparation goes a long way toward a perfect rise and easy cleanup, which is always a win in my book.
Here is what you’ll need to have ready before you even think about mixing the flour:
- A sturdy stand mixer is really my secret weapon for kneading this dough until it’s silky smooth.
- You’ll need the dough hook attachment for that mixer, naturally!
- A standard loaf pan, usually 8 ½ x 4 ½ inches, is what I use to give this bread its perfect shape.
- Make sure you have a sheet pan ready to go for the messy part where we assemble the raw pieces.
- Parchment paper is non-negotiable—it saves your sanity, trust me.
- Finally, a wire rack helps everything cool down nicely after it comes out of the oven hot.
Ingredients for the Perfect Cheesy Pull-Apart Bread
Okay, this is where we get serious! Gathering your ingredients is like gathering your tools before a big build—you want everything clean, measured, and ready to go. When you layer these simple components, you unlock that incredible, satisfying flavor that makes this Cheesy Pull-Apart Bread such a keeper. Don’t skip the notes on temperature or preparation; they really make the difference!
We’ve separated everything into three small jobs just to keep things neat. If you click on more of my favorite recipes, you’ll see I always suggest this layout!
For the Dough
This is the soft, fluffy base that catches all that amazing cheese later on. Remember, yeast is picky, so pay attention to that milk temperature!
- 2 1/4 cups all-purpose flour
- 2 tablespoons granulated sugar
- 2 teaspoons instant yeast
- 1 1/2 teaspoons kosher salt
- 3/4 cup whole milk, warmed (105°F to 115°F)
- 3 tablespoons unsalted butter, softened
For the Gooey Cheese Filling
This is the heart of the operation! The combination of mozzarella and cheddar is what guarantees that glorious, stringy pull we all love. This mixture builds the best Cheesy Pull-Apart Bread texture!
- 1/2 cup unsalted butter, softened
- 1 tablespoon garlic, minced
- 1 tablespoon parsley, chopped, plus extra for garnish
- 1/2 teaspoon kosher salt
- 1 cup mozzarella cheese, shredded
- 1/2 cup sharp cheddar cheese, shredded
For the Toppings
Just a tiny bit of extra richness goes on top to give it that beautiful golden crust when it comes out of the oven.
- 1 tablespoon unsalted butter, melted
- Kosher salt for garnish
Step-by-Step Instructions for Cheesy Pull-Apart Bread
Now for the fun part—putting it all together! Don’t let the dough intimidate you; yeast dough is mostly about patience, not complicated technique. We’re going to follow a basic process: make the base, let it rest, layer on the flavor, let it rest again, and then bake until golden. If you’ve ever wanted to see how simple it is to turn flour into amazing bread, check out my tips on making cheap keto meals—the principles of measuring dough ingredients are similar!
Making the Dough and First Rise for Cheesy Pull-Apart Bread
Grab your stand mixer fitted with the dough hook. We start by tossing in all the dry bits: the flour, sugar, yeast, and salt. Next, pour in that warm milk and the softened butter. Start slow! Mix on low until it just comes together—no stray flour bits. Then, kick it up to medium speed and knead for about 5 to 6 minutes. You want it smooth and elastic.
Expert Tip: If your dough looks too stiff and crumbly, add milk one tablespoon at a time. If it’s super sticky and slapping wetly against the sides of the bowl? Add flour, a tablespoon at a time. We are aiming for a workable but soft dough. Once it looks good, pop it into a greased bowl, cover it up, and let it chill out in a warm spot for about 1 hour and 30 minutes until it’s doubled up. Don’t rush this first rise!
Preparing the Garlic Butter and Cheese Filling
While that dough is doing its thing, we prep the flavor crew! For the garlic butter, just mash together that softened butter with the minced garlic, fresh chopped parsley, and half a teaspoon of salt. Make sure that butter is soft so it spreads easily later. In a completely separate bowl, dump together your shredded mozzarella and sharp cheddar. You want those two cheeses mixed well so every piece gets a similar cheesy hug.
Assembling the Pull Apart Bread Loaf
Gently punch down that beautiful risen dough and divide it into 12 equal pieces. This is important for even baking! Flatten each piece into a little 4-inch disc. Now, paint the garlic butter mixture onto each disc. Then, sprinkle a good, even layer of your cheese blend over the butter. You’re going to stack these up: create two piles of six cheesy discs each. Carefully lay those two stacks horizontally into your greased loaf pan. Just nudge them close together. Cover the whole thing up again and let it rest for a nice, cozy 45 minutes. This is the second rise!
Baking and Finishing Your Cheesy Pull-Apart Bread
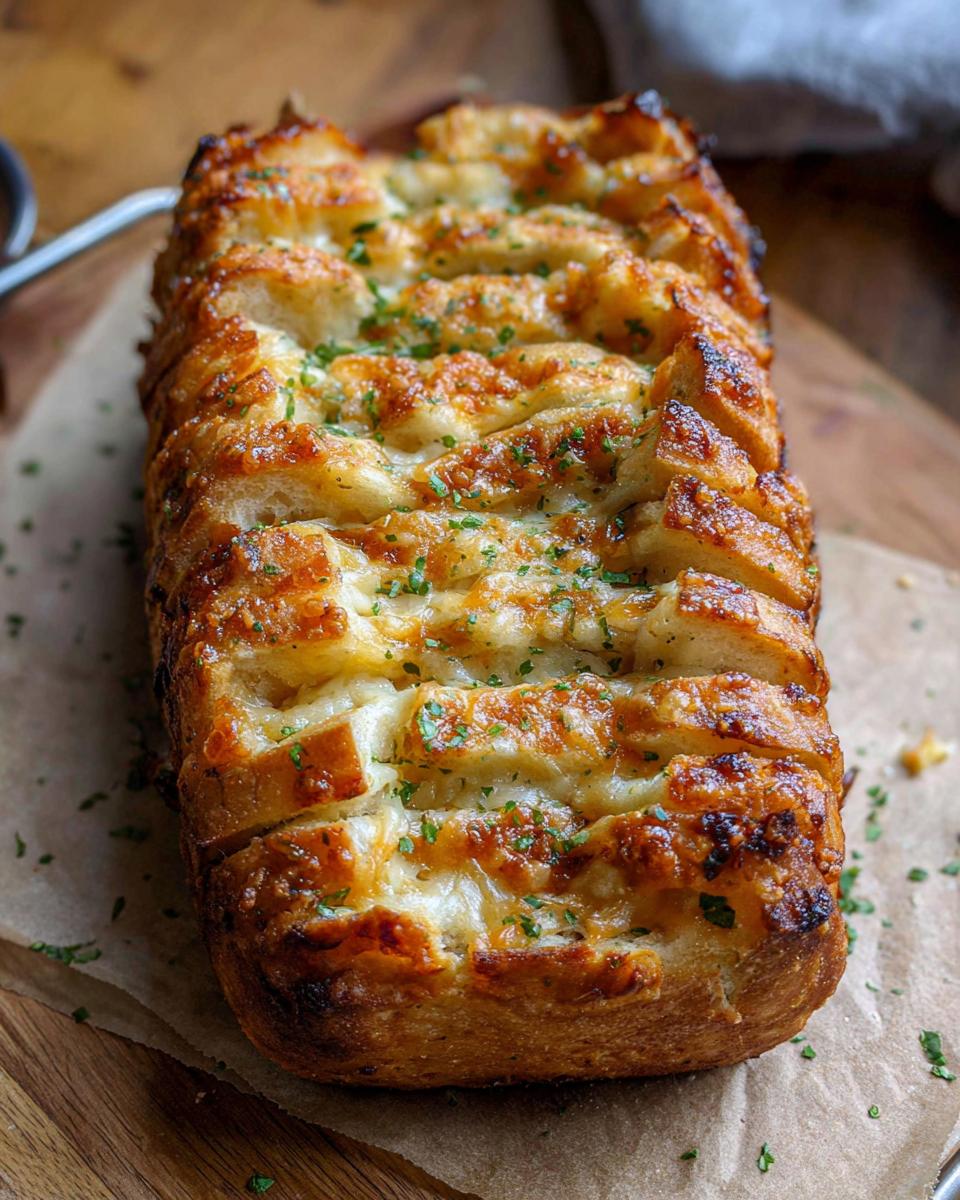
Time to crank up the heat! Get your oven preheated to 325°F while that dough is taking its second nap. Once it’s puffed up again, slide the loaf pan in for about 45 to 50 minutes. Keep an eye on it—if the top starts getting too dark before the time is up, just cover it loosely with aluminum foil. When it’s deeply golden brown, you’re done! Pull it out, let it cool slightly on a wire rack, and immediately brush that top with melted butter. A final sprinkle of salt and fresh parsley makes it look just as good as it smells before you dive in.
Tips for Achieving the Best Cheesy Pull-Apart Bread Texture
Look, anyone can throw some dough and cheese in a pan, but if you want that bread to be unbelievably tender on the inside while having that perfect pull, you need to pay attention to a few non-negotiables. These techniques are what take your loaf from “pretty good” to “I need the recipe right now!” I learned these the hard way—trust me, a soggy bottom is nobody’s friend.
Here are my big secrets for getting that dream texture in your Cheesy Pull-Apart Bread:
- Mind the Milk Temperature: This is crucial for your yeast, folks! If your milk is too cold, the yeast stays asleep. If it’s too hot (over 120°F), you kill it dead. You need that 105°F to 115°F sweet spot so the yeast wakes up happy and gives you a beautiful rise during both resting periods.
- Don’t Over-Knead (But Knead Enough!): When the dough is mixing, keep an eye on the clock. You need to develop the gluten for structure, but if you go too long, the bread gets tough. Stop when the dough is smooth, elastic, and holds its round shape when you poke it gently. That 5-6 minutes is usually perfect, but watch the dough, not the timer!
- Softened Butter is Key for Flavor Layers: For the garlic butter filling, make sure your butter is truly softened, not melted. Melted butter soaks right into the dough layers immediately, making the bottom greasy. Soft butter creates a stable, spreadable layer between the dough discs that traps steam and creates pockets of flavor. This directly results in that lighter texture you get when you pull a piece away.
- Don’t Overcrowd the Second Rise: When you stack the 12 pieces in the loaf pan, leave a tiny bit of air between them. They need room to expand during that final 45-minute rise. If you pack them too tightly, they bake into one big, dense lump instead of easy-to-pull pieces.
Follow these few pointers, and you’ll see why this becomes your next great simple balanced supper side dish or appetizer!
Serving Suggestions for Your Party Favorite Cheesy Pull-Apart Bread
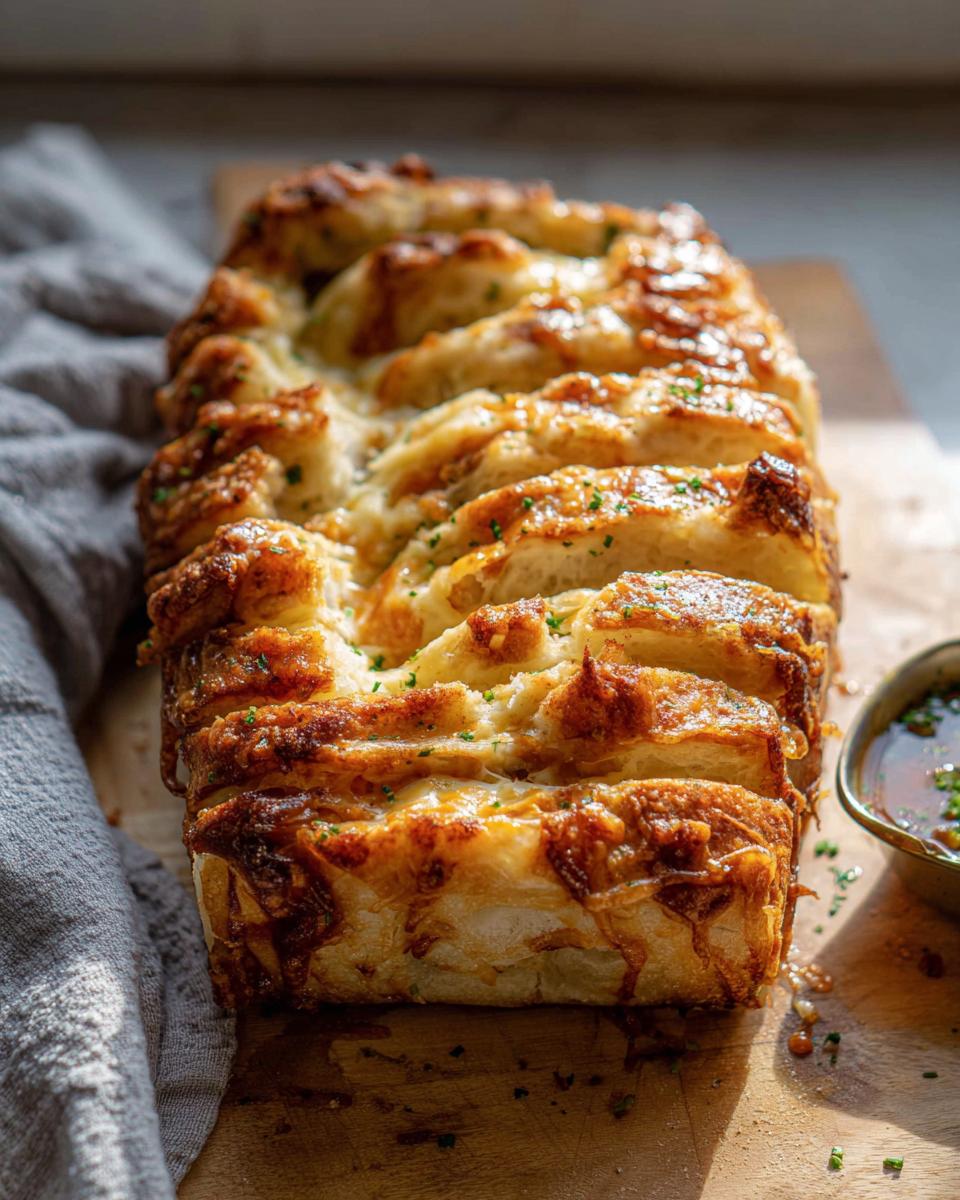
It’s nearly impossible to serve this bread without it disappearing instantly, especially when it comes fresh from the oven. It lives up to its reputation as a true Party Favorite! But honestly, while it’s fantastic all on its own, I love pairing it with something tangy or saucy to really cut through that rich, gooey cheese and garlic.
When I serve this, I usually plan for it to be the star of the snacking show, maybe alongside some veggies, but if you’re making it part of a bigger meal, here are the things that always disappear fastest:
- A Simple Marinara Dip: You need something warm, slightly acidic, and herbaceous to dip those cheesy chunks into. A quick, high-quality marinara sauce heated up is unbeatable. It transports you right back to your favorite Italian spot!
- Hearty Soup or Chili: We often make this alongside a big pot of beef chili in the colder months, or even just a rich tomato soup. It’s the perfect vehicle for soaking up every last drop of broth or chili liquid.
- Alongside Grilled Meats: If we’re grilling chicken or steak outside, this bread is the carb side that everyone actually fights over. It’s far more exciting than standard dinner rolls and complements the smoky flavor perfectly. I even made it once when we had that Garlic Chili Shrimp, and it worked beautifully to scoop up the extra sauce!
Whatever you serve it with, just make sure there are plenty of napkins handy. Trust me, things get messy fast when that cheese starts pulling!
Storage and Reheating Instructions for Leftover Cheesy Pull-Apart Bread
Okay, let’s be real: if you have leftovers of this Cheesy Pull-Apart Bread, you’re doing great! This loaf is undeniably best when it’s piping hot from the oven, with the cheese still stretching wildly, but sometimes life happens, and we have scraps. Don’t worry, we can bring that bread almost back to its former glory!
The biggest enemy of leftover bread is dried-out texture, especially after it’s been refrigerated. That’s why the microwave is a total last resort for this recipe. It heats the bread fast, which makes the inside tough and chewy instead of soft.
For storage, you must keep the air out. Once the loaf has cooled completely—and I mean *completely*, otherwise you steam it—wrap it tightly. An airtight container is perfect, or you can use heavy-duty foil, pressing it right up against the bread to seal it. Stored this way, it should stay good at room temperature for about a day before the dough starts to firm up too much. If you need longer, pop it in the fridge, but try to eat it within three days maximum.
To bring it back to life, you need gentle heat. You want to reactivate that butter and melt that cheese again! Preheat your oven to a lower temperature, maybe 300°F. Place the bread (still in its foil, or just directly on a baking sheet) into the oven for about 10 to 12 minutes. You might brush a little extra melted butter on top right before it goes in to help refresh that crust. When it smells garlicky and you can wiggle a piece free easily, it’s ready! It’ll be ninety percent as good as the first time around. If you are trying to save time next week, sometimes I look at recipes like my Creamy Turkey Stroganoff and plan to make the bread dough ahead of time so I only have to assemble and bake.
Frequently Asked Questions About Pull Apart Bread
I always get so many questions when I post this recipe online! It seems everyone wants to know how to tweak it perfectly for their own party or how to make it a little hotter. Don’t be shy about changing things up, but if you want that signature texture, stick close to the ratios, especially with the cheese!
Here are some of the most common things folks ask me when they want to bake up a batch of this wonderful Pull Apart Bread:
Can I substitute the yeast in this Cheesy Pull-Apart Bread recipe?
You absolutely can, but you need to know what you’re swapping! I use instant yeast because it’s fast and reliable. If you wanted to use active dry yeast, you’d need to proof it first in the warm milk with a pinch of sugar and let it get foamy before adding it to the flour mix. This adds about 10 minutes to your prep time. Now, if you were hoping to skip the yeast altogether and use store-bought pizza dough? You *can*, but I strongly advise against it. The structure of this bread relies on that yeast rising time, which makes it light enough to pull apart nicely. Store-bought stuff tends to bake up denser and heavier.
What is the best way to get that perfect gooey cheese texture?
Ah, the quest for the ultimate stretch! It all comes down to the blend of cheese, which is why I insist on mozzarella and cheddar. Mozzarella is your string king—it stretches beautifully and melts smooth. Cheddar gives you that sharp, complex flavor that cuts through the richness of the garlic butter. If you want even more pull power, throw in a handful of Monterey Jack! The key here is using room temperature cheese, or at least cheese that isn’t ice-cold from the back of the fridge. Putting cold cheese into a warm dough mixture can slow down the melt process and sometimes make the cheese a little oily instead of gooey cheese perfection.
If you have other questions, please don’t hesitate to shoot me a message on my contact page! I love hearing from fellow bakers.
Sharing Your Delicious Cheesy Pull-Apart Bread Creation
Well, we did it! We turned simple flour and cheese into what is undoubtedly the most fun appetizer on the block. I hope you had as much joy putting this together as my family did digging into it that first chilly autumn night. Seeing that loaf steam on the table is honestly the best part of hosting!
Now that your kitchen smells heavenly and your family is happily pulling apart their cheesy chunks, I really, really want to hear about it! The joy of baking is sharing the results, so please don’t be shy about telling me how it went.
If this Cheesy Pull-Apart Bread brought some magic to your party, please take a moment to leave a rating right below this section. Seriously, 5 stars if it stole the show! You can also drop a comment and tell me what you paired it with—did you use a special dip? Did you add a little heat? I read every single comment, and they help other bakers know they can trust this recipe too.
If you snapped a photo of that glorious, stretchy cheese pull, tag me on social media! It makes my entire week seeing your creations. It’s thanks to folks like you keeping these fun, comforting recipes alive that I keep sharing what I bake in my kitchen. For more about my baking journey, feel free to read a bit more about me on my About page!

Cheesy Pull-Apart Bread
Ingredients
Equipment
Method
- In the bowl of a stand mixer fitted with a dough hook, combine flour, sugar, yeast, and salt.
- With the mixer on low speed, mix in the warm milk and butter until just combined. Knead on medium speed for 5-6 minutes, or until smooth and elastic. If the dough is too dry, add more milk, 1 tablespoon at a time. Or, add more flour if too wet until the dough reaches the desired consistency.
- Transfer dough to a greased medium bowl. Cover with plastic wrap and let rise in a warm spot until doubled in size, about 1 hour and 30 minutes.
- While the dough rises, combine softened butter, minced garlic, chopped parsley, and salt in a small bowl. Set aside.
- In a separate bowl, combine mozzarella and cheddar cheese. Set aside.
- Spray an 8 ½ x 4 ½-inch loaf pan with nonstick cooking spray. Set out a sheet pan lined with parchment paper. Set aside.
- Punch down the risen dough and transfer to a clean surface. Divide the dough into 12 equal pieces.
- Flatten each piece into a 4-inch round disc and place onto the lined baking sheet.
- To each round disc of dough, spread the garlic butter mixture. Then, top each with an equal amount of the shredded cheese mixture.
- Create 2 stacks of 6 discs of dough. Carefully place the dough stacks horizontally into the prepared loaf pan. Gently separate the pieces slightly. Cover the pan and let rise again until almost doubled in size, about 45 minutes.
- While the dough rises for the second time, preheat the oven to 325°F.
- Bake the loaf for 45-50 minutes, or until golden brown. Cover the pan loosely with aluminum foil if the top starts to brown too quickly.
- Transfer the loaf pan to a wire rack and let cool slightly. Brush with melted butter, sprinkle with salt, and garnish with parsley before serving.
Notes
Tried this recipe?
Let us know how it was!
Precision Keto Scientist
Numbers don’t lie, and neither do my recipes. I’m a biochemist who fell into keto cooking through my own metabolic research—and I approach recipe development like a lab experiment, complete with macro calculations precise to the tenth of a gram.
My journey started in diabetes research labs at Johns Hopkins, where I spent six years studying how different macronutrient ratios affected insulin sensitivity. Personal experimentation with therapeutic ketosis for cognitive enhancement led me down a rabbit hole of recipe testing that eventually consumed more hours than my actual day job.
While other cookbook authors describe flavors and textures, I quantify ketone elevation curves and glycemic impact data. My recipe database contains 340+ formulations, each tagged with detailed nutritional analysis, predicted ketosis timing, and optimal meal spacing. I measure salt by weight, time cooking processes to the minute, and log ingredient sourcing obsessively for consistent results.
My breakthrough research on fat-protein ratios for sustained ketosis got published in the Journal of Nutritional Biochemistry. My “Macro Math Mastery” workshops have trained over 5,000 people in precision meal planning. I even collaborated with continuous glucose monitor manufacturers to create the first real-time feedback system for recipe optimization.
I left my pharmaceutical research position at Merck three years ago to focus on metabolic nutrition consulting. Now I work with professional athletes, biohackers, and medical professionals seeking therapeutic ketosis protocols. When I’m not in my lab-kitchen, I’m competing in chess tournaments or documenting my daily biomarker measurements with true data scientist obsessiveness.
Cooking is just applied chemistry—and chemistry follows predictable rules. Master the variables, control the outcomes.