
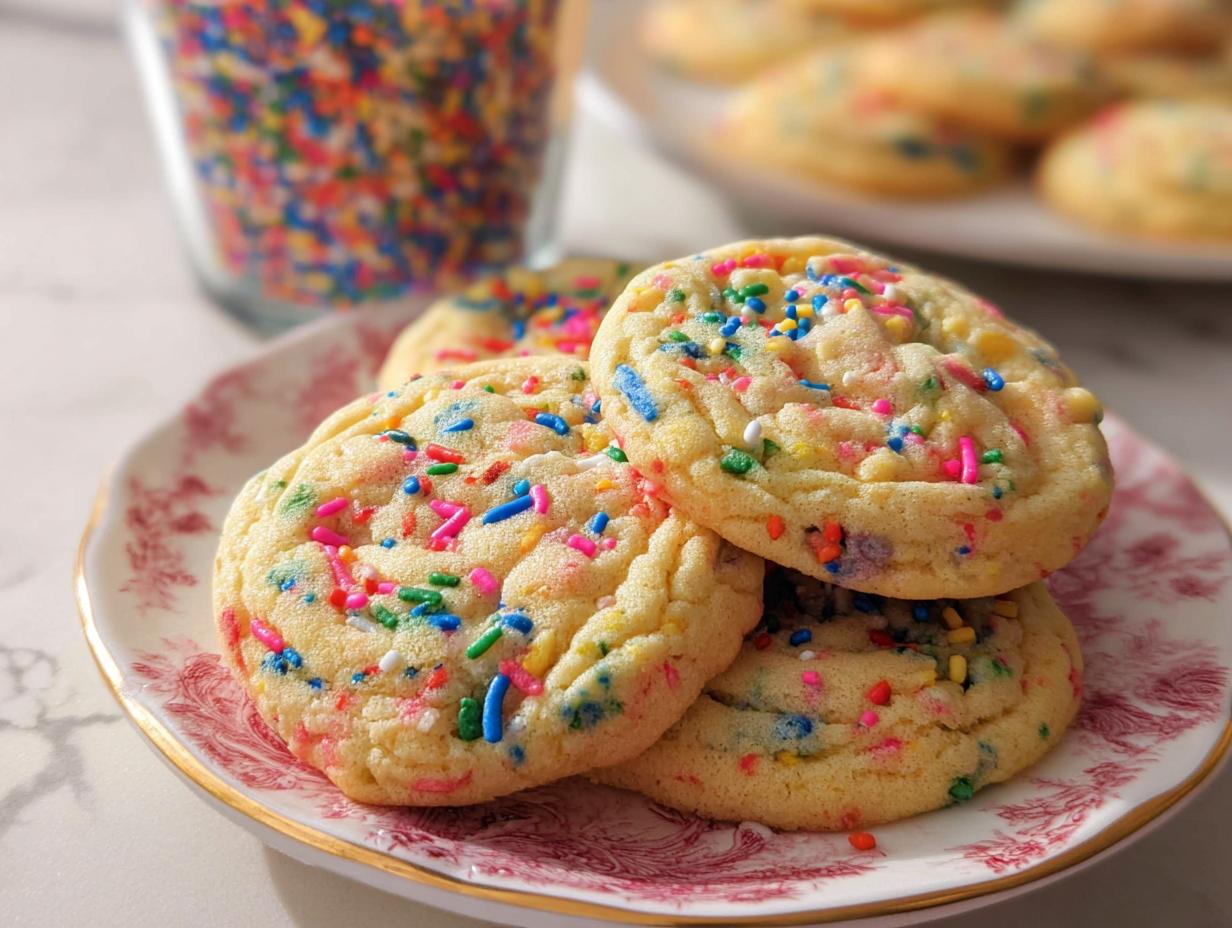
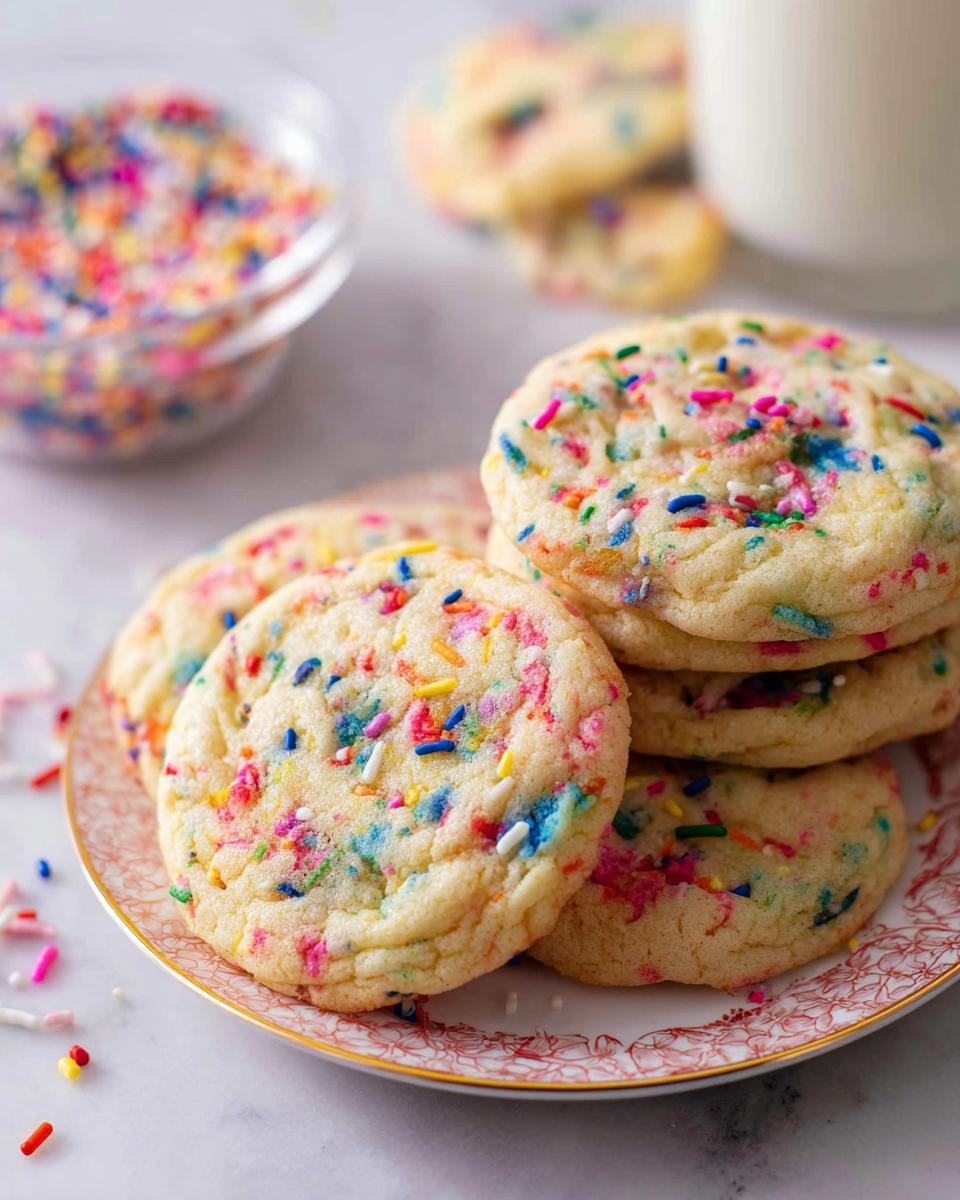
If you think baking has to be serious or complicated, then you haven’t met the magic of color! There is just something instantly happy about putting brightly colored sprinkles into dough, and trust me, these Confetti Sprinkle Cookies are the easiest way to bring a total flood of joy to any table. I’ll never forget the first time I made these cookies. It was a sunny afternoon in early spring, and my niece was visiting for the weekend. We decided to bake together, and as soon as she saw the colorful sprinkles, her eyes lit up with excitement!
We mixed the dough and laughed over the chaos of flour clouds, and when we pulled those vibrant cookies from the oven, the kitchen was filled with an aroma that made our mouths water. That day became a cherished memory—not just for the delicious cookies we created, but for the joy of sharing that simple moment. These cookies are perfectly soft, vibrantly colorful, and honestly, the best kind of fun you can have in the kitchen when you need an easy dessert!
Why You Will Love These Confetti Sprinkle Cookies
Seriously, what’s not to love? These aren’t just cookies; they are little pops of happiness waiting to happen. They tick every box for a perfect bake! You absolutely need these on your dessert roster because:
- They are incredibly easy—a true beginner-friendly recipe that still tastes gourmet.
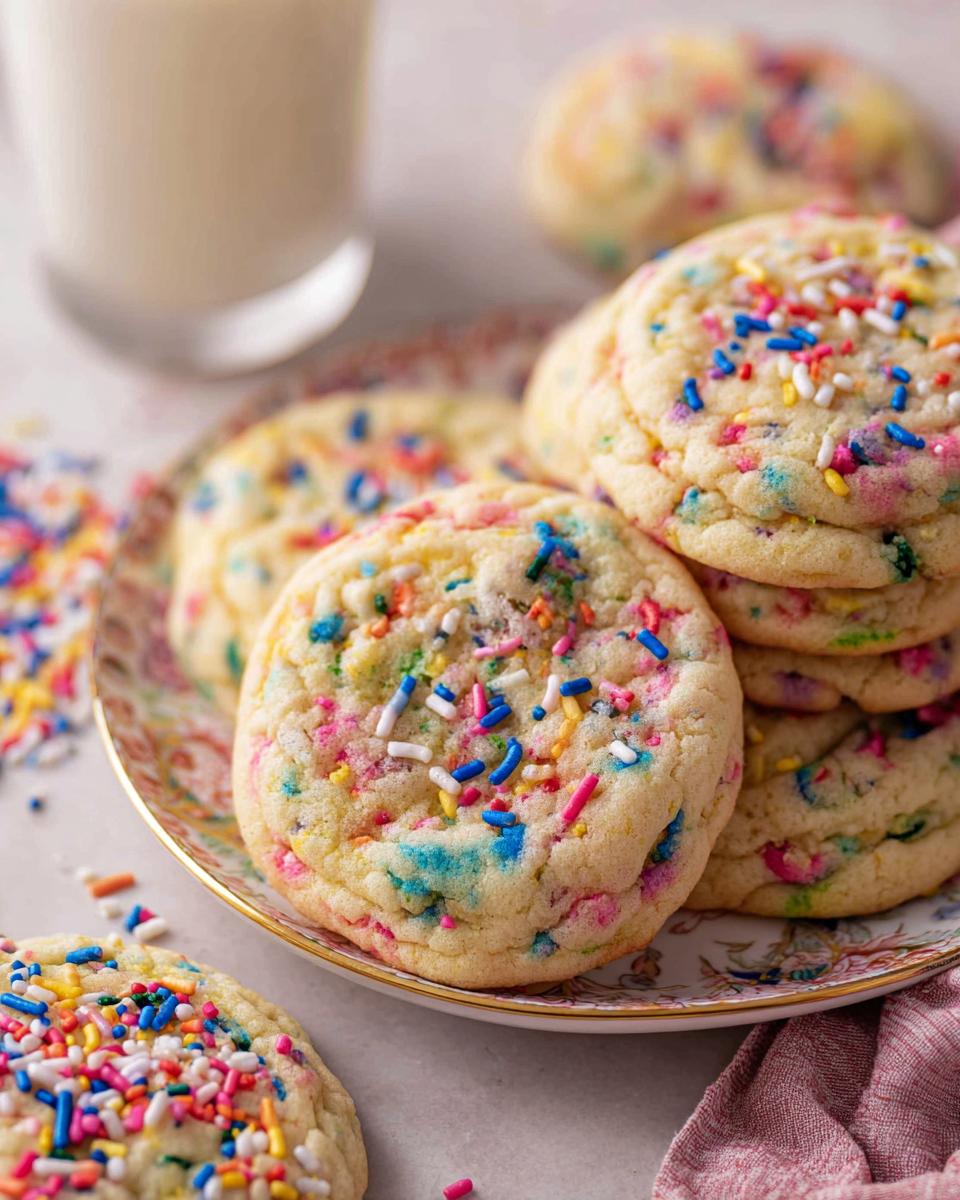
- The texture is spot-on: perfectly soft centers with beautifully set edges.
- They are instantly festive! Perfect for birthdays, holidays, or just a Tuesday.
- Baking them is messy, loud, and fun, especially if you have little kitchen helpers running around.
Essential Equipment for Perfect Confetti Sprinkle Cookies
Listen, you don’t need a million fancy gadgets for these Sprinkle Cookies, but having the right tools really does make all the difference, especially when you are trying to keep those cookie balls perfectly round. We aren’t looking for flat pancakes here, are we?
Here are the few things I always reach for when I’m whipping up a batch of these festive cookies for a party:
- Stand Mixer: While you *can* do this by hand with a sturdy whisk and some elbow grease, a stand mixer saves your wrist, honestly. It gets that butter and sugar nice and airy in just minutes.
- Baking Sheets: You’ll need a couple of these, unless you plan on making your cookies one grueling batch at a time! Make sure they are clean and flat.
- Silicone Mats or Parchment Paper: This is non-negotiable for these cookies—and here’s my little secret! Using silicone mats, rather than just greasing the pan, helps the cookies maintain their shape as they bake. They stop the bottoms from spreading too fast, which keeps your Confetti Sprinkle Cookies nice and thick in the middle. Parchment paper works great too, in a pinch!
Gathering Ingredients for Your Confetti Sprinkle Cookies
Okay, let’s talk specifics! These cookies are pretty straightforward, but you need the right stuff for that signature soft, chewy texture we are aiming for. Don’t substitute the important bits—especially the cornstarch—if you want them to turn out beautifully. I always lay all my ingredients out before I start mixing, just so I know everything is ready to go. It saves me from running around mid-cream. You can find more great baking recipes over at my recipe index!
Dry Ingredients for Soft Confetti Cookies
We mix these first so everything is perfectly distributed before it ever meets the wet stuff. Getting the balance right here is how we avoid those annoying pockets of baking soda in the final cookie!
- You need 1 and a half cups of all-purpose flour—that’s about 180 grams if you’re weighing, which I highly recommend!
- One tablespoon of cornstarch is the secret handshake for softness. Don’t skip this; it’s what keeps these Confetti Cookies tender and prevents them from getting too cakey.
- Half a teaspoon of baking soda for the perfect lift.
- And just half a teaspoon of salt to balance out all that sugar.
Wet Ingredients for Rich Confetti Sprinkle Cookies
Pay attention here, because temperature matters for this part! When your butter and egg are at room temperature, they blend so much better with the sugar, creating those beautiful air pockets we need. It really affects the final cookie structure.
- Half a cup of unsalted butter, and make sure it’s soft, room temperature butter (about 113g). If it feels greasy or melted, pop it back in the fridge for ten minutes!
- Three-quarters of a cup of granulated sugar (150g works well if you measure).
- One large egg, also softened a bit so it blends evenly.
- One full teaspoon of vanilla extract—always use the real stuff; it makes a difference in festive bakes like this!
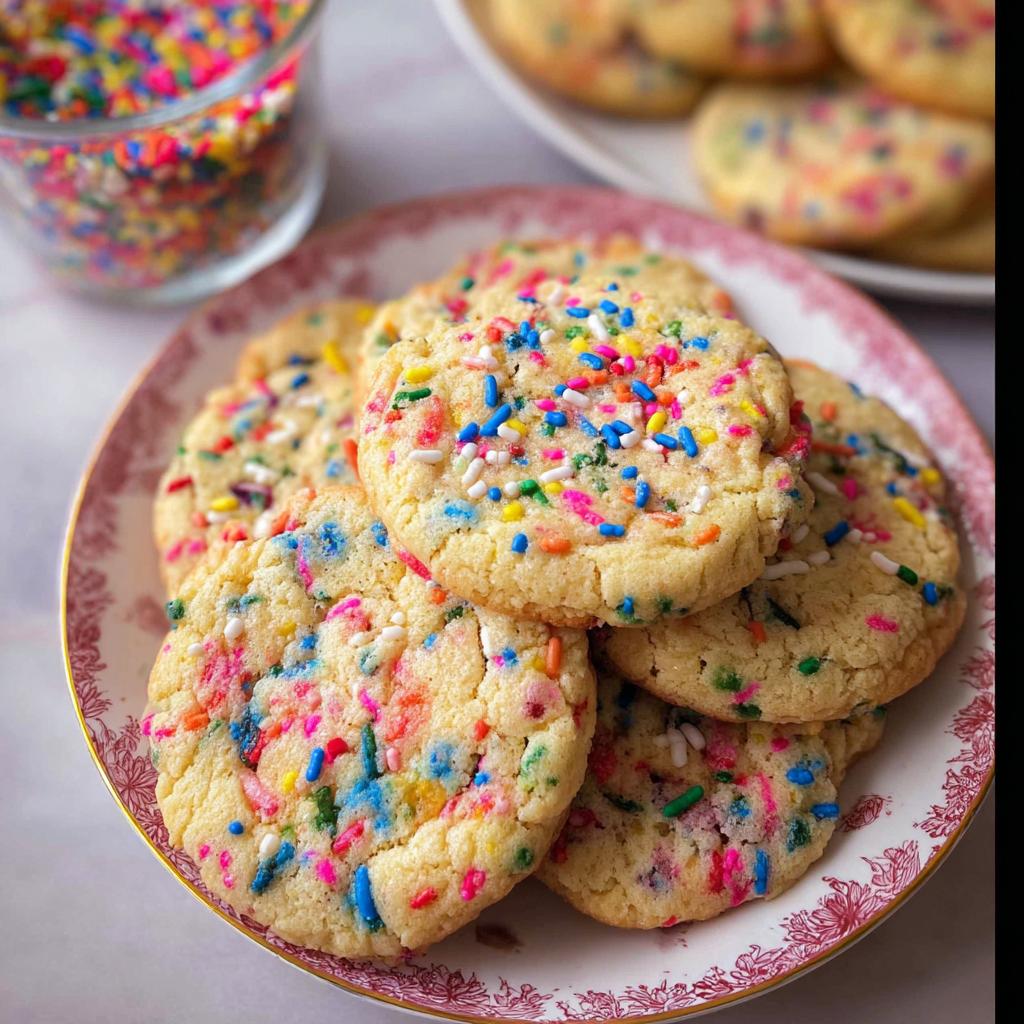
The Key Add-in: Sprinkles
This is the fun part! We are making Confetti Sprinkle Cookies, so we need the right sprinkles. Trust me on this one: use jimmies.
You’ll need about half a cup of sprinkles incorporated right into the dough. Jimmies hold their color much better during baking than the little round nonpareils, which can sometimes bleed color or get too crunchy. We want those bright, distinct flecks of color throughout! We’ll talk about adding more on top later.
Step-by-Step Baking Instructions for Confetti Sprinkle Cookies
Alright, this is where the magic really happens! Following these steps in order is key to getting those wonderfully thick and soft cookies. If you want to see how some other amazing bakers handle their celebratory bakes, you can always pop over to look at a few different interpretations of festive cookie making, like those found here.
Mixing the Dry and Wet Bases for Your Confetti Cookies
First things first, take that bowl of dry ingredients—your flour mix—and just give it a good whisk. Set that aside. Now, in your stand mixer, cream that room temperature butter and the sugar. You need to beat this until it looks really light and fluffy—I mean genuinely pale yellow, not just slightly mixed. Then, beat in your room temperature egg and that vanilla extract. Scrape down the sides really well after that so everything is totally uniform.
Incorporating Sprinkles into the Confetti Sprinkle Cookies Dough
Now, turn the mixer speed down low. Add your dry mixture slowly, just until you see the last bits of flour disappear. Stop *immediately* when it’s almost combined. Then, toss those 1/2 cup of sprinkles right in. Mix on the very lowest speed until the sprinkles are just incorporated. If you overmix now, all those beautiful colors will just bleed into a gray mess. We want distinct confetti!
The Crucial Chill Time for Perfect Confetti Cookies
Don’t even think about baking the dough yet! Portion out two tablespoons worth of dough for each cookie—I use about 40 grams—roll them into nice little balls, and then, roll those balls in a little extra sprinkle topping if you want that max color pop. Place them about two inches apart on your lined baking sheets. Now, this is the most important part for shape: you must chill these dough balls for at least one full hour. Chilling keeps them from spreading into thin crisps when they hit the heat. For more great baking blueprints, check out the latest posts in my recipe archive!
Baking and Cooling Your Festive Cookies
Once the hour is up, crank that oven to 350 degrees Fahrenheit (that’s 175 Celsius). Pop those chilled balls in there and bake for about 11 minutes. They should look puffed, and the edges should just be setting. The center will still look a *little* soft—please, resist the urge to bake longer! Let them sit right there on the hot baking sheet for about five full minutes before you even dare try to move them. This resting period lets them firm up so they don’t break when you transfer them to the cooling rack. Trust me, trying to move them too soon is disastrous!
Tips for Success When Making Confetti Sprinkle Cookies
You read the recipe, you gathered the ingredients, but here are the things I’ve learned over the years that take these from “good” to absolutely show-stoppingly perfect. Baking is chemistry, but with cookies, it’s often more about feel and little details, like how cold your butter is!
These tips are my best advice for ensuring you get that fantastic, puffy, soft texture every single time you make these Confetti Sprinkle Cookies.
Don’t Rush the Creaming Step: Seriously, this is where we build the structure. When you cream the butter and the sugar, you are literally whipping air into the dough. You need to beat it until it’s noticeably pale and fluffy, which feels like forever but is worth the wait. If you stop too soon, the cookies won’t have that lovely, slightly thick rise.
Temperature, Temperature, Temperature! I mentioned it before, but I have to hammer this home: your butter and egg need to be at room temperature. Cold butter won’t cream properly, and you risk cutting through the fat structure when you add the egg. Room temperature doesn’t mean melted or oily; it just means soft enough for your finger to make an indent easily.
Be Aggressive About Stopping the Mixer: This applies twice! First, stop mixing as soon as the flour disappears when adding the dry ingredients. Second, once the sprinkles go in, mix on the absolute lowest speed until you see them distributing—then turn it off! Overmixing develops gluten, and gluten means tough cookies, not soft, Kid Friendly treats. If you see some dry streaks of flour at the bottom after you take the bowl out, just fold those in with a spatula. That’s the safest way!
Cornstarch is Non-Negotiable: I know some recipes skip it, but for these Festive Cookies, the cornstarch is crucial. It acts as a tenderizer, binding the dough softly without making it heavy. It’s the ingredient that guarantees that pillow-soft center, so please don’t swap it out for extra flour!
Don’t Skip the Chill: I cannot overstate this enough. Chilling the dough balls for that full hour is what prevents them from flattening out into thin, crispy discs. When dough is cold, the fat stays solid longer in the oven, ensuring the cookies puff up before they spread wide. If you are in a hurry, try chilling the tray right on a shelf in the freezer for about 20 minutes, but an hour in the fridge is always better for overall flavor!
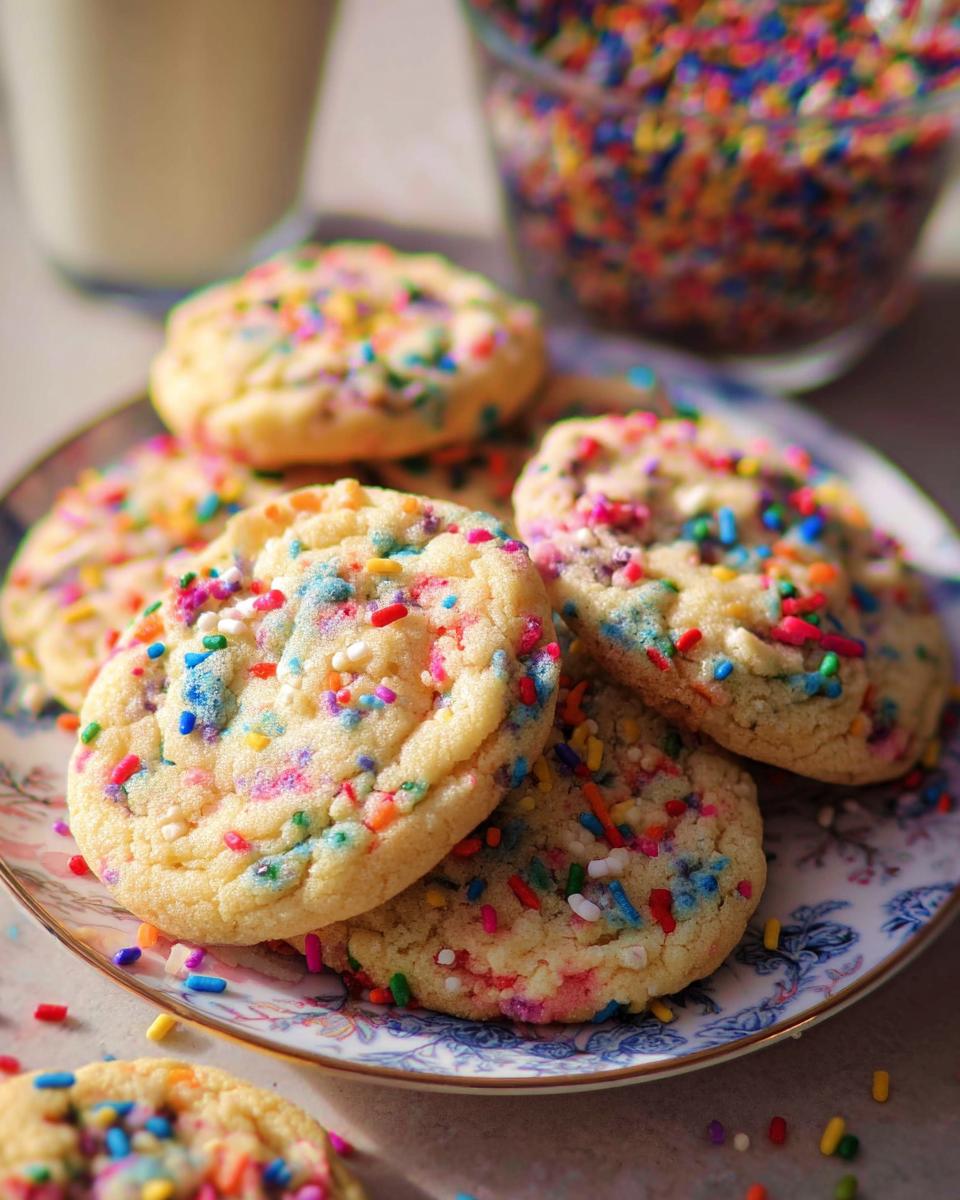
Decorating Tips for Your Kid Friendly Confetti Sprinkle Cookies
We already added a bunch of sprinkles into the dough, which gives us that great internal confetti look, but why stop there? These cookies are begging for a little extra flair, especially if you’ve got kids helping you out! Decorating is such a fun, low-pressure activity, and the messier the better, right?
If you’re looking for ideas on how to jazz up these Kid Friendly treats for a party or just a weekend bake, I have a few super simple ways to make them even more spectacular:
The Super Simple Glaze
If you want to add a smooth, slightly crunchy top layer, a quick glaze is your best friend. It’s so much easier than trying to perfectly frost every single cookie. You just need powdered sugar, a tiny splash of milk or water, and maybe a drop of vanilla—or even food coloring!
I like to mix up a small batch and divide it into three little bowls. I’ll color one pink, one blue, and leave one white. Then, instead of dipping the whole cookie, I just drizzle these colors back and forth over the cooled cookies using a fork or a small spoon. You get that beautiful, slightly messy watercolor effect!
Right after you drizzle, hit it immediately with a fresh handful of those colorful jimmies. They stick perfectly to the wet glaze, and honestly, it looks professionally done, even though it took about two minutes!
Sandwich Cookies for Extra Fun
These cookies are sturdy enough to handle being turned into a sandwich, which automatically makes them 100 times more fun! You just want to use a slightly softened filling—don’t use hard frosting here, or the cookie will break.
Try a simple buttercream (vanilla is classic) or even a quick cream cheese frosting if you want that little bit of tang.
- Bake your cookies flat. Let them cool completely.
- While the filling softens slightly, take one cookie and spread just a small layer of filing near the edges.
- Gently top it with a matching cookie. Press lightly until the filling just starts to peek out the sides.
- This is the time to roll the edges of the filling in extra sprinkles! It looks so polished and festive.
These turn a simple Sprinkle Cookie into a show-stopping little handheld dessert. If you’re hunting for other fun snack ideas for big gatherings, I put together some tips for handling snacks for themed parties over on the blog!
Turning Them into Cookie Pops
If you have leftover cookies that might have baked slightly wonky—no worries! We can hide any imperfections with a popsicle stick. This is a fantastic trick for parties, as everyone can just grab a stick!
- Make sure the cookies are completely cool.
- Melt a tiny bit of white chocolate (or candy melts, if you prefer brighter colors).
- Dip the tip of a lollipop stick into the melted chocolate and press it carefully into the bottom center of the cookie. The chocolate acts like glue!
- Let the chocolate set for about 10 minutes in the fridge until the stick is totally secure.
- Finally, dip the entire cookie into the melted coating or just drizzle it heavily, and immediately cover it in more Confetti Sprinkle Cookies toppings before the coating dries! Instant party favor!
Storage and Reheating Instructions for Confetti Sprinkle Cookies
One of the best things about these Confetti Sprinkle Cookies is that they are just as happy sitting on the counter for a few days as they are fresh out of the oven. That’s a big win when you’re planning a party and don’t want the stress of baking everything the morning of! They definitely qualify as an Easy Dessert because they hold up so well.
Here’s my simple breakdown on keeping these colorful beauties perfect:
Room Temperature Storage is Best
For the very best, softest texture, you want to keep these cookies at room temperature. Don’t try to store them in the fridge! Cold air is drying, and we worked really hard to get that soft, tender crumb thanks to the cornstarch and the proper creaming method. We don’t want that effort wasted!
Find yourself a good, sturdy, airtight container. Make sure your cookies are completely cooled before you even think about putting a lid on them—if you trap any steam, you’ll end up with sweaty, sticky cookies, and nobody likes that!
Piled them in the container, but try not to stack too many layers deep. If you have a ton of cookies, use parchment paper or wax paper sheets between the layers. Stored this way, they stay perfectly chewy and delicious for a solid five to seven days. That means you can bake them ahead of time with zero stress!
Freezing Baked Cookies for Future Fun
Oh yes, you can absolutely freeze these Sprinkle Cookies! This is a lifesaver if you’re making a massive batch for a holiday or celebration. Make sure they are 100% cooled down first.
- Flash freeze them first! Lay the cookies out in a single layer on a baking sheet. Pop that sheet in the freezer for about an hour until the cookies are solid. This stops them from sticking together when they are stored long-term.
- Once solid, transfer the frozen cookie balls into a heavy-duty freezer bag or an airtight container. I usually put a small square of parchment paper between any cookies that might touch, just to be safe.
- They will keep beautifully for up to three months in the freezer.
Thawing and Refreshing Your Cookies
Thawing is super easy, which keeps these in the realm of Easy Dessert planning! The best way is just to pull them out of the freezer and leave them in an airtight container on the counter for a few hours. They thaw perfectly right there!
If you are desperate to eat them *right now*, you can warm them up slightly. A few seconds in the microwave (maybe 10 to 12 seconds depending on your microwave power) will soften them right up. If you want them to resemble “fresh from the oven,” you can pop the thawed cookies on a baking sheet at 300°F (150°C) for just 3 or 4 minutes—but watch them closely so they don’t crisp up on the edges!
Frequently Asked Questions About Confetti Sprinkle Cookies
I get so many great questions when readers try their hand at these vibrant Festive Cookies! Since baking is all about precision sometimes, I wanted to clear up a few things that pop up most often. If you have other questions after trying this recipe, don’t hesitate to reach out via my contact page!
Can I use nonpareils instead of jimmies in these Confetti Cookies?
That’s a great question about swapping out the toppings! You absolutely can use nonpareils, but you are going to get a different final look and texture for your Confetti Cookies. Jimmies, those longer stick-shaped ones, tend to hold their vibrant color much better when baked. Nonpareils, those tiny hard balls, tend to soften up and sometimes bleed their color right into the dough, making it look more pastel and muddy instead of bright confetti.
If you decide to use them, I highly recommend only rolling the dough balls in the nonpareils right before they go into the oven, rather than mixing them into the main dough batter. This will help you keep some color definition!
How do I keep my Confetti Sprinkle Cookies soft after baking?
Keeping these soft is my number one focus! Since we used cornstarch and didn’t use any eggs that might dry them out, they are already set up for success, but storage is where people sometimes make a mistake. Remember what I said about not overbaking? That’s step one!
The crucial second step is storage. Never, ever put soft cookies in the fridge! They dry out faster there. You must keep them in a truly airtight container at room temperature. If you are stacking them, put a piece of wax paper between the layers. As long as they are protected from air, your Sprinkle Cookies will stay melt-in-your-mouth soft for nearly a week.
Is this recipe considered an Easy Dessert to make for a party?
Oh, absolutely! I wouldn’t put it on the blog if it wasn’t a total win for party planning. These are super straightforward to mix up, even if you only have basic baking equipment. The only part that takes a bit of patience is the mandatory one-hour chill time for the dough balls.
But here’s the secret to making it an Easy Dessert plan: you can do that chilling step overnight! Just roll your dough balls, stick them on a tray, cover them loosely, and pop them in the fridge. Then, the day of the party, all you have to do is preheat the oven and bake for 11 minutes. That really helps lower the stress level on party day!
Estimated Nutritional Breakdown for Confetti Sprinkle Cookies
Now, I know most of us aren’t baking these Confetti Sprinkle Cookies with calorie counts top of mind—they are meant for celebrating, after all! But for those of you who like to keep track, I figured out the math based on the ingredients list above. It helps give a good baseline, although we all know that the amount of sprinkles you use can really throw things off!
Based on the recipe yielding 24 cookies, here is the approximate breakdown per cookie. Remember, this is just an estimate, and the actual numbers can wiggle around depending on the specific brand of butter or sugar you grab off the shelf. Cooking with love means sometimes sacrificing perfect numeric precision!
Here is the ballpark:
- Calories: 158
- Fat: 6g (with 4g saturated fat)
- Carbohydrates: 24g
- Sugar: 14g
- Protein: 2g
See? Not too bad for such a happy, festive little cookie! The sugar content is pretty standard for a classic butter cookie base, especially considering those sprinkles we added. If you are swapping out ingredients, like using a different sweetener, keep in mind that your final numbers here will change. This breakdown assumes standard pantry staples, so consider it a friendly guide rather than gospel truth! Enjoy them guilt-free; they are worth every bite.
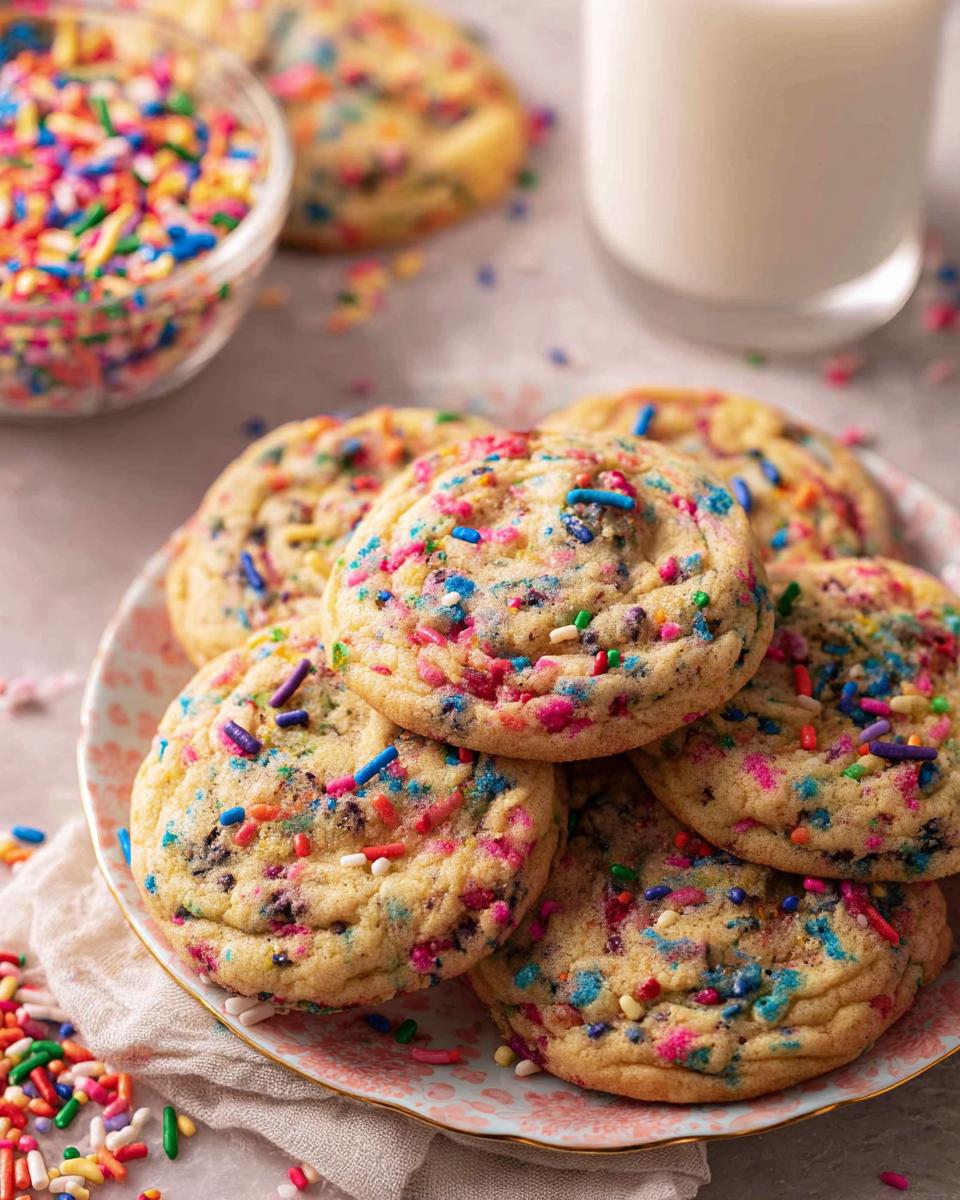
Share Your Joyful Confetti Sprinkle Cookies Creations
Wow, you made it to the end! I am so incredibly happy that you decided to spend some time making these vibrant Confetti Sprinkle Cookies. Baking is always better when shared, and I truly love hearing from you guys about how your bakes turned out!
Whether you made them for a wild birthday party, a quiet afternoon bake with the kids, or just because you needed a little color in your life, I want to see them!
Did you try my trick with the three-color drizzle, or did you stick to the classic roll-in-sprinkles method? Tell me everything!
Please, don’t keep all that joy to yourself! If you loved this recipe as much as my family does, I would be so grateful if you could take just a second to leave a rating at the top of the recipe card. Those little stars really help other bakers find these fun treats.
And if you snapped any pictures of your beautiful, colorful cookies—which I’m sure are much neater than the ones in my kitchen during the flour cloud phase—please share them on social media! Tag me so I can see the fun you’re having. I love browsing through your happy baking photos!
Your feedback helps me keep bringing you the best, most fun, and easiest recipes I can think of. You can learn a little more about me and why I love sharing my kitchen secrets over on my About page!
Happy baking, my friends! I truly hope these cookies bring as much sunshine to your table as they bring to mine.
Confetti Sprinkle Cookies
Ingredients
Equipment
Method
- Combine the flour, salt, cornstarch, and baking soda in a bowl. Whisk together and set aside.
- Cream the butter and sugar in the bowl of your stand mixer fitted with a paddle attachment. Mix on high speed until light and fluffy. Mix in the egg and vanilla. Scrape the bowl down and mix once more until well combined.
- Add the dry ingredients to the butter mixture and mix on low speed until almost combined. Scrape down the bowl, then add the sprinkles and mix on low speed until just combined.
- Use your spatula to fold in any extra flour. Portion out two tablespoon-sized pieces of dough (about 40g each), roll into balls, and top with more sprinkles.
- Place the dough balls about 2 inches apart on baking sheets lined with silicone mats or parchment paper. Chill the dough balls for at least one hour.
- Towards the end of your chill time, preheat your oven to 350F (175C). Bake for about 11 minutes, or until the edges are set and the cookies are puffed. They will continue baking after removal from the oven, so allow them to cool on the baking sheets for about 5 minutes.
Nutrition
Notes
Tried this recipe?
Let us know how it was!
Precision Keto Scientist
Numbers don’t lie, and neither do my recipes. I’m a biochemist who fell into keto cooking through my own metabolic research—and I approach recipe development like a lab experiment, complete with macro calculations precise to the tenth of a gram.
My journey started in diabetes research labs at Johns Hopkins, where I spent six years studying how different macronutrient ratios affected insulin sensitivity. Personal experimentation with therapeutic ketosis for cognitive enhancement led me down a rabbit hole of recipe testing that eventually consumed more hours than my actual day job.
While other cookbook authors describe flavors and textures, I quantify ketone elevation curves and glycemic impact data. My recipe database contains 340+ formulations, each tagged with detailed nutritional analysis, predicted ketosis timing, and optimal meal spacing. I measure salt by weight, time cooking processes to the minute, and log ingredient sourcing obsessively for consistent results.
My breakthrough research on fat-protein ratios for sustained ketosis got published in the Journal of Nutritional Biochemistry. My “Macro Math Mastery” workshops have trained over 5,000 people in precision meal planning. I even collaborated with continuous glucose monitor manufacturers to create the first real-time feedback system for recipe optimization.
I left my pharmaceutical research position at Merck three years ago to focus on metabolic nutrition consulting. Now I work with professional athletes, biohackers, and medical professionals seeking therapeutic ketosis protocols. When I’m not in my lab-kitchen, I’m competing in chess tournaments or documenting my daily biomarker measurements with true data scientist obsessiveness.
Cooking is just applied chemistry—and chemistry follows predictable rules. Master the variables, control the outcomes.