

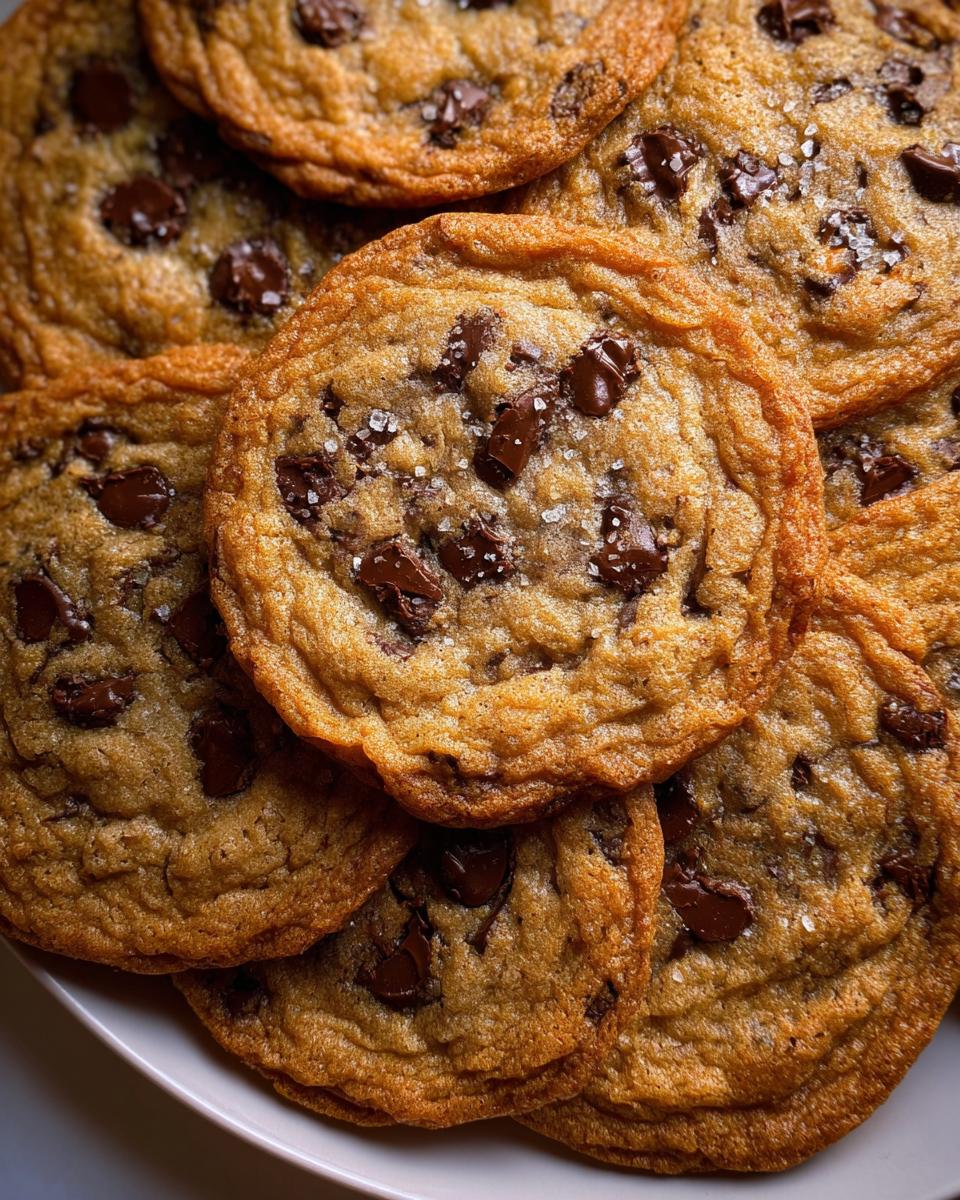
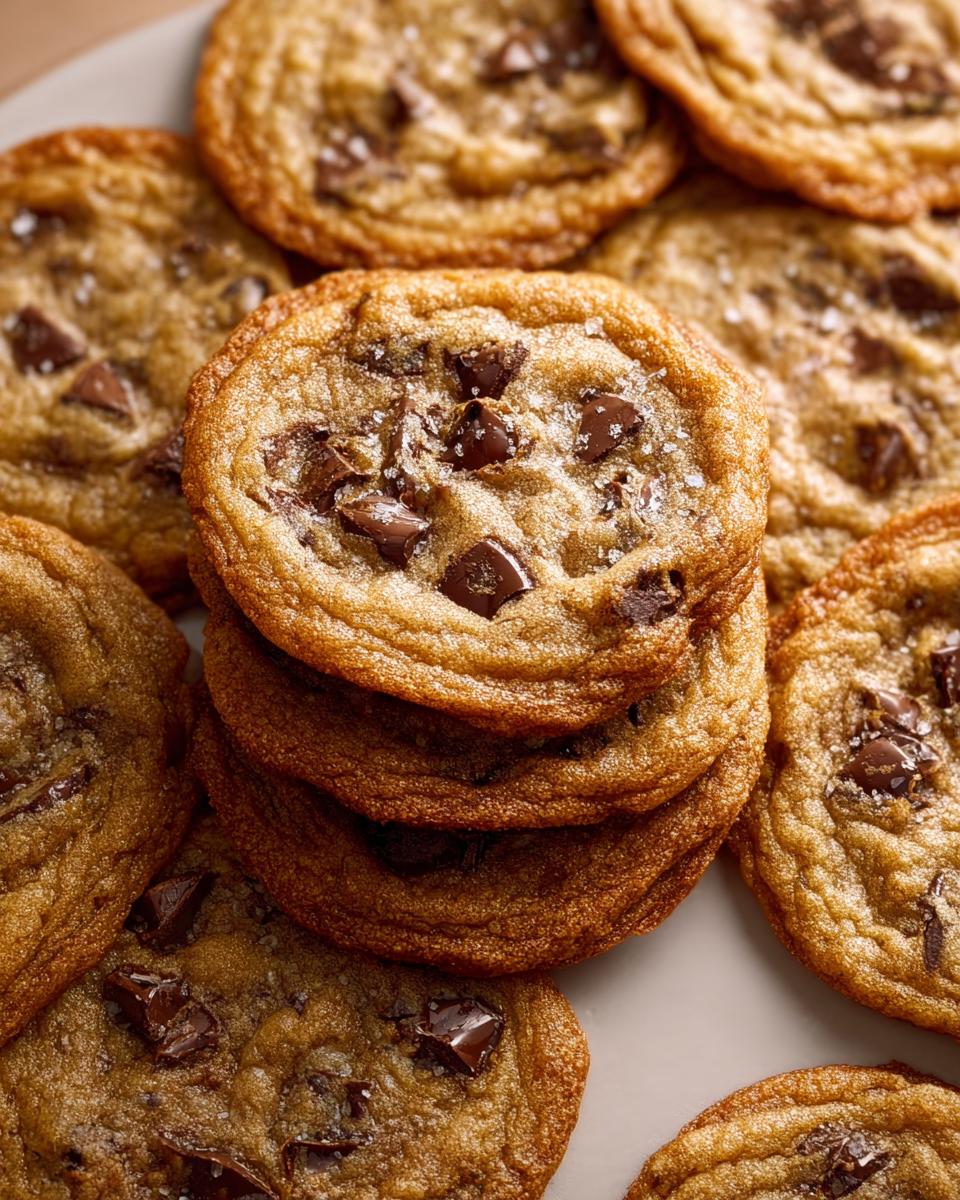
Oh, the quest for the perfect cookie! Isn’t that what every baker dreams about? I spent years chasing that elusive texture—you know the one—where the edges snap satisfyingly, but when you bite into the center, it’s still soft and chewy. Well, friends, I finally landed on the magic formula for **Crispy Chewy Thin Chocolate Chip Cookies** that nail that exact balance!
I vividly remember that first successful batch in my cozy Brooklyn kitchen. It was a rainy afternoon, and I was tossing in some urban-foraged sea salt with my favorite dark chocolate. Honestly, the aroma that poured out of the oven was pure nostalgia, an instant warm hug from the past, but the *taste*? Wow! That moment cemented my love for baking, proving that tweaking the classics can bring such joy. You’re getting my exact, tested-and-true blueprint today.
Why This Recipe Delivers the Best Crispy Chewy Thin Chocolate Chip Cookies
There’s a little bit of science—and a whole lot of butter—that makes these cookies what they are. We aren’t just making cookies here; we’re engineering texture! Trust me when I say these specific ratios are what separates a floppy, underbaked disk from the ultimate **Crispy Chewy Thin Chocolate Chip Cookies** you deserve.
- We use a higher ratio of white granulated sugar to promote spread, which gives us that perfect thinness right out of the gate.
- Room temperature ingredients ensure everything emulsifies beautifully for a smooth, spread-ready dough base.
- The baking time is dialed in precisely—no under-baking allowed!
If you want to see how other bakers tackle this challenge, check out some great tips on thin and crispy cookies here! But honestly, my method is the winner.
Achieving Perfect Thinness and Crispness
The thinness comes almost entirely from the fat and sugar combination. Because we cream the butter and sugar so well, we incorporate tons of air. That air, combined with the high sugar content, causes the dough to melt and spread rapidly in the oven. It’s what makes these cookies so wonderfully light and gives you that satisfying shatter when you break them. Perfect for those moments when you need super *thin crispy cookies*!
The Secret to a Chewy Center in Your Crispy Chewy Thin Chocolate Chip Cookies
Here’s the tricky part: we want the edges done, but the middle slightly underdone when they come out. That’s why the baking time is exactly 10 to 11 minutes. The magic happens *after* the oven. Leaving the cookies on the hot baking sheet for a full 15 minutes allows residual heat to set the center just enough to be chewy, but not dry. That residual cooking phase is the secret weapon for the **Crispy Chewy Thin Chocolate Chip Cookies** texture.
Essential Ingredients for Crispy Chewy Thin Chocolate Chip Cookies
Okay, no ifs, ands, or buts about it—the ingredients matter SO much for this specific texture we are going after. If you want that perfect thinness paired with that melt-in-your-mouth chew, stick exactly to what I have listed here. Every element is crucial for building the structure that allows these babies to spread just right.
I always tell people that baking is more like chemistry than cooking sometimes, especially when you are aiming for something really precise like this. If you’re looking for other great baking ideas, you can always check out some fun recipes I’ve compiled right here!
Dry Ingredients for Structure
We need a solid, measured base before we introduce the creamy stuff. Don’t go scooping your flour directly from the bag; fluff it up first, then measure it precisely! This helps prevent dry cookies, which we are definitely trying to avoid.
- 2 cups all-purpose flour
- 1 teaspoon baking soda
- 1 teaspoon sea salt
Wet Ingredients and Mix-ins for Flavor and Texture
This is where we set ourselves up for that perfect initial dough consistency. Remember, the butter, eggs, and milk absolutely *must* be at room temperature. If they’re cold, they won’t cream properly with the sugar, and your cookies won’t spread thin enough. Don’t skip warming them up a bit—it’s non-negotiable for these **Crispy Chewy Thin Chocolate Chip Cookies**!
- 10 ounces unsalted butter, at room temperature
- 1.33 cups granulated sugar
- 1/4 cup light brown sugar, packed
- 2 teaspoons vanilla extract
- 2 large eggs, at room temperature
- 1 Tablespoon milk, at room temperature
- 2 cups semi-sweet chocolate chips

Equipment Needed for Crispy Chewy Thin Chocolate Chip Cookies
You don’t need a fancy pastry kitchen for this recipe, thankfully! Having the right tools just makes the process smooth so you can get those cookies into the oven faster. We need to make sure we can cream the butter properly, which is half the battle for thinness!
Here’s the list of what you’ll want on hand before you even think about grabbing the flour:
- Stand mixer with paddle attachment—this makes creaming so much easier than by hand!
- Large baking sheets
- Parchment paper (a must! It helps with spreading)
- Medium bowl
- Wire rack
Step-by-Step Instructions for Perfect Crispy Chewy Thin Chocolate Chip Cookies
Now that we have all our perfectly tempered ingredients ready to go, it’s time for the assembly! Remember, baking these is an art, but it’s an art that follows a few key rules. Keep your mixer running smoothly, and trust the process. You can find some great tips on foolproof dinner ideas while you wait for your masterpiece to bake, over here, but stay focused—these cookies need your full attention!
Preparing the Oven and Dry Mix
First things first—get that heat going! Preheat your oven to 350 degrees Fahrenheit. That temperature is crucial for making sure they spread correctly, not puff up. While the oven warms up, grab a medium bowl. Whisk together the flour, baking soda, and salt. Just a quick whisk is enough to make sure everything is evenly distributed so you don’t end up with pockets of baking soda later.
Creaming Fats and Sugars for Spread
Time for the stand mixer! Fit it with the paddle attachment. Beat the room-temperature butter along with both types of sugar on medium speed. You absolutely must beat this until it looks light and fluffy—I usually give it a solid 2 minutes. Don’t forget to scrape down the sides of the bowl halfway through; we need every bit of that sugary air trapped in there for maximum cookie spread!
Mixing Wet Ingredients and Combining Dough
Stay on medium speed and mix in your vanilla until it looks smooth. Then, add your room-temperature eggs one at a time, making sure each one is fully incorporated before adding the next. Then, slowly pour in that tablespoon of milk. Now, drop the speed down to low. When you add the flour mixture, only beat it until you see the last streaks of flour disappear. Overmixing here leads to tough cookies, and we want *chewy*!
Baking and Cooling for Texture Control
Drop the dough onto your parchment-lined baking sheets using a 1-tablespoon scoop. You need 2 inches between each ball, seriously! They spread out a lot! Bake them one tray at a time for exactly 10 to 11 minutes. Rotate the tray halfway through baking, which helps them brown evenly. The second they come out, *do not touch them*! Let those **Crispy Chewy Thin Chocolate Chip Cookies** rest on the hot sheet for 15 full minutes before you use a thin spatula to move them to a wire rack. That rest keeps those centers perfectly chewy!
Pro Tips for Making Your Crispy Chewy Thin Chocolate Chip Cookies Even Better
Even though these instructions lead to amazing results, you can always tweak things slightly to make them *your* ultimate **chocolate chip classics**! Baking is personal, and once you master the base, you can start experimenting to get that signature layer of crispness and chew just right. These little adjustments really boost that Authoritativeness in the kitchen, you know?
If you want to see some other amazing ‘crispy outside, juicy inside’ ideas, definitely peek at those pointers over here!
The Importance of Ingredient Temperature
I harp on this because it’s true: room temperature butter, eggs, and milk are non-negotiable for the spread. Cold ingredients won’t cream correctly with the sugars, meaning you trap less air. Less air means taller, puffier cookies, and we want thin! Warmer ingredients help the dough spread quickly in the oven, delivering that snap and crispness we are after.
Chilling Dough for Crispy Chewy Thin Chocolate Chip Cookies
Now, this recipe is designed so you don’t *have* to chill it, allowing you to get those fast **Crispy Chewy Thin Chocolate Chip Cookies** you’re craving right now. However, if your kitchen is ridiculously hot or your butter was slightly too soft to begin with, try chilling the dough balls for just 15 minutes before baking. This tiny rest helps stabilize the fat just enough so they don’t turn into puddles before they set up. It’s a good safety net!
Serving Suggestions for These Dunkable Desserts
These cookies are practically begging to be dunked! That perfect balance of crisp edges and chewy middle means they hold up beautifully when dipped. Obviously, a tall, frosty glass of cold milk is the ultimate classic pairing for these **dunkable desserts**, taking you straight back to childhood.
But don’t stop there! They are also fantastic served slightly warm alongside a strong cup of coffee or even dipped into a small bowl of melted peanut butter for a real treat. If you’re looking for some amazing drink pairings to go alongside your batch, you should absolutely check out these recipes over here!
Storage and Reheating Instructions for Crispy Chewy Thin Chocolate Chip Cookies
Storing these delicate cookies correctly is almost as important as baking them right! We want to maintain that perfect texture—the crisp edges shouldn’t get soggy, and the chewy center shouldn’t seize up into a rock. The key to keeping your **Crispy Chewy Thin Chocolate Chip Cookies** tasting fresh is air restriction but not too much moisture retention.
Never stack them warm; that’s cookie suicide! Wait until they are completely cool, which usually takes about 30 minutes on a wire rack after that initial 15-minute rest on the pan. Once cool, you can store them in an airtight container.
I usually keep mine at room temperature. They should stay wonderfully textured for about four days. If you add too much moisture to the container—like a slice of bread, which some old cooks swear by—you risk softening those lovely crispy edges we worked so hard for!
Now, if you’ve managed to keep any for longer than a week, or if they’ve softened up a bit, don’t panic! You can easily bring back that fresh-from-the-oven magic. Just pop a few cookies on a baking sheet and reheat them in a 300-degree oven for about 3 to 4 minutes. Watch them closely! This flash reboot dries them just enough to reactivate the crispness while warming up that satisfyingly chewy core. They’ll be just as amazing as when they first came out!
Frequently Asked Questions About Thin Crispy Cookies
It’s totally normal to have questions when you’re chasing a specific texture! I field messages all the time about why cookies sometimes behave unexpectedly. Here are a few things I’ve learned over the years while trying to perfect these **thin crispy cookies**.
If you ever need more tips—maybe even some for a great seasonal dish like a fantastic Thanksgiving salad—feel free to stop by my resources page!
Can I use different types of chocolate chips?
Absolutely! I love using a mix of semi-sweet and dark chocolate chunks for that complex flavor, which always amplifies the *nostalgia baking* feel. The main thing to watch out for is using pure chocolate chips versus baking bars. Chips contain stabilizers to help them hold their shape. If you use chocolate bars, especially high-percentage dark ones, they will melt more completely, potentially making your cookies spread faster and resulting in a less defined crisp edge.
Why did my Crispy Chewy Thin Chocolate Chip Cookies turn out cakey?
Cakey cookies usually mean too much flour or that you overmixed after the flour went in! If your flour wasn’t measured correctly (too much flour equals cakey), the dough won’t spread enough in the oven. Also, if you beat the flour mixture too long, you develop gluten, which traps air and makes the cookie rise tall instead of spreading thin. For perfect **Crispy Chewy Thin Chocolate Chip Cookies**, remember: low speed, minimal mixing once the dry stuff is added!
How can I achieve maximum nostalgia baking results?
Ah, that deep, rich flavor of childhood cookies! To really hit that nostalgic note, step up your vanilla quality—use pure vanilla extract, not imitation! Also, try increasing that light brown sugar component by just a tablespoon or two. The extra molasses content deepens the caramel flavor notes, making the whole batch taste richer and more comforting, perfectly capturing that essence of *nostalgia baking*.

Share Your Perfect Crispy Chewy Thin Chocolate Chip Cookies
And there you have it—the blueprint for my favorite **Crispy Chewy Thin Chocolate Chip Cookies**! I truly hope these take you back to simpler, sweeter times, just like they did for me in my little Brooklyn kitchen. Baking is so much better when we share the results, don’t you think?
I absolutely love hearing from you all! Did you nail that perfect crispy edge? Were the centers as chewy as you hoped? Please, take a minute to leave a star rating right below this section. It helps other bakers know they are on the right track!
If you snapped a picture of your beautiful, beautifully thin cookies—maybe you’re proving they are the ultimate *dunkable desserts*—I’d be thrilled to see them! Feel free to share your creations and tag me or reach out using my contact page. Happy baking, everyone. I can’t wait to hear all about your batch!

Crispy Chewy Thin Chocolate Chip Cookies
Ingredients
Equipment
Method
- Preheat your oven to 350 degrees Fahrenheit. Line 2 large baking sheets with parchment paper and set them aside.
- In a medium bowl, whisk together the flour, baking soda, and salt. Set this mixture aside.
- In the bowl of a stand mixer fitted with the paddle attachment, beat the butter and both sugars on medium speed for about 2 minutes, or until the mixture is light and fluffy. Scrape down the bowl as needed during this process.
- Add the vanilla and beat until smooth. Add the eggs one at a time, beating well after each addition. Beat in the milk.
- On low speed, add the flour mixture, beating until the ingredients are just combined. Beat in the chocolate chips.
- Drop 1 tablespoon sized balls of dough onto the prepared baking sheets. Leave 2 inches between each cookie to allow for spreading.
- Bake, one tray at a time, for 10 to 11 minutes. Rotate the baking tray halfway through the baking time.
- Let the cookies cool for 15 minutes on the baking sheet. Then, use a thin spatula to transfer them to a wire rack to cool completely. Repeat this process with all the cookie dough.
Notes
Tried this recipe?
Let us know how it was!
Urban Forager & Hyperlocal Ingredient Specialist
My Brooklyn apartment balcony tells my story: vertical gardens packed with wild edibles, fermentation crocks bubbling with city-foraged greens, and the constant hum of dehydrators preserving herbs I’ve collected from unexpected urban corners. What started as weekend escapes to my aunt’s upstate farm during my Columbia botany studies turned into something bigger after I earned my Urban Ecology Master’s from The New School.
Instead of following traditional academic paths, I discovered that cities are actually amazing edible ecosystems—rooftop weeds, park-edge wild greens, vacant lot treasures that perfectly complement keto eating. Who knew that some of the best low-carb foods were growing right under our noses in Manhattan?
My recipe collections celebrate city seasons: spring dandelions and plantains, summer purslane from rooftops, autumn rose hips from community gardens, winter wild onions and cress. I’m certified through the New York Mycological Society and trained by Brooklyn Botanic Garden to forage safely and ethically. Over 180 of my recipes feature at least one urban-foraged ingredient—from sidewalk plantains to sumac berries and wild mint thriving in vacant lots.
My “Metropolitan Wild” column went viral after my dandelion coffee substitute hit social media. Now my weekend “Urban Wild Walks” through Central Park and Prospect Park sell out faster than I can schedule them. I teach city dwellers to spot safe, keto-friendly wild foods hiding in plain sight.
Currently, I’m partnering with local chefs to bring urban foraged elements to restaurant menus and developing an app that maps safe foraging spots across all five boroughs. Evenings find me tending my sourdough starters, pressing flowers for natural dyes, or weaving baskets from willow branches I collect during park maintenance.
Cities are wild food sanctuaries hiding in plain sight—keto eating becomes urban rebellion when you realize how much free, perfect nutrition grows right under our feet.