
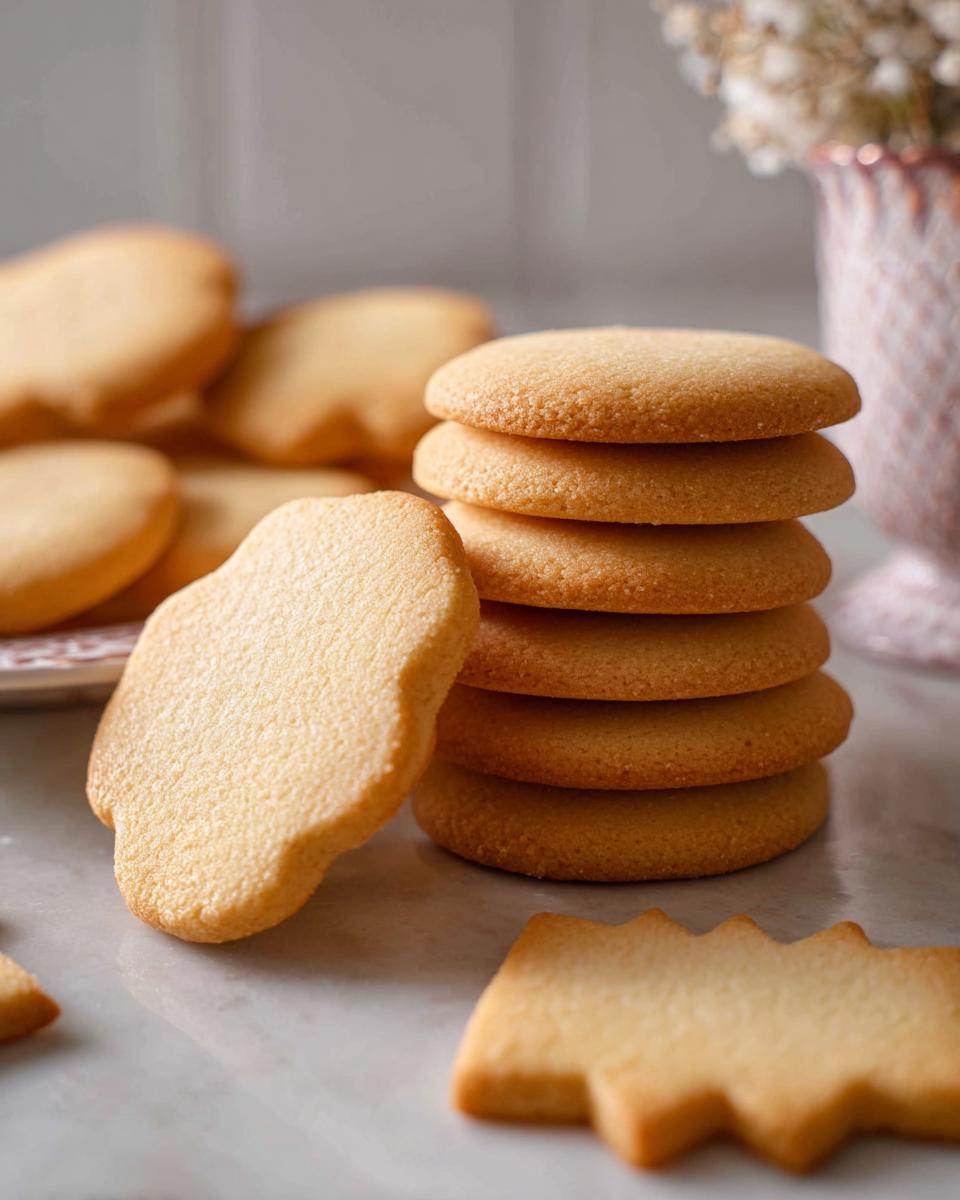
Oh, the sheer frustration of pulling a tray of what should be adorable holiday shapes out of the oven, only to find blobs that vaguely resemble what you started with! If you are tired of mushy edges and puffy centers ruining your baking vision, you’ve come to the right place. Trust me, I know the feeling well. Getting that crisp outline is the key to beautiful decorating, and that’s why I’m sharing my holy grail recipe for the very best Cutout Sugar Cookies (Sharp Edges).
I still remember the first time I attempted cutout sugar cookies as a child—my grandmother’s kitchen was a whirlwind of flour, laughter, and cookie cutters. We spent hours shaping dough into festive figures, laughing as we compared our creations. I was fascinated by how the cookies emerged from the oven with sharp, perfect edges, ready for icing and sprinkles. That experience ignited my passion for precision in baking, and to this day, I often revisit that memory when crafting my own batch of Cutout Sugar Cookies (Sharp Edges) for family gatherings. Sharing those cookies has become a cherished tradition, connecting my past to every joyful moment around the table.
By Alexandra Bennet, Urban Forager & Hyperlocal Ingredient Specialist, we’re focusing on the *how* and *why* behind a cookie that holds its shape perfectly.
Why This Recipe Guarantees Cutout Sugar Cookies (Sharp Edges)
This isn’t just any sugar cookie recipe; this is precision engineering in dessert form! We are aiming for cookies that don’t bloom in the oven. Achieving those beautiful, crisp lines comes down to managing the fat and temperature. As a baker focused on quality, I can tell you that the magic of my technique, honed over years, really centers on two things: the right ingredient ratio and mandatory refrigeration. I’m Alexandra Bennet, and I promise, once you follow these rules, you’ll get that ‘no spread’ magic every time.
The Secret to No Spread Sugar Cookie Cutouts
The way we treat the flour and fat is what unlocks that coveted ‘no spread’ result. We use a high flour-to-fat ratio, which is your first defense against spreading. But hear me out: the most important step is the chill dough requirement. This firms up the butter so much that when it hits the heat, it takes much longer to melt and run everywhere on the sheet. It sets those shapes fast!
Tips For Baking Perfect Sugar Cookies Every Time
When you roll out your dough for your Cutout Sugar Cookies (Sharp Edges), consistency is everything. You absolutely must aim for exactly ¼-inch thickness across the board—no thin spots! Also, don’t overcrowd your baking sheets. Bake one cookie sheet at a time, giving the edges enough space to breathe, which helps them set cleanly instead of steaming and puffing up. Keep that oven temperature steady, and you’ll see the difference immediately!
Essential Ingredients for Cutout Sugar Cookies (Sharp Edges)
Okay, if we want those gorgeous, defined shapes, we need to treat our ingredients with respect! This is where the chemistry of baking really comes into play, especially when aiming for those perfect Cutout Sugar Cookies (Sharp Edges) that won’t bulge in the middle. We need solid structure, which means quality butter and the right amount of dry ingredients. I always recommend stocking up before you start, just like I do when prepping for holiday baking. You can see a great general overview of basics over at Preppy Kitchen, but here is exactly what you need for this specific, reliable formula from my own recipe vault.
For the Cookies
For the cookie dough, you’ll need these exact measurements. Pay close attention to the notes, especially with the butter!
- 4 cups all-purpose flour (480g)
- 3/4 teaspoon salt
- 3/4 teaspoon baking powder
- 1 cup unsalted butter, softened (227g)
- 1 cup granulated sugar (200g)
- 2 large eggs
- 2 teaspoons vanilla extract
Step-by-Step Instructions for Cutout Sugar Cookies (Sharp Edges)
This is where the magic happens! Pay close attention during the mixing stage because this directly influences how sharp your cookies will be. It’s all about keeping that butter cold after we mix it in! We’re going to make sure every step supports that sharp, professional finish.
Preparing the Dough for Optimal Sharp Edges
First things first, grab a medium bowl and just whisk your flour, salt, and baking powder together. Easy peasy. Now, go to your big bowl; it’s time to cream that softened butter with the granulated sugar until it looks light and genuinely fluffy—this takes about two minutes on medium speed. Don’t rush the creaming!
Next, drop in your eggs one by one, making sure you scrape down the sides of the bowl after each addition. Then, splash in that vanilla extract. Once everything’s incorporated, you’re going to add the dry mixture in slowly while the mixer is running. You want it just mixed—stop as soon as you don’t see flour streaks anymore. Seriously, don’t overmix! If you need inspiration for quick, balanced meals while you wait for the dough to chill, check out some tips over at Simple Balanced Suppers.
Now for the crucial step for those Sharp Edges: divide that dough into two nice, fat disks, wrap them tight in plastic wrap, and send them to the fridge. They need a minimum of two hours—I always go for two hours—to let that dough really firm up. If you are prepping ahead, you can leave them up to two days, but remember to let them soften up for about 15 to 30 minutes on the counter before you start rolling!
Rolling and Cutting Your Sugar Cookie Cutouts
Alright, preheat that oven to 375F while you work. Lightly flour your surface—don’t go crazy, we don’t want dry pockets of flour stuck to our gorgeous cookies. Take one disk of dough and start rolling it out. You are aiming for a consistent ¼-inch thickness across the whole sheet. If you get gaps where you see the counter, keep rolling!
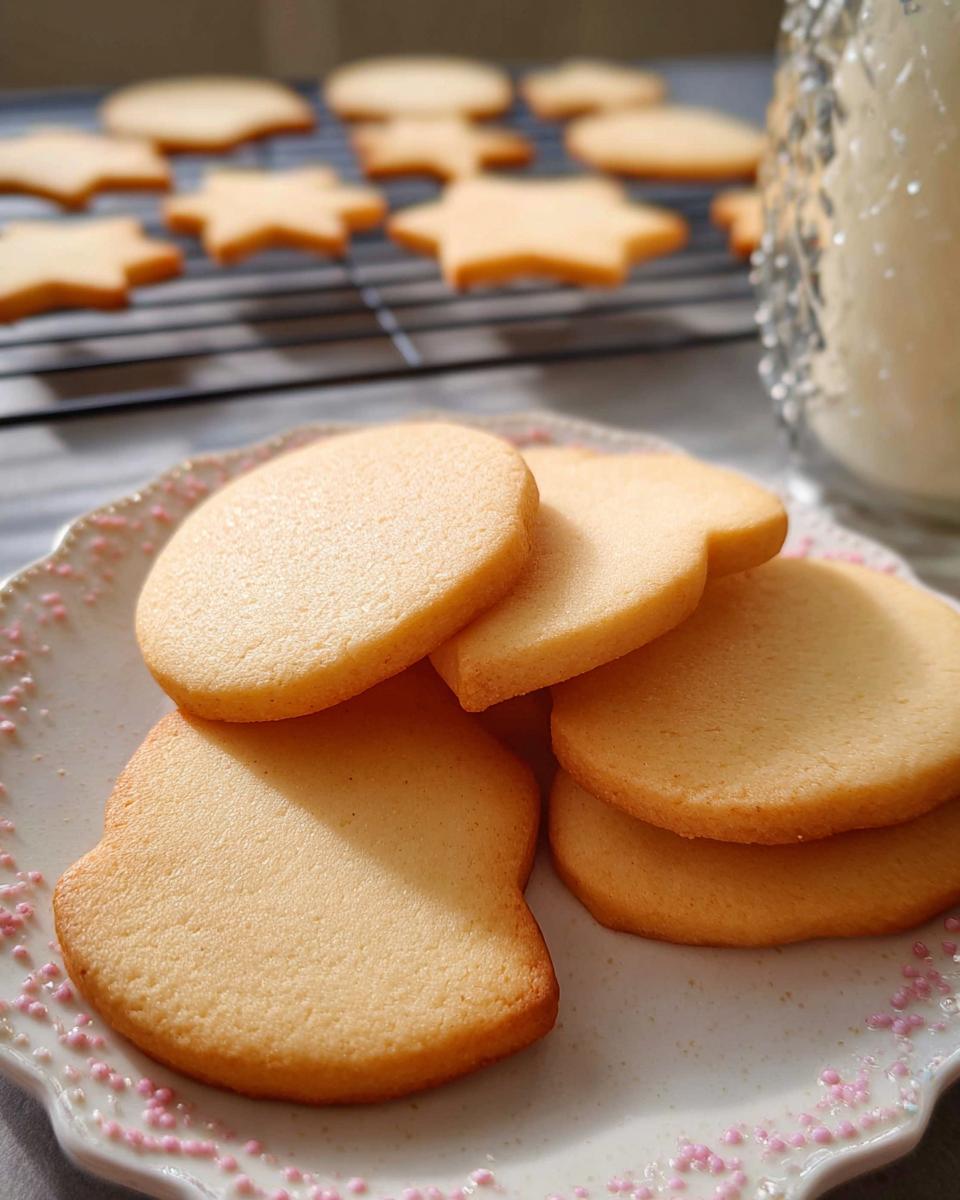
Now, grab your cutters and press them straight down firmly into the dough for those perfect Sugar Cookie Cutouts. Don’t twist them! Twisting is what causes the dough to tear slightly and leads to spreading. Once cut, quickly transfer the shapes onto your parchment-lined baking sheets, leaving about an inch between each one. Work fast so the dough stays chilled!
Baking Techniques for Perfect Cutout Sugar Cookies (Sharp Edges)
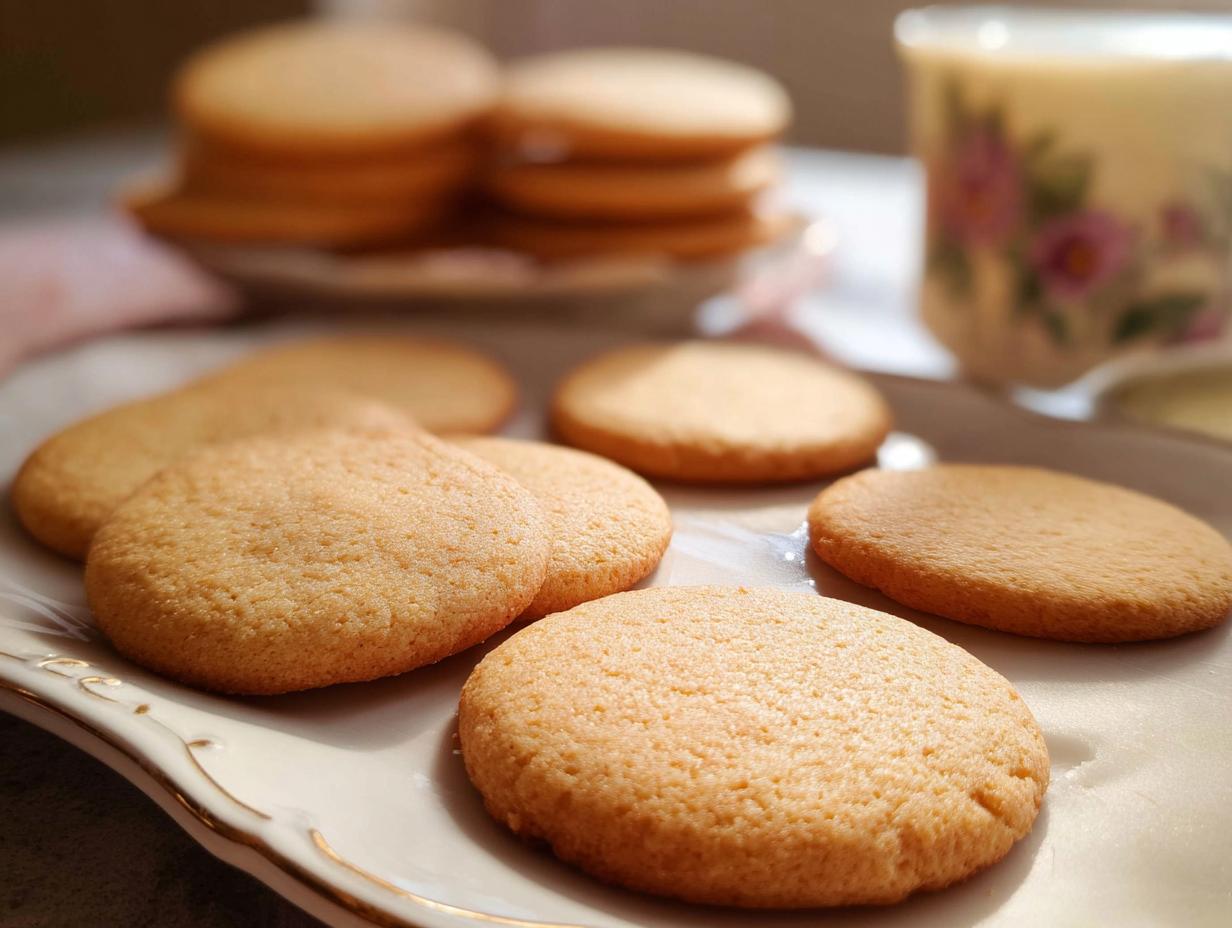
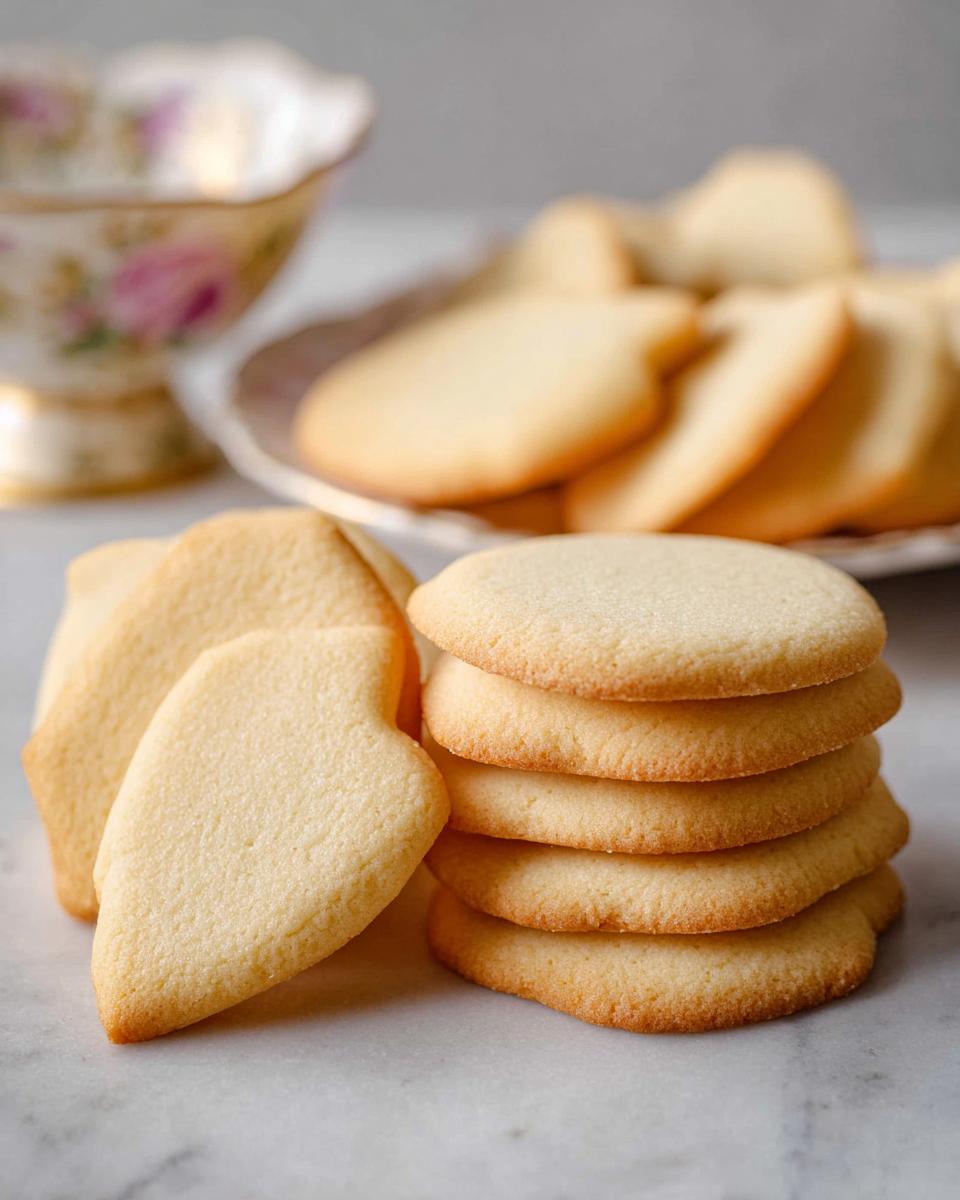
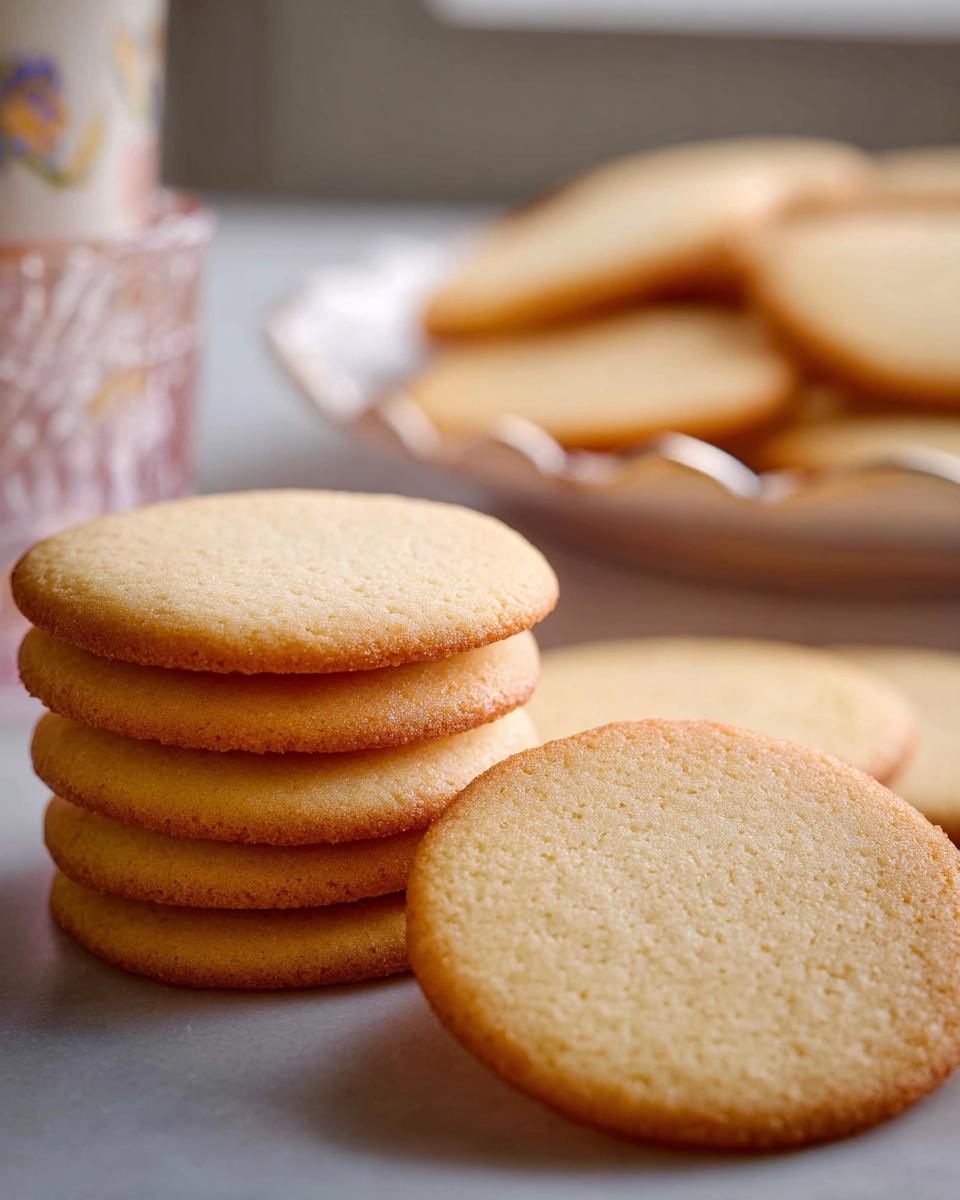
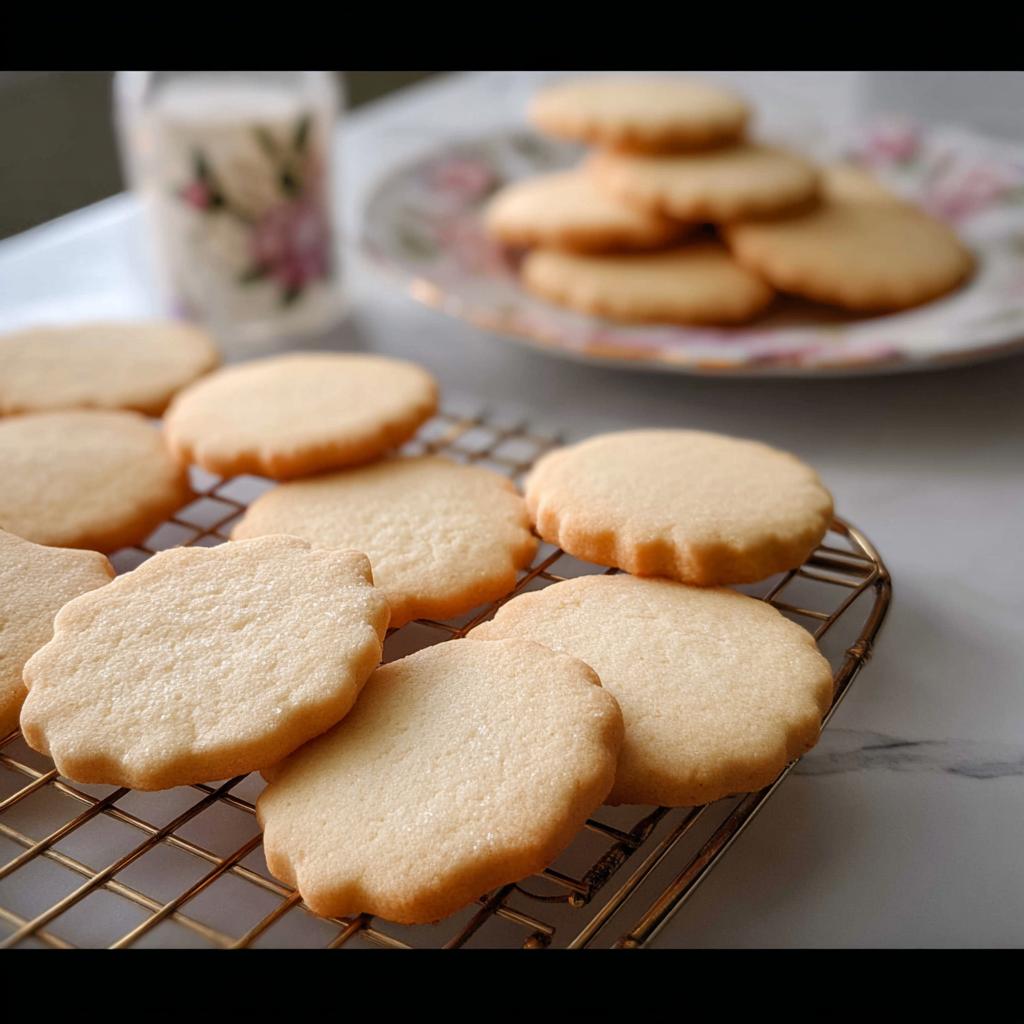
We bake these one sheet at a time, which is vital for even baking. Pop the tray into the oven for about 10 to 12 minutes. You aren’t looking for them to turn dark brown, no way! Just watch the bottom edges; the moment they start showing a slight hint of golden brown, they are done. That quick bake locks in the shape. Pull them out and let them rest on the hot pan for just a few minutes before gently moving them over to a wire rack to cool completely. Never decorate a warm cookie—that’s a recipe for melty disaster, I learned that the hard way! Keeping them cool ensures you keep those beautiful, crisp **Cutout Sugar Cookies (Sharp Edges)**.
Ingredient Notes and Substitutions for Cutout Sugar Cookies
When we’re trying to achieve those perfectly crisp lines, the quality of what goes into that bowl really matters, doesn’t it? I can’t stress enough how important it is to use real, unsalted butter. Don’t even think about using margarine here; the dairy content and fat structure in real butter help stabilize the dough far better, which is exactly what prevents spreading. Also, make sure your butter is truly room temperature—soft enough to dent, but not greasy or melty. That softness allows it to cream up correctly with the sugar and incorporate air pockets.
As for flour, we stick to all-purpose because its protein content is just right for structure without being too tough. Cake flour tends to make things too delicate, and that’s the opposite of what we want for these sturdy holiday cookies. If you’re looking for more baking tips focused on ingredient balancing, I put a lot of helpful notes over at my recipe index!
Tips for Decorating Ideas For Sugar Cookies
Now that you have these flawless Cutout Sugar Cookies (Sharp Edges), it’s time for the fun part—decorating! But hold on tight! If you try to rush a single second here, you risk melting all that hard work you put into chilling the dough. My absolute first rule? The cookies must be completely, stonily cool before any icing touches them. I learned this the hard way during a Christmas marathon when I tried using lukewarm cookies for my first batch of royal icing outlines. Everything slid right off the edges! It was a disaster!
For those intricate designs that really showcase those sharp cookie shapes, you need Royal Icing. It dries hard and holds its line beautifully. You’ll want to mix your batches thin enough for ‘flooding’ the surface neatly—nice and smooth—but thick enough so it doesn’t run right off the sides. If you’re aiming for something quicker and softer, a simple glaze works fine, but it won’t set nearly as firmly. If you are ever looking for fun, slightly chaotic holiday inspiration, check out some of my favorite themed ideas over at my seasonal roundups!
Troubleshooting Common Issues with Cutout Sugar Cookies (Sharp Edges)
It happens to the best of us! Even with the best recipes, sometimes the cookies don’t behave. If you are looking at cookies that puffed up in the middle and lost their crisp shape, nine times out of ten, it’s because your dough wasn’t cold enough going into the oven. Don’t skip that mandatory chill time! If your shapes warped, double-check how you measured the flour. Too much flour can make the dough brittle and cause it to crack, but too little—well, that guarantees spreading.
If you see the edges melting before the center cooks, try moving the rack to the center position and consider putting your baking sheet in the freezer for 10 minutes right before the cookies go in. That blast of extra cold helps lock in those beautiful **Sharp Edges**. If you have questions about anything else, feel free to reach out to me over at my contact page!
Storage & Reheating Instructions for Cutout Sugar Cookies
Once you’ve mastered the art of the perfect cutout, you want those gorgeous cookies to last, right? Here’s the deal: undecorated sugar cookie cutouts are superstars at storage! Keep them in a single layer in an airtight container at cool room temperature for up to a week. If you stack them, make sure you put a piece of parchment paper between each layer so the icing doesn’t stick or smudge!
For decorated cookies, especially those with royal icing, you should generally keep them at room temperature too, but try to use them within three or four days for the best texture. Don’t freeze them if they are heavily iced, as the moisture change can sometimes make things look sad. They are so good, though, you probably won’t have any leftovers to worry about!
Frequently Asked Questions About Sugar Cookie Cutouts
I always get questions about these cookies because everyone wants that perfect, crisp look! It’s all about mastering a few little tricks that make a huge difference between a good cookie and a spectacular one that survives the decorating table. Here are the things I hear most often from my fellow bakers.
How long must the dough chill before cutting?
For these specific Cutout Sugar Cookies (Sharp Edges), the minimum chilling time really is non-negotiable for success. You absolutely need to let that dough rest in the fridge for at least two hours. Think of it as setting the structure! You want the butter fully solidified so that when you roll it out and cut your shapes, everything is firm and ready to bake cleanly. Anything less risks puffing!
Can I skip chilling the dough entirely?
Oh goodness, please don’t! If you skip the chill dough step, you might as well just bake pancakes instead of cookies. The primary goal of this recipe is that beautiful ‘no spread’ effect, and that only happens when the fat is super cold when it enters the heat. Skipping this means those gorgeous, intricate Sugar Cookie Cutouts will melt into flat puddles on your pan. A little patience goes a long way here!
What is the best flour to use for Sugar Cookie Cutouts?
I rely on good old all-purpose flour for these cookies because it strikes that perfect balance of structure and tenderness we are looking for. Cake flour can sometimes result in a cookie that’s *too* crumbly or delicate, and we need a little sturdiness to achieve those crisp lines needed for sharp edges. All-purpose flour holds up beautifully to mixing, chilling, and decorating!
Estimated Nutritional Data for Cutout Sugar Cookies (Sharp Edges)
I always feel a little nervous sharing this part, because honestly, I don’t bake these beauties keeping calorie counts in mind—it’s about the joy! But for those of you tracking things, based on the ingredients list, these Cutout Sugar Cookies (Sharp Edges) come out to roughly 122 calories per cookie. You can check out the full breakdown below, but remember, these are just estimates! My favorite way to see nutritional estimates is always as a suggestion, since how soft your butter was or exactly how much you rolled the dough affects the final count!
- Calories: 122
- Fat: 6g
- Carbohydrates: 16g
- Protein: 2g
Share Your Beautifully Shaped Cutout Sugar Cookies (Sharp Edges)
Whew! We made it! We tackled the chill time, mastered the rolling technique, and now you should have a tray full of stunning, crisp **Cutout Sugar Cookies (Sharp Edges)** that are just begging for those intricate icing designs.
I genuinely want to see what you created! Did you keep it simple, or did you go all out with piping details? Seriously, please don’t be shy. Head down to the comments section right now and let me know how your cookies turned out. Did they stay perfectly sharp? Which cookie cutter shape was your favorite to cut?
If you snap a picture of your decorated masterpieces, tag me on social media! Seeing your beautiful holiday cookies is honestly the best part of sharing these recipes with you all. It reminds me of those early days in Grandma’s kitchen. If you found this guide helpful in finally achieving that perfect, non-spreading cookie, give it a five-star rating right underneath this section. Happy baking, my friends—and I look forward to seeing those gorgeous shapes!
P.S. If you need last-minute ideas for what to do with your flawless cookies—like making fun spooky treats—check out some of my favorite themed ideas over at my seasonal roundups for later inspiration!
Cutout Sugar Cookies (Sharp Edges)
Ingredients
Equipment
Method
- In a medium bowl, sift together the flour, salt, and baking powder.
- In a large mixing bowl or the bowl of a stand mixer fitted with the paddle attachment, beat the butter and sugar together on medium speed until light and fluffy, about 2 minutes.
- Add the eggs, one at a time, while mixing. Scrape down the sides of the bowl. Beat in the vanilla.
- With the mixer running, gradually add in the flour mixture and mix until everything is well incorporated. Divide the dough in half, shape into two disks, and tightly wrap in plastic wrap. Refrigerate for 2 hours or up to 2 days. If chilling longer than 2 hours, let the dough sit at room temperature for 15 to 30 minutes or until slightly softened.
- Once the dough is chilled and you’re ready to bake, preheat the oven to 375F.
- Roll the dough on a lightly floured surface to ¼-inch-thickness. Cut out shapes using 2½-inch cookie cutters. Re-roll as needed for more cookies.
- Place the cut-outs on non-stick or parchment-lined baking sheets 1 inch apart.
- Bake one sheet at a time for 10 to 12 minutes or until the bottom edges start to turn brown. Let cool for a few minutes on the pan then transfer to a wire rack and cool completely.
Nutrition
Notes
Tried this recipe?
Let us know how it was!
Urban Forager & Hyperlocal Ingredient Specialist
My Brooklyn apartment balcony tells my story: vertical gardens packed with wild edibles, fermentation crocks bubbling with city-foraged greens, and the constant hum of dehydrators preserving herbs I’ve collected from unexpected urban corners. What started as weekend escapes to my aunt’s upstate farm during my Columbia botany studies turned into something bigger after I earned my Urban Ecology Master’s from The New School.
Instead of following traditional academic paths, I discovered that cities are actually amazing edible ecosystems—rooftop weeds, park-edge wild greens, vacant lot treasures that perfectly complement keto eating. Who knew that some of the best low-carb foods were growing right under our noses in Manhattan?
My recipe collections celebrate city seasons: spring dandelions and plantains, summer purslane from rooftops, autumn rose hips from community gardens, winter wild onions and cress. I’m certified through the New York Mycological Society and trained by Brooklyn Botanic Garden to forage safely and ethically. Over 180 of my recipes feature at least one urban-foraged ingredient—from sidewalk plantains to sumac berries and wild mint thriving in vacant lots.
My “Metropolitan Wild” column went viral after my dandelion coffee substitute hit social media. Now my weekend “Urban Wild Walks” through Central Park and Prospect Park sell out faster than I can schedule them. I teach city dwellers to spot safe, keto-friendly wild foods hiding in plain sight.
Currently, I’m partnering with local chefs to bring urban foraged elements to restaurant menus and developing an app that maps safe foraging spots across all five boroughs. Evenings find me tending my sourdough starters, pressing flowers for natural dyes, or weaving baskets from willow branches I collect during park maintenance.
Cities are wild food sanctuaries hiding in plain sight—keto eating becomes urban rebellion when you realize how much free, perfect nutrition grows right under our feet.