
Ugh, is it *another* busy week already? Between work, errands, and just trying to catch our breath, sometimes the thought of planning and cooking a decent meal feels like climbing Mount Everest. But what if I told you that comfort food classic you probably grew up with, the one that always made things better, can actually be your meal prep superhero? Yep, I’m talking about grilled cheese! Forget those sad, rubbery versions you might have tried to meal prep in the past. We’re talking about genuine, delicious, soul-warming **Grilled Cheese Recipes Meal Prep That Actually Tastes Great**. It’s all about smart techniques and killer ingredients!
I remember my college days like it was yesterday – late nights, endless textbooks, and the magical, cheesy goodness of a grilled cheese sandwich was my ultimate comfort. Back then, it was whatever bread and cheese I could find, but man, did it hit the spot! Now, as a grown-up navigating hectic weeks, I’ve discovered the absolute joy of taking that nostalgic flavor and turning it into a meal prep win. By tweaking my approach, I found ways to make these beloved sandwiches not just convenient, but truly spectacular. Think gooey, melty cheese, perfectly toasted bread, and even some fancy additions that make you feel like you’re dining out, not just surviving the week!
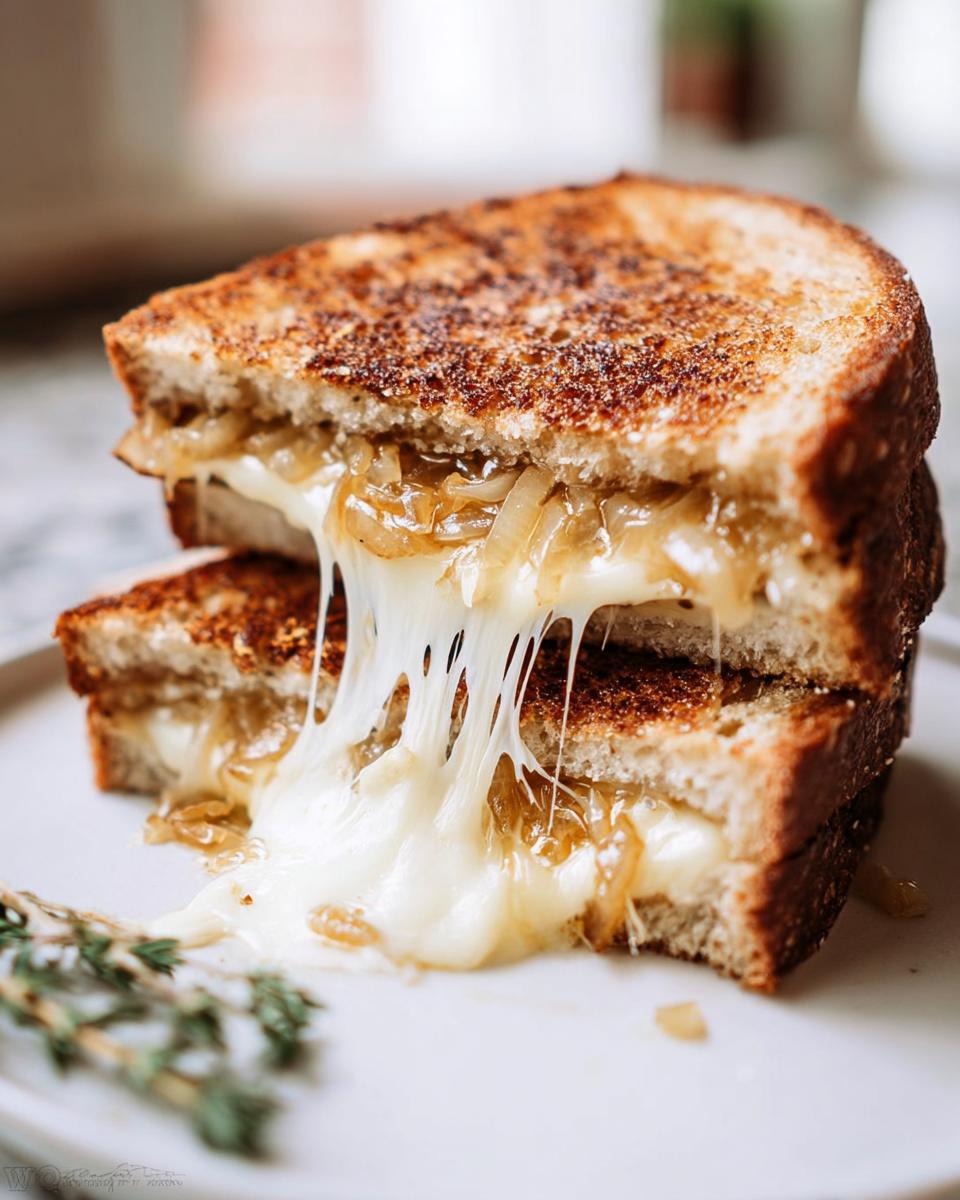
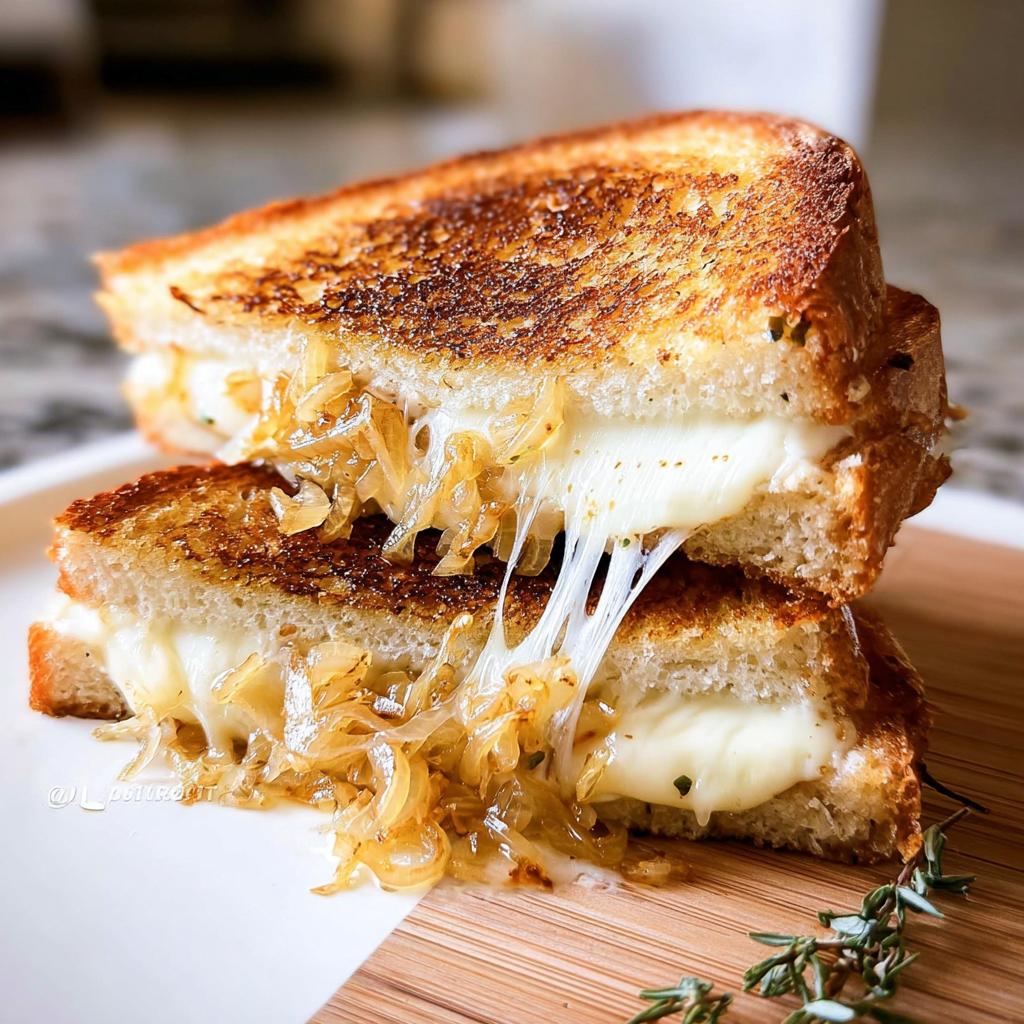
Why This Caramelized Onion Grilled Cheese is a Meal Prep Game-Changer
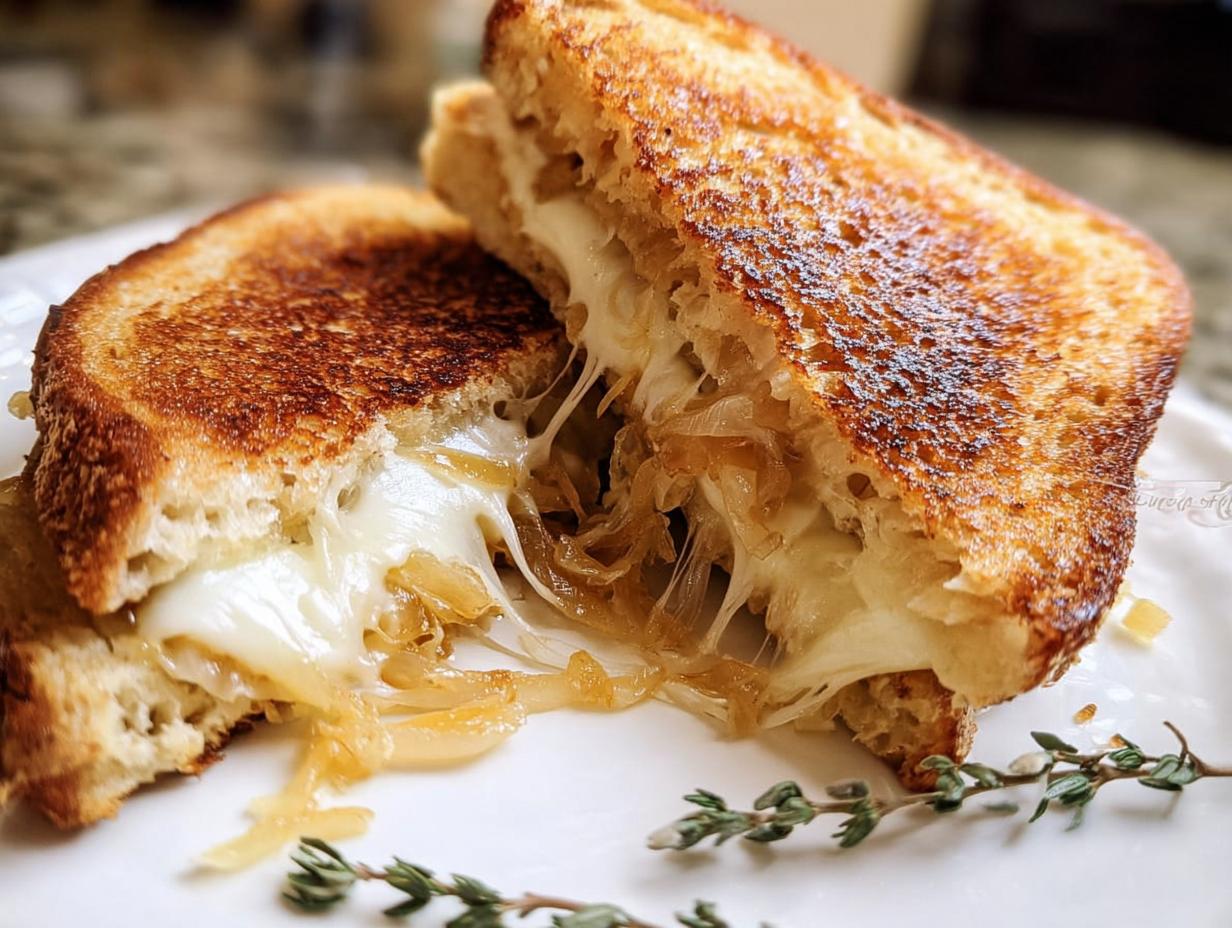
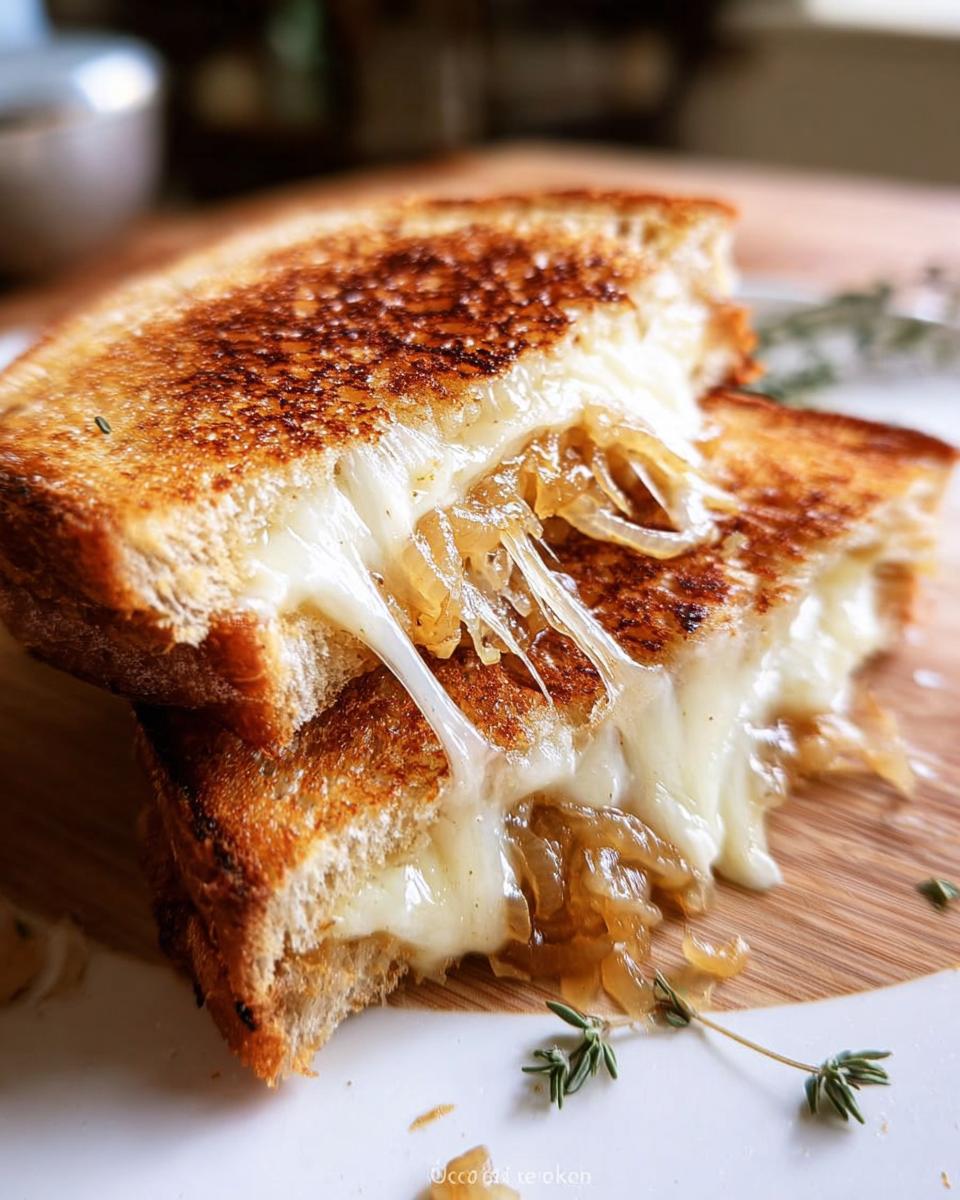
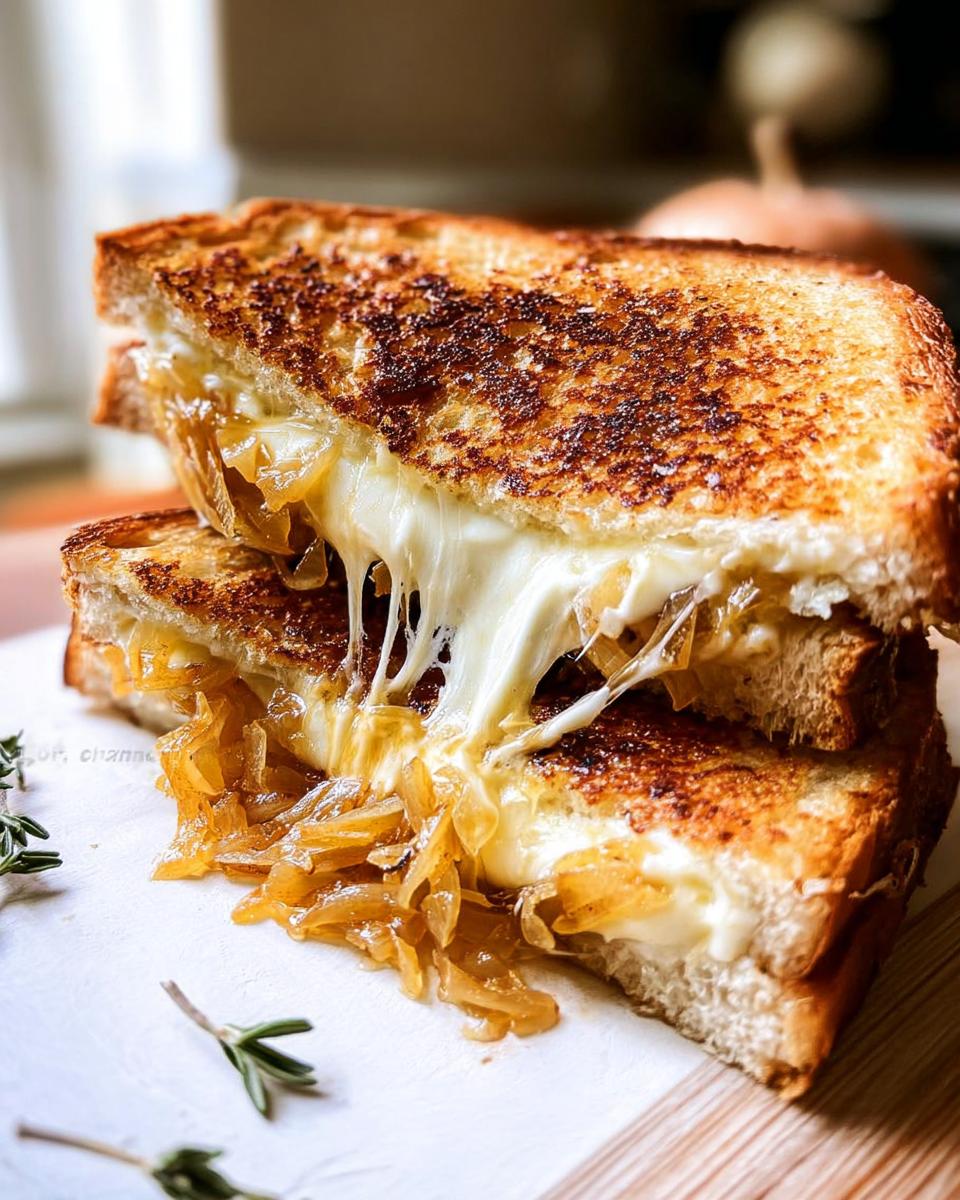
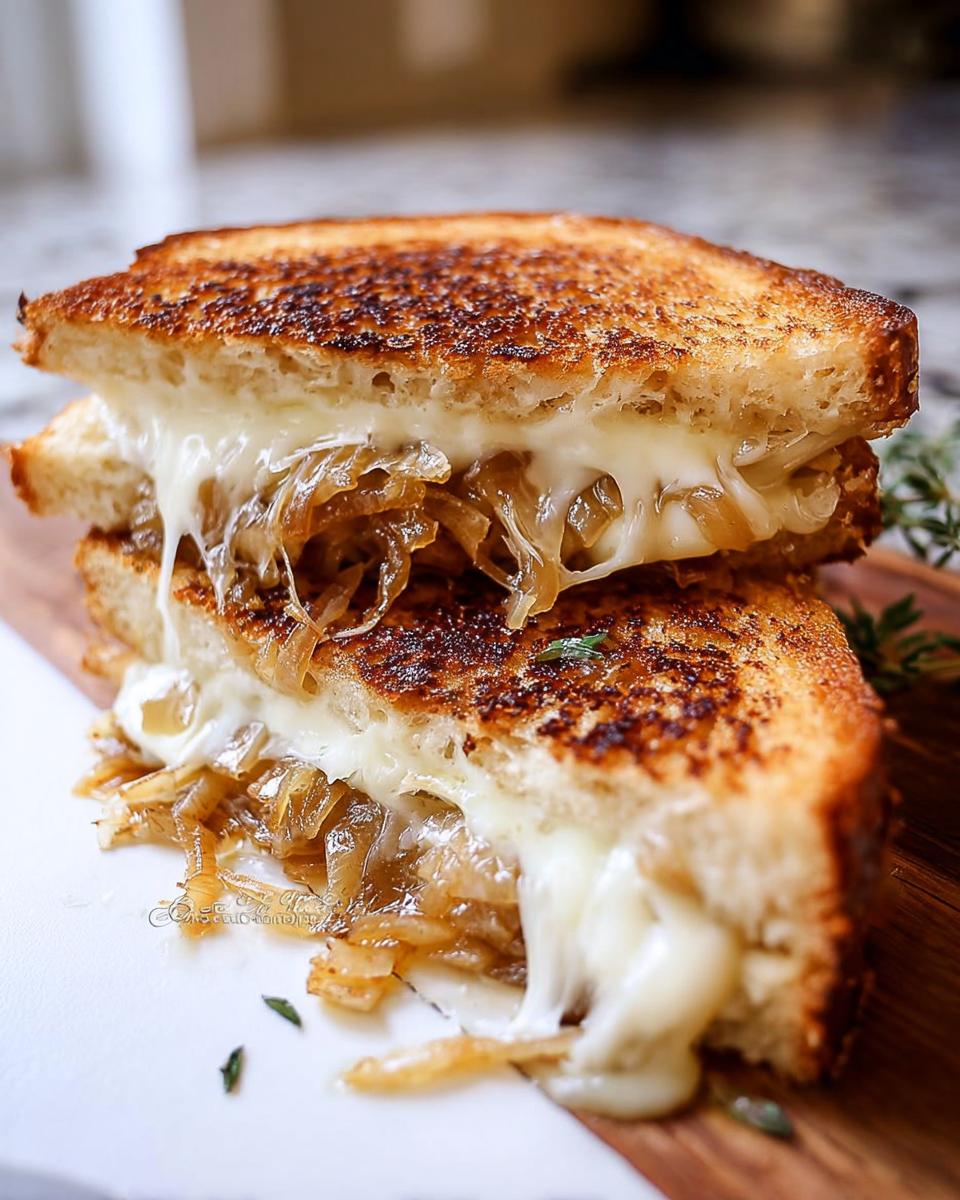
Okay, so why is *this* particular grilled cheese recipe my absolute go-to for meal prep? Because it’s not just convenient, it’s seriously delicious and holds up so well! All those other quick fixes you’ve tried? Forget ’em. This one delivers that same incredible, melty cheese pull and toasty exterior even after a few days. The caramelizing onions ahead of time is a total game-changer. They get super sweet and jammy, adding this amazing depth of flavor that makes the whole sandwich taste way more gourmet than it is. Plus, that blend of Gruyere and white cheddar? It’s perfectly balanced – sharp, nutty, and oh-so-gooey when you reheat it. You can check out some other quick and flavorful dinner ideas if you need more inspiration! It’s the kind of meal that genuinely makes you happy you prepped, and it’s *so* quick to assemble once those onions are ready. It’s the kind of meal that genuinely makes you happy you prepped. I honestly feel like a kitchen wizard when I pull these out of the fridge during a busy week!
Gather Your Ingredients for the Best Grilled Cheese Recipes Meal Prep
Alright, ready to build the ultimate grilled cheese for your meal prep stash? It all starts with grabbing the right stuff. For this recipe, we’re talking about two main players: the sweet, jammy caramelized onions and the star of the show, the grilled cheese itself. You’ll want to make sure your cheeses are at room temperature before you start assembling; trust me, it makes *all* the difference for that perfect, gooey melt!
For the Caramelized Onions
- 2 medium yellow onions, diced
- 1 tsp fresh thyme, minced
- 1 tsp fresh rosemary, minced
- 1 tsp brown sugar
- 1.5 Tbsp butter
- 1 Tbsp olive oil
- Salt and black pepper, to taste
For the Grilled Cheese
- 8 slices of thick-cut artisan bread (sourdough or a good country loaf is fantastic!)
- 12 oz Gruyere cheese, thinly sliced or grated
- 6 oz white cheddar cheese, thinly sliced or grated
- 4 slices Muenster cheese
- 1 Tbsp mayonnaise (for spreading on the bread – it’s the secret to a golden crust!)
- 1.5 Tbsp butter, divided
- 1 tsp fresh rosemary, minced
Step-by-Step: Crafting Your Perfect Grilled Cheese Recipes Meal Prep
Okay, let’s get down to business and build these incredible grilled cheese sandwiches for your meal prep! It’s honestly super quick, especially once those sweet, jammy caramelized onions are ready to go. First things first, grab two slices of bread and spread a thin, even layer of mayonnaise on one side of each. Trust me on this one – mayo is the secret weapon for getting that perfect golden-brown, crispy crust that just sings! Now, if you’ve used the same skillet for your onions, give it a quick wipe. Melt that last bit of butter in the skillet over medium heat, and toss in the minced rosemary. Let it get fragrant for a few seconds, then carefully place the bread slices, mayo-side down, into that deliciousness. Let them toast for about 2-3 minutes until they’re beautifully golden. While that’s happening, start layering on the cheese – that Gruyere and white cheddar. Remember, room temperature cheese melts like a dream! Once the bread is toasted, spoon a generous couple of tablespoons of those sweet caramelized onions over the cheese on one of the slices. Then, top it off with the other bread slice and gently press down. Keep the heat on low, and let the cheese get all melty and gooey. You’re looking for it to just start oozing out the sides. Once they are perfectly melty, remove them from the pan and set aside. Just repeat this whole glorious process for the rest of your sandwiches!
Caramelizing the Onions
This is where the flavor depth really comes from! Heat the butter and olive oil in a skillet over medium-low heat. Add your diced onions, a pinch of salt, pepper, and the thyme and rosemary. You want to let these cook low and slow, stirring often, for about 10 minutes until they’re soft and starting to turn a lovely golden brown. Then, stir in that pinch of brown sugar and cook for another minute. Patience here really pays off for that sweet, jammy texture!
Assembling and Grilling Your Grilled Cheese
Alright, building time! After you’ve got your mayo-ed bread slices toasting in the skillet (mayo-side down, remember?), it’s time to load them up. As soon as the bread hits the pan, start stacking your Gruyere and white cheddar on top. Once that bottom piece of bread is perfectly golden, sprinkle a couple of tablespoons of those amazing caramelized onions over the cheese. It’s like a little flavor bomb waiting to happen! Then, top it off with the other bread slice and gently press down. Keep the heat on medium-low so the cheese gets perfectly melty and gooey. You can even lift an edge to peek and make sure it’s getting that gorgeous golden color. Cook for another 2-3 minutes per side, really watching that cheese melt. The goal is that beautiful, stretchy, cheesy center!
Tips for Achieving That Perfect Melty Cheese
The absolute key to a super melty grilled cheese for your meal prep is starting with room-temperature cheese. Cold cheese just takes forever to melt and can leave you with a slightly tougher sandwich. Also, keep that heat low and steady! If the heat is too high, the bread will burn before the cheese has a chance to get properly gooey. A lid can be your friend here too; putting a lid on the skillet for a minute after you flip can trap steam and help the cheese melt faster and more evenly. Don’t rush it – that gooey, cheesy center is totally worth the extra minute! You can even pair this with a quick soup for a complete meal!
Making Ahead and Storing Your Grilled Cheese Recipes Meal Prep
Okay, so you’ve made these amazing sandwiches, and now you’re wondering how to keep that grilled cheese magic alive for your busy week. The best part? This recipe is totally meal-prep friendly! The caramelized onions? They’re a flavor powerhouse that just gets better as they hang out. You can totally make a big batch of those and store them in an airtight container in the fridge for up to 4 days. When it’s sandwich time, just assemble with your room-temp cheeses and bread. For the ultimate convenience, you can even assemble the whole sandwich *before* grilling and wrap it tightly in parchment paper. Store these assembled (but uncooked) sandwiches in the fridge for about 2 days. When you’re ready to eat, just pull one out, melt a tiny bit more butter in the pan (or use the skillet trick from the recipe!), and grill it up like normal. The mayo on the bread helps it crisp up beautifully even when it’s been chilling! It’s like having a little slice of comfort ready to go whenever you need it. It’s a super smart way to have those delicious, quick meals on hand, kind of like these awesome breakfast burritos or these handy egg cups!
Variations to Elevate Your Grilled Cheese Meal Prep
Now, I know this caramelized onion version is dreamy, but the beauty of grilled cheese is how easily you can tweak it to your heart’s content! For your next meal prep adventure, why not switch up the cheese? Try adding some smoked gouda for a little extra depth, or maybe a sharp provolone for a tangier bite. If you’re feeling adventurous, a little bit of crumbled blue cheese can be *amazing* with the sweet onions, though that might be a bit more of an “eat it fresh” kind of deal. Breads are fun too – think a hearty rye or a nice multigrain for a different texture! And for those who like a little extra, consider adding a layer of thinly sliced tomato (pat it dry really well first!), a few slices of crispy cooked bacon, or even some mashed avocado right before you grill. These little additions can totally transform your grilled cheese into a whole new experience, keeping your meal prep exciting week after week. It’s all about remixing those classics, making them work for *your* busy schedule, kind of like how people reinvent lasagna!
Frequently Asked Questions About Grilled Cheese Recipes Meal Prep
Got questions about making grilled cheese your meal prep bestie? I’ve got you covered! These are some of the things I get asked most often, so hopefully, this helps you nail that perfect, melty bite every time. Because who doesn’t want a quick, delicious grilled cheese ready to go?
Can I freeze grilled cheese sandwiches?
You *can*, but it’s not my absolute favorite way to meal prep grilled cheese if you want that perfect, crispy exterior. If you do freeze them (assembled but un-grilled is best), let them thaw completely in the fridge before cooking. They might not get quite as crispy, but the melty cheese inside will still be awesome! For the best results, I’d stick to refrigerating them for a few days. Check out these ideas for other make-ahead meals like breakfast casseroles or these handy meal prep bowls!
What’s the best bread for meal-prepped grilled cheese?
Great question! For meal prep grilled cheese, you want a bread that’s sturdy enough to hold up to a few days in the fridge and toasting up nicely later. Thick-cut artisan breads like sourdough, country white, or even a hearty multigrain are fantastic. They have a good crust and don’t get too soggy. Avoid super flimsy sandwich bread; it just can’t handle the pressure!
How do I reheat grilled cheese without it getting soggy?
This is key! If you’ve prepped assembled sandwiches, the trick is to reheat them in a skillet over medium-low heat with a little bit of butter or even that mayo trick. This helps re-crisp the bread. You can also toast them in an oven or toaster oven for a few minutes. Microwaving is generally a no-go if you want that lovely crunch; it tends to make them a bit rubbery. We’re aiming for that perfect, melty goodness!
Nutritional Information (Estimated)
Just a heads-up, these numbers are an estimate and can wiggle around a bit depending on the exact bread, cheese, and butter you use! This recipe makes about 4 generous sandwiches. Each serving typically has around 550-650 calories, 35-45g of fat, 25-30g of protein, and 30-40g of carbs. Enjoy!
Share Your Delicious Creations!
So, what did you think? Did you try making this caramelized onion grilled cheese for your meal prep? I’d absolutely LOVE to hear about it! Drop a comment below with your favorite variations or how you spiced things up. Don’t forget to rate the recipe if you liked it, and if you snapped some photos, tag me on social media – I live for seeing your gorgeous creations! If you have any questions, feel free to reach out on my contact page. Happy cooking!
Caramelized Onion Grilled Cheese
Ingredients
Equipment
Method
- Heat 1 1/2 Tbsp butter and olive oil in a skillet over medium-low heat. Add diced onions, salt, pepper, fresh thyme, and 1 tsp of fresh rosemary. Sauté, stirring often, until onions are soft and starting to brown, about 10 minutes.
- Stir brown sugar into the onions and cook for another minute.
- Transfer the caramelized onions to a plate.
- Spread a thin layer of mayonnaise on one side of two pieces of bread.
- To the same skillet, add the remaining butter and minced rosemary. Heat over medium heat, swirling to coat the bottom of the skillet with the melted butter.
- Add both pieces of bread, mayonnaise side down, to the skillet. Cook until the bread is golden brown and crunchy, about 2-3 minutes.
- As soon as you add the bread to the skillet, place some cheese on top of each piece. Once the cheese begins to melt slightly, sprinkle a couple tablespoons of the caramelized onions over the top of one of the bread pieces.
- When the bread is golden brown, sandwich the two pieces of bread together. Cook on low heat until the cheese is fully melted.
- Transfer the sandwich to a plate. Repeat with the remaining slices of bread and ingredients.
- Slice and enjoy.
Notes
Tried this recipe?
Let us know how it was!
Precision Keto Scientist
Numbers don’t lie, and neither do my recipes. I’m a biochemist who fell into keto cooking through my own metabolic research—and I approach recipe development like a lab experiment, complete with macro calculations precise to the tenth of a gram.
My journey started in diabetes research labs at Johns Hopkins, where I spent six years studying how different macronutrient ratios affected insulin sensitivity. Personal experimentation with therapeutic ketosis for cognitive enhancement led me down a rabbit hole of recipe testing that eventually consumed more hours than my actual day job.
While other cookbook authors describe flavors and textures, I quantify ketone elevation curves and glycemic impact data. My recipe database contains 340+ formulations, each tagged with detailed nutritional analysis, predicted ketosis timing, and optimal meal spacing. I measure salt by weight, time cooking processes to the minute, and log ingredient sourcing obsessively for consistent results.
My breakthrough research on fat-protein ratios for sustained ketosis got published in the Journal of Nutritional Biochemistry. My “Macro Math Mastery” workshops have trained over 5,000 people in precision meal planning. I even collaborated with continuous glucose monitor manufacturers to create the first real-time feedback system for recipe optimization.
I left my pharmaceutical research position at Merck three years ago to focus on metabolic nutrition consulting. Now I work with professional athletes, biohackers, and medical professionals seeking therapeutic ketosis protocols. When I’m not in my lab-kitchen, I’m competing in chess tournaments or documenting my daily biomarker measurements with true data scientist obsessiveness.
Cooking is just applied chemistry—and chemistry follows predictable rules. Master the variables, control the outcomes.