
Oh, that sound! You know the one—that unmistakable, loud, satisfying SIZZLE when the potato hits the hot fat? That’s the sound of success, and frankly, if you aren’t hearing it, you aren’t making hash browns right. It’s a common kitchen tragedy: you follow the steps, but end up with a soggy, sad potato patty instead of the golden, crunchy stack you dreamed of. But listen, achieving that perfect Hash Browns (Crispy Skillet) texture is less about luck and more about applied science.
My journey to cracker-crisp perfection started back when I was grinding through metabolic research at Johns Hopkins. I desperately needed that comfort food crunch, but my strict ketogenic goals meant tossing out the usual carb-heavy starch bombs. After several experimental Sunday mornings—meticulously adjusting fat ratios and timing heats—I cracked the code. That single, perfect batch of crispy shreds wasn’t just a meal; it was the beautiful fusion of my culinary passion and precision science. Now, every time I crisp these up, I’m reminded that limits in the kitchen only exist if you let them!
By Thomás Anderson, Precision Keto Scientist
Why Hash Browns (Crispy Skillet) Are a Breakfast Essential
Honestly, what says “weekend brunch” better than a platter of perfectly golden, steaming potatoes? These Hash Browns (Crispy Skillet) aren’t just filler; they are the textural backbone of any great breakfast spread. They bring that essential crunch that offsets soft eggs and bacon perfectly. No fancy recipes required—just pure, satisfying flavor.
- Incredible, deep golden crunch that lasts.
- Versatile side dish that pairs with anything savory.
- Amazingly quick total cook time once you get the hang of it.
Check out the full range of ideas over at our recipe index for more inspiration!
Quick Preparation for Perfect Hash Browns (Crispy Skillet)
Speed is your friend here, especially when you’re aiming for that crisp exterior before the inside gets steamed. With only about 10 minutes of active prep time—mostly just shredding and squeezing—you can get these potatoes over high heat fast. Remember, the faster they hit that sizzling fat, the better the texture of your Hash Browns (Crispy Skillet) will be. If you wait around, you lose that initial energy for crisping!
Ingredients for Optimal Hash Browns (Crispy Skillet)
Getting these Hash Browns (Crispy Skillet) right starts before you even turn on the stove. We need the right stuff in the right amounts to serve about 4 people perfectly. Getting your measured salt and onion powder ready upfront makes the entire process smooth, which, as you know, is key when working with high heat and fast cooking times.
Here is what you need to gather for this superior brunch side:
- 1.25 lb russet potatoes (that’s usually about 2 medium-large ones)
- 1/2 tsp onion powder
- 2 Tbsp light olive oil or bacon grease (divided)
- 2 Tbsp butter (divided)
- To taste fine sea salt
- To taste freshly ground black pepper
- 1 Tbsp chives (optional to garnish)
Ingredient Notes and Substitution Guidance
When dealing with starches, the potato type matters tremendously. For maximum exterior crunch, you absolutely must use Russets. They have the higher starch content we need to create that lattice-like structure when they crisp up. Do not substitute with waxy potatoes, or you’ll end up with something too close to roasted cubes, trust me.
Now, let’s talk flavor vehicles: the fat. While olive oil handles the high heat like a champ and gets things sizzling beautifully, if you want deep, authentic, almost savory depth? Use bacon grease. If you have rendered bacon grease lying around, swap out the oil for that. The butter is non-negotiable, though, because it helps that final golden browning process and adds richness you just don’t get from oil alone.
Mastering the Technique for Hash Browns (Crispy Skillet)
Alright, here’s where we separate the excellent brunch sides from the mushy messes. If you want true, restaurant-quality crunch in your Hash Browns (Crispy Skillet), you have to treat the preparation almost like a chemistry experiment. Forget everything else for a moment; the success hinges on what you do immediately after shredding those russets.
We need everything mixed—the seasoning, the potatoes—but before that, we handle the water situation. This dedication to dry potatoes is the single most important factor if you want that gorgeous shatter on the outside. Since we’re aiming for speed and quality, knowing how to keep your skillet moving is key. Don’t be afraid to try something new, like incorporating flavors from my Turkey Veggie Skillet into your seasoning mix!
The Crucial Step: Removing Potato Moisture
Look, potatoes are basically tiny sponges filled with water. If that water turns to steam while you’re trying to crisp the starch, guess what? You’re not making crispy brown; you’re making steamed potato hash. It’s that simple! After you shred them, pile those shreds into a clean kitchen towel or a few layers of cheesecloth. Now, grit your teeth and squeeze. I mean really put your back into it. You need to press until you think you’ve gotten every last drop out—and then squeeze one more time!
When you see the liquid pouring out, you know you’re doing it right. Seriously, don’t skimp here. Once they are as dry as possible, *then* you mix in your onion powder, salt, and pepper. Keep that dry mix ready to go.
Achieving the First Golden Crust on Hash Browns (Crispy Skillet)
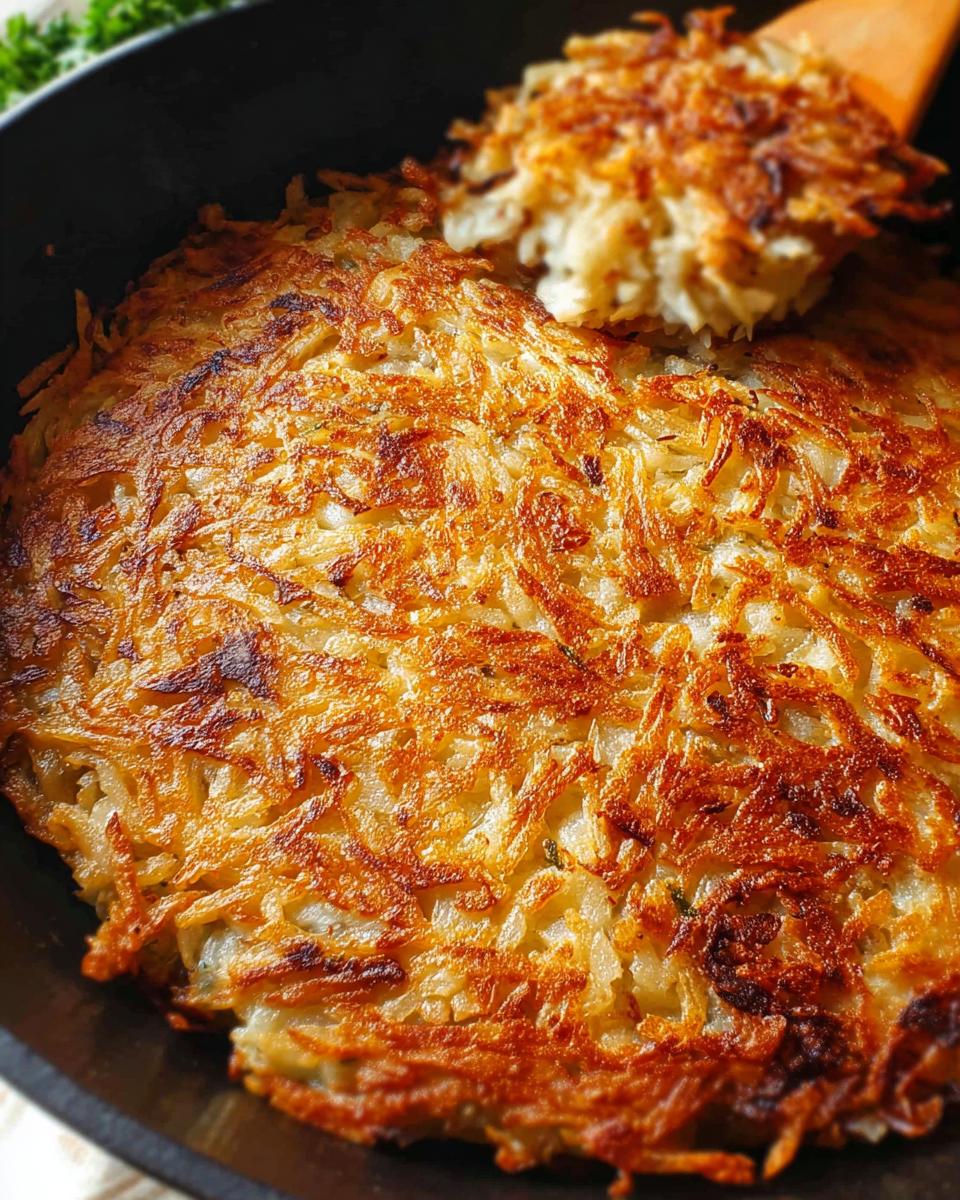
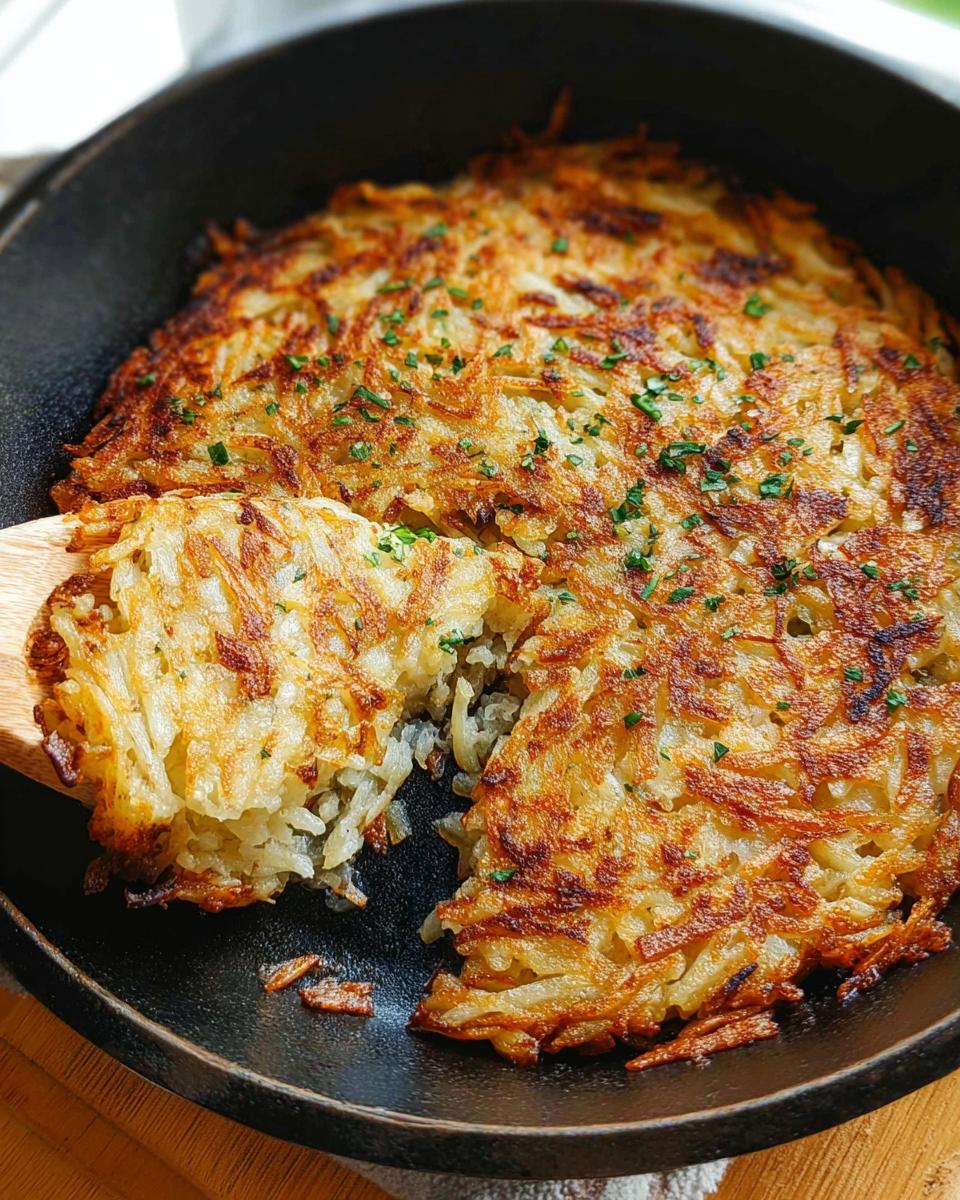
Next, we go hot and heavy. Get your 10-inch skillet screaming hot over medium-high heat, using one tablespoon of your oil/grease and one tablespoon of butter. You want that fat shimmering before the potatoes even think about hitting the pan. Carefully add your dried potato mix and immediately press it down flat with your spatula. Pat it tight! This creates the initial structural integrity.
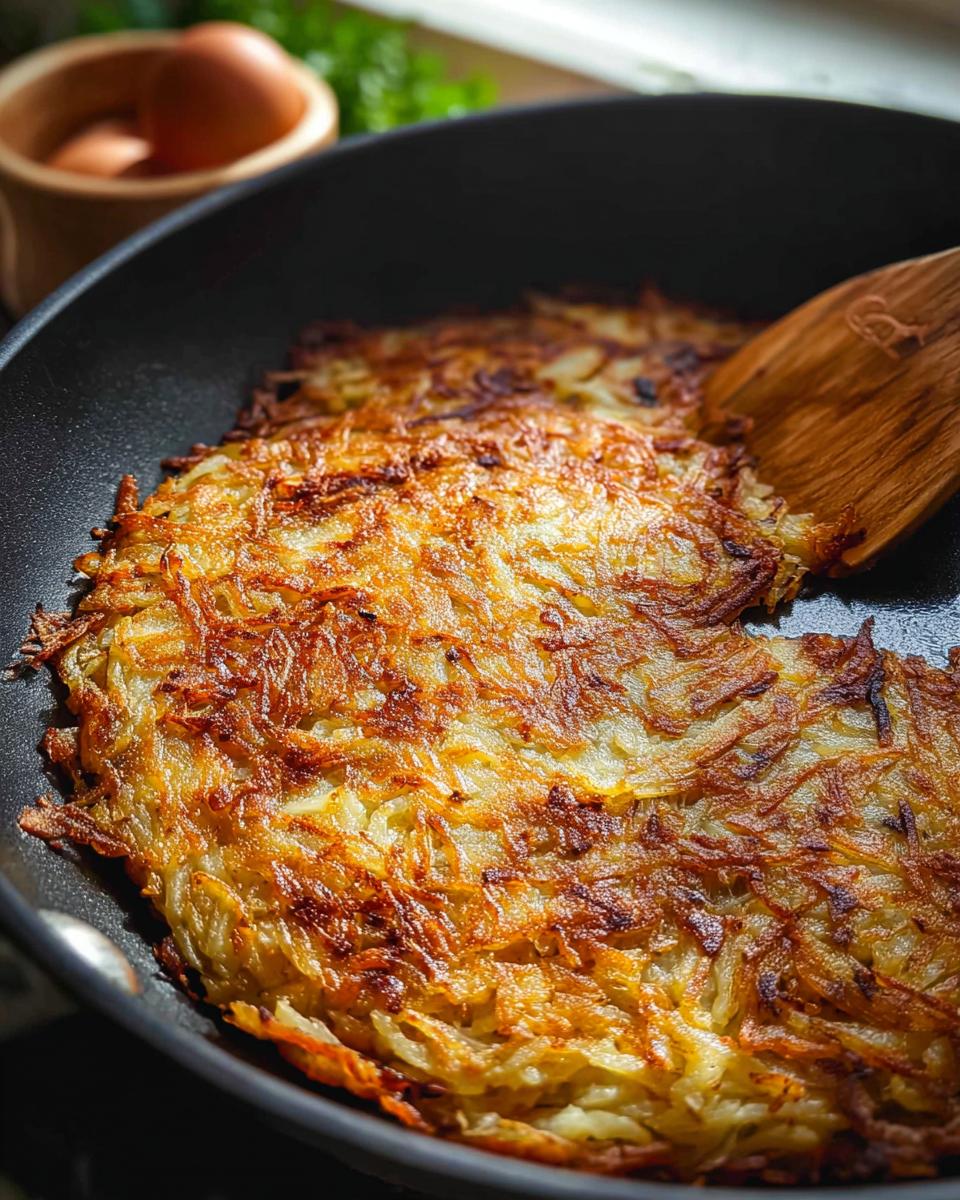
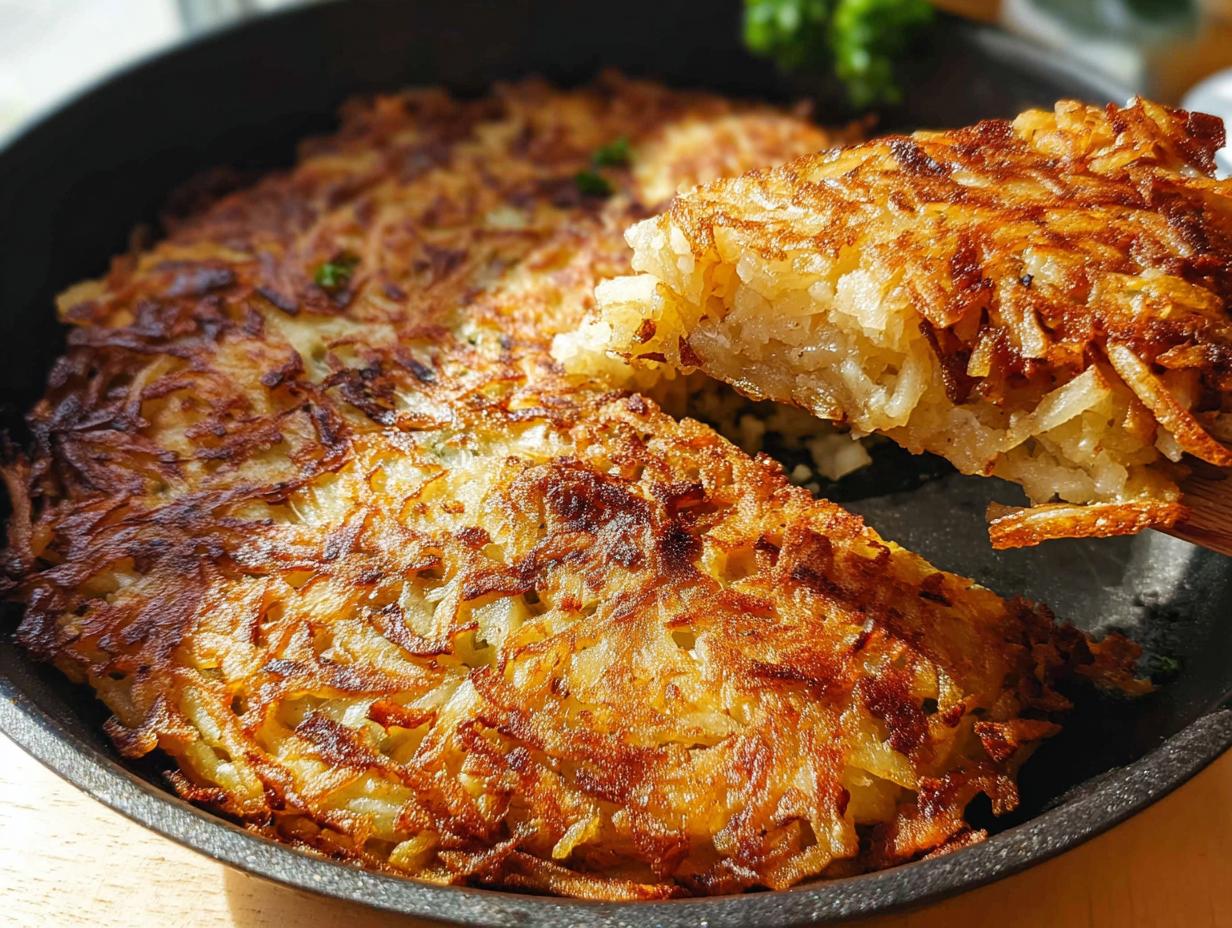
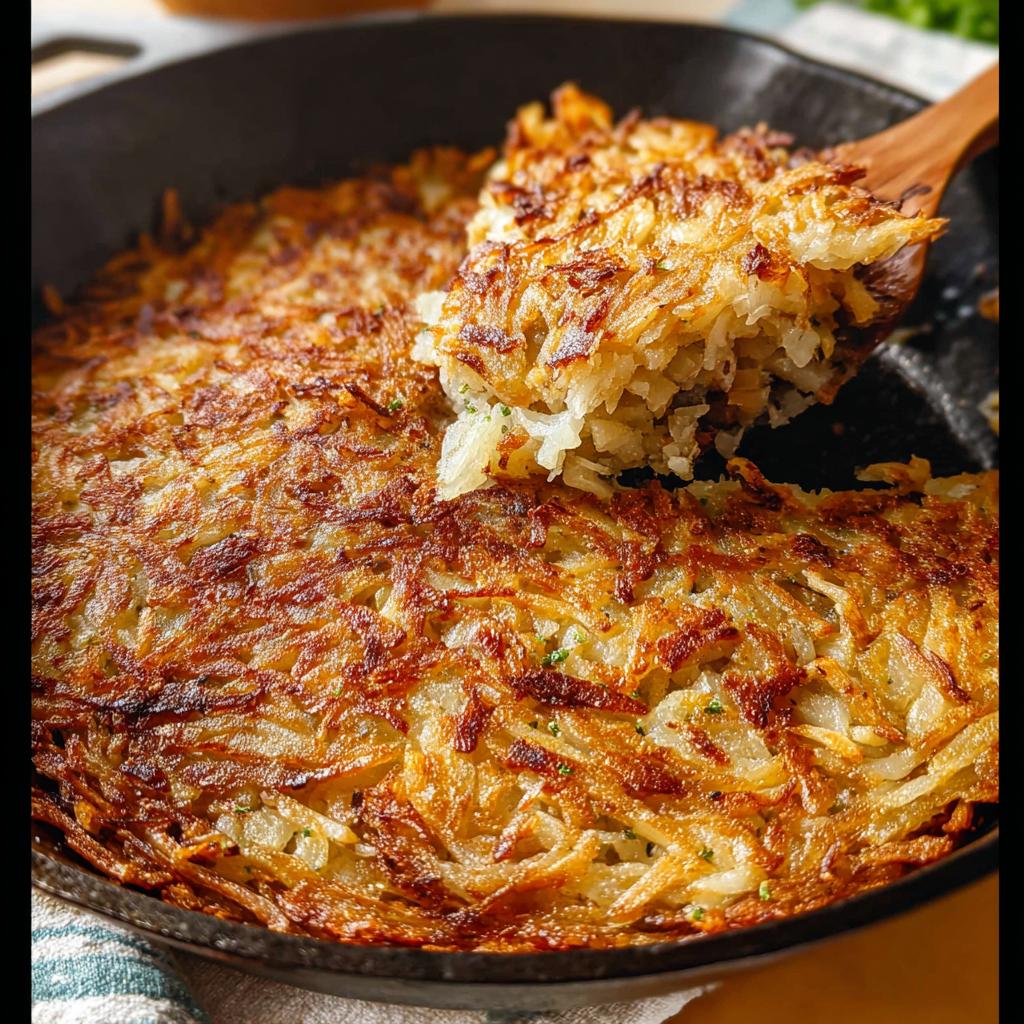
Now, the hardest part: Do not touch them. Seriously, put the spatula down! Let them sit undisturbed for a solid 8 to 10 minutes. You are waiting for deep, mahogany color to form on that bottom layer. When you can easily lift an edge and see that beautiful crust, you’re ready for the flip.
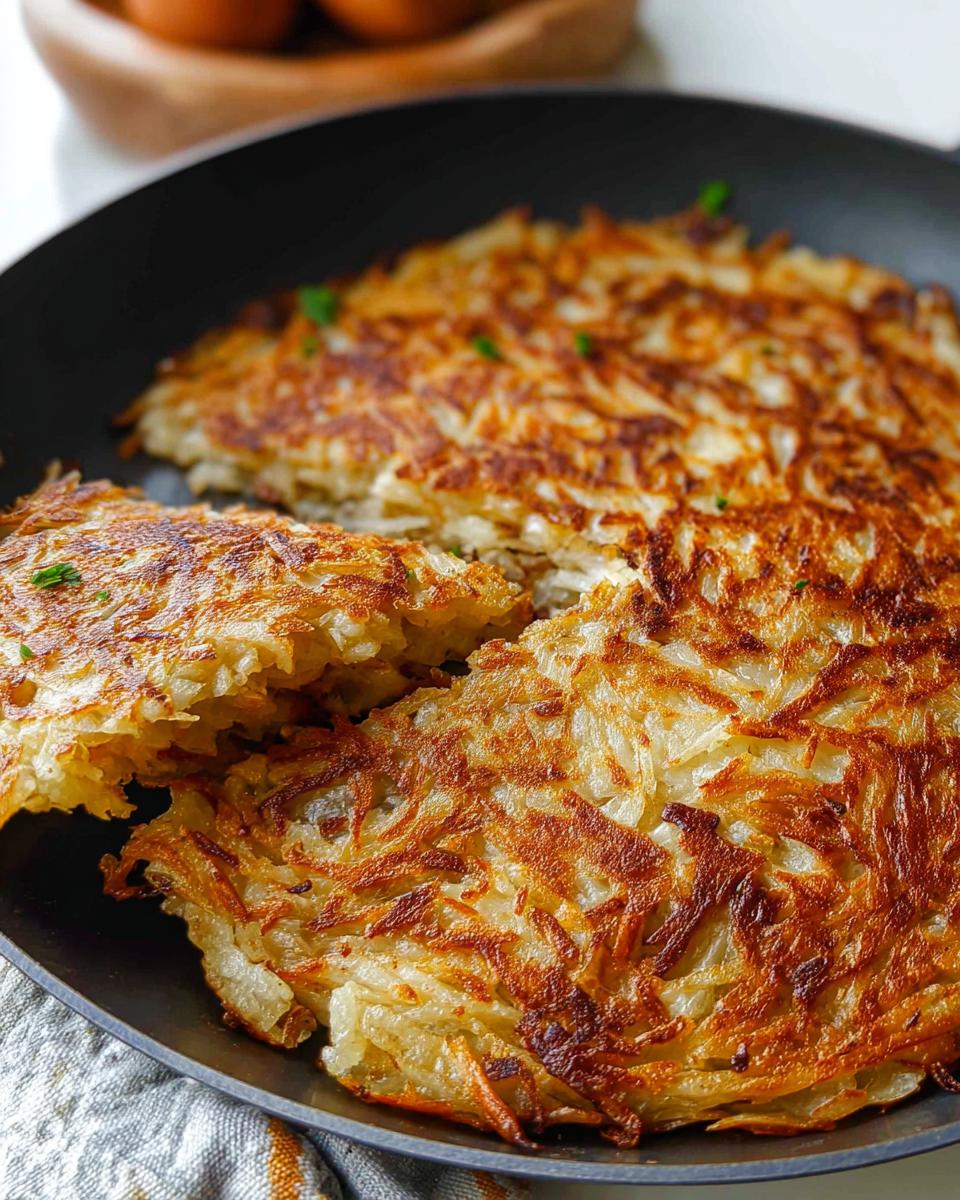
After flipping and adding the final bits of fat, cook the second side just as long. When they are done, slide them onto a cutting board and let them rest for about 5 minutes before slicing. This short rest period allows the internal structure to set so they don’t fall apart when you serve them!
If you want to see a fantastic technique breakdown on getting that flip just right, check out this guide for visual tips!
Tips for Success with Crispy Skillet Hash Browns
Look, getting that perfect crunch on your Hash Browns (Crispy Skillet) isn’t just about squeezing the water out; it’s about geometry and consistency. You need surface contact, which means you cannot, I repeat, *cannot* overcrowd the pan. If you pile them high, you trap steam, and steam equals soggy potatoes. Science doesn’t lie on this one!
The best skillet material? Cast iron. It holds heat incredibly evenly, giving you that consistent golden-brown crust edge-to-edge. If you only have stainless steel, you need to be extra vigilant about maintaining that medium-high temperature. I sometimes use mine for my One Pot Turkey Taco Skillet, and I know how quickly the heat can drop when you add cold ingredients!
Skillet Size and Batch Cooking for Hash Browns (Crispy Skillet)
If you’re cooking for a crowd—say, you’re hosting a massive brunch and need more than 4 servings worth—you need a bigger playground for those potatoes. If you’re scaling up the recipe to about 1.5 lbs of potatoes, ditch that 10-inch skillet and grab a 12-inch skillet, or even better, use two separate pans. You need that layer of potatoes to remain thin, ideally around 1/3 of an inch thick.
If you try to cram too many shredded potatoes into one small pan, they steam themselves rather than fry. Remember: thin layers cook faster and crisp better. If you absolutely must do a big batch in one go, you might need to cook it in two stages, maybe adding extra fat halfway through to ensure the bottom layer gets that glorious, crusty release.
Variations for Your Shredded Potatoes Side
While these Hash Browns (Crispy Skillet) are perfection in their simplicity, I totally get it—sometimes you want to tweak things up based on what you have in the pantry or just for fun! Since we established that the core technique relies on dry potatoes and high, even heat, the seasoning is where you can really play around without messing up the texture.
Don’t feel tied just to onion powder! Think about what spice blends you love in other meals. If you’re planning to serve these alongside something smoky, lean into that profile. A little smoked paprika, perhaps, right in with the salt and pepper, totally changes the mood of the dish.
I often look at what I’m making for dinner the next night to decide on a breakfast profile. If I know I’m having something rich or slightly spicy later, I’ll load the hash browns up with flavor to match. You can see some of my favorite flavor fusion ideas over at my Turkey Bolognese recipes—those savory depth cues work surprisingly well here, too!
What are some easy additions you can toss in when squeezing the water out? Try these additions right before mixing them in:
- Garlic Heat: Add about 1/2 teaspoon of granulated garlic powder with your onion powder for a stronger aromatic base that really stands up to bacon fat.
- Smoky Crunch: A pinch of smoked paprika or a tiny dash of cayenne pepper gives you that low-level heat that wakes up your palate. Be cautious with cayenne—a little goes a long way!
- Herbal Freshness (Post-Cook): While rosemary can burn if added before cooking, fresh thyme or finely chopped sage stirred in *after* you flip and are finishing the second side adds a fantastic earthy note.
The key takeaway is that the crispiness comes from the squeeze and the heat, so play with your herbs and spices freely! They won’t derail your crunch, they’ll just enhance your incredible Brunch Side.
Serving Suggestions for Hash Browns (Crispy Skillet)
Once you’ve achieved that perfect, shatteringly crisp texture on your Hash Browns (Crispy Skillet), the next joy is plating them up! It’s easy to get tunnel vision focusing only on the crisping technique, but these potatoes are designed to elevate *everything* else on your plate. Since we are catering to that precision keto lifestyle, we need pairings that bring flavor without wrecking the macros!
When I’m serving these, I treat them as the main textural component. The rich saltiness and the crunch play perfectly against anything soft, creamy, or savory. Forget about pairing them with sugary syrup—that’s never going to happen in this kitchen!
For low-carb elegance, here are my tried-and-true favorites to surround your perfectly cooked breakfast potatoes:
- Perfectly Poached Eggs: The runny yolk creates its own luxurious, natural sauce that mixes beautifully with the crispy shreds. The contrast between the hot, firm potato exterior and the rich, flowing yolk is just unbeatable.
- Thick-Cut Bacon or Sausage Patties: You need fatty, savory partners here. The way the leftover grease pools under the hash browns just adds another layer of flavor goodness.
- Avocado Slices or Guacamole: Creamy, healthy fats are essential for keto compliance, and a side of sliced avocado or a dollop of fresh guacamole provides that cool, smooth counterpoint to the hot, salty potatoes.
- Low-Carb Hollandaise: If you’re feeling ambitious, whipping up a homemade keto hollandaise is spectacular. Drizzle a little over the top of the Hash Browns (Crispy Skillet) and an egg for a decadent weekend spread.
If you love building visually stunning plates, check out some of my bento-style ideas over at the Bento Box archives—they often require a substantial, structured side like these potatoes!
Storage and Reheating Hash Browns (Crispy Skillet)
Listen, these Hash Browns (Crispy Skillet) are honestly best eaten fresh, right when they come out of that hot pan. That initial, audible crunch? It diminishes slightly as they cool, which is just a fact of fried potato life. But don’t toss those leftovers out! We have ways to resurrect that crispness, provided you store them correctly.
First things first for storage: let them cool down completely on a wire rack after you finish cooking. Seriously, put them on a rack, not stacked in a container. If you try to seal them while they’re still warm, the residual steam gets trapped, and you’re basically creating a soggy potato sauna overnight. That is the fastest way to kill your hard-earned crisp!
Once they are fully cooled—and I mean stone cold—transfer them into an airtight container. They should be fine in the fridge for up to three days. Remember that the trick to great Hash Browns (Crispy Skillet) is eliminating moisture, and refrigeration naturally reintroduces it, so eating them fast is always recommendation number one.
The Cardinal Sin: Why You Can’t Microwave Hash Browns (Crispy Skillet)
I have to be firm about this one, friends. If you even *think* about microwaving these beauties, I will know. Microwaves heat water molecules. You just spent 20 minutes aggressively removing water, and the microwave will put it right back in there unevenly, turning your crispy hash brown into a hot, limp, sad sponge. It’s a complete betrayal of the texture we worked so hard to achieve.
If you want perfection, you need dry heat to bring that crisp back. The two best methods rely on circulating air, similar to how they cooked initially. You can always check out my recipe for freezer-friendly waffles—the reheating principles are surprisingly similar!
- The Oven Method (Best for Larger Batches): Lay the cooled hash browns in a single layer on a baking sheet. Pop them into a preheated oven set to 400°F (200°C). Bake for about 8 to 10 minutes, flipping halfway through, until they feel firm and sound crisp again.
- The Air Fryer (Fastest Reheat): If you have an air fryer, this is my go-to hack! Place the desired amount in the basket, ensuring they aren’t overlapping too much. Cook at 375°F (190°C) for just 4 to 6 minutes. Shake the basket once halfway through. They come out shockingly close to the original pan-fried texture!
Use these dry-heat methods, and your leftovers will be almost as good as the fresh batch. Almost!
Frequently Asked Questions About Crispy Skillet Potatoes
I know you’re going to have questions once you start cooking, because getting that perfect shatter takes timing and technique! It’s all about precision, right? We want the gold standard for Breakfast Potatoes every single time we fire up the stovetop for a weekend spread. Here are the few things folks ask me most often when they are perfecting their technique for this amazing Brunch Side.
Can I use pre-shredded potatoes for Hash Browns (Crispy Skillet)?
Oh, I strongly advise against it, honestly. When you buy pre-shredded, they are usually cut in a way that makes them very fluffy, and they often have additives to keep them from sticking together in the bag. Those additives actively resist crisping up in your pan! If you are truly in a bind and have no choice, you need to hydrate them first—yes, really! Run the pre-shredded potatoes under cold water, drain them immediately, and then you have to squeeze them with even *more* force than you would fresh ones. You have to force out their built-in moisture and any starches that the manufacturer added to keep them separate.
What is the best fat to use for the crispiest Breakfast Potatoes?
This is where you decide between classic flavor and high-heat stability. The absolute best for flavor is bacon grease, hands down. It’s got that inherent savory smokiness that permeates the potato beautifully. However, bacon grease has a lower smoke point than refined oils. For the initial, high-heat searing where you need that strong, dry fry, I love using light olive oil—it has a higher smoke point, so it won’t burn immediately when you add the first batch.
My personal workflow, as detailed in the main instructions, is to use a mixture: start with oil for the initial sear, and then add the butter later. Butter adds incredible flavor and aids in that rich brown color, but adding all the butter at the very beginning risks burning it before the potatoes are set. Using both taps into the stability of the oil and the amazing flavor of the butter. If you want to explore more budget-friendly cooking without sacrificing quality, check out my guide on making cheap keto meals!
Nutritional Snapshot of Your Hash Browns (Crispy Skillet)
Now, I know for some of you, flavor is king, but for my fellow precision eaters, the numbers matter just as much! Whether you’re tracking every carbohydrate or just keeping an eye on overall macros, it’s good to know what you are putting into your body when you make these amazing Hash Browns (Crispy Skillet). Remember, because we are frying them in oil and butter, they bring a bit more fat content than a baked potato would, but that’s how we get that signature crispness!
The data below is based on the recipe as written, yielding 4 servings. This is an estimate, of course, as the exact fat absorbed by the potatoes can vary based on how well you squeezed them dry. Less water means less fat absorption, which is another great reason to squeeze them aggressively!
Here is the approximate breakdown per serving for these delicious Hash Browns (Crispy Skillet):
- Calories: 180
- Fat: 7g
- Carbohydrates: 26g
- Protein: 3g
If you’re deep into tracking your numbers, like I was when I developed this recipe, you can always check out my personal tracking documentation over at My Real Keto Diet Meal Plan to see how I personally incorporate sides like this into my daily intake. Even with the carbs from the russets, they can absolutely fit into a disciplined eating plan if you manage the rest of your day correctly!
Share Your Perfect Hash Browns (Crispy Skillet) Experience
And there you have it! We’ve gone from damp, sad shreds to a stack of pure, golden, audible perfection. You’ve mastered the science of moisture removal and the art of the high-heat fry. That satisfying crunch you get from these Hash Browns (Crispy Skillet) is something you should absolutely be proud of!
Now that you’ve got this perfected technique in your tool belt, I want to hear all about it! Did you use the bacon grease for that deep flavor, or stick to olive oil for maximum heat handling? Did you manage to get that flip perfect without breaking the crust?
Head down to the comments right now and tell me how your Hash Browns (Crispy Skillet) turned out. I’m always eager to see what combinations people create for their ultimate weekend brunch featuring this side. If you loved the recipe and it’s going into your rotation, please hit that 5-star rating button—it really helps support the work we do here to keep balancing science and flavor!
If you have any suggestions, need troubleshooting help, or just want to say thanks for keeping the weekend breakfast delicious and macro-friendly, you can always reach out via the contact page. Happy cooking, everyone!
Hash Browns (Crispy Skillet)
Ingredients
Equipment
Method
- Peel the potatoes and shred them using a box grater or food processor. Place the shredded potatoes in a clean kitchen towel or cheesecloth and squeeze out as much moisture as possible. This step is crucial for achieving crispy hash browns.
- In a bowl, combine the squeezed shredded potatoes with onion powder, salt, and pepper. Mix well.
- Heat 1 tablespoon of olive oil or bacon grease and 1 tablespoon of butter in a 10-inch skillet over medium-high heat until shimmering.
- Add the potato mixture to the hot skillet, spreading it into an even layer. Press down gently with a spatula.
- Cook for 8-10 minutes without disturbing, until the bottom is golden brown and crispy. You can test by lifting an edge with a spatula.
- Carefully flip the hash browns using a spatula, or by inverting the skillet onto a plate and then sliding it back into the skillet. Add the remaining 1 tablespoon of olive oil or bacon grease and 1 tablespoon of butter to the skillet.
- Cook for another 8-10 minutes, until the second side is golden brown and crispy. You may need to adjust the heat to prevent burning.
- Slide the hash browns onto a cutting board. Let them rest for about 5 minutes before slicing and serving. Garnish with chives, if desired.
Nutrition
Notes
Tried this recipe?
Let us know how it was!
Precision Keto Scientist
Numbers don’t lie, and neither do my recipes. I’m a biochemist who fell into keto cooking through my own metabolic research—and I approach recipe development like a lab experiment, complete with macro calculations precise to the tenth of a gram.
My journey started in diabetes research labs at Johns Hopkins, where I spent six years studying how different macronutrient ratios affected insulin sensitivity. Personal experimentation with therapeutic ketosis for cognitive enhancement led me down a rabbit hole of recipe testing that eventually consumed more hours than my actual day job.
While other cookbook authors describe flavors and textures, I quantify ketone elevation curves and glycemic impact data. My recipe database contains 340+ formulations, each tagged with detailed nutritional analysis, predicted ketosis timing, and optimal meal spacing. I measure salt by weight, time cooking processes to the minute, and log ingredient sourcing obsessively for consistent results.
My breakthrough research on fat-protein ratios for sustained ketosis got published in the Journal of Nutritional Biochemistry. My “Macro Math Mastery” workshops have trained over 5,000 people in precision meal planning. I even collaborated with continuous glucose monitor manufacturers to create the first real-time feedback system for recipe optimization.
I left my pharmaceutical research position at Merck three years ago to focus on metabolic nutrition consulting. Now I work with professional athletes, biohackers, and medical professionals seeking therapeutic ketosis protocols. When I’m not in my lab-kitchen, I’m competing in chess tournaments or documenting my daily biomarker measurements with true data scientist obsessiveness.
Cooking is just applied chemistry—and chemistry follows predictable rules. Master the variables, control the outcomes.