
You know, there was a time when a vegetable side dish was just… well, a side dish. Something to fill the plate. But I still remember the first time I truly felt like a “pro” in my kitchen. It was a buzzing summer evening, friends were coming over, and instead of my usual go-to, I decided to really elevate things. I gathered some gorgeous local greens and sweet heirloom tomatoes, tossed them with a little olive oil and seasoning, and let the oven do its magic. As they roasted, the most incredible aromas filled my little Brooklyn apartment – it was pure kitchen alchemy! My friends were raving, and that night totally changed how I approach veggies, showing me that anyone can learn How to Make Veggie Sides Recipes Like a Pro (2025). As an Urban Forager & Hyperlocal Ingredient Specialist, I’ve learned that simple ingredients, treated with a little love and know-how, can transform any meal.
Why You’ll Love These How to Make Veggie Sides Recipes Like a Pro (2025)
Trust me, these aren’t just any ordinary veggie sides. They’re your ticket to impressing everyone at the dinner table!
- Super Easy: Seriously, roasting beets is practically foolproof. Toss ’em in foil, and let the oven do the heavy lifting!
- Flavor Explosion: Roasting brings out the natural sweetness of beets like nothing else. It’s a totally different ballgame from boiling.
- Healthy & Wholesome: Packed with nutrients, these beets are a guilt-free addition to any meal. You’ll feel good about serving them!
- Total Versatility: Serve them warm, cold, sliced, diced… they’re amazing with pretty much anything – grilled pork chops, fish, or piled high on a salad.
- Instant Pro Status: Nail this one, and people will think you’ve been cooking like a seasoned chef for years. It’s that impressive yet simple.
- Meal Prep Magic: Roast a big batch on the weekend and have a delicious side ready to go all week long. Talk about smart **meal planning**!
Essential Ingredients for Perfect Veggie Sides
Alright, let’s talk about what you’ll need to make these gorgeous roasted beets that taste like they came from a fancy restaurant. It’s really simple, which is the beauty of it! We want to highlight the star of the show, the beet, and let its natural goodness shine. So, grab these items and get ready to rock your kitchen!
For the Beets:
- 6 medium beets, tops removed, scrubbed well (give ’em a good rinse, but don’t peel yet!)
- Extra-virgin olive oil, for drizzling (use a nice one, it makes a difference!)
- Sea salt, to your taste
- Freshly ground black pepper, because everything is better with a little peppery kick
That’s it! Seriously. Fresh, good-quality ingredients are key. Don’t be tempted by those pre-cut veggies; the magic happens when you start with the real deal.
Ingredient Spotlight: Beets
Beets are like little nutritional powerhouses, seriously! They’re packed with vitamins, minerals, and antioxidants. Plus, did you know they have this amazing earthy sweetness that just blooms when you roast them? And the color? Forget about it! They’re gorgeous. Look for beets that feel firm and heavy for their size – that usually means they’re juicy and fresh!
Step-by-Step Guide: How to Make Veggie Sides Recipes Like a Pro (2025)
Okay, let’s get these beautiful beets into the oven and transform them into something truly special. This is where the magic really happens, and I promise, it’s way easier than it looks. Following these steps will have you cooking like a seasoned pro in no time!
Prepping Your Beets for Roasting
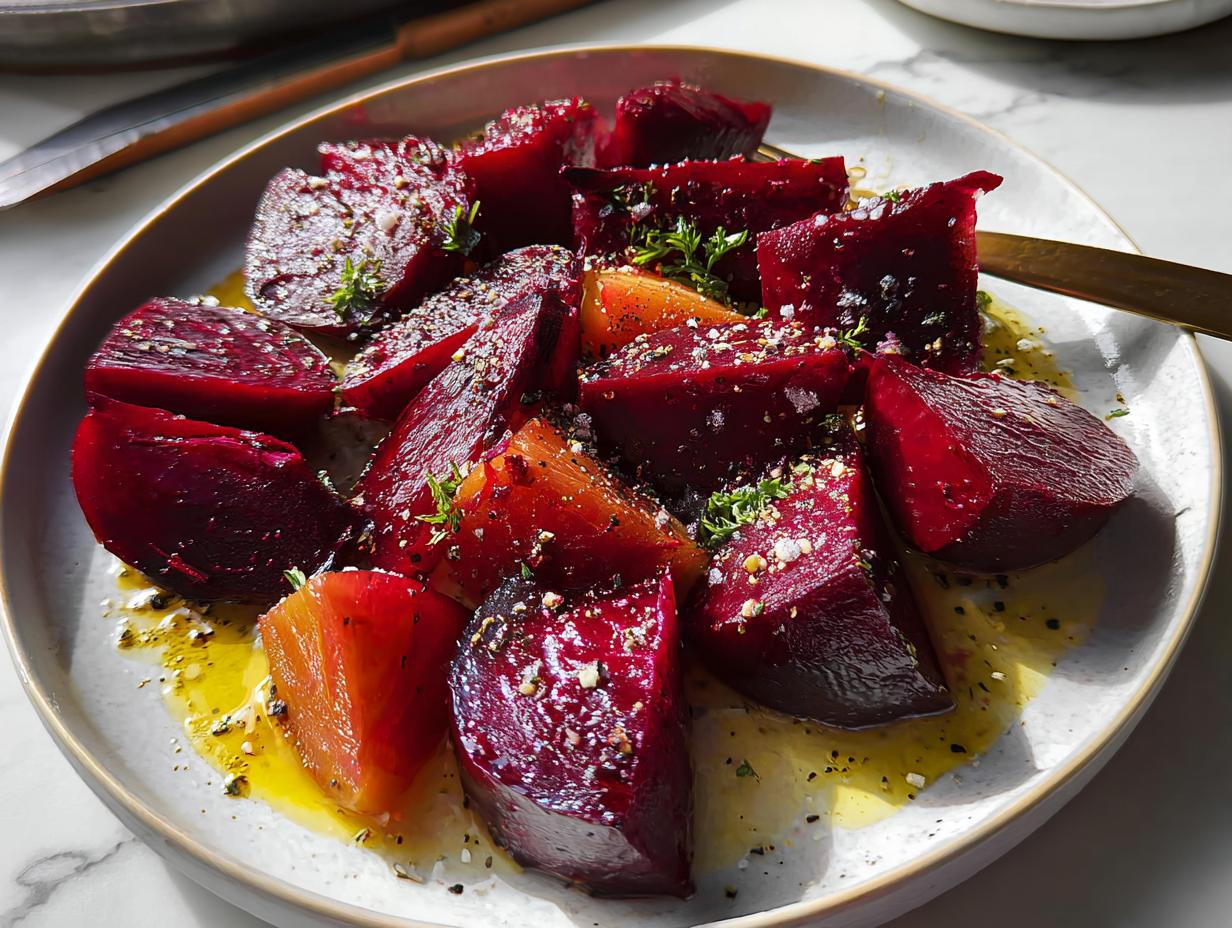
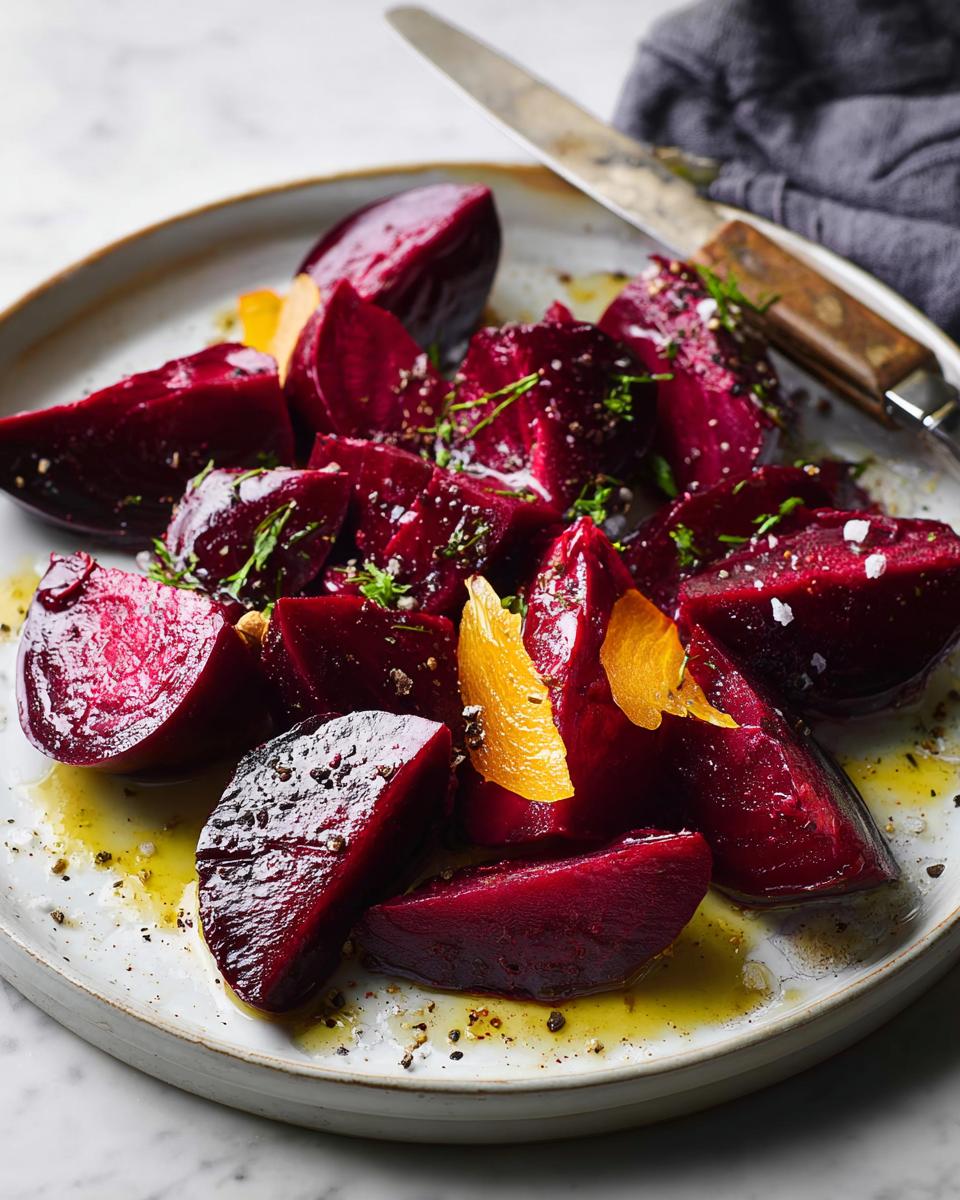
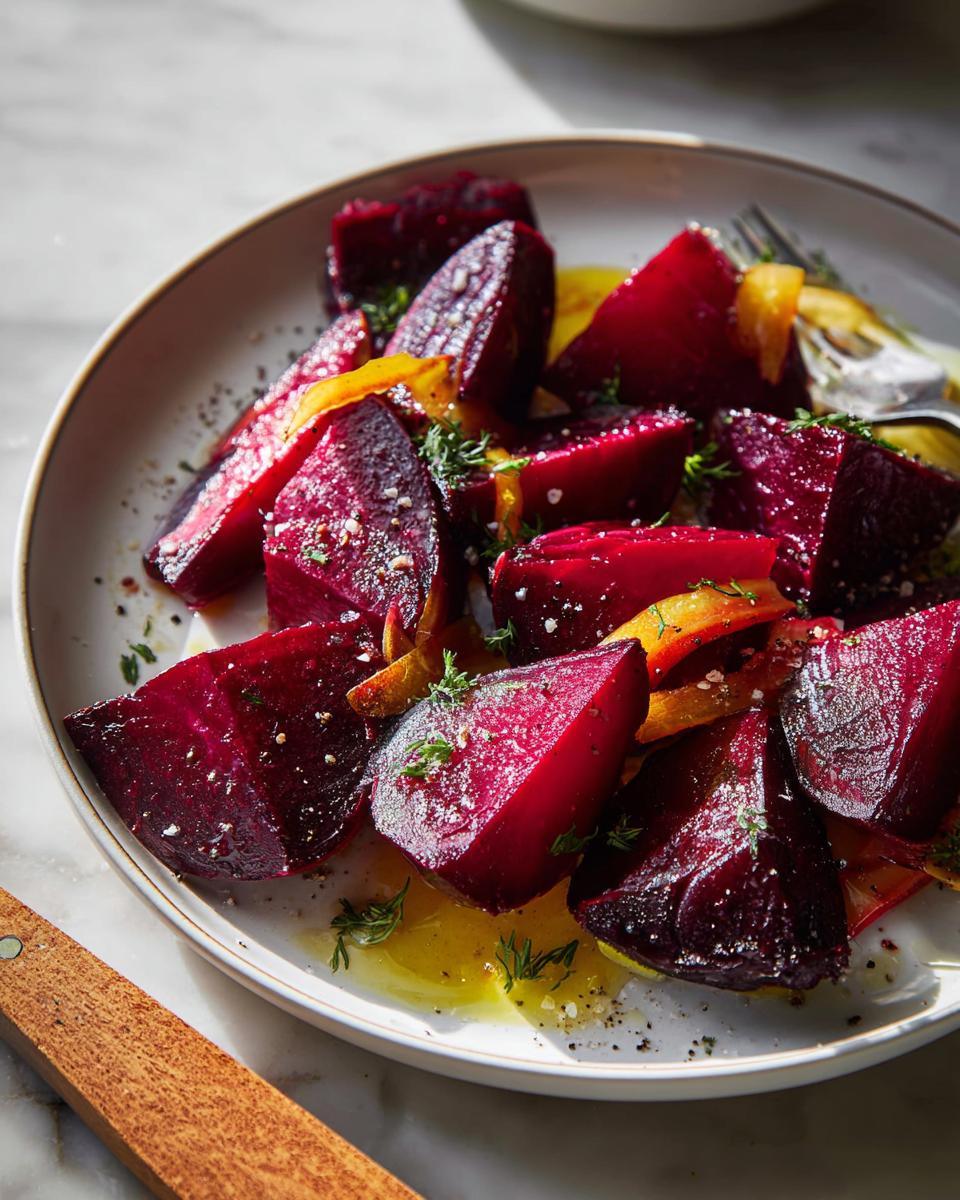
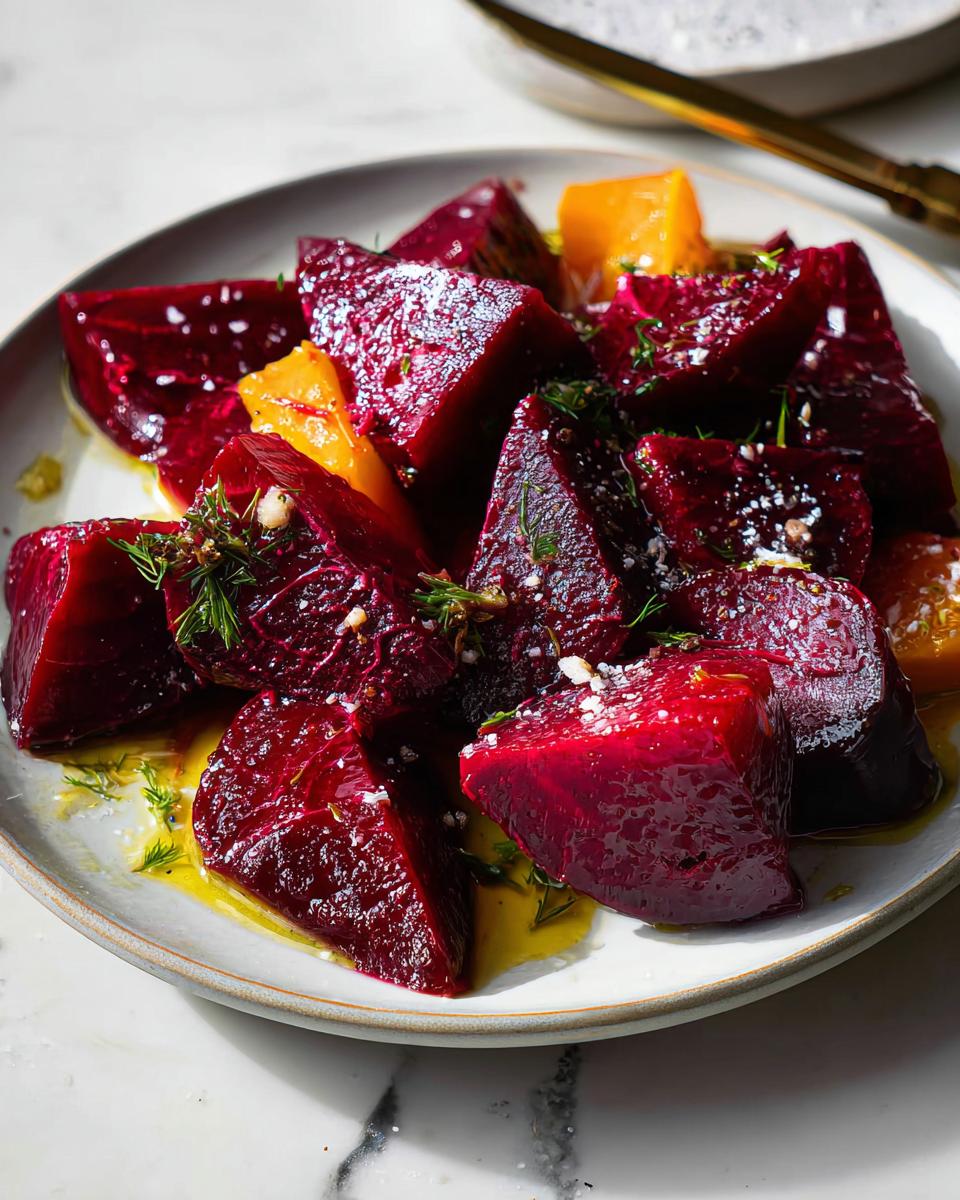
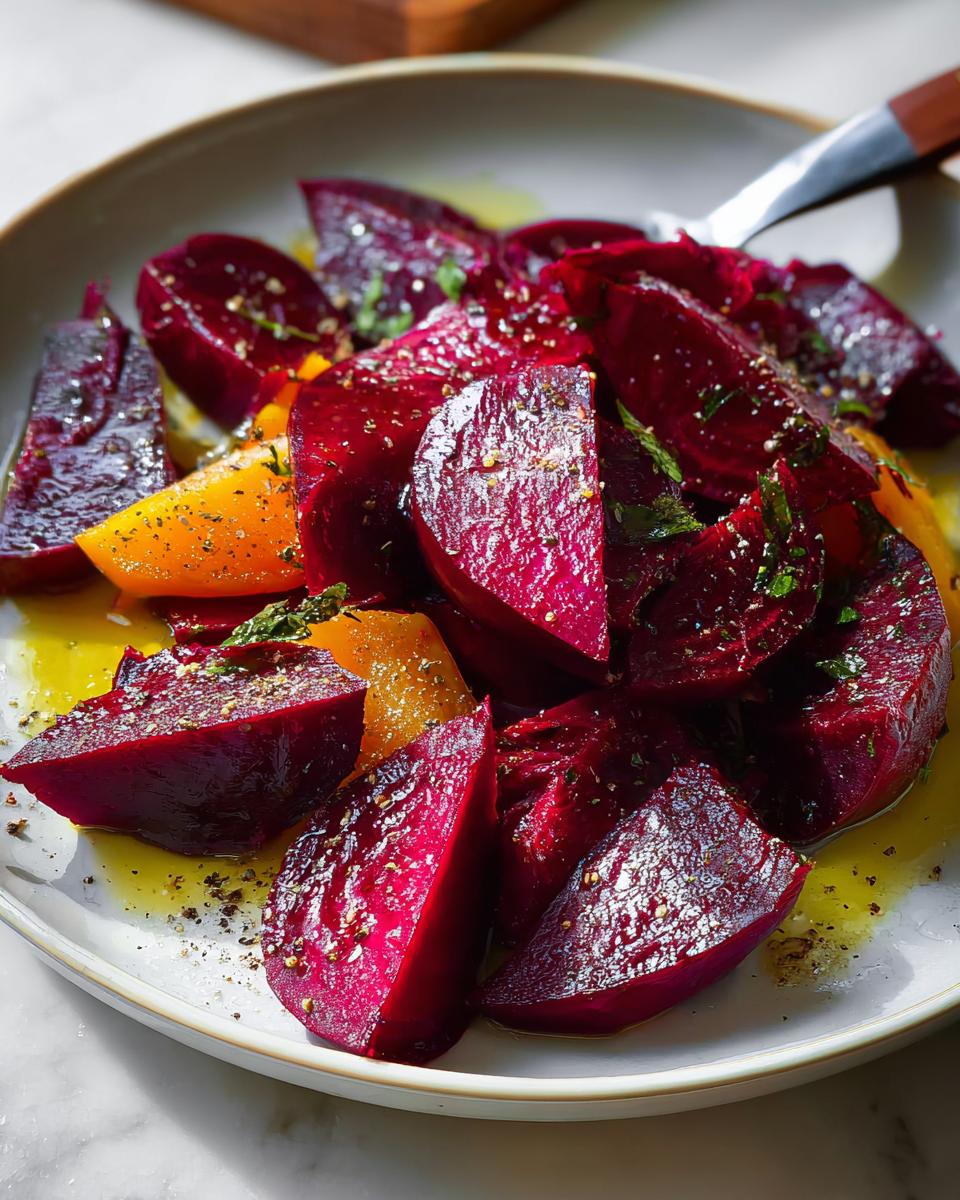
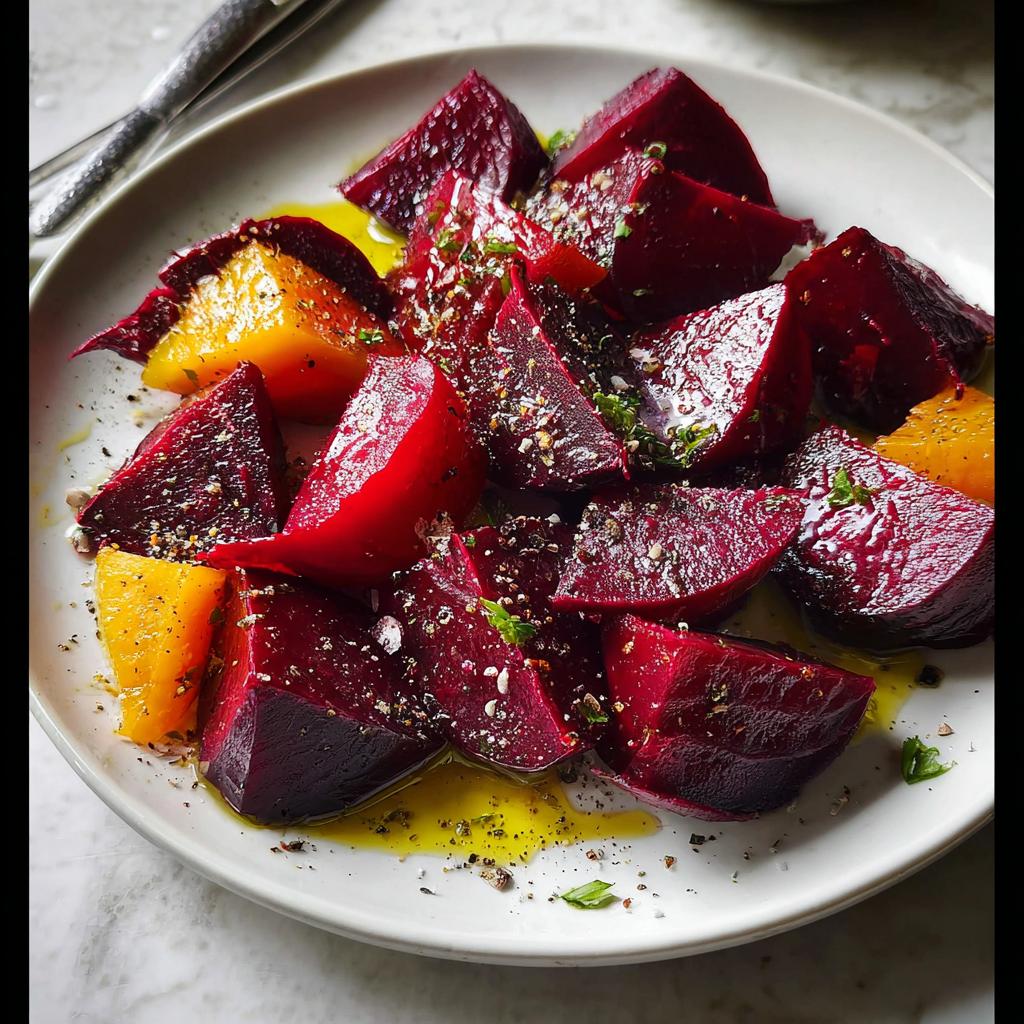
First things first, let’s get our oven nice and hot! Preheat it to 400°F (200°C). Now, grab your scrubbed beets. If they have any scraggly bits or roots, just snip those off. We’re not peeling them yet – trust me, the skin comes off like a dream after roasting! Place each beet onto its own piece of foil. A good drizzle of olive oil over each one is essential, followed by a generous sprinkle of sea salt and freshly ground black pepper. Then, just wrap ’em up snug in their foil little packages.
Roasting for Ultimate Flavor
Once your beets are all wrapped up, carefully place them on a baking sheet. This is like their little cozy bed for the oven. Now, slide that baking sheet into your preheated oven. The roasting time can vary depending on the size of your beets, but usually, somewhere between 35 to 60 minutes is the sweet spot. You’re looking for them to be totally fork-tender. That means when you poke one with a fork or a thin knife, it should slide in with little to no resistance. It’s like magic how the heat transforms them inside their foil tents!
Peeling and Finishing Touches
Once they’re done, carefully pull them out of the oven. Let them sit in their foil packets for a bit until they’re cool enough to handle – maybe 10-15 minutes. This makes them even easier to peel! Unwrap them, and you’ll see that the skins should just—*poof*—slide right off. You can even do this under a little running water if they’re being stubborn, or just use your hands. Slice or cut them up however you like, give them another tiny drizzle of olive oil, and a final pinch of salt and pepper. Toss gently, and they’re ready to shine!
For more amazing vegetable side dishes, check out these ideas. And if you’re looking for more recipes, you can always find them here.
Tips for Success: Elevating Your Veggie Sides
Okay, so you’ve mastered the basic roasted beet, which is fantastic! But let’s take it up another notch, shall we? As an urban forager, I’m always looking for ways to really make my ingredients sing. Here are a few little tricks I’ve picked up that’ll have you cooking like a seasoned pro in no time.
First off, picking the best beets is half the battle. Look for ones that feel firm and heavy for their size—that usually means they’re super juicy inside. Avoid any that look shriveled or have soft spots. And honestly, don’t stress too much about the size; you can totally adjust your roasting time. Smaller beets will cook faster, and bigger ones will just need a little more time in their foil sleeping bags.
Also, don’t be afraid to get creative with flavor! Once your beets are roasted and peeled, you can toss them with a little balsamic glaze instead of just olive oil, or maybe some fresh dill or parsley. A sprinkle of goat cheese or some crushed walnuts is divine, too. These simple additions take your side dish from ‘nice’ to ‘WOW!’ Don’t forget to check out these healthy dinner recipe ideas for even more inspiration!
Serving and Storage Suggestions
These gorgeous roasted beets aren’t just pretty faces; they’re incredibly versatile! They pair beautifully with almost anything. Imagine them alongside a perfectly grilled steak, some flaky baked fish, or even tossed into a big, fresh salad for a burst of color and sweetness. They’re also a total game-changer for **meal planning** – I often roast a big batch of them on Sunday, and then I have a healthy, delicious side ready to grab all week long. You can totally find more ideas for making healthy dinners happen here.
If you have leftovers, just pop them into an airtight container in the fridge. They’ll keep for about 3-4 days. You can enjoy them cold, toss them into salads, or gently warm them up in a skillet or a low oven – just be careful not to overcook them!
Frequently Asked Questions
Got questions about these amazing roasted beets? I totally get it! Veggies can sometimes feel tricky, but trust me, this method is a lifesaver. Let’s clear up any little doubts you might have so you can get cooking!
Can I roast beets with other vegetables?
Oh, you absolutely can! Roasting beets alongside other root veggies like carrots, parsnips, or sweet potatoes is a fantastic idea. Just make sure they’re all cut to a similar size so they cook evenly. Be aware that beets can sometimes bleed their gorgeous color onto other things, so if you’re roasting something delicate like cauliflower, you might want to keep them separate or embrace the pink hue!
How do I prevent beets from staining everything?
This is the big one, right? The staining! The best trick is to wear gloves when you’re peeling them after roasting – that really helps. Also, try to keep them contained on their foil packets while roasting. And if you’re cutting them up, use a cutting board you don’t mind getting a little colorful, or line it with parchment paper first. It’s just part of the beet’s charm, though!
What are other ways to prepare beets besides roasting?
Roasting is my absolute favorite because it brings out that incredible sweetness, but beets are super versatile! You can totally boil them, steam them, or even eat them raw in salads (thinly sliced or grated). They’re amazing pickled, blended into smoothies for a nutrient boost, or even added to baked goods for a surprising pop of color and moisture. For a juicy pork chop, try serving them pickled for a tangy contrast!
How long do roasted beets last in the fridge?
They keep really well! Once they’re cooled and stored in an airtight container, you can expect them to stay fresh in the refrigerator for about 3 to 4 days. They’re perfect for whipping out for quick lunches or adding to dinners throughout the week.
Estimated Nutritional Information
Just a heads-up, the nutritional info for these delicious roasted beets is an estimate, okay? It can totally change depending on how much oil you drizzle or the exact size of your beets. But generally, per serving, you’re looking at about 100-150 calories, with a good amount of fiber, some carbs from the natural sugars in the beet, and very little fat if you go easy on the oil. They’re a super healthy choice!
Share Your ‘Pro’ Veggie Side Creations!
Alright, now it’s your turn to shine! I’d absolutely love to hear about your adventures making these roasted beets or any other veggie side dish triumphs. Did you try a new variation? Snap a pic? Drop a comment below and tell me all about it! Your experiences help us all cook with more confidence and fun. And if you loved this recipe, a quick star rating would be amazing – it really helps others find these kitchen secrets. You can also reach out to me directly here!
Roasted Beets
Ingredients
Equipment
Method
- Preheat your oven to 400°F (200°C).
- Place each beet on a piece of foil. Drizzle generously with olive oil and sprinkle with salt and pepper. Wrap the beets in the foil, place on a baking sheet, and roast for 35 to 60 minutes, or until fork-tender. The timing will depend on the size and freshness of the beets.
- Remove the beets from the oven, remove the foil, and set aside to cool. When the beets are cool to the touch, peel off the skins. You can hold them under running water and slide the skins off with your hands.
- Cut or slice the beets and drizzle lightly with olive oil. Season to taste with salt and pepper, toss, and serve.
Notes
Tried this recipe?
Let us know how it was!
Urban Forager & Hyperlocal Ingredient Specialist
My Brooklyn apartment balcony tells my story: vertical gardens packed with wild edibles, fermentation crocks bubbling with city-foraged greens, and the constant hum of dehydrators preserving herbs I’ve collected from unexpected urban corners. What started as weekend escapes to my aunt’s upstate farm during my Columbia botany studies turned into something bigger after I earned my Urban Ecology Master’s from The New School.
Instead of following traditional academic paths, I discovered that cities are actually amazing edible ecosystems—rooftop weeds, park-edge wild greens, vacant lot treasures that perfectly complement keto eating. Who knew that some of the best low-carb foods were growing right under our noses in Manhattan?
My recipe collections celebrate city seasons: spring dandelions and plantains, summer purslane from rooftops, autumn rose hips from community gardens, winter wild onions and cress. I’m certified through the New York Mycological Society and trained by Brooklyn Botanic Garden to forage safely and ethically. Over 180 of my recipes feature at least one urban-foraged ingredient—from sidewalk plantains to sumac berries and wild mint thriving in vacant lots.
My “Metropolitan Wild” column went viral after my dandelion coffee substitute hit social media. Now my weekend “Urban Wild Walks” through Central Park and Prospect Park sell out faster than I can schedule them. I teach city dwellers to spot safe, keto-friendly wild foods hiding in plain sight.
Currently, I’m partnering with local chefs to bring urban foraged elements to restaurant menus and developing an app that maps safe foraging spots across all five boroughs. Evenings find me tending my sourdough starters, pressing flowers for natural dyes, or weaving baskets from willow branches I collect during park maintenance.
Cities are wild food sanctuaries hiding in plain sight—keto eating becomes urban rebellion when you realize how much free, perfect nutrition grows right under our feet.