
When you’re deep into the science of nutrition, sometimes a complex meal plan just isn’t feasible during a long day. Believe me, I get it! That’s why my lab bench often needs a quick, satisfying reboot, something that requires zero downtime waiting for an oven to preheat. This is where my training as a Precision Keto Scientist unexpectedly merges with sweet cravings.
I developed these No Bake Chocolate Peanut Butter Oat Bars out of necessity. I needed maximum flavor and energy with minimum fuss. The trick, just like in the lab, is precision—getting the right ratio of oats to melted binder so it sets up beautifully without any baking whatsoever. Forget complicated steps; these are ready in about fifteen minutes of active work. Trust me, these fuss-free peanut butter bars are about to become your go-to simple sweet recipe!
Why You Will Love These No Bake Chocolate Peanut Butter Oat Bars
Look, my life as a scientist means my time is precious, and I bet yours is too! That’s why these bars are absolute gold. They fit right into even the busiest schedules. You get instant satisfaction without firing up the oven.
- Ready in about 15 minutes of active time – seriously fast!
- The ultimate crowd-pleaser combining rich chocolate and salty peanut butter.
- Perfect for meal prepping; they freeze beautifully as excellent freezer snacks.
- Simple sweet recipes like this prove healthy eating doesn’t need to be complicated.
Essential Ingredients for Perfect No Bake Chocolate Peanut Butter Oat Bars
When we’re dealing with no bake desserts, the quality and precision of the ingredients are everything, especially since we skip the oven’s leveling effect. Since I approach everything with laboratory precision, paying attention to details like ‘packed’ versus just ‘scooped’ makes a real difference in how these bars set up! Here is exactly what you need to gather up before we start mixing. For more general cooking guidance, you can check out my tips on how to make dinner ideas foolproof, which emphasizes preparation, just like this recipe!
Ingredients for the Oat Base
This is the chewy, comforting structure of our peanut butter bars. Make sure your brown sugar is nicely packed into the measuring cup—it adds essential moisture!
- 1 cup of butter (Yes, real butter makes the binding structure fantastic.)
- 1/2 cup of packed brown sugar
- 1 teaspoon of vanilla extract
- 3 cups of quick cooking oats (Do not substitute rolled oats here; quick oats absorb the melted butter binder perfectly for that chewy texture.)
Ingredients for the Chocolate Topping
The topping needs to melt together smoothly, so use decent quality chips. We want a rich, decadent hit to balance the oats.
- 1 cup of semisweet chocolate chips (Semi-sweet helps keep the sweetness balanced!)
- 1/2 cup of peanut butter (Your favorite creamy kind works best here for smooth melting.)
Pro Tips for Making the Best No Bake Chocolate Peanut Butter Oat Bars
Making a no bake dessert is straightforward, but getting that perfect texture—chewy but firm enough to hold its shape—that’s where precision comes in! Since we aren’t baking, compacting the base layer is non-negotiable. Grab the bottom of a measuring cup or a sturdy spatula and really press that oat mixture into the pan. You want zero air pockets down there. When you start testing out these simple sweet recipes, you’ll see how much this step matters.
Then there’s the topping. Chocolate chips and peanut butter melt great, but you need to handle them gently. Microwave in short bursts—30 seconds max—and absolutely stir between each one. If you overheat them, that peanut butter can seize up and become grainy, and nobody wants a grainy chocolate top layer!
For more tips on making sure your recipes turn out exactly right every time, check out my guide on how to make Thanksgiving green beans foolproof; the principles of careful heating apply everywhere in the kitchen!
Step-by-Step Instructions for No Bake Chocolate Peanut Butter Oat Bars
Alright, scientist friend, let’s get this done! Remember, we’re aiming for about 15 minutes of active work here, so have everything measured out and ready to go before you turn on that stove. Mixing these bars is quick, but transferring them to the pan needs to happen fast before that butter mix cools down too much. When you’re ready for more great results, you can always browse my full collection of recipes!
Preparing the Pan and Melting the Base Ingredients
First things first, let’s secure our workspace! You absolutely have to line that 9×13 inch baking pan with parchment paper. I always leave the sides long—like little handles—so we can lift this whole thing out later without any breakage. Safety first!
Next, grab a saucepan and set it over medium heat. Toss in the full cup of butter and that brown sugar. Keep stirring constantly. We need that sugar fully dissolved until the mixture looks smooth and shiny. Once it’s liquid gold, take it *off* the heat immediately. Don’t even wait a second! Stir in your vanilla extract right away while it’s still super hot.
Combining Oats and Setting the Base Layer
Now for the oats! Pour those 3 cups of quick cooking oats right into the wet mixture. Use a sturdy spoon or spatula and fold everything together until those oats are completely coated. It should look really thick—almost doughy, but still loose enough to pour.
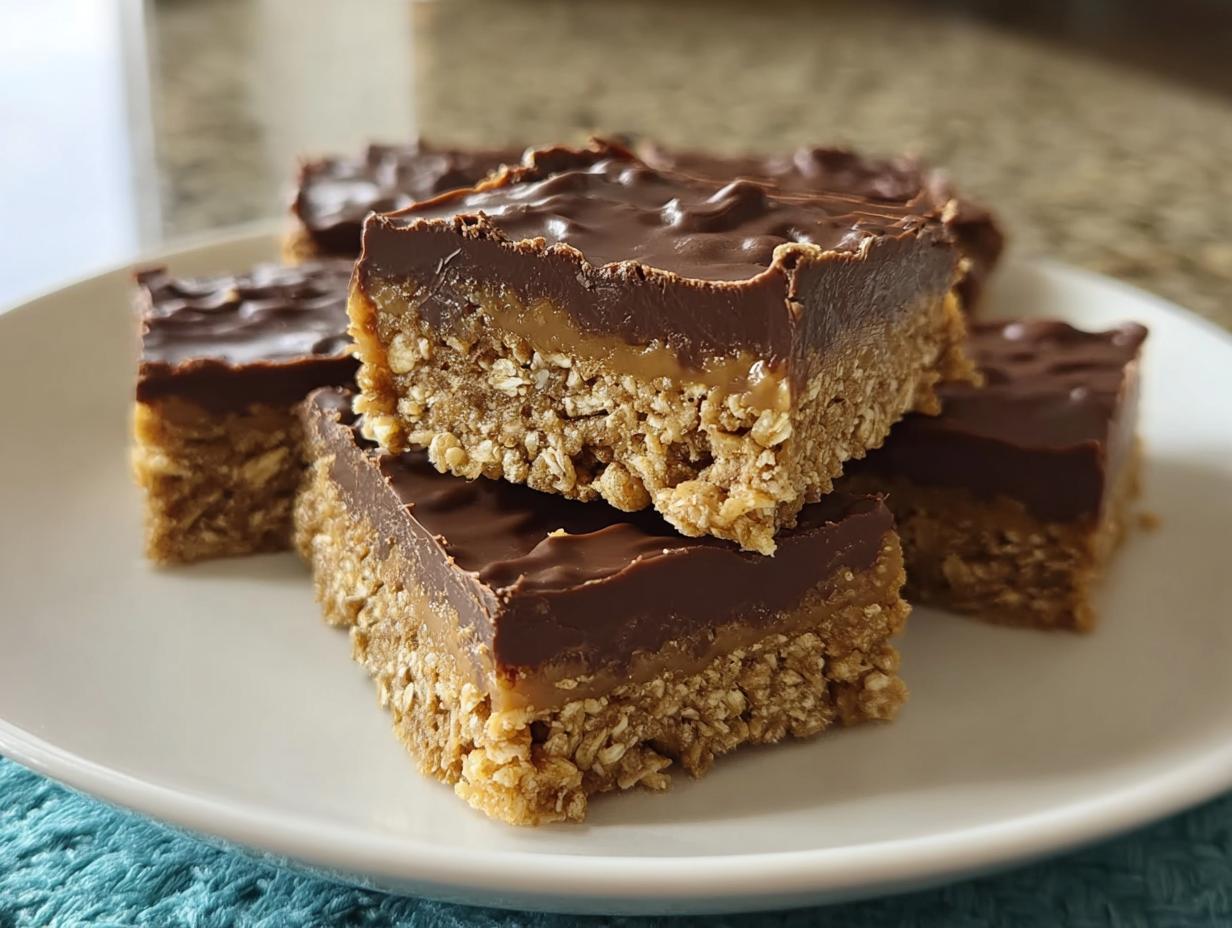
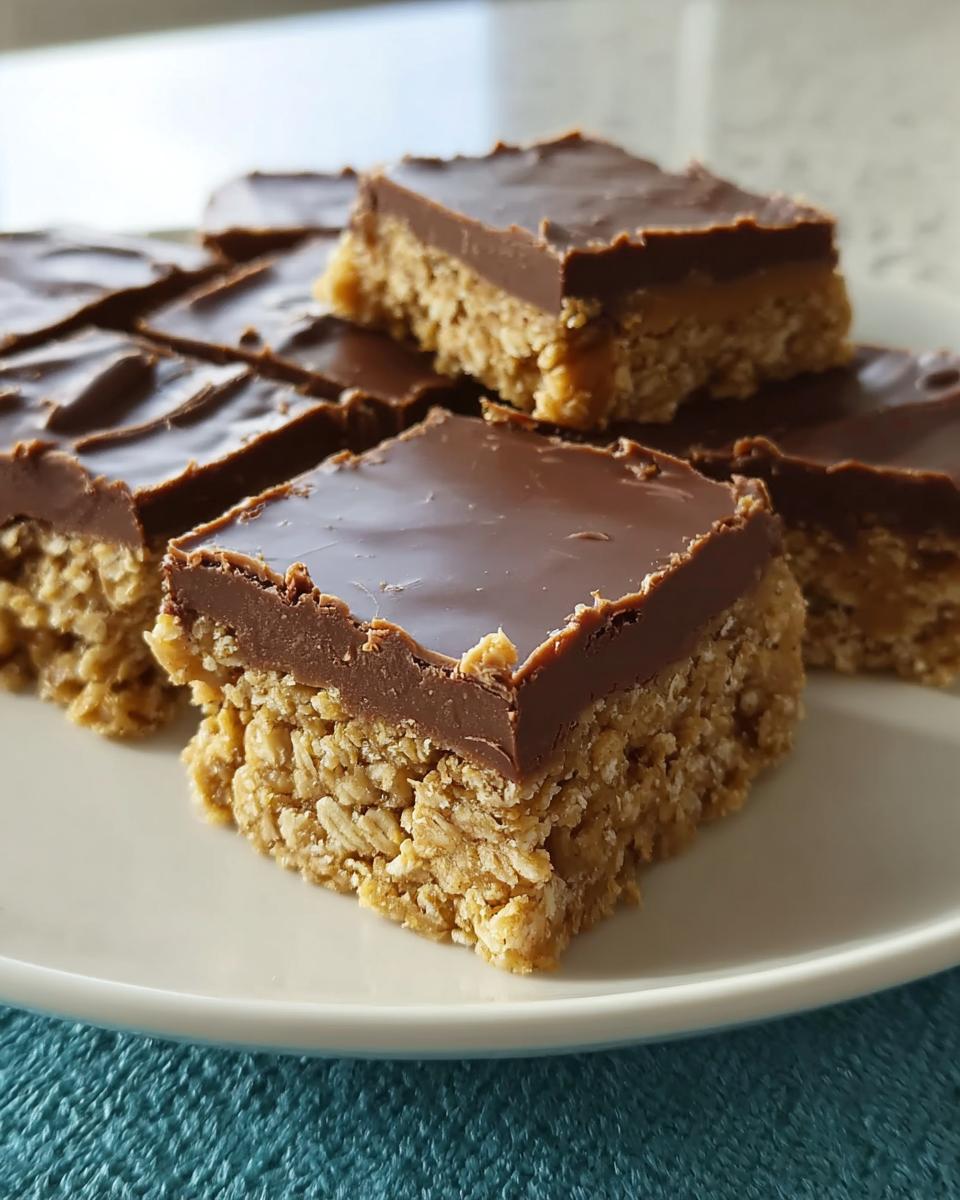
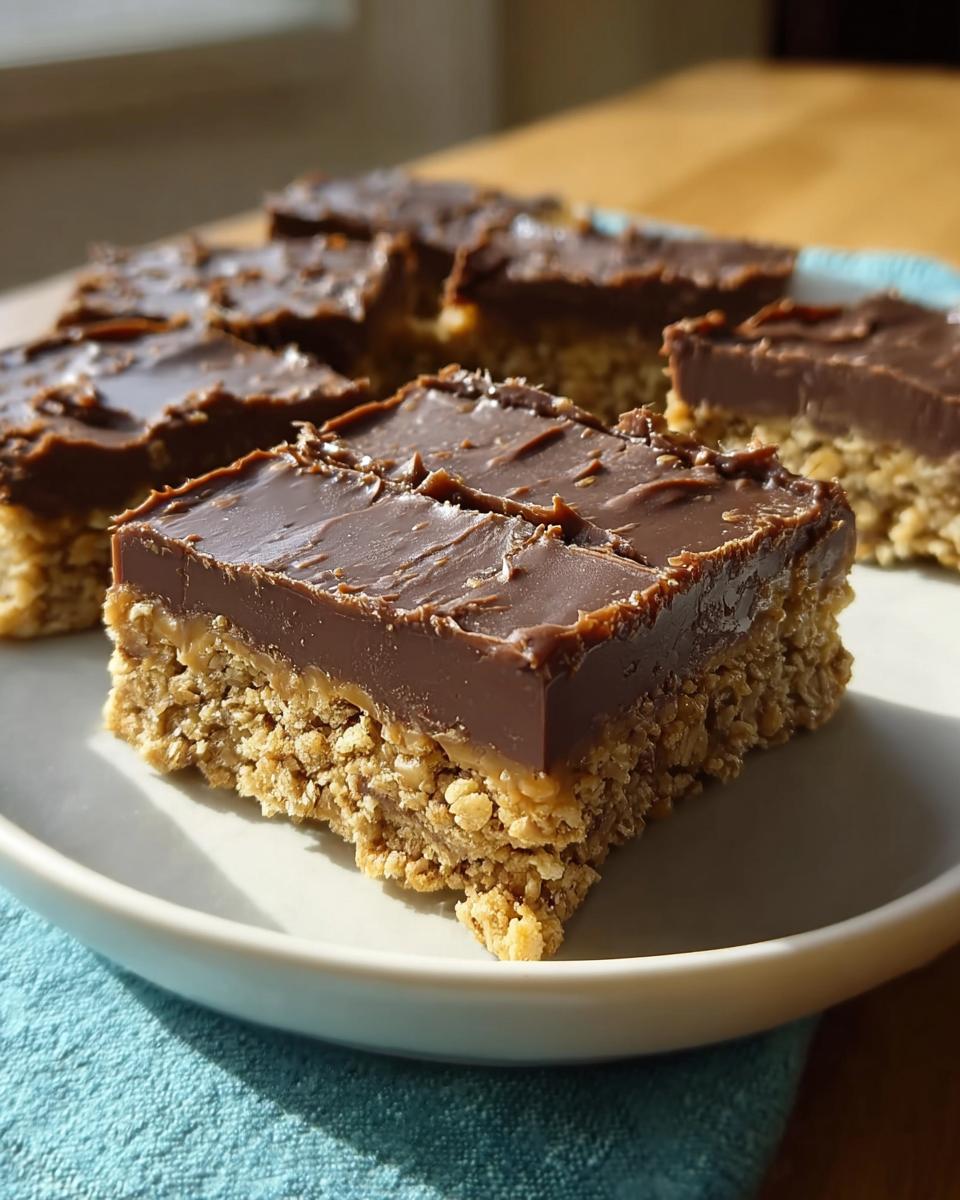
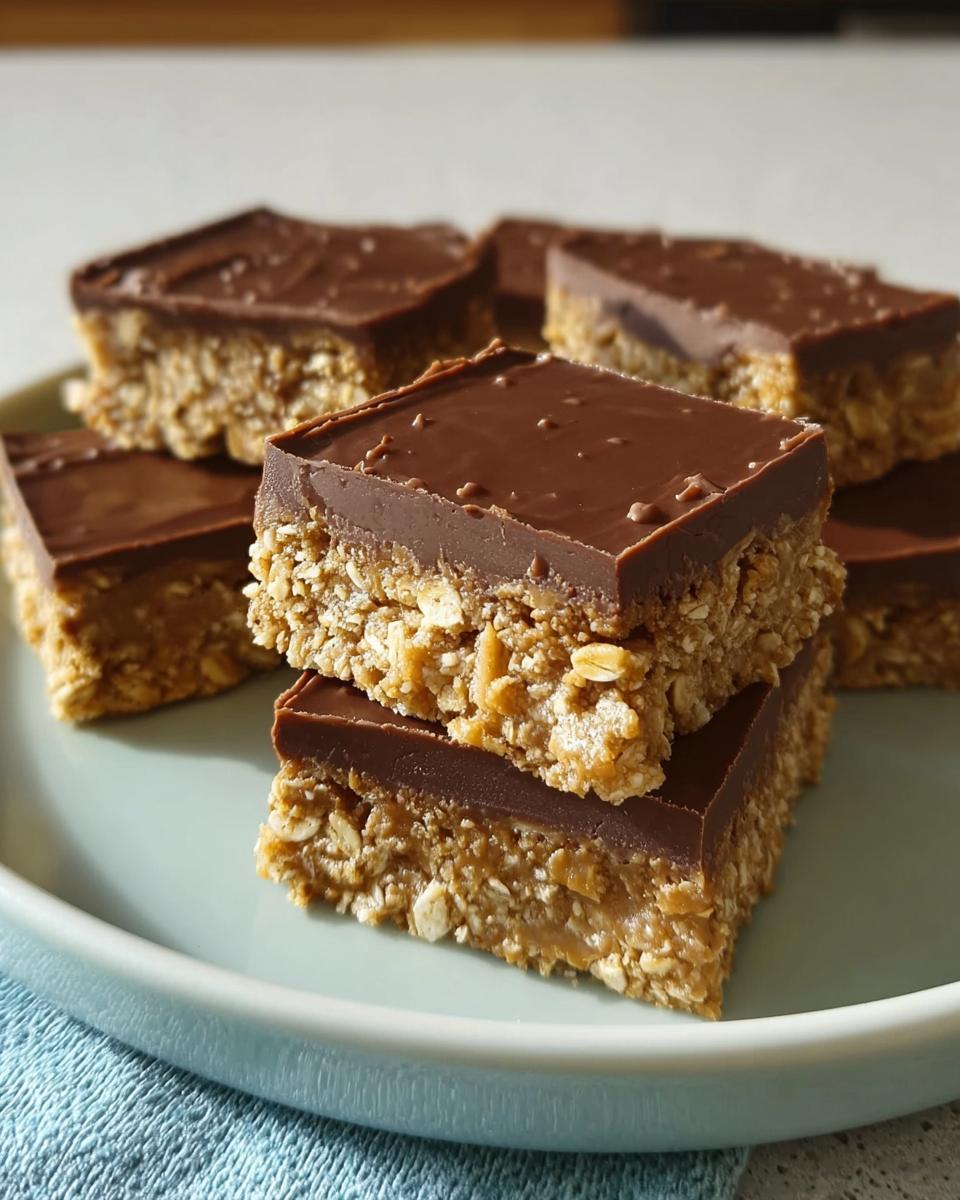
Transfer this whole mixture into your parchment-lined pan. This is the most important step for bar structure, so don’t be shy! Use the back of your spatula—or even the bottom of a flat glass—and press that mixture down *firmly*. I mean really press it until it’s totally even and compressed. It needs to be tight so these peanut butter bars don’t crumble when you cut them!
Creating and Applying the Chocolate Peanut Butter Topping
Time for the best part! Grab a separate, microwave-safe bowl. Combine your chocolate chips and the half-cup of peanut butter. We’re melting this gently, which keeps it creamy. Microwave for 30 seconds, stir really well. See how it looks? If it’s not smooth, zap it for another 30 seconds, stirring in between each blast. That way, you avoid overheating the peanut butter.
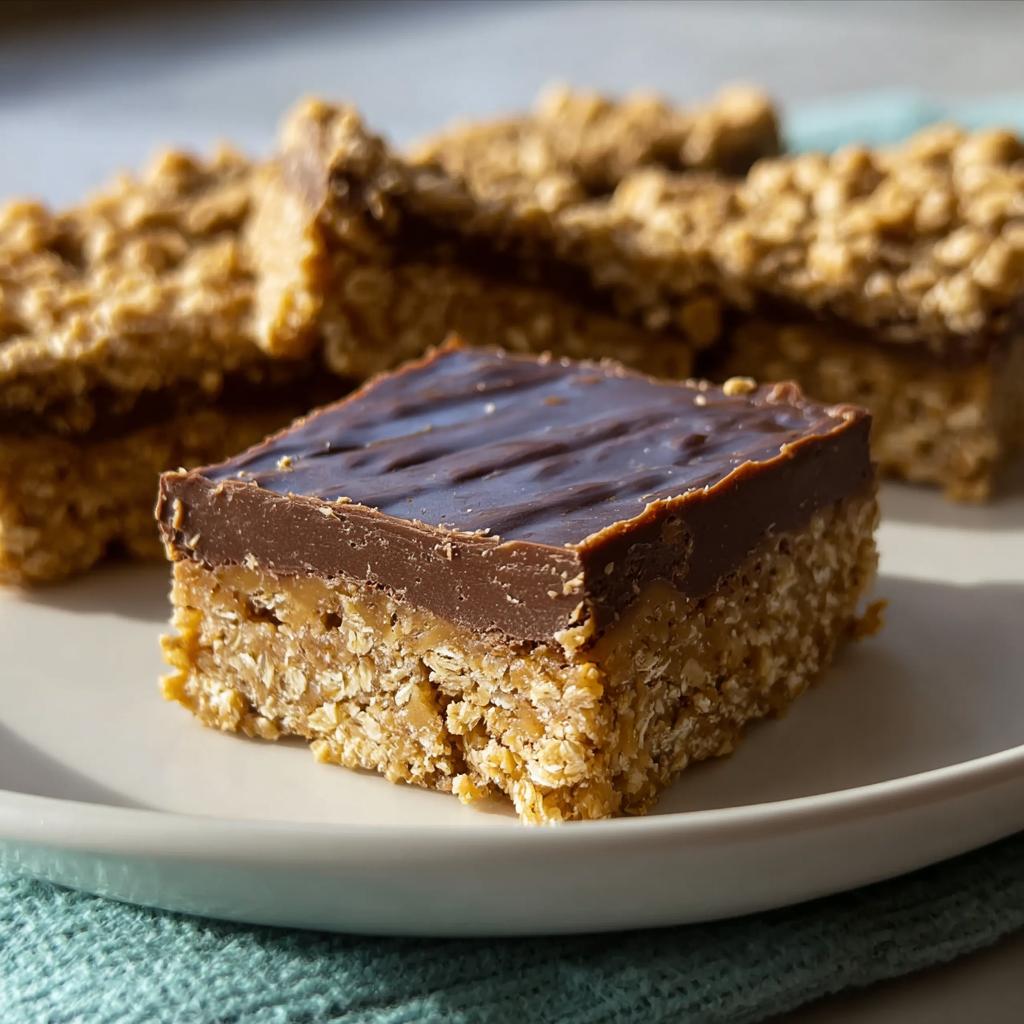
Pour that beautiful, glossy chocolate peanut butter topping right over the oat base. Use an offset spatula—or the back of a spoon if you don’t have one—to spread it out edge-to-edge as evenly as possible. You don’t want one corner thick and the middle thin, or it won’t set uniformly.
Chilling and Cutting Your No Bake Chocolate Peanut Butter Oat Bars
These have to chill to set up property; no shortcuts here, or you’ll end up with a gorgeous, messy puddle! Pop the whole pan into the refrigerator. You need a minimum of 2 hours for that topping to get firm enough. If your kitchen is warm, maybe give it a little longer.
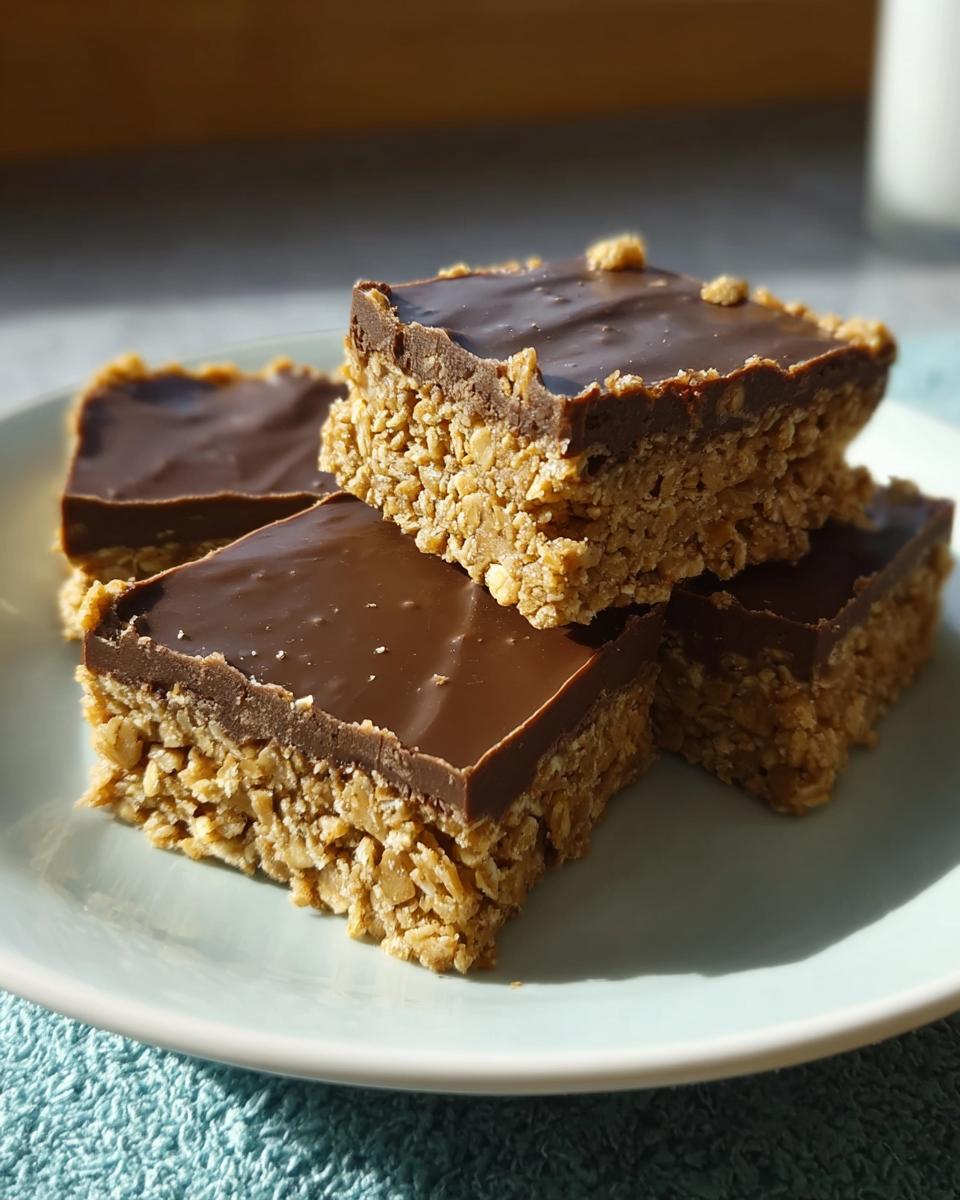
Once the chocolate is completely set—no stickiness at all—it’s time to cut. Use those parchment paper overhangs like handles and lift the whole slab out onto a cutting board. Take a sharp knife and cut straight down into 32 neat pieces. A quick peek at the original recipe submission shows this is where another great recipe gets its texture, but ours is just faster!
Ingredient Substitutions for No Bake Chocolate Peanut Butter Oat Bars
As a scientist, I always believe in flexibility—and sometimes, that means swapping ingredients based on what you have on hand or what fits your health goals better! While these are already fantastic simple sweet recipes, we can definitely adjust things without ruining that perfect no-bake structure. Because we skip the oven, the balance is key, but these swaps are totally doable!
If you’re trying to cut back on dairy, replacing the butter in the oat base is a common question. You can use coconut oil instead, cup-for-cup. Now, since coconut oil handles differently when cool, you might notice the base is *slightly* softer, but it sets up fine in the fridge. For more insights on managing ingredients on a budget, take a look at my guide on how to create a cheap keto grocery list—a lot of those principles apply to smart substitution!
Speaking of sugar, you noticed this recipe calls for brown sugar. If you’re looking for a keto-friendly or lower-sugar route, you can substitute the brown sugar with a granular sugar substitute like erythritol or monk fruit blend. Just know they won’t dissolve quite the same way the real sugar does, so make sure you heat that mixture long enough until it feels perfectly smooth before adding the oats. You want to avoid any gritty texture in your peanut butter bars!
For the topping, if you need to avoid dairy in the chocolate chips, I highly recommend looking for specific vegan or dairy-free semisweet chips. They melt just as beautifully as the regular ones, so you still get that amazing texture. Just remember the mixing rule: go slow in the microwave for the chocolate and peanut butter, no matter which brand you choose!
Storage & Freezer Tips for These Peanut Butter Bars
One of the best things about these fantastic no bake desserts? They are absolutely perfect for making ahead! Since there is no eggs or delicate baking involved, these peanut butter bars are incredibly sturdy, making them some of the best, most reliable freezer snacks you can have tucked away for busy weeks.
When it comes to keeping them fresh on the counter is not the way to go since we have that rich chocolate layer. You should always store uneaten portions in an airtight container. I usually line the bottom of the container with a small piece of parchment paper just to be safe, then stack them up gently. Kept this way, they stay perfect in the refrigerator for up to one week. They hold their shape really well in the cold, which is great!
But if you really want to stock up, the freezer is your friend! These freeze like a dream, honestly. If you know you won’t get to them within a week, wrap individual bars tightly in plastic wrap or wax paper, and then place those wrapped bars into a single layer inside a large freezer-safe bag or container. This keeps them from sticking together, which is crucial!
When you need a quick energy boost—maybe you rushed through dinner prep—you don’t have to wait long at all. Just pull out one or two of these frozen treats and let them sit on the counter for about 10 to 15 minutes. They come to the perfect slightly firm chewiness. It’s a fantastic way to have simple sweet recipes ready whenever life gets hectic. For more helpful meal prep strategies, you can look at my advice on thanksgiving salad recipes for great meal prep; similar planning applies here!
Frequently Asked Questions About No Bake Chocolate Peanut Butter Oat Bars
Even with precise instructions, folks always have a couple of little questions pop up when they are making a brand new recipe, especially when oven heat isn’t there to solve problems! I’ve gathered up the most common ones I get about these speedy peanut butter bars. I want to make sure your batch of these no bake desserts turns out perfectly chewy and delicious!
Can I use rolled oats instead of quick cooking oats in these no bake desserts?
That’s such a common question! You *can* technically substitute old-fashioned rolled oats for the quick-cooking kind, but I honestly don’t love the result for this specific recipe. Quick oats are more fragile and soften up better when they soak up that melted butter and sugar mixture. If you use rolled oats, the base will be much chewier—almost toothsome—and might not compress as tightly. If you must use them, I suggest pulsing them a few times in a food processor just to break them up a bit. It helps them behave more like the quick oats!
How long do these peanut butter bars last if kept refrigerated?
Because we melted the fat and sugar mixture, these bars are wonderfully preserved, which is why they are such great candidates for weekly meal prep. If you store them sealed tightly in an airtight container with that parchment paper barrier—just like I described in the storage section—they stay perfectly fresh in the refrigerator for up to a full week. They are so reliable!
What happens if my chocolate topping does not set properly?
Oh, that’s frustrating, but it’s usually an easy fix! The topping usually fails to set if it’s too warm when you spread it, or if the peanut butter ratio was slightly off and made it too greasy. If you wait the full two hours and it’s still soft, don’t panic! Just pop the entire pan back into the fridge for another hour. If it’s still greasy after that, sometimes the fix is to gently sprinkle a very thin layer of powdered sugar over the top—it helps absorb a little surface moisture. If you’re finding you need a little more direction on prepping things in general, my About page explains a lot about my methodology!
Understanding the Nutritional Snapshot of Your No Bake Chocolate Peanut Butter Oat Bars
Even though these are quick, satisfying peanut butter bars, I know many of you, just like me, want to keep an eye on what fuels your day. Precision is just as important when looking at macro counts as it is when measuring that vanilla extract!
Remember, because we are dealing with ingredients like butter and chocolate chips in these simple sweet recipes, these nutritional values are our best estimate based on standard ingredient sourcing. Treat these numbers as a fantastic guideline for tracking your intake, but like any home recipe, slight variations in brands can change the final count. We made 32 bars total, so these numbers reflect just one delicious piece!
Here is the snapshot for one bar:
- Calories: 200
- Carbohydrates: 25g
- Protein: 5g
- Total Fat: 10g
- Saturated Fat: 5g
- Sugar: 12g
- Fiber: 2g
For those of you tracking similar simple sweet recipes or keto compliance, keeping an eye on the fat and sugar content is important, even though these are no bake desserts. If you’re serious about tracking daily intake for progress or health metrics, you might find my template helpful; I put hours into making sure that tool actually works for precise tracking—it’s located here on the site. Enjoy knowing exactly what you’re fueling up with!
Share Your Simple Sweet Recipes Experience
Now that you’ve successfully navigated the science—and the sweetness—of these No Bake Chocolate Peanut Butter Oat Bars, I genuinely want to hear about it! It’s one thing for me to create a perfect, precise recipe in my own kitchen, but it’s another thing to know it succeeded on yours.
Did this become your go-to quick fix? Were your peanut butter bars firm enough to handle moving straight into the freezer? Please drop a comment below! I read every single one, and your feedback helps me keep my simple sweet recipes as reliable as possible for everyone else looking for fast, delicious fuel.
If you snapped a gorgeous picture of your finished product—especially if you got a clean cut on those 32 bars—tag me on social media! I love seeing your results. If you need to get in touch directly for more personalized advice or troubleshooting, feel free to reach out through my contact page anytime. Happy snacking!
No Bake Chocolate Peanut Butter Oat Bars
Ingredients
Equipment
Method
- Line a 9×13 inch baking pan with parchment paper, leaving an overhang on the sides for easy removal later.
- In a saucepan over medium heat, melt the butter and brown sugar together. Stir until the sugar is dissolved and the mixture is smooth. Remove from heat.
- Stir the vanilla extract into the butter mixture.
- Add the quick cooking oats to the wet ingredients and mix until everything is evenly coated.
- Press the oat mixture firmly and evenly into the bottom of the prepared baking pan.
- In a separate microwave-safe bowl, combine the chocolate chips and peanut butter. Microwave in 30-second intervals, stirring between each, until the mixture is smooth and fully melted.
- Pour the chocolate peanut butter topping over the oat base and spread it into an even layer.
- Refrigerate the bars for at least 2 hours, or until the chocolate topping is set. Once firm, use the parchment paper overhang to lift the bars from the pan and cut them into 32 pieces.
Nutrition
Notes
Tried this recipe?
Let us know how it was!
Precision Keto Scientist
Numbers don’t lie, and neither do my recipes. I’m a biochemist who fell into keto cooking through my own metabolic research—and I approach recipe development like a lab experiment, complete with macro calculations precise to the tenth of a gram.
My journey started in diabetes research labs at Johns Hopkins, where I spent six years studying how different macronutrient ratios affected insulin sensitivity. Personal experimentation with therapeutic ketosis for cognitive enhancement led me down a rabbit hole of recipe testing that eventually consumed more hours than my actual day job.
While other cookbook authors describe flavors and textures, I quantify ketone elevation curves and glycemic impact data. My recipe database contains 340+ formulations, each tagged with detailed nutritional analysis, predicted ketosis timing, and optimal meal spacing. I measure salt by weight, time cooking processes to the minute, and log ingredient sourcing obsessively for consistent results.
My breakthrough research on fat-protein ratios for sustained ketosis got published in the Journal of Nutritional Biochemistry. My “Macro Math Mastery” workshops have trained over 5,000 people in precision meal planning. I even collaborated with continuous glucose monitor manufacturers to create the first real-time feedback system for recipe optimization.
I left my pharmaceutical research position at Merck three years ago to focus on metabolic nutrition consulting. Now I work with professional athletes, biohackers, and medical professionals seeking therapeutic ketosis protocols. When I’m not in my lab-kitchen, I’m competing in chess tournaments or documenting my daily biomarker measurements with true data scientist obsessiveness.
Cooking is just applied chemistry—and chemistry follows predictable rules. Master the variables, control the outcomes.