
Oh, you’re looking for that perfect little sweet spot where deep satisfaction meets sensible eating? Believe me, I am obsessed with finding that balance!
We all get those cravings, right? That need for something comforting, something rooted in nostalgia. For me, it was always a banana bread aroma wafting through the kitchen, but my background in metabolic science means I’m always scrutinizing the carb count. That’s exactly how this incredible Peanut Butter Banana Bread recipe was born. It’s lower in sugar and carbs than those traditional loaves, yet it delivers all the cozy, rich flavor you deserve.
I still remember the first time I decided to really experiment with peanut butter banana bread. I was deep into my metabolic research, juggling numbers and formulas, when a craving for something sweet just struck. With a few adjusted ingredients and a rigorous macro calculation, I mixed up a batch that ended up exceeding my expectations. The aroma wafting through my kitchen was so comforting and nostalgic, reminiscent of my grandmother’s kitchen where everything tasted wonderful, but maybe wasn’t so great for my weekly targets!
That moment reinforced my belief that even in the world of precise science, there’s room for the delightful warmth and creativity of home baking. This recipe isn’t just a treat; it’s proof that you don’t have to sacrifice flavor for mindful eating. You’ll find that this recipe, along with others in my calorie-smart recipe collection, makes eating well feel truly joyful.
Why This Peanut Butter Banana Bread is a Smart Choice
Look, baking doesn’t have to derail your goals. That’s the beauty of getting creative in the kitchen! This peanut butter banana bread recipe is engineered specifically for those of us who watch what we eat but still need something genuinely satisfying when that sweet tooth hits.
We dialed back the traditional sugar here, relying instead on ripe bananas and just a touch of brown sugar to keep the impact low. It’s just a wonderful combination that tastes decadent without the guilt.
Health Benefits of Our Peanut Butter Banana Bread
The main win here is mindful sugar and carbohydrate intake. By using yogurt and adjusting the fats, we get incredible tenderness while keeping the glycemic load much lower than standard quick breads. You get fiber from the banana and slow-releasing energy throughout the afternoon.
Plus, hello, peanut butter! That ingredient does some serious work providing satisfying healthy fats and a boost of **protein snack ideas** to keep you feeling full longer. You won’t be crashing an hour later, trust me on this.
Perfect for After School Snacks and More
If you’ve got kids in the house—or maybe you just enjoy a snack that holds up until dinner—this is your new go-to. It slices beautifully and travels well, making it an excellent choice for packed lunches or quick **after school snacks**. It packs enough good stuff in there to feel like real fuel, not just empty calories.
It’s sturdy, it’s flavorful, and it really hits the spot when you need something quick that doesn’t taste like health food!
Essential Ingredients for Perfect Peanut Butter Banana Bread
When we’re aiming for precision while still keeping things delicious and comforting, the ingredients really matter. I learned from my time balancing macros that you can’t just toss things in randomly, especially not with quick breads! For this Peanut Butter Banana Bread to come out perfectly moist and balanced, you need to respect the measurements, even if you plan on making some clever swaps later on.
You’ll need three bananas, and I mean truly ripe ones—the kind that are practically black so they bring maximum sweetness naturally! Then we move into our wet ingredients: just half a cup of light brown sugar (though you can swap that out if you prefer!), eggs, creamy peanut butter, and that secret weapon for texture, Plain Greek Yogurt. The yogurt is key here! We’re using coconut oil for the fat content, which works beautifully.
For the dry side, it’s mostly all-purpose flour, but don’t panic if you don’t have that on hand; we have options! Baking soda and powder provide the lift we need, balanced by a pinch of salt. And of course, you HAVE to have chocolate chips—three-quarters of a cup folded in, plus a little extra on top because why not?
Ingredient Notes and Substitutions for Your Peanut Butter Banana Bread
This is where the fun really begins for home bakers who like to tinker! My notes in the recipe card are absolutely filled with ways to adjust this recipe to fit your needs. Don’t have creamy peanut butter? Any nut butter works just as well—almond butter or cashew butter will be fantastic! And if you’re steering clear of traditional chocolate, walnuts or pecans make wonderful banana loaf variations.
Flour is super flexible here too. You can absolutely substitute the all-purpose flour with oat flour or even a good gluten-free blend. Just be sure the texture feels right when you mix it; you want it incorporated smoothly but not overworked. Even the sugar can be substituted with low-calorie sweeteners if you need to cut back further. This recipe is forgiving enough to support your specific nutritional goals while still delivering that amazing, satisfying bite.
For more recipe ideas that are flexible like this, check out my main collection of kitchen experiments!
Equipment Needed for This Peanut Butter Banana Bread Recipe
Okay, let’s get set up! You don’t need a ton of fancy gear for this recipe, which is part of why I love it so much for a weeknight bake. Having the right tools just makes the process much smoother, and trust me, nobody wants peanut butter batter spraying onto the walls!
Because we are making a loaf, the most important piece of kit you need is a sturdy 9×5 loaf pan. Make sure it’s clean and ready to go before you even look at the bananas!
For mixing, you’ll want two primary implements:
- A good sturdy whisk for getting those eggs and wet ingredients nice and emulsified.
- A reliable spatula. This is crucial for gently folding in the dry ingredients and the chocolate chips so we don’t overmix the batter—that’s the number one way to get a tough loaf!
And finally, once your amazing Peanut Butter Banana Bread comes out of the oven, you absolutely must have a wire rack waiting for it. Letting bread cool on a rack prevents that soggy bottom syndrome where steam gets trapped underneath. It might seem small, but this step is vital for texture integrity!
Step-by-Step Instructions for Baking Peanut Butter Banana Bread
Alright, time to get baking! This is where the aroma starts to fill your kitchen and you start questioning why you ever bought bread from a store. Precision is important here, especially with the mixing, so follow these steps closely for the best results in your Peanut Butter Banana Bread.
First things first: Get that oven preheated! We need a steady 350°F before anything else goes into the pan. While it’s warming up, take your 9×5 loaf pan and either generously coat it with baking spray or, even better, line it with parchment paper so it hangs over the sides a bit. This makes the removal SO much easier later!
Now for the wet team. Grab a medium bowl. You need to mash those three large, ripe bananas—really get them broken down until they look like baby food. Then, whisk in your half-cup of light brown sugar, those two large eggs, the Greek Yogurt, the coconut oil, your half-cup of creamy peanut butter, and the vanilla extract. You want this mixture completely combined and smooth before moving on. Keep whisking until it looks uniform! For a great guide on making flavorful dinners, sometimes similar mixing techniques apply; check out these dinner ideas fool-proof tips.
Time to introduce the dry team. In a separate bowl, whisk together the required flour (one and a half cups), the baking powder, baking soda, and salt. Whisking the dry ingredients separately is important; it acts like sifting, making sure those leavening agents are evenly spread out.
Here is the crucial part: Combine them gently! Dump the dry mixture right into the wet mixture. Use your spatula now, not the whisk. Fold everything together until you can barely see streaks of flour left. Seriously, stop mixing when you think you should stop, and then fold just a couple more times. Overmixing is the enemy of a tender loaf!
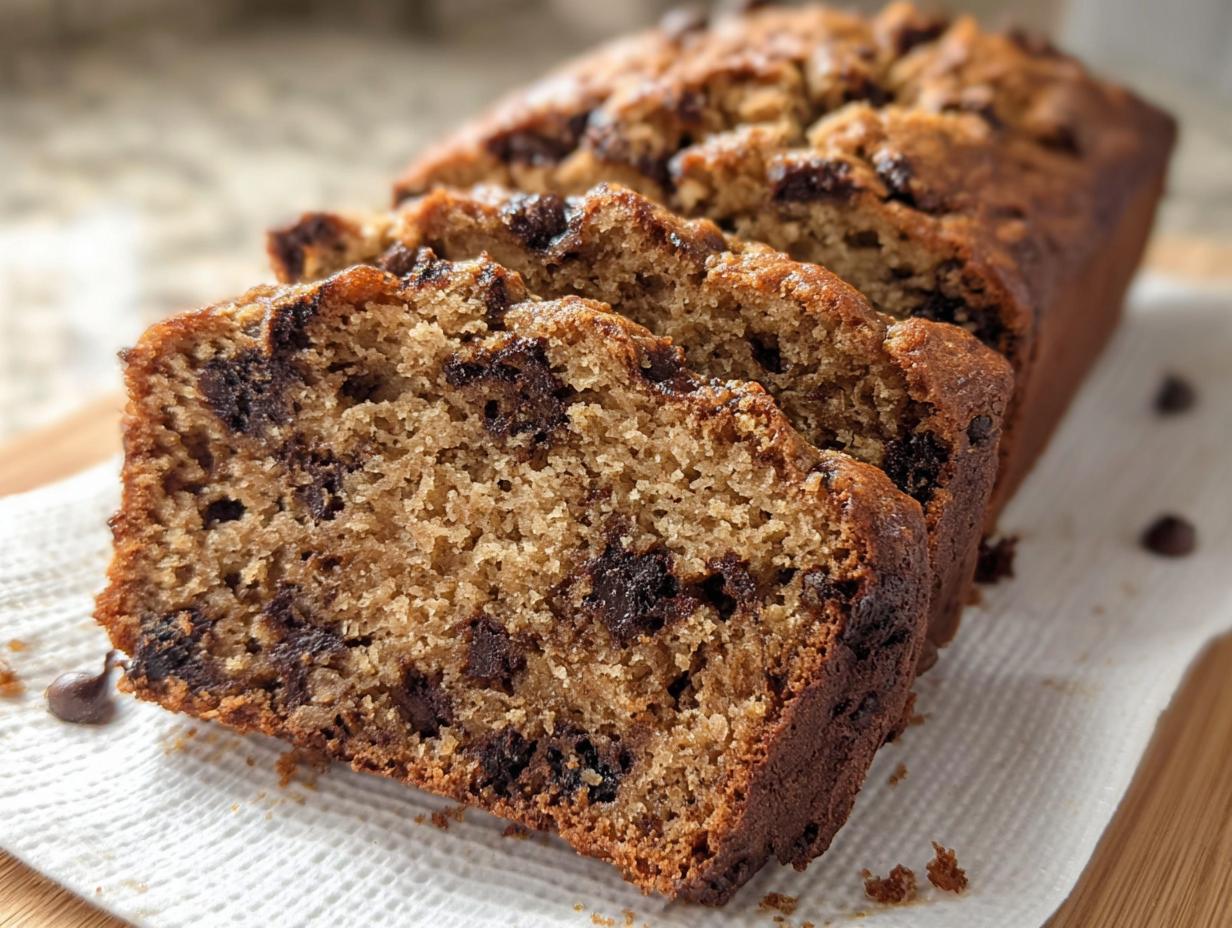
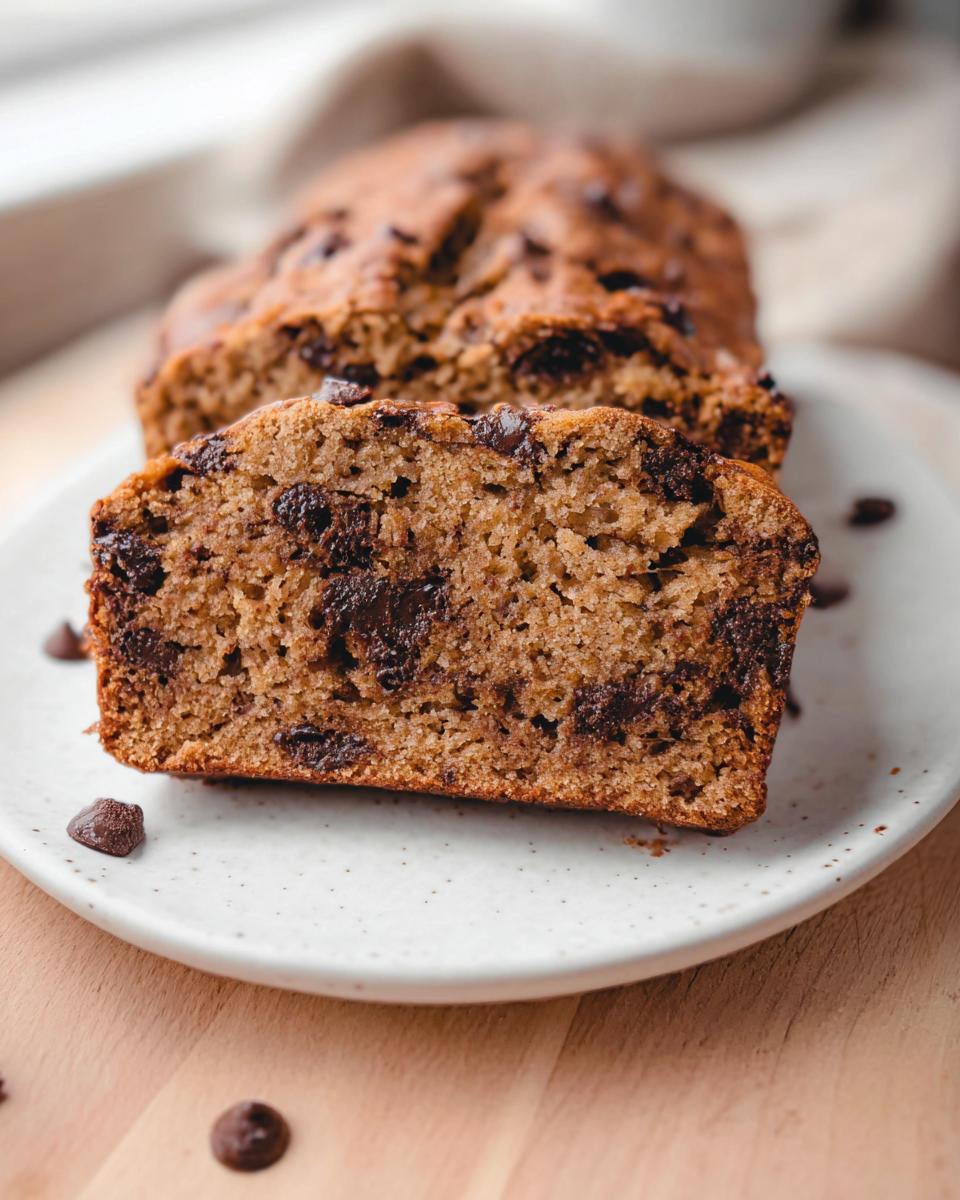
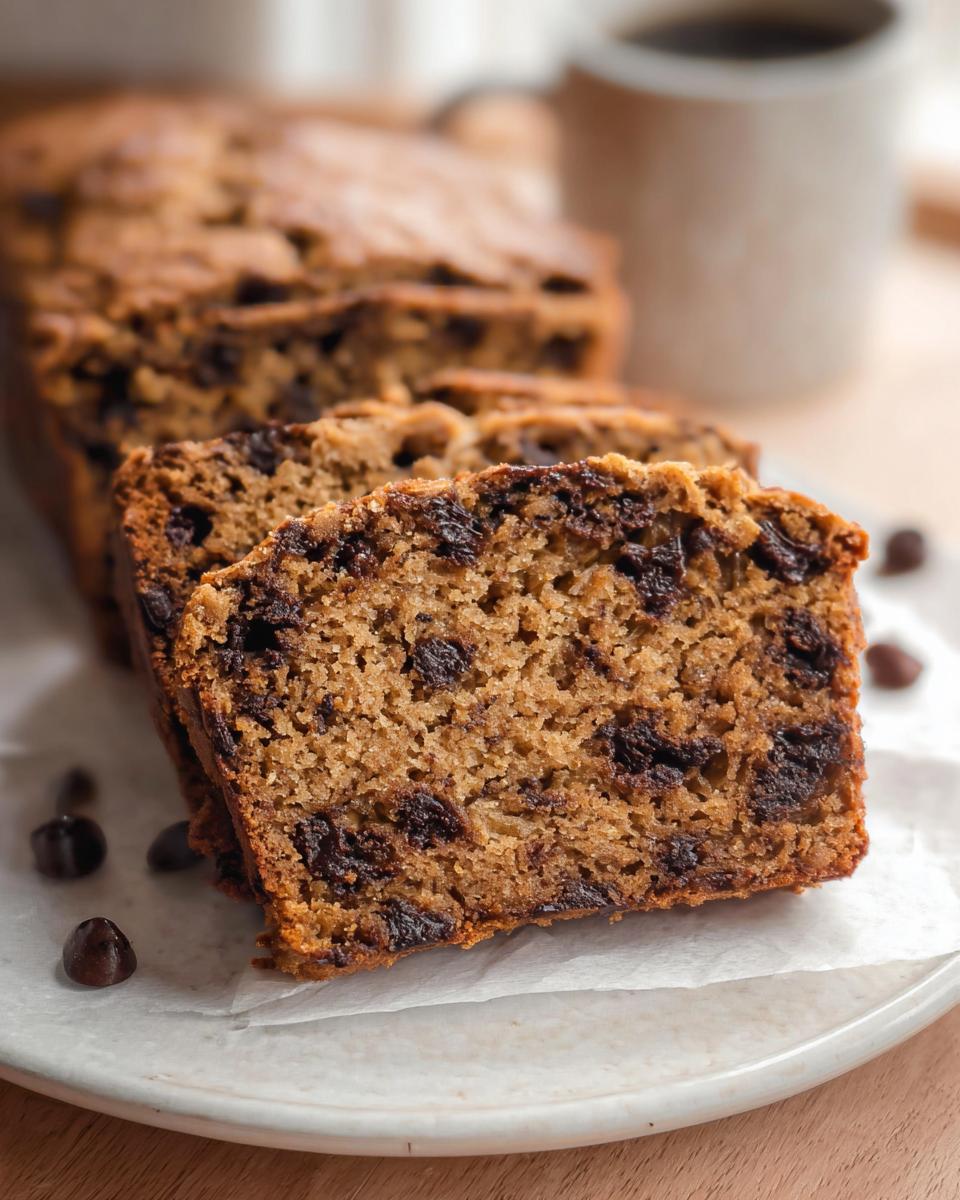
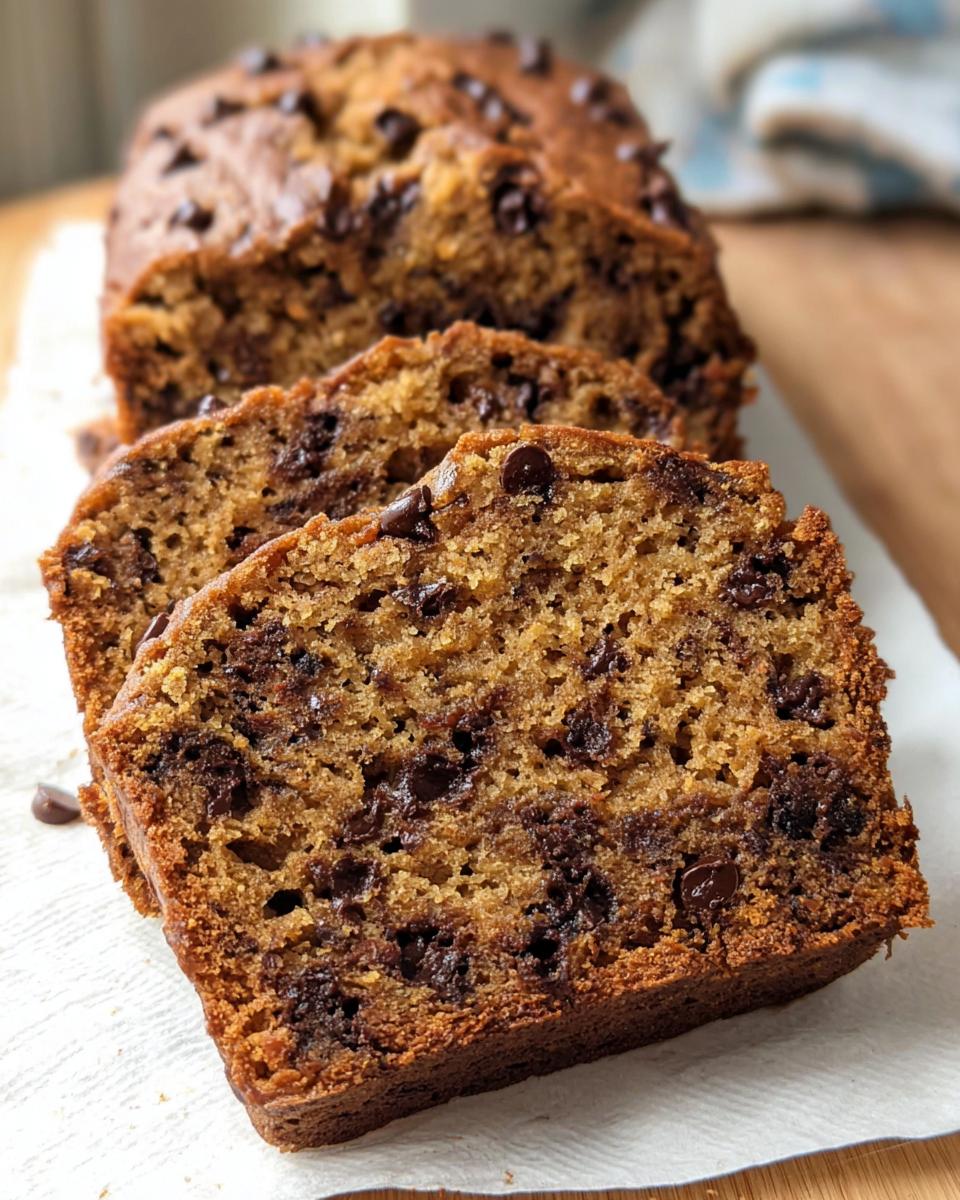
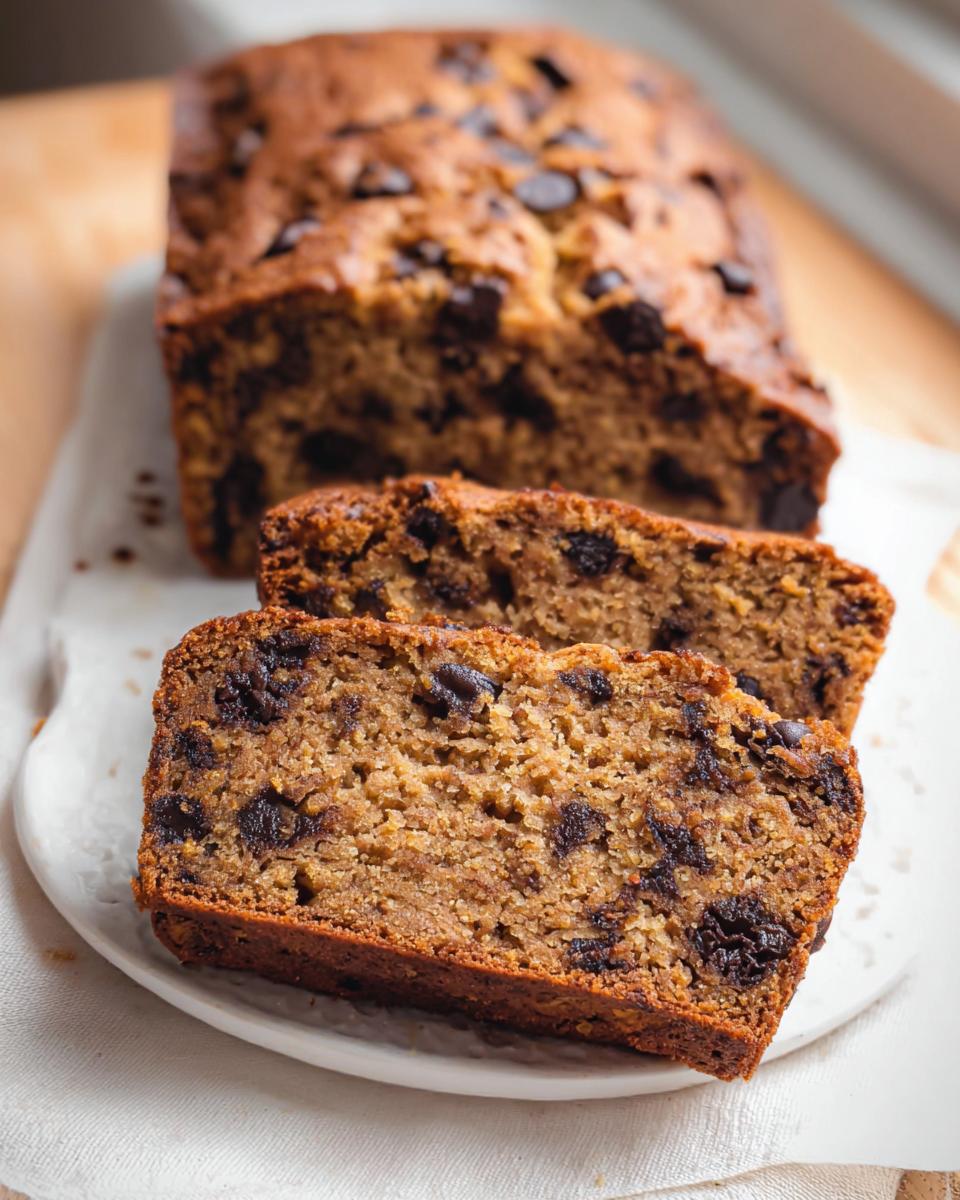
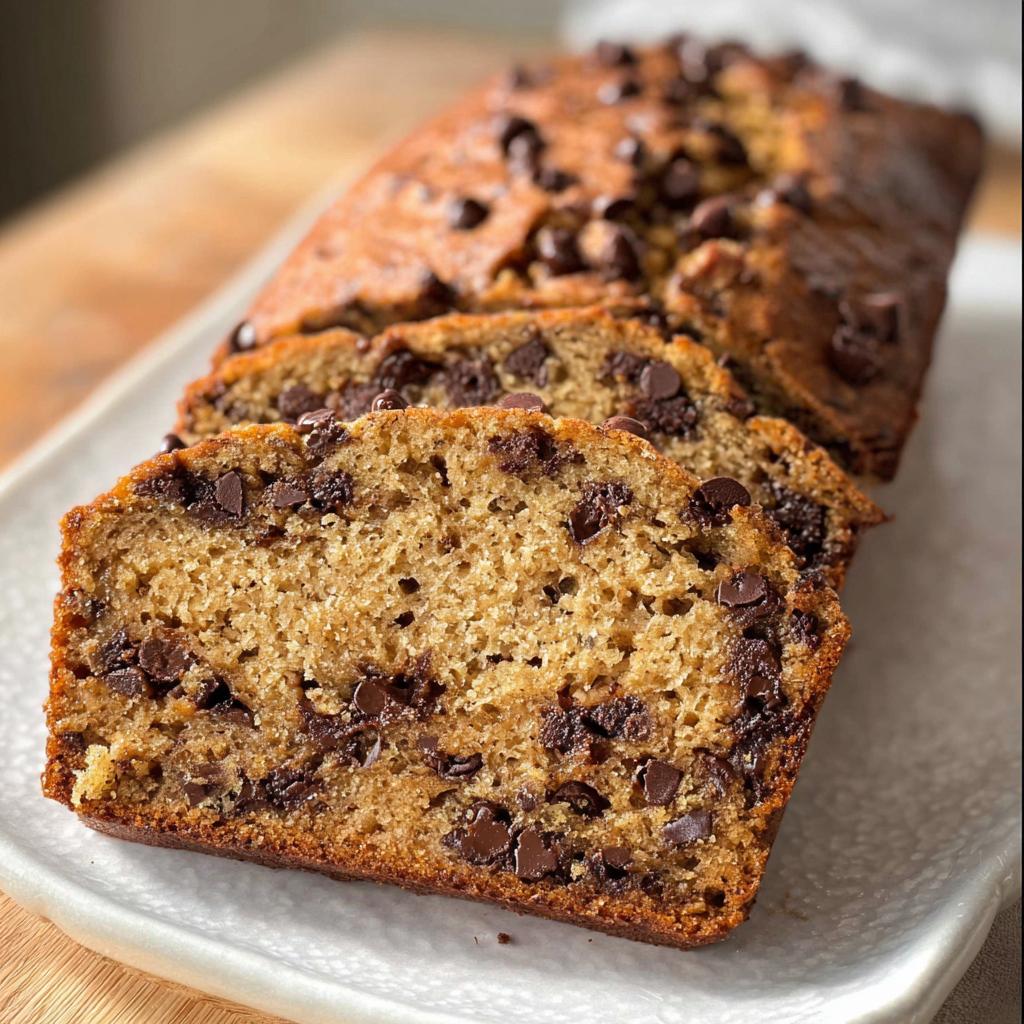
Finally, fold in the three-quarters cup of chocolate chips. Pour that gorgeous batter into your prepared pan. You can sprinkle the extra two tablespoons of chocolate chips right on top for a pretty finish. Bake this beauty for 50 to 55 minutes. How do you know it’s done? A toothpick inserted right into the center should come out clean or with just a few moist crumbs attached—never wet batter!
Once it looks done, pull it out! It needs a cooling vacation. Let it chill in that pan for a full 20 minutes. Then, use those parchment paper handles (if you used them!) to lift it out onto the wire rack to cool for another 10 minutes before slicing. If you want to see how I structure an amazing recipe just like this one, you can look at the original source for this specific Peanut Butter Banana Bread.
Baking Tips for the Best Peanut Butter Banana Bread Results
Listen, I’m a precision person by trade, but baking these comfort foods requires intuition too. Overmixing is the biggest trap in quick bread making. When you mix the flour too much, you develop gluten, which turns your soft, fluffy loaf into something tough—and nobody wants that!
Another thing I always focus on is the temperature of the ingredients, even though this recipe is pretty forgiving. Make sure your eggs and yogurt aren’t ice-cold straight from the back of the fridge. Room temperature ingredients emulsify better, meaning they blend together into one smooth, stable mixture, which is what gives you that great structure you see in the final product.
Also, don’t be tempted to open the oven door before the 45-minute mark! That blast of cold air can cause your beautiful rise to suddenly collapse on itself. Patience during that crucial rising time is the final piece of building authority in your baking skills!
Making Peanut Butter Banana Bread Ahead of Time
One of the greatest features of any good quick bread is that it tastes even better the next day, and this Peanut Butter Banana Bread is certainly no exception! Having a loaf ready to go means effortless protein snack ideas whenever you need a boost.
If you plan on baking this over the weekend, you’ve got options for keeping it fresh. When it comes out of the oven and has cooled completely on the wire rack (remember that step!), slicing it before storing is sometimes easier for portion control, though leaving it whole traps moisture better.
For short-term storage—say, the next three days—wrap the cooled loaf tightly in plastic wrap, and then slide that into an airtight container or even a gallon-sized zip-top bag. Leave it right there on the counter at room temperature. The fats and the yogurt help keep it wonderfully moist for days!
Now, if you’re planning for the long haul, freezing is the way to go. Slice the bread first; this makes it so much easier to grab just one slice later on. Wrap each individual slice tightly in plastic wrap, then pop those wrapped slices into a larger freezer-safe, airtight bag. It keeps beautifully for up to three months! Thaw a slice on the counter for an hour, or just microwave it for 15 seconds to get that fresh-baked feeling back.
If you want tips on ensuring other savory recipes keep well too, I wrote a whole post on how to make sure things like Thanksgiving green beans turn out perfectly, and those storage concepts apply to many baked goods!
Serving Suggestions for Your Peanut Butter Banana Bread
You’ve done the hard work, you’ve baked this masterpiece, and now it’s time to enjoy it! While I think this Peanut Butter Banana Bread is perfect all on its own—seriously, that chocolate chip swirl is almost a meal in itself—sometimes a few extras can elevate your snack experience, especially if you’re aiming for another great **protein snack idea**.
Because this loaf is relatively low in sugar compared to traditional versions, it pairs wonderfully with a few simple additions. Think of it as a slightly healthier base for creativity!
Here are my favorite ways to dress up a slice:
- For a decadent treat, especially if you’re serving it warmed up, a light drizzle of extra creamy peanut butter makes this one of the best low-fuss **peanut butter desserts** you can whip up. The warmth melts it just perfectly.
- If you need a little extra protein boost to keep you going through the afternoon slump, try spreading a thin layer of cottage cheese or Greek yogurt on your warmed slice. It sounds wild, but the coolness balances the warm bread so well!
- When I’m serving this as a weekend brunch item, I love keeping it simple—a light dusting of cinnamon or a sprinkle of flaky sea salt right on top after slicing adds such a professional touch without adding any unnecessary work.
We aim for simple, balanced flavors here, which is why these pairings work so well. They complement the rich peanut butter and banana notes without overpowering them. For more ideas on keeping your meal times simple and enjoyable, take a peek at my thoughts on simple balanced suppers!
Frequently Asked Questions About Peanut Butter Banana Bread
I know you might still have a few lingering calculation questions! It’s totally natural when you’re trying out a recipe that’s been tweaked for mindful eating. I’ve gathered a few questions I often get after someone tries this fantastic Peanut Butter Banana Bread recipe. Bring on the questions!
Can I make this Peanut Butter Banana Bread entirely sugar-free?
That’s a great question, especially if you’re really focusing on carbohydrate reduction! The answer is yes, you absolutely can adjust it. Remember how I mentioned that brown sugar can be swapped out? If you use a zero-calorie sugar substitute that measures cup-for-cup like the brown sugar—think erythritol blends or monk fruit sweeteners—you can make this loaf completely sugar-free while keeping that structure intact. Just make sure whatever you use handles heat well in baking!
What is the best way to ripen bananas quickly for this recipe?
Oh, the rush! Sometimes you realize you need that bread *now*, but your bananas are still stubbornly yellow. Don’t worry, I have a trick for that! Preheat your oven to 300°F (that’s low and slow). Pop the unpeeled bananas right onto a baking sheet. Let them hang out there for about 15 to 20 minutes. You’ll pull them out when the skin is completely black. Let them cool slightly—careful, the peels will be hot! Once cooled, they mash up perfectly sweet, ready to go into your batter. It’s a lifesaver when you’re craving those **banana loaf variations** immediately!
How does this compare to standard banana loaf variations in terms of density?
This is where the yogurt and peanut butter really shine and make a noticeable difference compared to standard recipes. A traditional banana loaf or bread often relies heavily on refined white sugar and sometimes sour cream or only oil, which can lead to a lighter, cakier crumb. Because we’re using Greek yogurt, which is thick and protein-rich, and the natural density of peanut butter, this loaf feels incredibly substantial.
It’s certainly not dry—that Greek yogurt ensures it stays moist for days—but it has a satisfying heft to it. It’s denser than an airy cake, but beautifully soft, which is exactly what you want in a hearty snack. If you’re looking for more ways to keep your recipes balanced, feel free to reach out via my contact page!
Nutritional Estimates for Peanut Butter Banana Bread
Now, because I approach baking from a scientific, mindful perspective, I know lots of you are curious about the numbers behind the deliciousness. We want to enjoy this treat, but we also want to know what kind of fuel we’re putting into our bodies, right?
Keep in mind that these figures are estimates! The exact values will shift based on the specific brand of peanut butter you use, whether you used full-fat yogurt or a substitute, and the type of sugar or flour you chose. But for a general idea—especially if you’re tracking macros—this gives you a fantastic baseline.
Based on the standard measurements for this recipe for one slice, here is what you can generally expect from one satisfying serving of this Peanut Butter Banana Bread:
- Calories: Approximately 382
- Total Carbohydrates: Roughly 46 grams
- Protein: About 9 grams
- Total Fat: Around 20 grams
- Sugar: Approximately 22 grams
That protein punch alone makes this such a wonderful option when you need something sweet but structured, unlike a standard slice of cake that might just send your sugar soaring. We’ve packed a lot of flavor and substance into just one piece!
Share Your Peanut Butter Banana Bread Creations
Now that you’ve pulled a warm, fragrant loaf of this incredible Peanut Butter Banana Bread out of your oven, I just have one request: Show me what you made!
I pour my heart and my science into developing these recipes, but the joy really happens when you take the formula and make it your own. Did you use almond butter instead of peanut butter? Did you swap those chocolate chips for pecans? Did you manage to get a perfect, crack-free top?
I absolutely live to hear about your baking adventures in the comments section below. Let me know how you tweaked it, especially if you’re trying out one of the healthier banana loaf variations we discussed, or if you found a clever way to incorporate this into your weekly **after school snacks** rotation!
If you loved this recipe and want to dive deeper into how I balance flavor with mindful eating principles, feel free to read a little more about my philosophy on the About Page!
Snap a photo of your finished loaf—maybe sliced with a little extra drizzle of peanut butter next to it—and tag me on social media! Seeing your successes helps me keep creating recipes that bring that comforting warmth back into scientific kitchen routines. Happy baking, and don’t forget to leave a star rating if this recipe hit the spot!
Peanut Butter Banana Bread
Ingredients
Equipment
Method
- Preheat the oven to 350°F and line a 9×5 loaf pan with parchment paper or baking oil spray.
- In a bowl, mash the 3 large ripe bananas. Add the 1/2 cup light brown sugar, 2 large eggs, 1/2 cup Plain Greek Yogurt, 1/3 cup Coconut oil, 1/2 Cup Creamy peanut butter, and 2 teaspoons Vanilla Extract. Use a whisk to combine all the ingredients thoroughly.
- Pour in the 1 1/2 cups All-purpose flour, 1 teaspoon baking powder, 1 teaspoon baking soda, and 1/4 teaspoon salt. Use a spatula to mix to incorporate. Do not overmix.
- Add in the 3/4 cup dark chocolate chips and fold again.
- Pour the batter into the prepared pan, top with more chocolate chips, and bake for 50 to 55 minutes or until a toothpick comes out clean.
- Allow the bread to cool for 20 minutes before removing it from the pan. Let it cool for another 10 minutes on a wire rack. Slice and serve.
Nutrition
Notes
Tried this recipe?
Let us know how it was!
Precision Keto Scientist
Numbers don’t lie, and neither do my recipes. I’m a biochemist who fell into keto cooking through my own metabolic research—and I approach recipe development like a lab experiment, complete with macro calculations precise to the tenth of a gram.
My journey started in diabetes research labs at Johns Hopkins, where I spent six years studying how different macronutrient ratios affected insulin sensitivity. Personal experimentation with therapeutic ketosis for cognitive enhancement led me down a rabbit hole of recipe testing that eventually consumed more hours than my actual day job.
While other cookbook authors describe flavors and textures, I quantify ketone elevation curves and glycemic impact data. My recipe database contains 340+ formulations, each tagged with detailed nutritional analysis, predicted ketosis timing, and optimal meal spacing. I measure salt by weight, time cooking processes to the minute, and log ingredient sourcing obsessively for consistent results.
My breakthrough research on fat-protein ratios for sustained ketosis got published in the Journal of Nutritional Biochemistry. My “Macro Math Mastery” workshops have trained over 5,000 people in precision meal planning. I even collaborated with continuous glucose monitor manufacturers to create the first real-time feedback system for recipe optimization.
I left my pharmaceutical research position at Merck three years ago to focus on metabolic nutrition consulting. Now I work with professional athletes, biohackers, and medical professionals seeking therapeutic ketosis protocols. When I’m not in my lab-kitchen, I’m competing in chess tournaments or documenting my daily biomarker measurements with true data scientist obsessiveness.
Cooking is just applied chemistry—and chemistry follows predictable rules. Master the variables, control the outcomes.