
Oh, those moments when a giant, sugar-fueled craving hits and you think you have to choose between your goals and pure deliciousness? I know that feeling well! I spent years accidentally derailing my healthy eating habits just because I couldn’t find one truly satisfying dessert.
That all changed one lazy Saturday afternoon here in my Brooklyn apartment. I was absolutely determined to hit that sweet spot—you know, decadent flavor without the sugar crash later. I was flipping through my book, looking for inspiration amongst my hyperlocal cacao finds, and I landed on what would become my famous Peanut Butter Chocolate Fudge Squares.

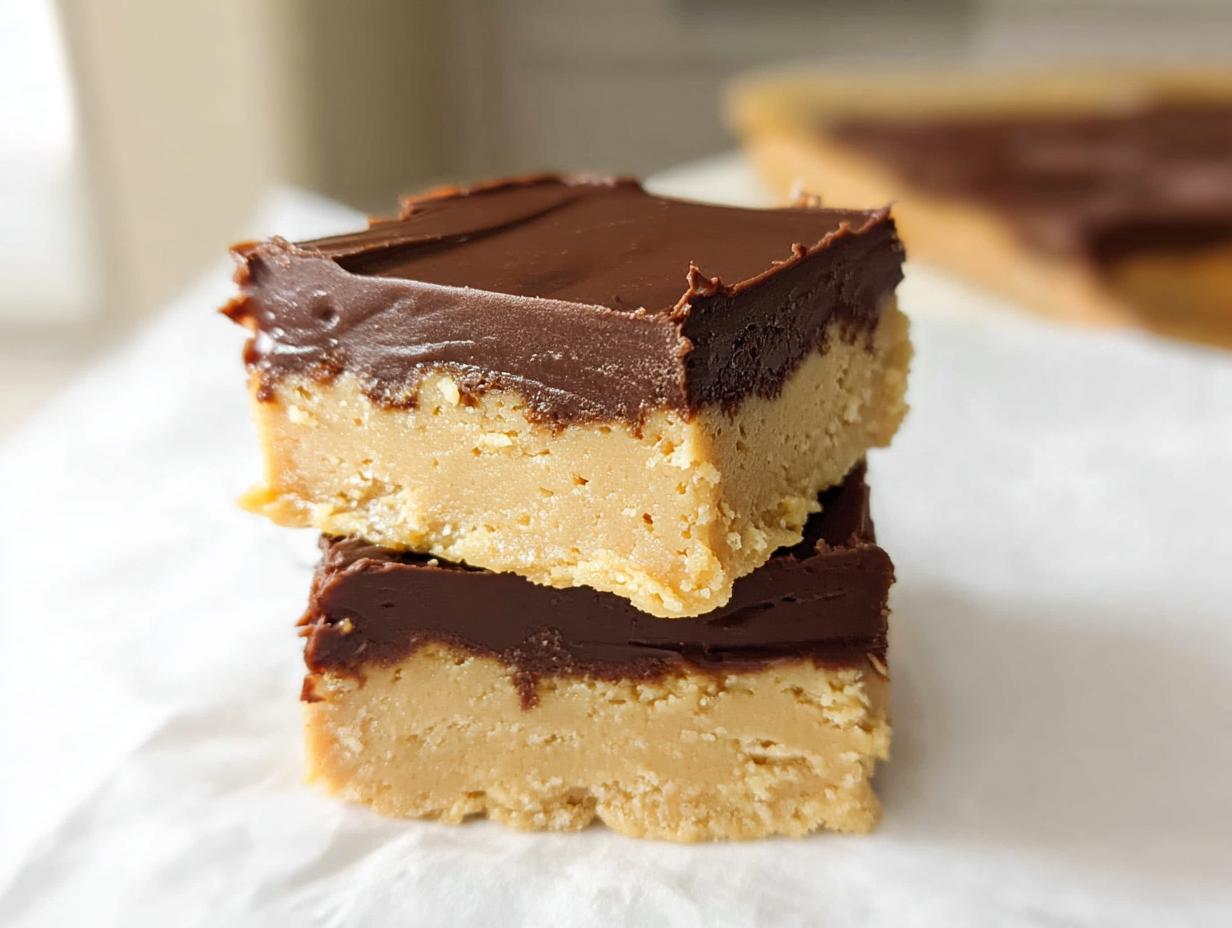
The aroma when that chocolate was melting was just incredible; it instantly took me back to raiding the pantry as a kid! When they finally set and I bit into that first square—creamy, deeply chocolatey, and utterly guilt-free—I was ecstatic. These are the ultimate rich, bite-sized desserts because they prove you never have to compromise on flavor when you cook with intention.
If you’re looking to treat yourself right this week, you’ve got to try this chocolate fudge recipe. Don’t forget to check out some of the common pitfalls I hit when starting out; you can read about my journey fixing those keto mistakes right here!
Why You Will Love These Peanut Butter Chocolate Fudge Squares
Seriously, I wouldn’t bother sharing a recipe if it wasn’t a genuine crowd-pleaser, especially when it comes to something as important as dessert! These Peanut Butter Chocolate Fudge Squares hit all the right notes, even on my busiest days.
- They satisfy those deep, dark chocolate cravings without any of the guilt. They feel super indulgent!
- Setup is a snap! We’re talking 15 minutes of active time before they chill themselves without any oven hassle. That’s my kind of baking.
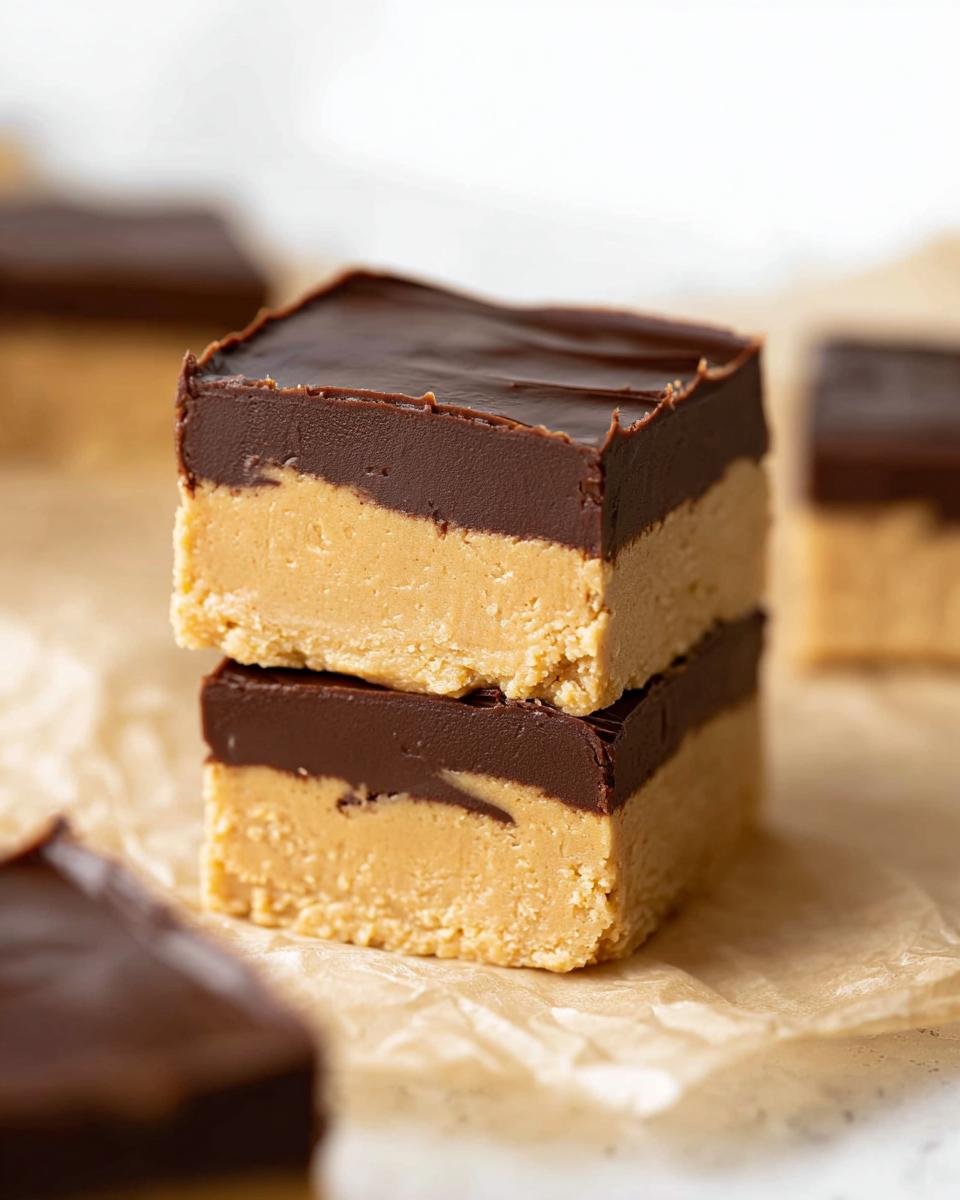
- They are perfectly portioned. These are true rich bite-sized desserts, which means I can have one (or two!) and feel completely satisfied.
- The texture is just *chef’s kiss*—that creamy peanut butter layer beneath the snappy chocolate top? Perfection.
- They store beautifully, which means I never run out when a craving unexpectedly strikes mid-week.
Essential Equipment for Perfect Peanut Butter Chocolate Fudge Squares
When you’re making something this easy, having the right tools ready makes all the difference. Trust me on this one; prepping your station first stops that frantic searching midway through mixing! You don’t need a ton of fancy gadgets for these Peanut Butter Chocolate Fudge Squares, but a few basics are non-negotiable.
First and most importantly, you absolutely need your baking vessel ready to go. For the perfect yield, grab that standard 8-inch square baking pan. I always talk about prepping the pan ahead of time, and for fudge, it’s crucial!
Here’s the short list of what you’ll need on your counter before you even touch the butter:
- 8-inch square baking pan: This gives you the ideal depth for those creamy layers. It has to be square!
- Large mixing bowl: You need room to beat that peanut butter base until it’s fluffy; a cramped bowl means a messy counter!
- Microwave or a double boiler: This is essential for getting that chocolate glaze perfectly smooth and shiny without scorching it. Please don’t try to melt chocolate in a saucepan directly over high heat—it’s a disaster waiting to happen.
Having these items clean, accessible, and ready to go shaves serious time off the process. When the base is mixed, you don’t want it sitting around while you search for a bowl large enough!
Gathering Ingredients for Your Peanut Butter Chocolate Fudge Squares
Okay, we’ve got the pans lined up, now comes the fun part: gathering the goodies! To make sure these Peanut Butter Chocolate Fudge Squares turn out perfectly creamy—and believe me, texture is everything with fudge—we need to be specific about our ingredients, especially their temperature when we mix them in.
I always lay everything out on the counter first, like I learned reading all those old cookbooks. This prevents that moment where you realize your butter is rock solid and suddenly you’ve added too much sugar! If you’re trying to figure out how to make incredible desserts without breaking the bank, sometimes the key is just using what you have intelligently; you might find some great budget tips in this guide on affordable cooking.
Let’s break down what needs to be ready for our two delicious layers.
For the Peanut Butter Base
This homemade candy idea relies on mixing fat and sugar precisely, so make sure your butter and peanut butter are truly at room temperature—that means soft, but not melted or greasy. This ensures we incorporate air properly when mixing.
- You’ll need a half cup of packed brown sugar. Pack it tightly into that measuring cup!
- We need a generous one and three-quarter cups of powdered sugar. Sifting is optional, but if yours is lumpy, give it a quick whisk beforehand.
- Make sure you have a quarter cup of butter, at room temperature. This is crucial for creaming later on!
- One full cup of smooth peanut butter, at room temperature. Avoid natural, runny peanut butter here, or your base might get too soft.
- A half teaspoon of vanilla to boost that classic flavor.
For the Chocolate Glaze
This glaze sets up beautifully, giving us that satisfying snap when you bite in. The corn syrup is key for getting that wonderful shine!
- Four ounces of good quality semisweet chocolate. You can use chips or a solid bar, chopped up.
- One tablespoon of extra butter for richness.
- One tablespoon of corn syrup. Don’t skip this! It keeps the chocolate glossy and soft enough to cut later.
- Three tablespoons of cream. Heavy cream works best here for a lovely, lush texture.
Step-by-Step Instructions to Make Peanut Butter Chocolate Fudge Squares
Alright, deep breath! This is where the magic happens, and honestly, it’s the easiest part. We’re aiming for a total active time of about 15 minutes for this whole chocolate fudge recipe, but remember, we need time for chilling later. Keep your ingredients at room temperature like we prepped them earlier; it makes such a difference in mixing!
I always line my 8-inch pan with parchment paper—let the sides hang over a bit like little handles. That way, once it’s chilled, you can just lift the entire block out. No scraping, no fuss!
If you want some more inspiration on quick dinner ideas while you wait for the fudge to set, I recently put together a post on some easy Thanksgiving sides that work year-round; maybe grab those while you wait?
Preparing the Pan and Peanut Butter Layer
First things first, get that 8-inch square baking pan ready! Grease it up, and lay down that parchment paper sling. I love using parchment because it saves my life later on when I need to get the fudge out in one piece. If you look up some classic homemade candy ideas online, you’ll see that pan prep is always step one!
In your large bowl, mix together the powdered sugar, brown sugar, softened butter, vanilla, and that full cup of smooth peanut butter. Now, don’t just stir it gently! You need to beat it until it’s totally combined and looks crumbly but holds together when you squeeze it. Since the peanut butter and butter were softest, this should come together quickly, usually just a minute or two.
Once it looks uniform—no streaks of white powder left—just press that mixture down firmly and evenly into the waiting pan. Use the back of a spoon or your clean fingers to make the top nice and flat. This is the foundation, so make it sturdy!
Pop it in the fridge while you whip up the topping. We don’t want the base getting too soft while we work on the chocolate.
Creating the Smooth Chocolate Glaze
Time for the decadent part! We melt the chocolate, butter, and corn syrup together. You can use your microwave—do it in 20-second bursts, stirring well between each blast. Or, if you prefer gentle heat, use a double boiler. Either way, stir until everything is completely melted and glossy, with no solid chocolate chunks left.
I look for a perfectly smooth, dark melted pool before moving on. If it still looks a little thick, don’t panic. That’s why we saved the cream!
Now, whisk in the three tablespoons of cream. Mix it just until the glaze becomes totally smooth and shiny. If you notice it seizing up or looking dull, you might have added the cream too quickly, or maybe your chocolate was too hot. Just keep whisking gently near the residual heat—it usually comes back shiny!
For reference, if you’re ever trying to replicate a specific texture like the one used in this vintage fudge recipe, the cream and corn syrup are your secret weapons for that perfect finish.
Assembling, Chilling, and Cutting Your Rich Bite Sized Desserts
Pour that luxurious chocolate glaze right over the chilled peanut butter base. Use an offset spatula—or just the back of a spoon—and gently spread it all the way to the edges. Try not to press too hard, or you risk dragging bits of the peanut butter layer up into the chocolate! We want clean layers here.
Now, the hard part: waiting. These squares need to chill until they are absolutely firm. The recipe calls for at least 30 minutes in the refrigerator, but honestly, if you can leave them for an hour or two, you’ll thank me later when you go to cut them.
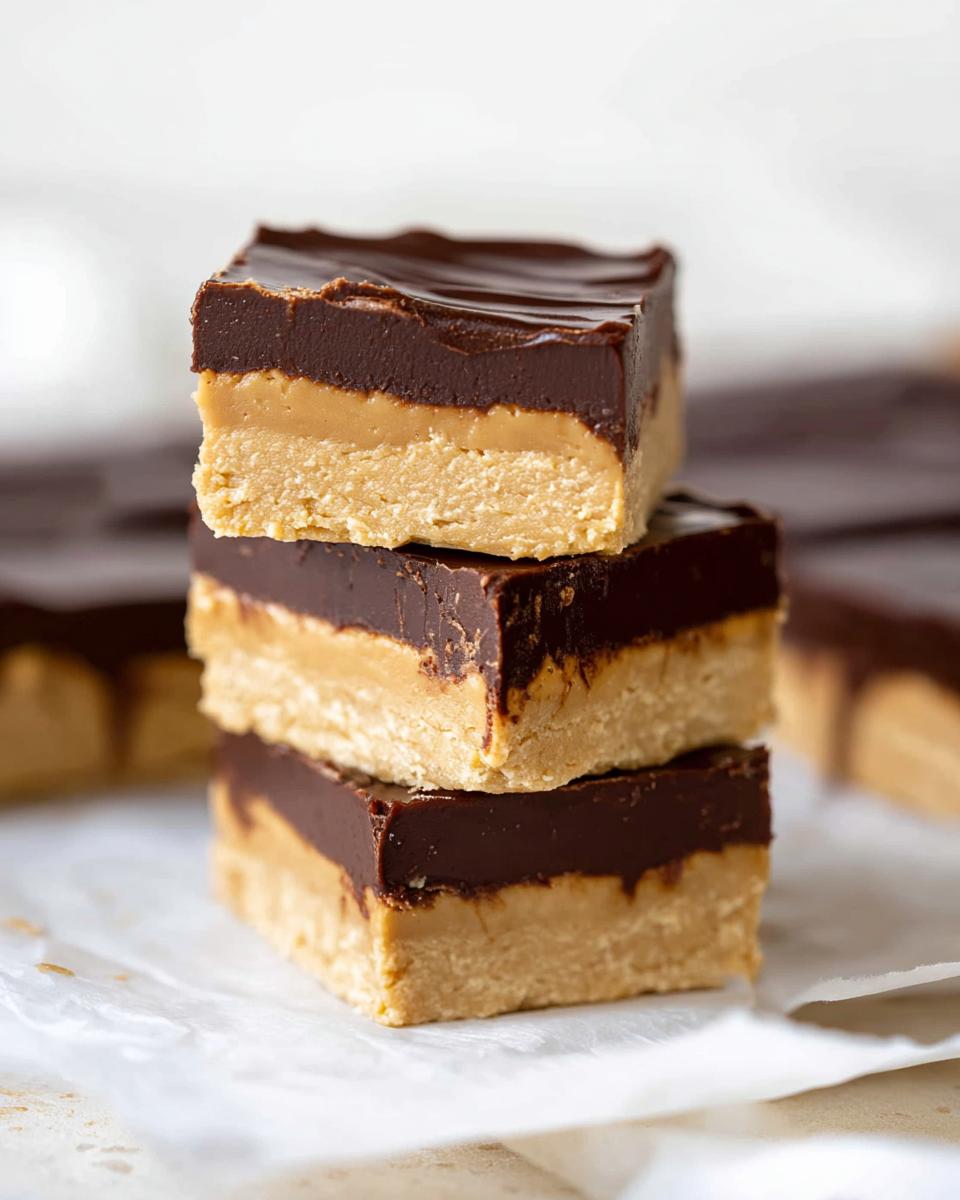
Once they are rock solid, take them out. Slide a thin knife along the edges where the fudge meets the pan, then grab those parchment handles and lift the whole block out onto your cutting surface. To get those perfect, clean cuts for your rich bite-sized desserts, use a long, sharp knife. Wipe the blade clean between every cut! That ensures you don’t drag chocolate crumbs into the next beautiful square. Slice them into whatever shape makes you happy—squares, triangles, little diamonds—just enjoy them!
Tips for Perfect Peanut Butter Swirl and Texture
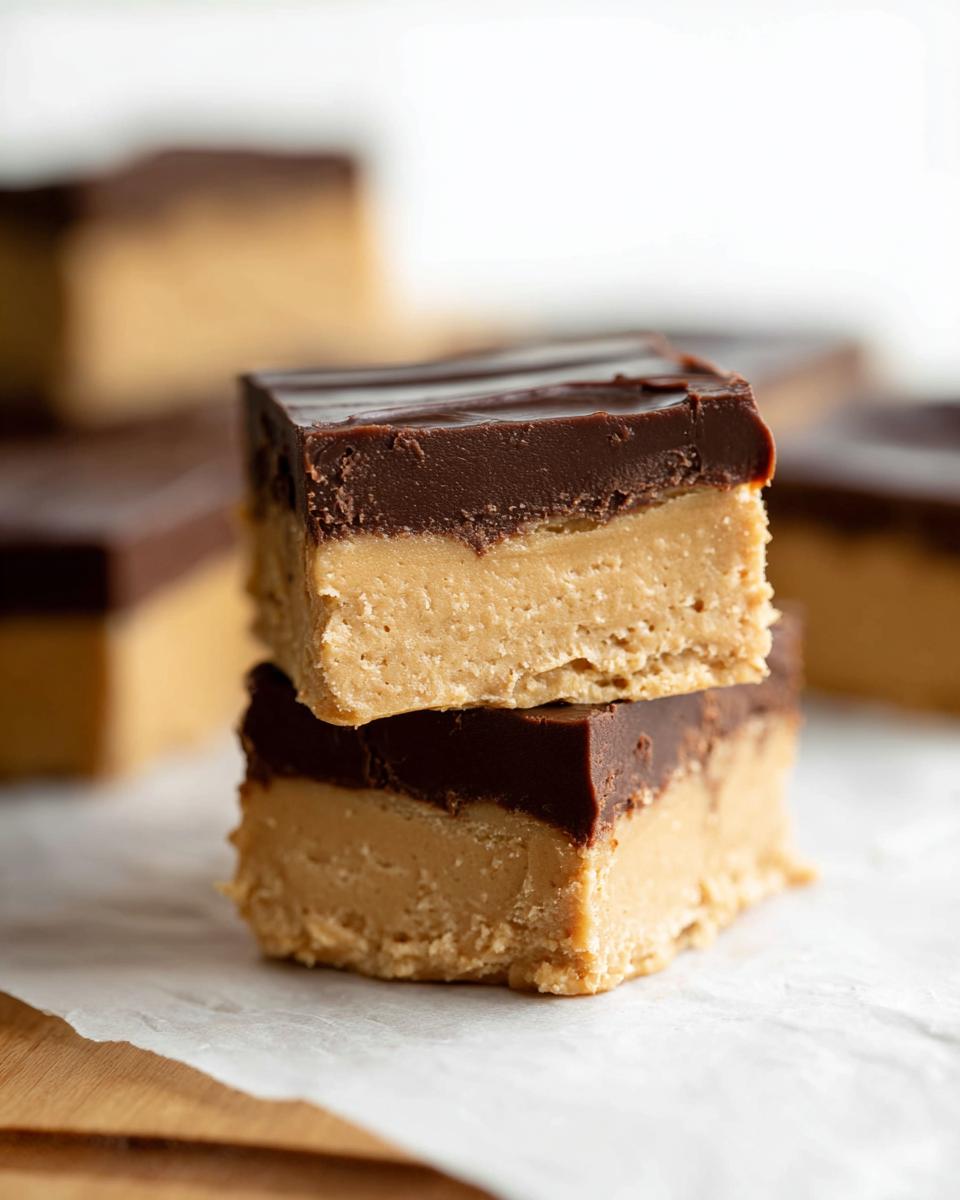
Even though this recipe is designed for that beautiful, clean two-layer look when you slice into your Peanut Butter Chocolate Fudge Squares, I totally get the urge to swirl! A little peanut butter swirl can really elevate the look, and it’s surprisingly easy to do if you want to mess with the basic structure. It’s all about knowing when to intervene!
If you want that marbled effect, don’t chill the base layer until it’s totally firm. Once you pour the chocolate glaze over the peanut butter layer in Step 7, immediately dollop small amounts—say, a teaspoon at a time—of extra softened peanut butter along random spots on the top glaze.
Then, grab a skewer or the tip of a butter knife. Gently drag the skewer through the chocolate and peanut butter dollops, creating swirls that go maybe a quarter-inch deep. Be careful not to drag it all the way down to the base layer; we just want that beautiful ribbon effect right on top!
Achieving That Heavenly Fudge Texture
Texture is everything when it comes to homemade candy ideas. If your fudge turns out grainy or too crumbly, it usually means one of two things happened. First, your base ingredients weren’t at the right temperature. If the butter and peanut butter were too cold when you mixed them, they won’t cream properly with the sugars, leading to a dry, sand-like mix.
Second, and this is my personal pet peeve, don’t overmix the base layer once everything is combined! Once the sugars and fats are incorporated, stop beating. Over-mixing can sometimes activate the powdered sugar in a weird way, making the final product too stiff and less creamy. Remember, we want smooth, melt-in-your-mouth deliciousness!
Troubleshooting a Sticky Chocolate Glaze
Sometimes, even with the corn syrup, that chocolate glaze can feel sticky instead of firm and slightly snappy after chilling. This usually happens if you used a low-quality chocolate or if you added too much cream. If your glaze isn’t setting up, don’t stress! It just means your Peanut Butter Chocolate Fudge Squares need a little more cold therapy.
Pop them back in the fridge for another 30 minutes, or even the freezer for 15 minutes if you’re impatient like me! The cold helps bind the fats in the chocolate and butter, making it firm enough to cut cleanly.
For general tips on keeping my kitchen running perfectly, especially when I’m balancing my foraging schedule with my baking, I always reference my real-life meal plan to make sure I stock the right fats!
Ingredient Notes and Homemade Candy Ideas Substitutions
Part of the fun when you’re crafting delicious treats like these Peanut Butter Chocolate Fudge Squares is knowing you can adapt them slightly to fit what’s in your pantry or what your taste buds are calling for that day! Since we’re aiming for the best possible homemade candy ideas, let’s talk about making smart swaps without sacrificing that heavenly creaminess.
My original recipe relies on traditional, stabilized peanut butter because it mixes into a firmer base when combined with the powdered sugar. If you are using that natural, runny peanut butter—the kind where the oil separates out—be warned: your base mixture might feel way too loose. If that happens, just measure out the peanut butter you need, but stick the dollop in the fridge for about 20 minutes before mixing. That slight chill helps bring back some of the structure!
Swapping Out the Nut Butter
If peanuts aren’t your favorite, or if someone has an allergy, the good news is this structure handles other creamy nut butters really well! I’ve had great success subbing almond butter or even cashew butter. Remember though, almond butter tends to be a little runnier than peanut butter, so you might need to add an extra tablespoon or two of powdered sugar to the base mixture just to get that right, pressable consistency.
When I’m exploring different flavor profiles for my keto desserts selection, I sometimes try sunflower seed butter. It creates a slightly earthier flavor that pairs surprisingly well with dark chocolate. Just treat it like you would the natural peanut butter—get it slightly cooler so it firms up when you mix it.
What to Use for Chocolate Alternatives
For the glaze, we called for semisweet chocolate, which gives a nice balance against the sweet peanut butter base. But you can absolutely play around here!
- Want it richer? Use bittersweet chocolate! It cuts the sugar down substantially and gives the fudge a more intense cocoa punch.
- Want it sweeter? Mix the semisweet chocolate 50/50 with milk chocolate. You might want to skip adding the corn syrup in this case, as milk chocolate is already softer.
The key to successful homemade candy ideas like this is understanding the fat ratios. As long as you keep the total weight of the chocolate and butter consistent, the glaze should set up beautifully, no matter which type you feature!
Storing Your Peanut Butter Chocolate Fudge Squares
One of the absolute best features of these Peanut Butter Chocolate Fudge Squares is that unlike a cake or cookie, they actually get *better* after a little rest period. Seriously, resisting the urge to eat them all on day one is tough, but it pays off!
Because these are built on fats—butter and peanut butter—they really prefer the cold. Trying to keep them out on the counter, especially if your kitchen gets warm, will just result in soft, messy squares that look nothing like the beautiful stack you cut yesterday afternoon. We definitely want to avoid that!
The Airtight Container Rule
My rule for anything fudge-like? Always use an airtight container. If you don’t have one, even a simple food storage container with a tight-fitting lid works great. You don’t want them exposed to any air, which can dry out the chocolate glaze or make the peanut butter base feel stiff.
If you are stacking them up for storage—which, let’s be honest, you probably are—don’t just throw them in there! Here’s a little trick I learned: cut small squares of parchment or wax paper and slip one between each layer of fudge.
This stops the chocolate top of one square from sticking to the peanut butter layer of the square above it. When you go to grab one later, they separate cleanly, and your beautiful layers stay intact. It makes serving these simple homemade candy ideas so much easier!
How Long They Last in the Fridge
Good news for those of us who love to bake ahead: these last for ages! The recipe notes mentioned storing them in the refrigerator, and that’s exactly where they should live. When stored properly in that airtight container, they should comfortably last several weeks. I’ve honestly lost track after week three, but they were still fantastic then!
If you plan on having a big batch for a party, just bake them a few days early. They firm up nicely after 24 hours in the fridge, and the flavors meld together perfectly. That chilling time is part of the process, just like the 30 minutes we needed right after glazing!
Serving Temperature Tip
While they must be stored cold, I don’t actually like to eat them straight out of the fridge. They can be a little too firm right when you pull them out, and you don’t get that lovely melt-in-your-mouth feel.
My recommendation is to pull out whatever squares you plan to eat about 15 to 20 minutes before serving. This allows the butter and coconut oil in the glaze to soften just a tiny bit. That brief wait makes the difference between a hard little bite and a truly decadent, creamy experience. Enjoy every last bite of these amazing Peanut Butter Chocolate Fudge Squares!
Frequently Asked Questions About This Chocolate Fudge Recipe
I get so many questions about these squares—which totally makes sense, everyone wants to get their homemade candy ideas just right! Since these Peanut Butter Chocolate Fudge Squares are so popular, I pulled together the most common things people ask me about ingredient swaps and making sure the texture is spot-on. If you need more general cooking help, check out my tips on foolproof dinner ideas!
Can I make this a true peanut butter swirl chocolate fudge recipe?
You absolutely can! The base recipe gives you those gorgeous, distinct layers, which I personally love for structural integrity, but a swirl is so pretty. If you want that marbled effect like a fancy peanut butter swirl chocolate fudge recipe, you just need to intervene during the assembly stage.
Instead of pouring the chocolate glaze right over the firm peanut butter base in one smooth layer, use a teaspoon to drop small mounds of slightly softened peanut butter randomly over the top of the chocolate. Then, take a thin knife or a wooden skewer and gently drag it through the chocolate and the peanut butter mounds. Don’t push it down too far! You only want to gently mix the top inch or so to create that beautiful feathered look. It cuts down slightly on the perfect two-tone look but adds a lot of visual appeal!
What is the best way to cut clean squares?
This is the difference between a beautiful tray of rich bite-sized desserts and a messy pile of crumbs! The secret to cutting clean squares, especially through that hardened chocolate glaze, is temperature control on your knife.
Once the fudge is fully chilled (at least 30 minutes!), lift it out onto a clean cutting board using the parchment handles. Before you make your first cut, take a sharp, long knife and dip the blade completely into a glass of very hot water. Wipe the knife completely dry with a clean towel—this is crucial! The hot, dry blade glides right through the chocolate layer cleanly without dragging or cracking it.
Reclean and reheat your knife for every single cut you make. It sounds tedious, but I promise, wiping the knife clean after each slice gives you those professional-looking edges worthy of any bakery case!
How long do these peanut butter chocolate fudge squares really last?
Because we use butter and chocolate, which are stable fats, these squares last a wonderfully long time thanks to the high sugar content! If you store them correctly in an airtight container in the refrigerator, they stay moist and delicious for several weeks. I often make a batch just before a busy week, and honestly, they are still perfect straight out of the fridge after three weeks. Just remember my earlier tip: pull them out about 15 minutes before serving so they soften up perfectly!
Can I use natural, oily peanut butter?
You can, but you have to adjust your expectations and mixing! Natural peanut butter separates, and the liquid oil will make your peanut butter base much softer than intended. If you use it, I highly recommend measuring your cup of natural peanut butter and then chilling that measured amount for about 20 minutes before you add it to the sugars and butter. This helps solidify the fats a bit so that they combine into a more manageable texture that you can actually press uniformly into the pan.
Estimated Nutritional Data for Peanut Butter Chocolate Fudge Squares
Okay, so I know we are indulging here, and while these delicious Peanut Butter Chocolate Fudge Squares are certainly a treat, I always get asked about the stats. Since I’m using hyperlocal ingredients that change based on what’s in season, I can’t give you exact numbers down to the decimal point, but I can certainly give you a very good estimate based on standard measurements for the base recipe!
Please remember, this is just an estimate, intended to give you a baseline understanding. If you are tracking meticulously, especially if you’re using alternative almond butters or different types of chocolate, you should run the exact ingredients you used through your favorite tracking app. I sometimes use a great free template for keeping track of my weekly intake; you can grab that template here if you want to compare!
These numbers below are based on breaking the entire batch into what I consider standard, satisfying 1-inch squares, which usually yields about 16 to 20 pieces depending on how thick you cut them. See? That’s why these rich bite-sized desserts are so great—portion control is built right in!
Here is a rough idea of what you’re looking at per square:
- Calories: You’re looking at roughly 180 to 200 calories per square, depending heavily on the brand of peanut butter and chocolate used.
- Fat: Definitely on the higher side, as expected from a fudge, around 12-14 grams. That richness comes from the butter and the nuts!
- Protein: A modest amount, usually around 4 grams, coming mostly from the peanut butter.
- Total Carbohydrates: This will vary the most based on whether you are using traditional brown sugar versus a sugar substitute, but in the standard recipe, expect around 18-20 grams.
- Sugar: Again, substitution dependent, but usually around 16 grams in the standard version.
They are seriously satisfying, and knowing you aren’t loading up on artificial fillers makes them taste even better. Happy fudging!

Peanut Butter Chocolate Fudge Squares
Ingredients
Equipment
Method
- Grease an 8-inch square baking pan, or line it with parchment paper on the bottom and two sides for easy removal.
- In a large bowl, beat the powdered sugar, brown sugar, butter, vanilla, and peanut butter until the mixture is completely combined and crumbly.
- Pat the peanut butter mixture evenly into the prepared pan.
- Refrigerate the base while you prepare the chocolate glaze.
- Melt the chocolate, butter, and corn syrup together in the microwave or a double boiler. Mix until smooth.
- Add the cream and mix with a whisk or spatula until the glaze is completely smooth and shiny.
- Pour the chocolate glaze over the peanut butter layer and spread it evenly using an offset spatula or spoon.
- Refrigerate the fudge until it is firm, which may take 30 minutes to a couple of hours.
- Slide a smooth knife along the sides of the pan to release the fudge. Lift the block out using the parchment paper handles.
- Transfer the fudge to a flat surface and cut it into 1-inch squares, triangles, or rectangles using a sharp knife.
Notes
Tried this recipe?
Let us know how it was!
Urban Forager & Hyperlocal Ingredient Specialist
My Brooklyn apartment balcony tells my story: vertical gardens packed with wild edibles, fermentation crocks bubbling with city-foraged greens, and the constant hum of dehydrators preserving herbs I’ve collected from unexpected urban corners. What started as weekend escapes to my aunt’s upstate farm during my Columbia botany studies turned into something bigger after I earned my Urban Ecology Master’s from The New School.
Instead of following traditional academic paths, I discovered that cities are actually amazing edible ecosystems—rooftop weeds, park-edge wild greens, vacant lot treasures that perfectly complement keto eating. Who knew that some of the best low-carb foods were growing right under our noses in Manhattan?
My recipe collections celebrate city seasons: spring dandelions and plantains, summer purslane from rooftops, autumn rose hips from community gardens, winter wild onions and cress. I’m certified through the New York Mycological Society and trained by Brooklyn Botanic Garden to forage safely and ethically. Over 180 of my recipes feature at least one urban-foraged ingredient—from sidewalk plantains to sumac berries and wild mint thriving in vacant lots.
My “Metropolitan Wild” column went viral after my dandelion coffee substitute hit social media. Now my weekend “Urban Wild Walks” through Central Park and Prospect Park sell out faster than I can schedule them. I teach city dwellers to spot safe, keto-friendly wild foods hiding in plain sight.
Currently, I’m partnering with local chefs to bring urban foraged elements to restaurant menus and developing an app that maps safe foraging spots across all five boroughs. Evenings find me tending my sourdough starters, pressing flowers for natural dyes, or weaving baskets from willow branches I collect during park maintenance.
Cities are wild food sanctuaries hiding in plain sight—keto eating becomes urban rebellion when you realize how much free, perfect nutrition grows right under our feet.