

Oh, you just wait until you see what happens when you get this icing right! There’s something truly magical about taking a simple sugar cookie and turning it into a tiny piece of edible art. I still remember the first time I tried to decorate for my niece’s birthday; it was a glorious, messy panic! But seeing her eyes light up over those colorful designs? Totally worth the initial sprinkle chaos.
That moment, that joy—that’s why I spent years perfecting this mix. Forget those dull, cracked frostings you sometimes see. This recipe for Royal Icing for Decorated Cookies delivers that perfectly smooth, high-shine finish every single time. It’s the foundation for all those intricate designs you dream about making. Trust me, once you nail this glossy icing, your cookie game goes from zero to hero instantly!
Why This Royal Icing for Decorated Cookies Recipe Works Wonders
If you’re looking to move past beginner cookies and tackle those gorgeous, detailed designs you see online, you need icing that works *with* you, not against you. This recipe sets you up for success right from the bowl. It’s formulated for stability, which is non-negotiable when you’re layering colors or piping fine lines!
- It holds its shape beautifully for outlines.
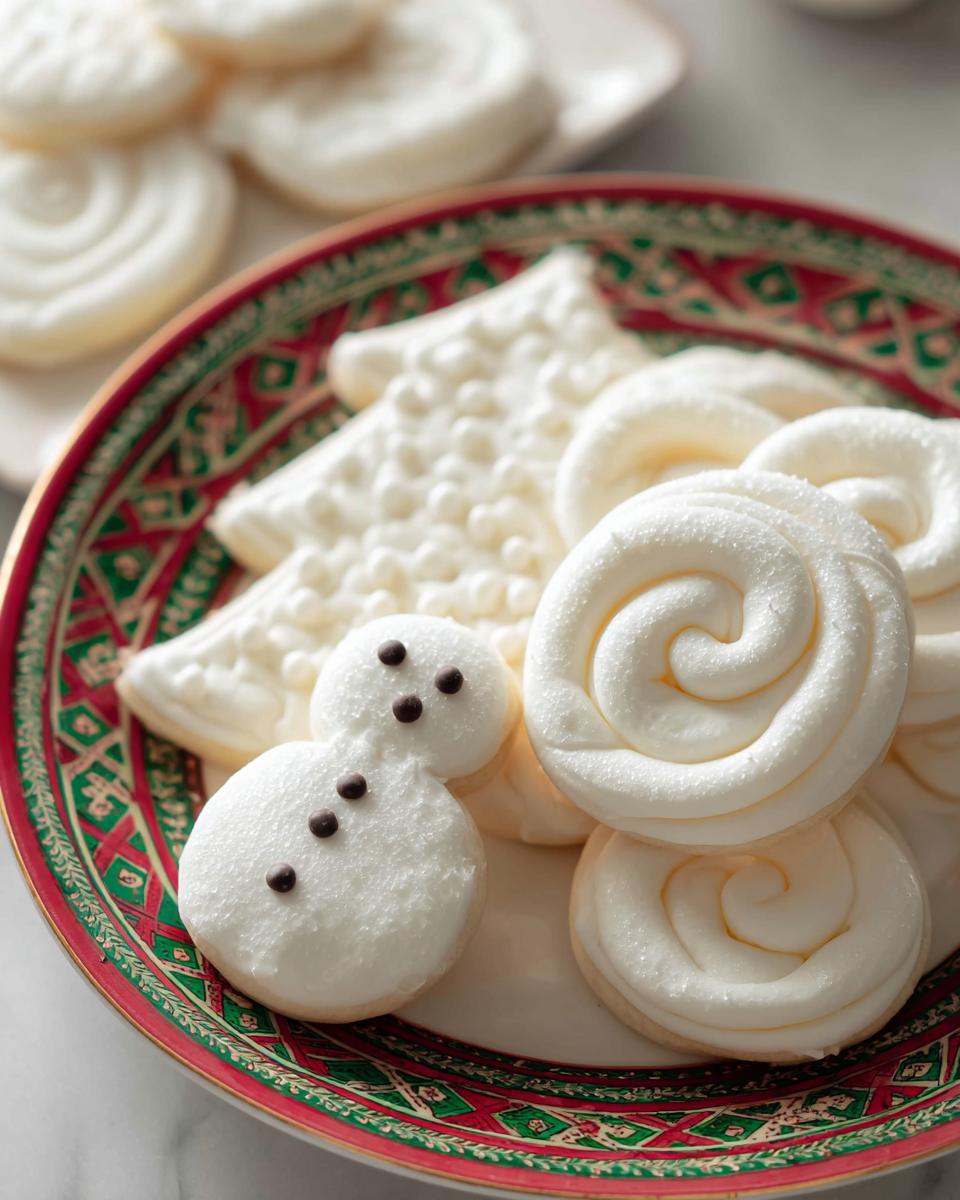
- It settles into an incredibly smooth surface when flooded.
- You get that professional, shelf-stable finish that lasts.
Achieving That Perfect Glossy Icing Consistency
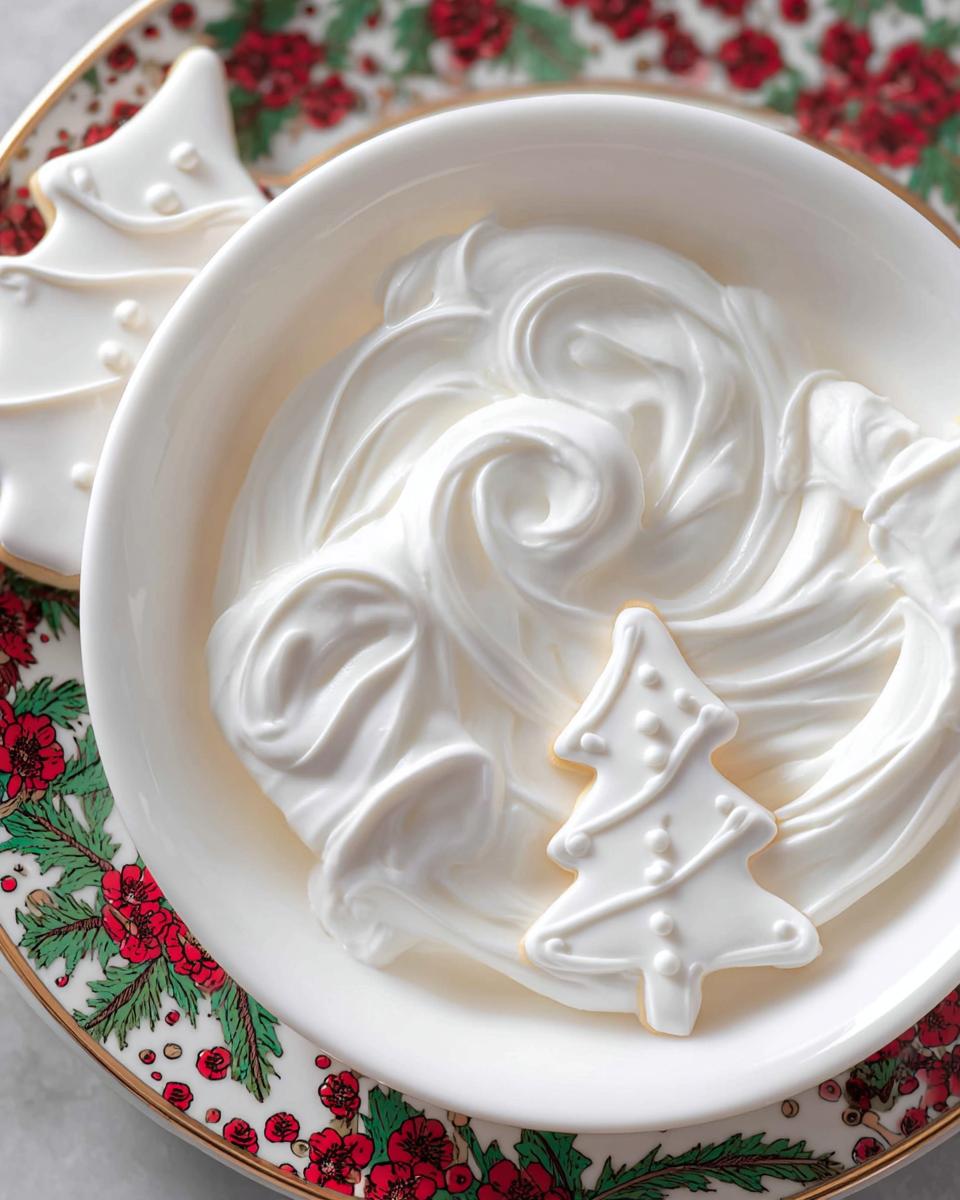
The secret to that stunning, almost wet-looking shine—that beautiful Glossy Icing—comes down to two main players: the massive amount of confectioners’ sugar against just three egg whites. That high sugar ratio is what creates that hard, mirror-like shell when it dries. It’s simple chemistry, but it requires precision to get that high-shine finish without it immediately cracking!
Essential Ingredients for Royal Icing for Decorated Cookies
You can’t build a masterpiece on a shaky foundation, and that goes for cookie frosting too! This isn’t the time to substitute out key players here, friends. Using the right ingredients ensures you get that beautiful, sturdy Cookie Frosting we’ve been chasing. When I gathered my ingredients for my niece’s birthday batch, I made sure everything was exactly this way—no guesswork!
Ingredient Clarity and Preparation
First things first: you absolutely must have confectioners’ sugar. I mean, a full pound of it! Sifting it is an optional step, but honestly, with how fast this recipe comes together, I sometimes skip it unless I see a giant clump. For this batch, we’re using 3 egg whites—make sure they aren’t icy cold, room temperature works best for whipping!
Last but certainly not least is the vanilla extract; just one teaspoon goes in to give it just a little background flavor so it’s not purely sweet. If your confectioners’ sugar has cornstarch mixed in as an anti-caking agent, that’s usually fine, but for the purest shine, always aim for the kind that is just pure pulverized sugar. This clean base is what lets us manipulate the texture later!
Step-by-Step Guide to Making Royal Icing for Decorated Cookies
Okay, now for the fun part! This is where we turn those simple ingredients into the perfect canvas. Follow these steps closely, and you’ll understand why I preach patience here—it really pays off when you use this Royal Icing for Decorated Cookies. Remember that time I tried to rush the mixer? Oops! Instant cloud of powdered sugar everywhere!
Whipping the Egg Whites to Perfection
Grab your stand mixer—or a very strong hand if you’re doing this old-school! We start slow. Pop those 3 egg whites in the bowl and beat them only on medium-low speed to begin. You’re not looking for huge peaks yet; you just want them frothy, kind of like the top of a fancy cappuccino. This initial gentle whipping prevents those massive, air-pocket bubbles that can ruin the smooth finish we are aiming for.
Incorporating Sugar and Achieving Stiff Peaks for Royal Icing for Decorated Cookies
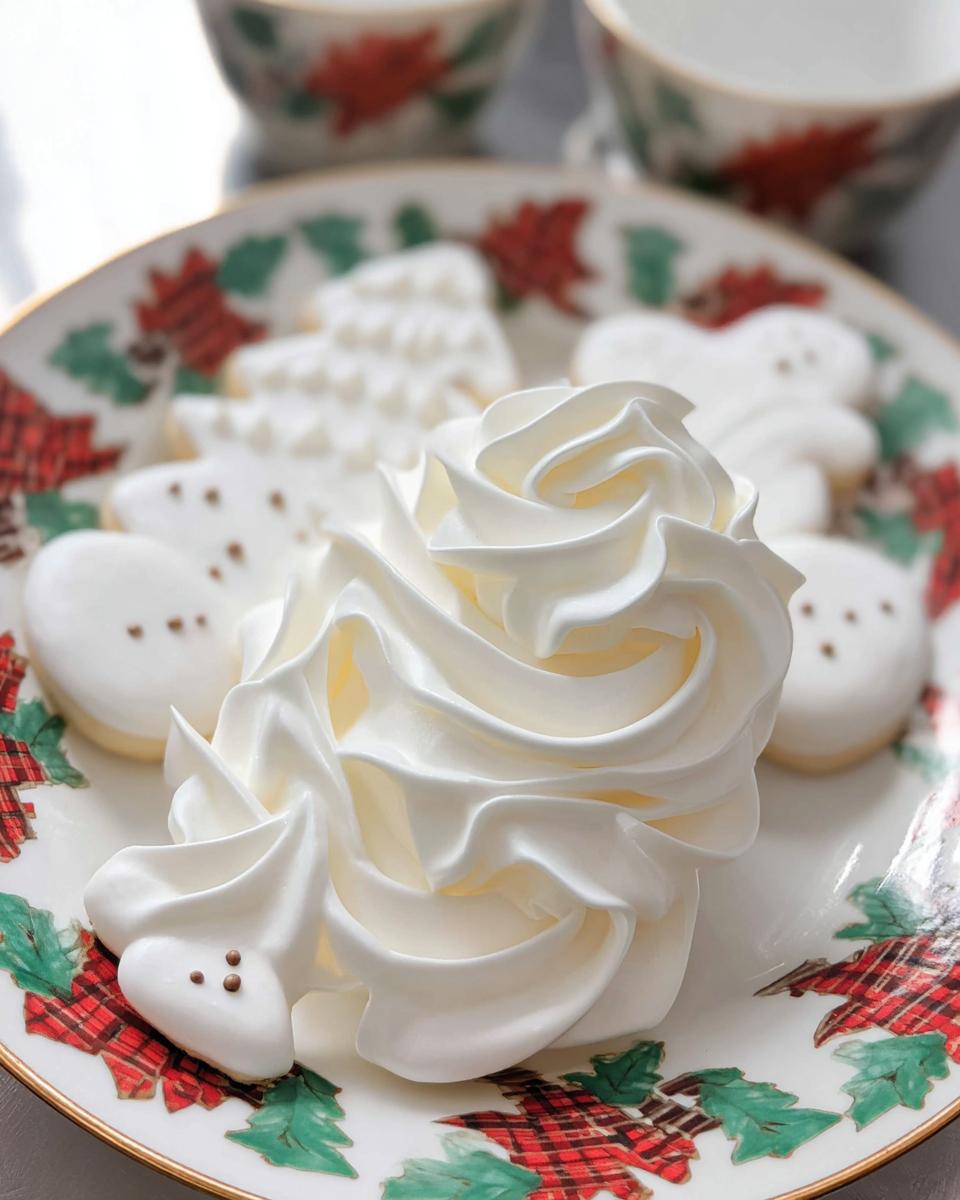
Once you have that nice froth, you need to introduce the pound of confectioners’ sugar and that teaspoon of vanilla extract. Start the mixer on low speed so the sugar doesn’t fly out! Slowly, slowly, add it all in. Once it’s all mixed together, crank that speed up to medium-high. Now we beat! You’re looking for stiff, shiny peaks—I mean, seriously shiny. When you lift the whisk, the icing should stand up straight, looking almost like soft, glossy clay. That’s your cue; you’re ready to decorate those cookies!
If you’re looking for more general baking inspiration after you finish icing, check out some other great recipes over here on my resource page. If you want to see someone else’s amazing royal icing technique, I sometimes peek at Preppy Kitchen’s guide too!
Techniques for Coloring and Thinning Your Royal Icing for Decorated Cookies
So, you’ve got this gorgeous, perfect stiff icing, right? Now we need to make it actually *work* for decorating those cookies! This is where we tailor the icing consistency, which is absolutely crucial if you want those professional-looking results when you start to decorate cookies. Trust me, moving from piping consistency to flooding consistency is like learning a new language, but once you get it, you’re unstoppable!
The Flooding Consistency Secret
The icing that comes straight out of the mixer is way too thick for filling in large areas—that’s for your borders! Remember I mentioned outlining first? That takes the stiff icing straight from the bag. For the middle filling, that’s the ‘flood.’ You need to take a small portion of your colored icing and add water, one drop at a time. Seriously, start with half a teaspoon and stir gently with a spatula.
You’re aiming for the ’10-second rule.’ When you lift your spatula and drizzle some icing back onto the surface, it should disappear smoothly back into the main batch within about ten seconds. If it disappears faster, you added too much water! This consistency is what allows the icing to settle perfectly flat inside your piped border. It’s amazing how smooth the final product looks when you do this right!

Working with Piping Tips and Bags
Choosing the right tool makes decorating so much easier. For those crisp outlines you need to hold their shape, you’ll want a smaller round tip—maybe a Wilton #2 or #3. These little guys let you control the flow when you’re drawing edges with your thick icing.
But when you go to flood, you can often use the same bag, just slightly bigger, or even just a snipped corner if you’re careful! If you’re using detailed Piping Tips for lettering or tiny dots, you absolutely must use the stiff icing. Keep the thinned ‘flood’ icing for filling the large carved-out spaces. It keeps your tool selection manageable and your design clean!
Tips for Success When Making Royal Icing for Decorated Cookies
Okay, you’ve made the perfect batch of Royal Icing for Decorated Cookies. Don’t let all your hard work turn into a cement block! This icing is tricky because it sets up faster than anything else in the baking world. You have to be your own best supervisor when this stuff is sitting out on the counter while you bake your cookies.
I learned this the hard way when I got distracted by a phone call and came back to find one bowl had a hard skin forming over the top. Total disaster! The texture you want for all those delicate designs relies on moisture.
Preventing Your Icing from Drying Out
This tip is the most important thing I can teach you about working with this Glossy Icing: plastic wrap must touch the surface. Don’t just loosely tent it over the bowl! Cut a piece of plastic wrap and physically press it down right onto top of the icing, pushing out all the air in between. This seals out the atmosphere completely.
When I’m dividing my icing into four little bowls for different colors, every single bowl gets that plastic wrap treatment. If you’re just letting it sit for a few minutes between coloring batches, use a damp, clean paper towel laid directly over the opening of the bowl. When you pull it out, just stir it very gently, and it’s good as new. If you store it airtight in the fridge, you can often revive it later, but wrapping it tight while you work is key to keeping that beautiful working consistency.
If you’re looking for some savory inspiration for the rest of your meal planning, you can check out some great dishes over on my turkey skillet recipe!
Troubleshooting Common Royal Icing for Decorated Cookies Issues
Even with the best intentions, sometimes our wonderful Royal Icing for Decorated Cookies decides to throw a little tantrum. Don’t panic or scrape the entire batch yet! Usually, it’s just a tiny adjustment needed to save your beautiful, glossy icing. I’ve seen every problem under the sun; I’ve learned the quick fixes are the best fixes.
If your icing starts weeping—that means a little pool of liquid separates on top—it usually means you added a touch too much thin water when you were flooding. My quick fix? Just take a tablespoon of that extra-thick, unused icing from your outline bowl and gently mix a little bit into the weeping batch. It stiffens it right back up!
If your finished cookies are cracking horribly after drying, that’s often because the icing dried too fast or you went overboard on meringue powder (if you use it). For quick fixes on a developing batch, make sure it’s mixing well. If it’s grainy, it often means your confectioners’ sugar wasn’t uniformly fine. The only real fix here is to strain a small testing amount through a very fine-mesh sieve before you commit the whole batch. See? Nothing is ever truly ruined in the decorating kitchen!
Storing Leftover Royal Icing for Decorated Cookies
What do you do when you’ve decorated fifty cookies but still have half a bowl of perfect icing left? You save it, of course! This beautiful Royal Icing for Decorated Cookies keeps wonderfully. For short-term storage—overnight, maybe—just press that plastic wrap right onto the surface and keep it in the fridge.
When you bring it out the next day, it will look stiff and maybe a little sad. Don’t panic! Just let it warm up on the counter for about 30 minutes, then stir it gently. If it seems a touch too firm for piping, add just a tiny drop or two of water until it’s workable again. It’s like magic, and you saved your gorgeous frosting!
Estimated Nutritional Snapshot
Now, let’s talk reality check! Since this royal icing is mostly straight sugar—it’s delicious, but boy, is it sweet! These numbers are just an estimate based on the basic ingredients used in this batch, so keep that in mind when you’re planning portions.
- Calories: Around 51 per serving
- Carbohydrates: Roughly 13g
- Protein: About 1g
- Fat: Near 1g
This lovely Cookie Frosting is almost entirely energy, so a little decoration goes a long way when you’re enjoying your decorated masterpieces!
Share Your Cookie Decorating Creations
Now that you have mastered the Cookie Frosting, I am dying to see what you create! Please, try this recipe for your next family gathering or just for fun. If you do, leave me a star rating right here on the post! It helps me know what’s working.
I’d absolutely love to see your glossy designs on social media—tag me! If you have any last-minute questions that I didn’t cover, feel free to shoot me a note through my contact page. Happy decorating, friends!

Royal Icing for Decorated Cookies
Ingredients
Equipment
Method
- In the bowl of a stand mixer or large mixing bowl, beat egg whites on medium-low speed until frothy, about 1 minute.
- With the mixer on low speed, slowly add in confectioners’ sugar and vanilla.
- Once fully incorporated, increase speed to medium-high and beat until stiff, shiny peaks form.
- Divide icing among small bowls, and dye with gel food coloring if desired. Keep any icing that isn’t being immediately used covered with plastic wrap as it dries out very quickly. Transfer to piping bags and decorate cookies.
Nutrition
Notes
Tried this recipe?
Let us know how it was!
Urban Forager & Hyperlocal Ingredient Specialist
My Brooklyn apartment balcony tells my story: vertical gardens packed with wild edibles, fermentation crocks bubbling with city-foraged greens, and the constant hum of dehydrators preserving herbs I’ve collected from unexpected urban corners. What started as weekend escapes to my aunt’s upstate farm during my Columbia botany studies turned into something bigger after I earned my Urban Ecology Master’s from The New School.
Instead of following traditional academic paths, I discovered that cities are actually amazing edible ecosystems—rooftop weeds, park-edge wild greens, vacant lot treasures that perfectly complement keto eating. Who knew that some of the best low-carb foods were growing right under our noses in Manhattan?
My recipe collections celebrate city seasons: spring dandelions and plantains, summer purslane from rooftops, autumn rose hips from community gardens, winter wild onions and cress. I’m certified through the New York Mycological Society and trained by Brooklyn Botanic Garden to forage safely and ethically. Over 180 of my recipes feature at least one urban-foraged ingredient—from sidewalk plantains to sumac berries and wild mint thriving in vacant lots.
My “Metropolitan Wild” column went viral after my dandelion coffee substitute hit social media. Now my weekend “Urban Wild Walks” through Central Park and Prospect Park sell out faster than I can schedule them. I teach city dwellers to spot safe, keto-friendly wild foods hiding in plain sight.
Currently, I’m partnering with local chefs to bring urban foraged elements to restaurant menus and developing an app that maps safe foraging spots across all five boroughs. Evenings find me tending my sourdough starters, pressing flowers for natural dyes, or weaving baskets from willow branches I collect during park maintenance.
Cities are wild food sanctuaries hiding in plain sight—keto eating becomes urban rebellion when you realize how much free, perfect nutrition grows right under our feet.