
I don’t know about you, but sometimes I just want dessert to be ready right now, perfectly portioned, and ready to take on the go! Forget having to slice a big dish; individual servings are just the best, right? That’s why I absolutely love transforming beloved classics into these convenient handheld treats, and nothing beats my amazing Strawberry Shortcake Trifle in a Jar when summer rolls around. I still remember the first time I served a Keto version of our family’s traditional shortcake—meticulously layered, of course—and seeing everyone’s faces light up was the whole point. I realized that with a little precision, we could absolutely recreate those cherished summer moments without missing a beat on our dietary goals. You can find endless inspiration over at our main recipe index, but trust me, these jarred trifles are going straight to the top of your list!
Why You Will Make This Strawberry Shortcake Trifle in a Jar Recipe
Honestly, once you see how these turn out, you’ll wonder why you ever bothered with a huge layered dish. They are just brilliant for so many reasons, especially when you’re trying to keep things neat and tidy at a gathering. Here’s the breakdown on why this recipe is about to become your summer staple:
- Perfect Portion Control: This is the biggest win here! Since everything is pre-portioned into individual jars, you don’t have to worry about scooping messy servings. Grab a jar, and you’re good to go!
- Ultimate Portability for Parties: Whether you are heading to a picnic or just across the yard for a BBQ, these mason jar treats are sealed up and safe. No sliding layers when you transport them!
- Stunning Layered Presentation: I love seeing those distinct layers of golden cake, vibrant red sauce, and bright white cream staring back at me through the glass. It just looks so much more elegant than a standard plate.
- Make-Ahead Magic: You can prep all the components the day before, assemble them in the morning, and keep them chilled. This makes hosting so much less stressful when it comes to summer party desserts.
- Less Waste, More Fun: Everyone gets a perfectly balanced bite every single time. No more finding out someone got the heel-end of the cake that never has enough topping!
Essential Components for Your Strawberry Shortcake Trifle in a Jar
Creating the perfect little towers of heaven requires breaking down exactly what goes into them. Making amazing layered trifle recipes isn’t just about tossing stuff in a jar; it’s about making sure each element is balanced and precise. I focus on getting the three main parts—the cake, the sauce, and the cream—absolutely spot-on before we even think about assembly. Trust me, when you measure the flour for the cake base exactly right, that payoff in texture is totally worth it!
For all the planning nerds out there trying to organize your shopping trip, you can check out some general guides on foolproof meal prep, but for this dessert, precision is key!
Ingredients for the Vanilla Cake Base
Since this cake is the backbone of our treat, we need to be careful here. Make sure your butter is actually room temperature—not melted, just soft enough to press a finger into easily.
- 3 cups all purpose flour (that’s 390g, folks!)
- 1/4 tsp baking soda
- 2 3/4 tsp baking powder
- 1 tsp salt
- 1 1/2 cups unsalted butter, room temp (336g)
- 2 cups sugar (414g)
- 4 egg whites
- 3 tsp vanilla extract
- 1 1/2 cups milk (360ml)
Making the Bright Strawberry Sauce
This sauce is what provides that beautiful moisture and tang. Make sure you get your strawberries pureed first—no big chunks here—before we cook it down. It should only need a quick boil!
- 1 lb strawberries, pureed
- 1/2 cup sugar (104g)
- 3/4 tsp vanilla extract
Ingredients for Whipped Cream and Assembly of Strawberry Shortcake Trifle in a Jar
For the cream, you absolutely must use cold heavy whipping cream for the best lift. We also need fresh berries for that final fresh pop of flavor.
- 2 3/4 cups heavy whipping cream, cold (660ml)
- 1 1/2 cup powdered sugar (173g)
- 1 tbsp vanilla extract
- 2 lbs strawberries, chopped (about 5 cups total needed for layering)
If you want to see a gorgeous final presentation example, check out how some folks layer theirs over at this site for inspiration!
Baking the Cake Component for Your Strawberry Shortcake Trifle in a Jar
Alright, let’s get baking! The cake is the cozy base for our beautiful Strawberry Shortcake Trifle in a Jar, and we want it light and tender. First things first: get your oven humming at 350°F (176°C) and make sure you grease up that 9×13 cake pan well—we don’t want anything sticking!
In one bowl, whisk together the dry stuff: flour, baking soda, baking powder, and salt. Set that aside for just a moment while we tackle the creaming stage. That’s where the air gets built in! Beat your room-temperature butter and sugar for a good two minutes until it looks noticeably fluffy. Then, mix in the egg whites and vanilla until everything looks smooth.
Here’s where we alternate, just like we do with those big calorie-smart recipes we love over at the blog. Add about a third of the flour mixture, mix until just combined, then add half the milk and mix again. Repeat this pattern: flour, then milk, ending with the last bit of flour. Don’t overmix now! Bake this lovely batter for about 35 to 40 minutes. You want a toothpick inserted in the center to come out totally clean. Let it cool completely; patience pays off before we start layering!
Preparing the Strawberry Sauce for Layered Trifle Recipes
This simple sauce is what ties everything together beautifully. It really brightens up the vanilla cake and mingles perfectly with the fresh berries and cream in these layered trifle recipes. You don’t need much fuss here, thankfully!
Grab a medium saucepan—no need to drag out the big pots for this small task. We’re combining the strawberry puree (make sure it’s smooth!), the sugar, and your touch of vanilla extract right in there.
Put that pan over medium heat. You want it to come up to a gentle boil while you stir it occasionally so nothing scorches on the bottom. Once it hits that rolling boil, let it bubble away for just one minute—no longer, because we aren’t trying to reduce it into jam.
The absolute most important thing after you pull it off the heat is to let it cool down completely. Seriously, don’t even try to assemble the jars if the sauce is warm! Warm sauce will melt your beautiful whipped cream into a sad, soupy mess, and we can’t have that. Set it aside on the counter until it reaches room temperature, then move it to the fridge to chill out before it meets the cake.
Whipping the Cream for the Strawberry Shortcake Trifle in a Jar
The cream in this Strawberry Shortcake Trifle in a Jar has to be perfect—light, airy, and stiff enough to hold its shape when piped high in that glass jar. This isn’t the time for lazy mixing! We need volume here to really balance out the dense cake and the sweet sauce.
First, make sure your heavy whipping cream is ice cold. I mean, fridge-cold, maybe even chilly from the back corner of the fridge! Also, use the largest bowl your mixer will allow. We want to incorporate as much glorious air as possible.
Toss that cold cream into your mixer bowl along with the powdered sugar and the vanilla extract. Don’t start slow! I usually turn mine right up to high speed immediately. I know, I know, it splatters a little at first, but that’s just the sound of you earning your dessert!
You have to watch it closely here because the difference between perfect stiff peaks and over-whipped grainy butter is about five seconds. You’re looking for the cream to keep its shape when you lift the whisk attachment—the peaks should stand straight up without flopping over at the tip. That’s the sign of a truly stable cream layer that will hold up beautifully in your trifle!
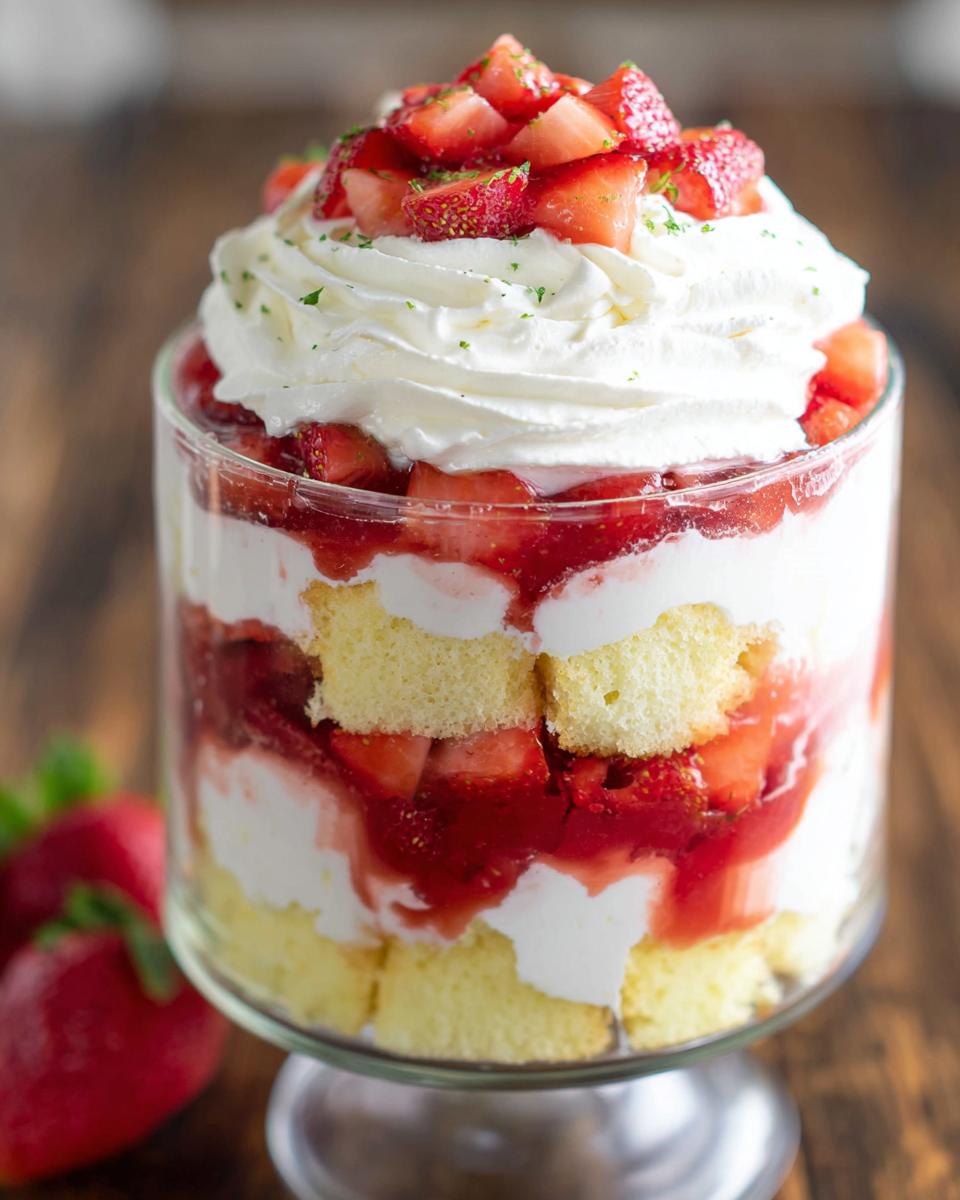
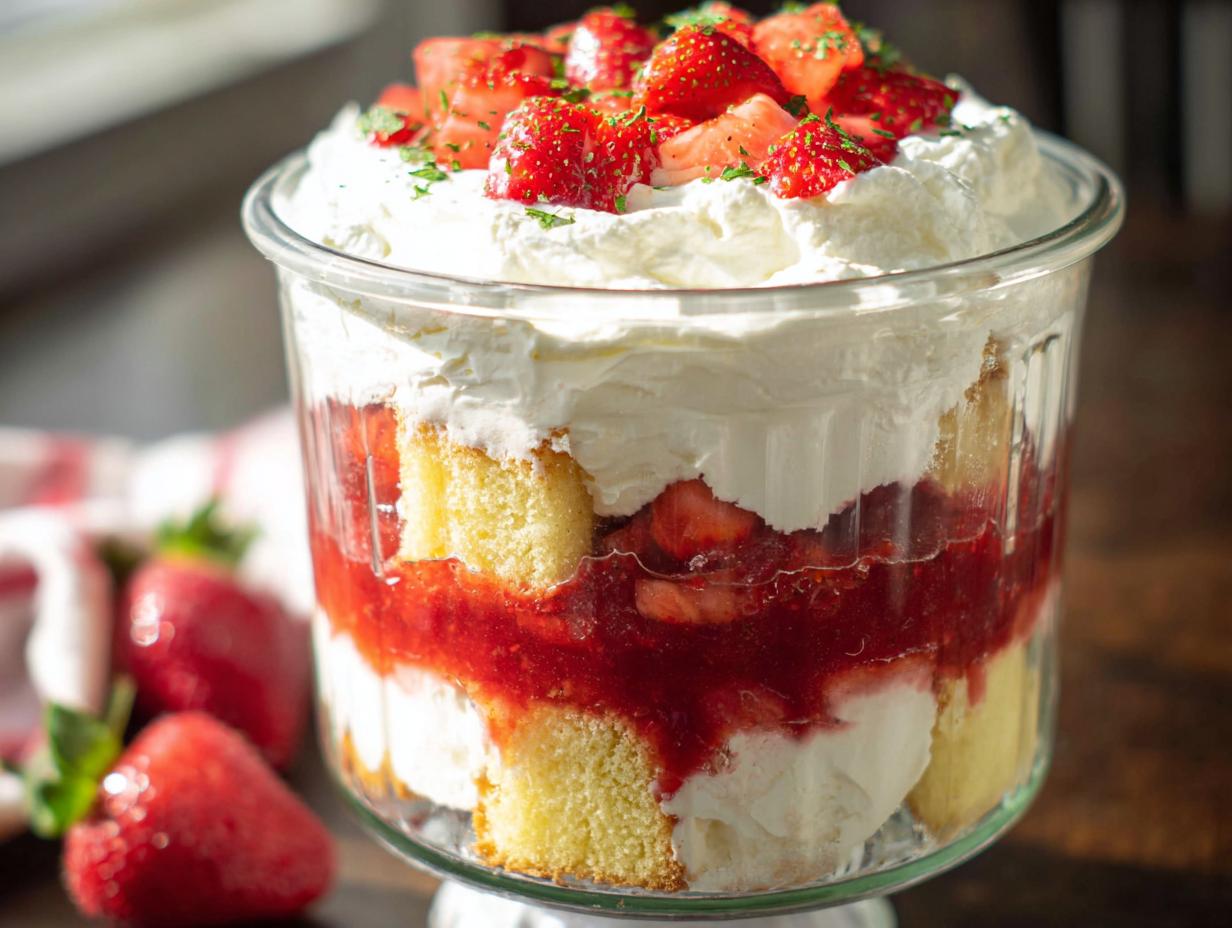
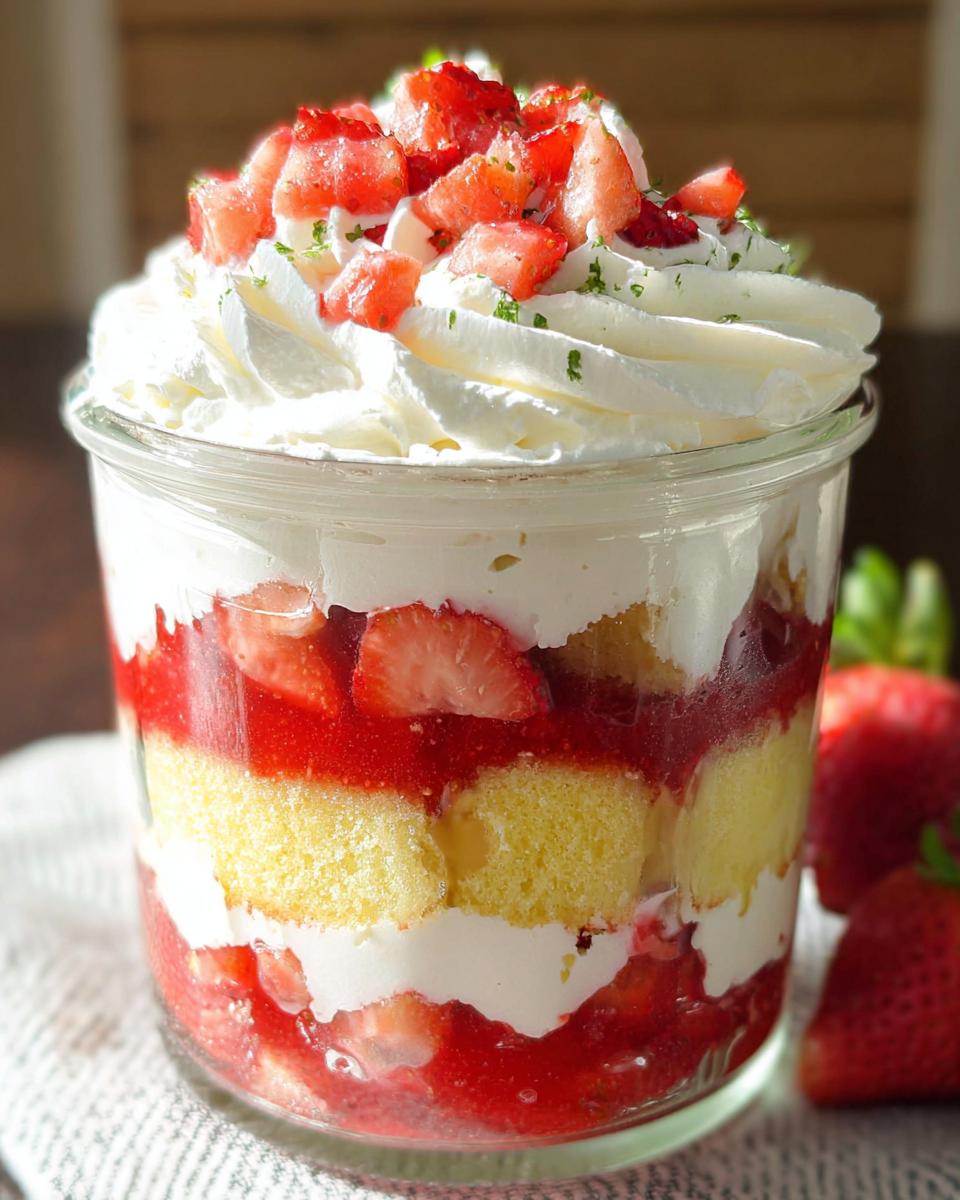
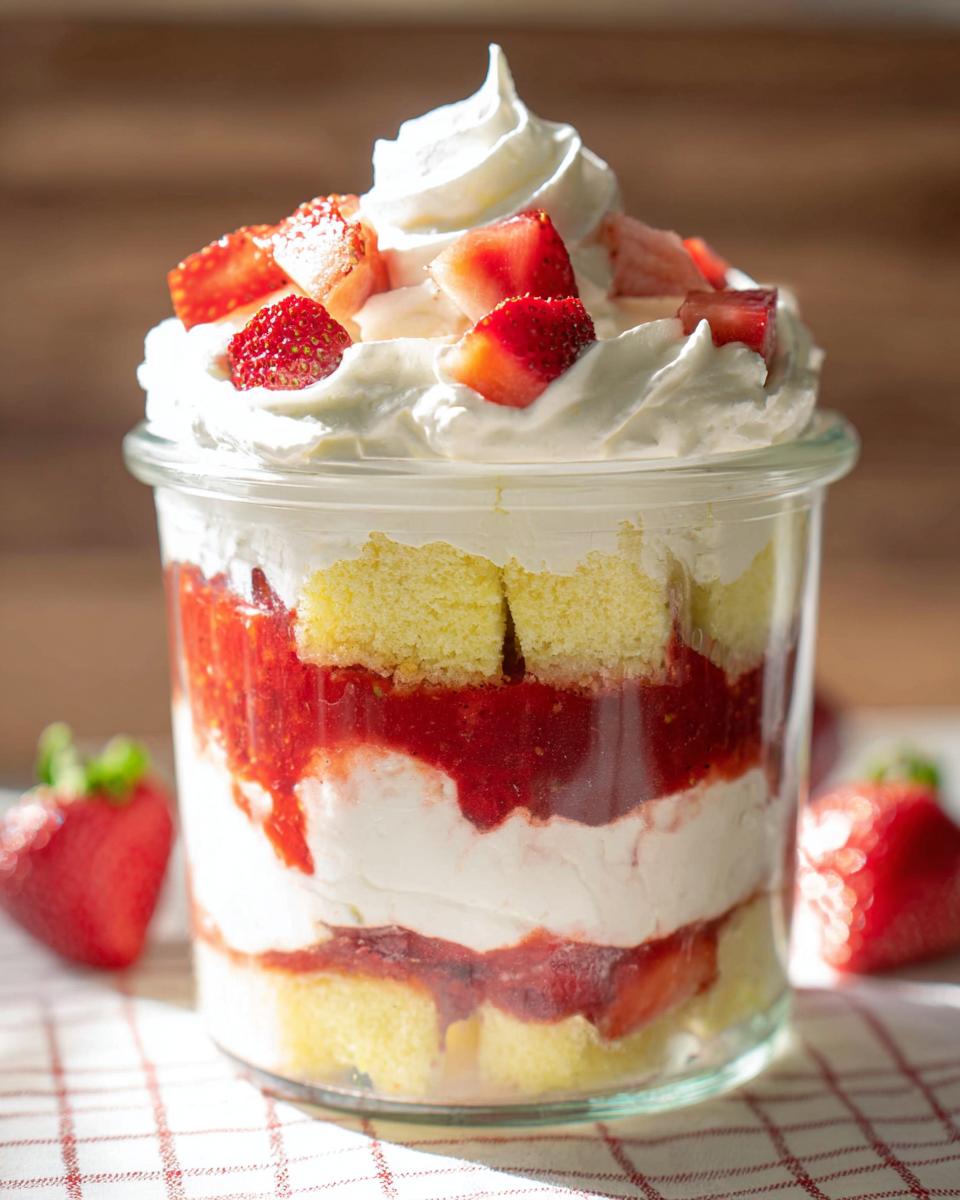
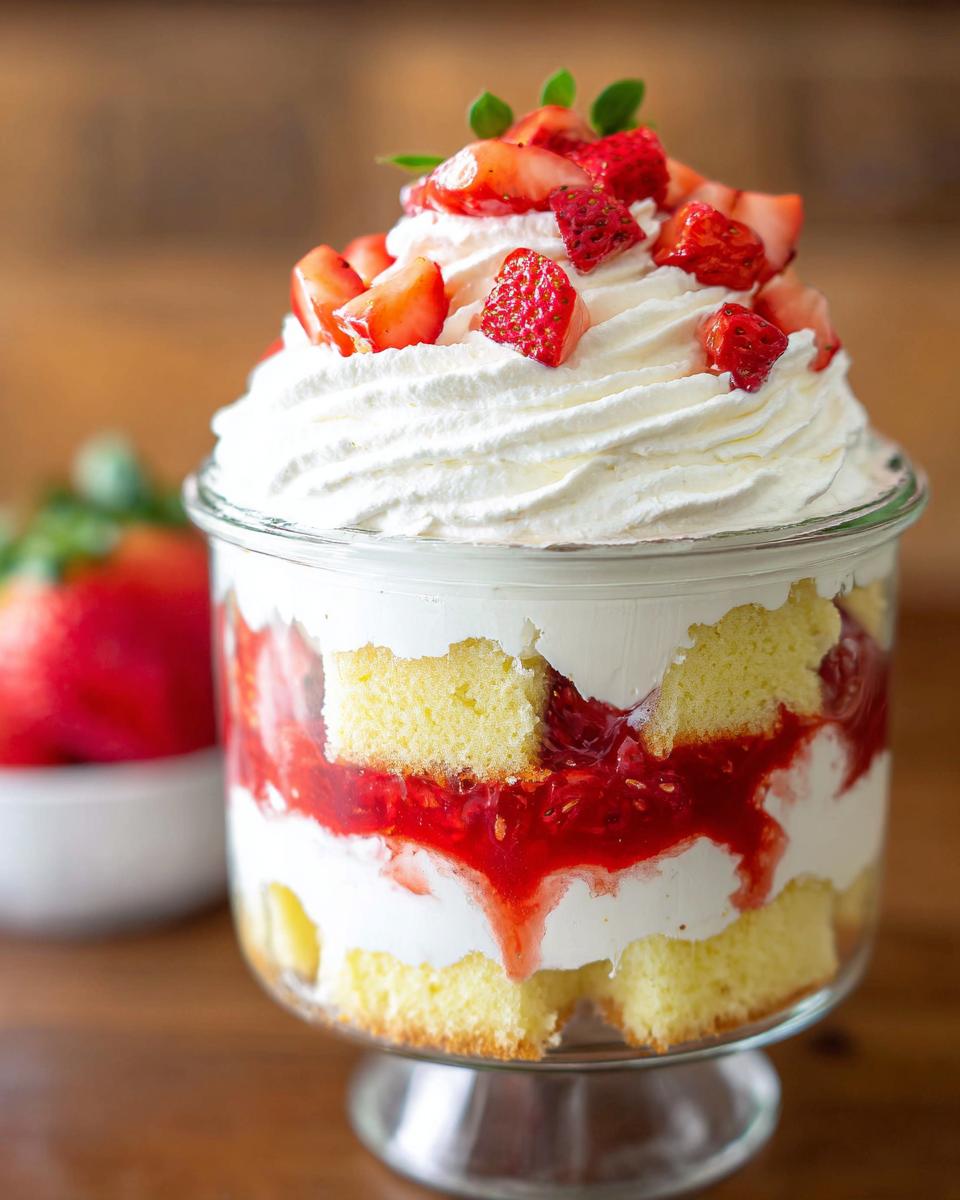
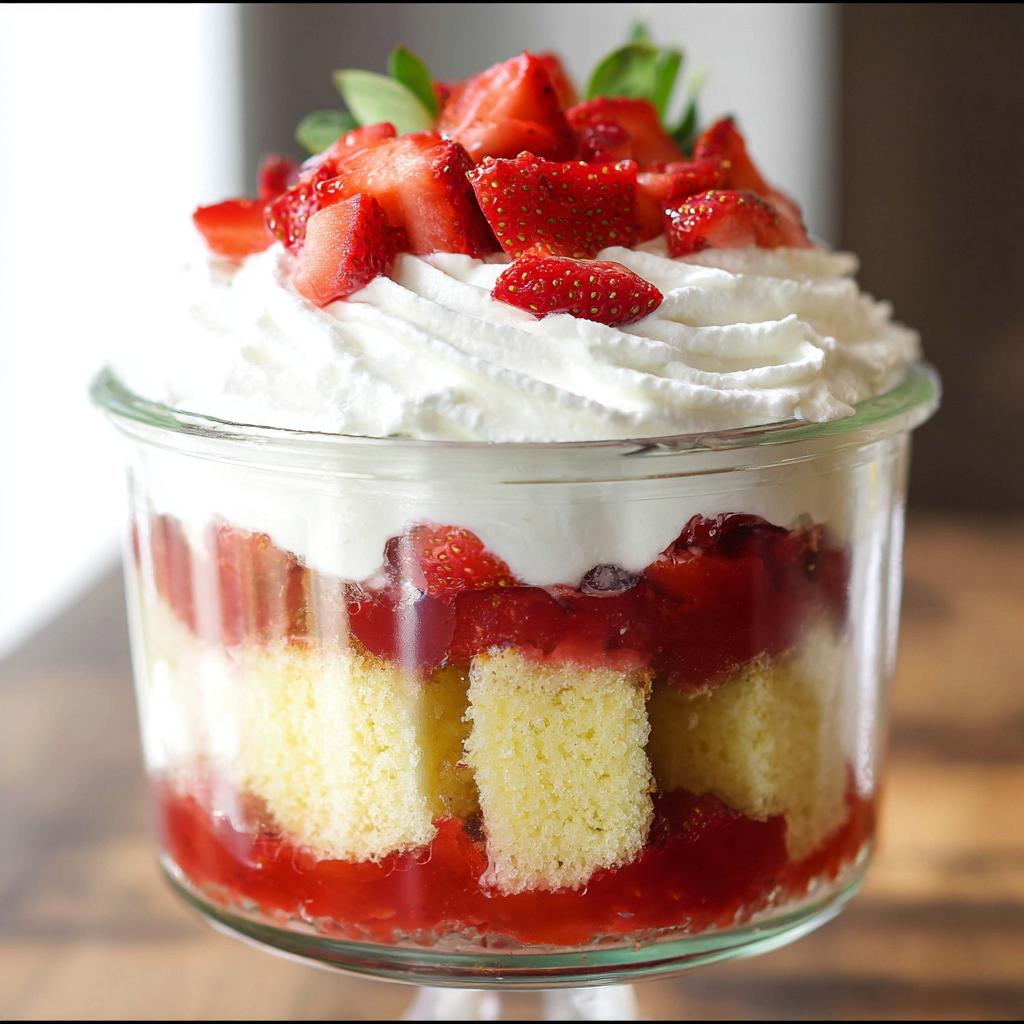
Assembling the Perfect Strawberry Shortcake Trifle in a Jar
This is the moment we’ve all been waiting for! All that careful baking and sauce simmering finally pays off when we build these gorgeous little Strawberry Shortcake Trifle in a Jar towers. Because you are working in small jars, you need to be efficient and deliberate with your placement. Think of it like building a beautiful, slightly messy skyscraper!
First, you need to cut or cube your cooled vanilla cake into small, manageable pieces—something that fits nicely through the mouth of your jar. You might find you have leftover cake, which is totally fine; just tuck that away for yourself later, as the note mentioned you might not use it all for the assembly!
Now, let’s layer up! We are building two main layers of goodness here. Follow this sequence strictly inside each jar:
- Start with a solid layer of cake pieces pressed lightly into the bottom.
- Next, add about half of your chopped fresh strawberries over the cake layer.
- Spoon about half of your cooled strawberry sauce directly over the berries and cake.
- Top that with a generous dollop—or better yet, pipe it—with half of your stiff whipped cream.
Repeat that whole sequence again: cake, the rest of your chopped strawberries, and the rest of the strawberry sauce. You want to make sure the final top layer is the whipped cream.
For that spectacular finish, use a piping bag with a star tip if you have one—it makes the cream look so professional, like something you’d buy! Swirl that remaining whipped cream high up on top. Finish it off with just a couple more of those fresh, gorgeous strawberry pieces right on the peak. If you’re looking for ideas on balancing those components for the best bite, checking out some tips for simple balanced suppers can actually give you a surprising perspective on layering textures!
Once assembled, pop a lid on them if you are transporting them. These are best served chilled, so get them right back into the fridge until it’s time to enjoy your perfect individual Strawberry Shortcake Trifle in a Jar!
Tips for Success with Mason Jar Treats
When you’re dealing with individual servings like these mason jar treats, a few small tweaks can make a huge difference, especially when you’re making them for a crowd or planning ahead. My biggest piece of advice is always to be prepared for extra cake. Remember that note saying you might not use it all? That’s usually because we bake a standard 9×13 cake, which yields a lot more crumbled cake than you need to layer up maybe six or eight jars perfectly. Don’t stress about the leftovers; they disappear fast around my house!
Here are a few things I’ve learned from making batches for picnics and gatherings:
Know Your Jars: The size you pick really matters for presentation. I find that standard 8-ounce or 12-ounce wide-mouth mason jars are perfect. If you use anything too skinny, it gets hard to layer neatly, and you can’t show off those pretty rings of cake and cream. A wide mouth lets you get a spoon right down to the bottom layer easily!
Prep Logistics Are Everything: You absolutely should make the cake and the strawberry sauce the day before you plan to assemble everything. Those components need time to cool completely, and letting the sauce chill overnight just lets the flavor deepen a bit, which is a nice bonus. For the ultimate lightened-up dinner ideas assembly marathon, you want the cake completely cool and slightly firm, which makes cubing it much cleaner, too.
Cream Last Promise: Seriously, only whip your cream right before you assemble. If you whip the cream the night before and let it sit, even in the fridge, it tends to deflate a little bit, and you lose that cloud-like volume you worked so hard to create. Assemble the jars full of cake, strawberries, and sauce, and then whip that cream just 30 minutes before you plan to fill the top layer. If you are looking for more ways to balance out a rich dessert with lighter elements, checking out our thoughts on making lighter meals can sometimes inspire better dessert balance!
If you seal those jars right after piping the cream, they will stay looking picture-perfect in the fridge for hours!
Serving Suggestions for This Strawberry Shortcake Dessert
The best part of making individual desserts like this is that they travel so well, making them instantly perfect for any kind of casual gathering, but they look fancy enough for a bigger celebration, too. When you talk about a classic strawberry shortcake dessert, you usually picture a plate, but presenting it in a jar just ramps up the whole experience!
These jars really shine when you need simple, stunning summer party desserts. If you’re hosting a backyard BBQ, you can set up a little dessert station where everyone can grab their jar right out of a cooler or an ice bucket. It keeps them perfectly chilled and ready to eat without taking up precious fridge space!
For presentation, skip the fussy plates. My favorite way to serve them is to tie a little piece of twine or a colorful ribbon around the neck of the jar—maybe a gingham pattern to really lean into that picnic vibe. You can even tuck a small spoon right into the ribbon before setting them out. It looks so thoughtful!
As for pairings, since these are intensely flavorful and rich, you don’t need much else! If you are serving them after dinner, they go absolutely amazingly with a very crisp, slightly tart beverage. Think about a chilled sparkling water with mint, or if you’re serving grown-ups, a nice crisp Prosecco cuts through the sweetness of the cream and the sauce really nicely. It just elevates the whole thing!
Seriously, I used these for a recent small gathering I hosted, and I felt like a professional pastry chef; meanwhile, I barely broke a sweat! Everything was constructed ahead of time, and I felt so relaxed just pointing people toward the dessert table. If you’re looking for other great items to bring to the table that feel special but aren’t super heavy, you might want to check out some of the ideas we talk about when we discuss lighter yet festive holiday treats—the presentation tricks often overlap!
Frequently Asked Questions About Layered Trifle Recipes
When you make complex layered trifle recipes, it’s normal to have questions pop up, especially when you’re dealing with individual portions! I know I did when I first started experimenting with turning my family favorites into these neat little jars. Here are the things folks ask me most often when they are getting ready to assemble their own strawberry shortcake dessert.
If you’re looking for more general baking questions, you can always browse through the main recipe section for more foundational info!
Can I make the components of the Strawberry Shortcake Trifle in a Jar ahead of time?
Yes, absolutely! This is one of the best things about making individual desserts. The vanilla cake base—once cooled—can be baked maybe a full day ahead of time and stored right under a lid or plastic wrap on the counter. The strawberry sauce is fantastic if you make it a day ahead, too; it actually deepens in flavor when chilled!
However, you have to treat the whipped cream with respect. It’s the most delicate part. I highly recommend whipping your heavy cream mixture only about an hour or two before you plan to assemble or serve the jars. If you make it too far ahead, it starts to weep and lose that beautiful stiffness we worked so hard to achieve!
What is the best type of jar to use for these mason jar treats?
When picking out containers for these mason jar treats, shape matters almost as much as size! I find that the standard 8-ounce or 12-ounce regular mouth jar works perfectly fine, but if you want maximum visual appeal with those chunky layers, go for a wide-mouth jar. The wider opening lets you see the layers better.
If you are planning to transport these—say, bringing them to a picnic or a potluck—you absolutely need a tight-fitting lid. Make sure you seal them up right after you pipe that final swirl of cream on top! They hold up incredibly well when sealed and kept cold.
Storage and Reheating Instructions for Strawberry Shortcake Trifle in a Jar
So you’ve made these gorgeous Strawberry Shortcake Trifle in a Jar masterpieces, and maybe you have a few left over—or maybe you’re just planning ahead for dessert tomorrow. That’s where smart storage comes in! Because we used real, fresh whipped cream and that vibrant strawberry sauce, these are definitely best eaten fresh, but we can get a little extension out of them if we treat them right.
The bottom line is that these need to stay cold. As soon as the last dollop of cream is piped on, you want to seal those jar lids on tight and move them straight into the refrigerator. That cold environment keeps the cake from getting soggy too quickly and keeps that homemade cream firm.
If you want the absolute best texture and flavor, try to enjoy them within 24 hours of assembly. That’s when the cake is still tender but hasn’t completely absorbed all the liquid from the sauce yet. After about 36 hours, the cake starts to break down too much, and while it’s still safe to eat, the beautiful distinct layering starts to disappear, which defeats the whole visual point of these pinterest trends desserts!
Now, let’s talk about reheating—and please believe me when I say: don’t even try it! This dessert is not built for heat at all. The cream will instantly melt, and the fresh strawberries will turn mushy. These little jars are designed to be enjoyed perfectly chilled, straight from the fridge, spoon in hand. If you’re looking for warm desserts, you’re better off browsing the main recipe category for baked goods that are sturdy enough to handle heat!
Strawberry Shortcake Trifle in a Jar
Ingredients
Equipment
Method
- Preheat the oven to 350°F (176°C). Grease a 9×13 cake pan.
- Combine the flour, baking soda, baking powder and salt in a medium sized bowl. Set aside.
- Beat the butter and sugar in a large bowl on medium speed about 2 minutes, until light and fluffy. Scrape down the sides of the bowl.
- Add the egg whites and vanilla and beat on medium speed until well combined and smooth.
- Add about a third of the flour mixture to the batter and beat on medium speed until incorporated.
- Add about half of the milk and beat on medium speed until incorporated.
- Add another third of the flour mixture and beat until incorporated, scraping down the sides of the bowl as needed.
- Add the remaining milk and beat on medium speed until incorporated.
- Add the remaining flour mixture and beat until well combined, scraping down the sides of the bowl as needed.
- Bake the cake for 35-40 minutes, or until a toothpick inserted in the center comes out clean. The cake will be browned on top.
- When the cake is done, set aside to cool.
- To make the strawberry sauce, add the strawberry puree, sugar and vanilla extract to a medium saucepan. Cook over medium heat until it begins to boil, stirring occasionally.
- Allow sauce to boil for one minute, then remove from heat and set aside to cool.
- When everything has cooled, make the whipped cream. Add the heavy whipping cream, powdered sugar and vanilla extract to a large mixer bowl and whip on high speed until stiff peaks form.
- To layer everything in the trifle dish, add a layer of cake on the bottom, then about half of the chopped strawberries, about half of the strawberry sauce, then about half of the whipped cream.
- Add a second layer of cake, strawberries and strawberry sauce, then pipe the remaining whipped cream on top in swirls. Add a few additional strawberries on top as decoration.
Nutrition
Notes
Tried this recipe?
Let us know how it was!
Precision Keto Scientist
Numbers don’t lie, and neither do my recipes. I’m a biochemist who fell into keto cooking through my own metabolic research—and I approach recipe development like a lab experiment, complete with macro calculations precise to the tenth of a gram.
My journey started in diabetes research labs at Johns Hopkins, where I spent six years studying how different macronutrient ratios affected insulin sensitivity. Personal experimentation with therapeutic ketosis for cognitive enhancement led me down a rabbit hole of recipe testing that eventually consumed more hours than my actual day job.
While other cookbook authors describe flavors and textures, I quantify ketone elevation curves and glycemic impact data. My recipe database contains 340+ formulations, each tagged with detailed nutritional analysis, predicted ketosis timing, and optimal meal spacing. I measure salt by weight, time cooking processes to the minute, and log ingredient sourcing obsessively for consistent results.
My breakthrough research on fat-protein ratios for sustained ketosis got published in the Journal of Nutritional Biochemistry. My “Macro Math Mastery” workshops have trained over 5,000 people in precision meal planning. I even collaborated with continuous glucose monitor manufacturers to create the first real-time feedback system for recipe optimization.
I left my pharmaceutical research position at Merck three years ago to focus on metabolic nutrition consulting. Now I work with professional athletes, biohackers, and medical professionals seeking therapeutic ketosis protocols. When I’m not in my lab-kitchen, I’m competing in chess tournaments or documenting my daily biomarker measurements with true data scientist obsessiveness.
Cooking is just applied chemistry—and chemistry follows predictable rules. Master the variables, control the outcomes.