
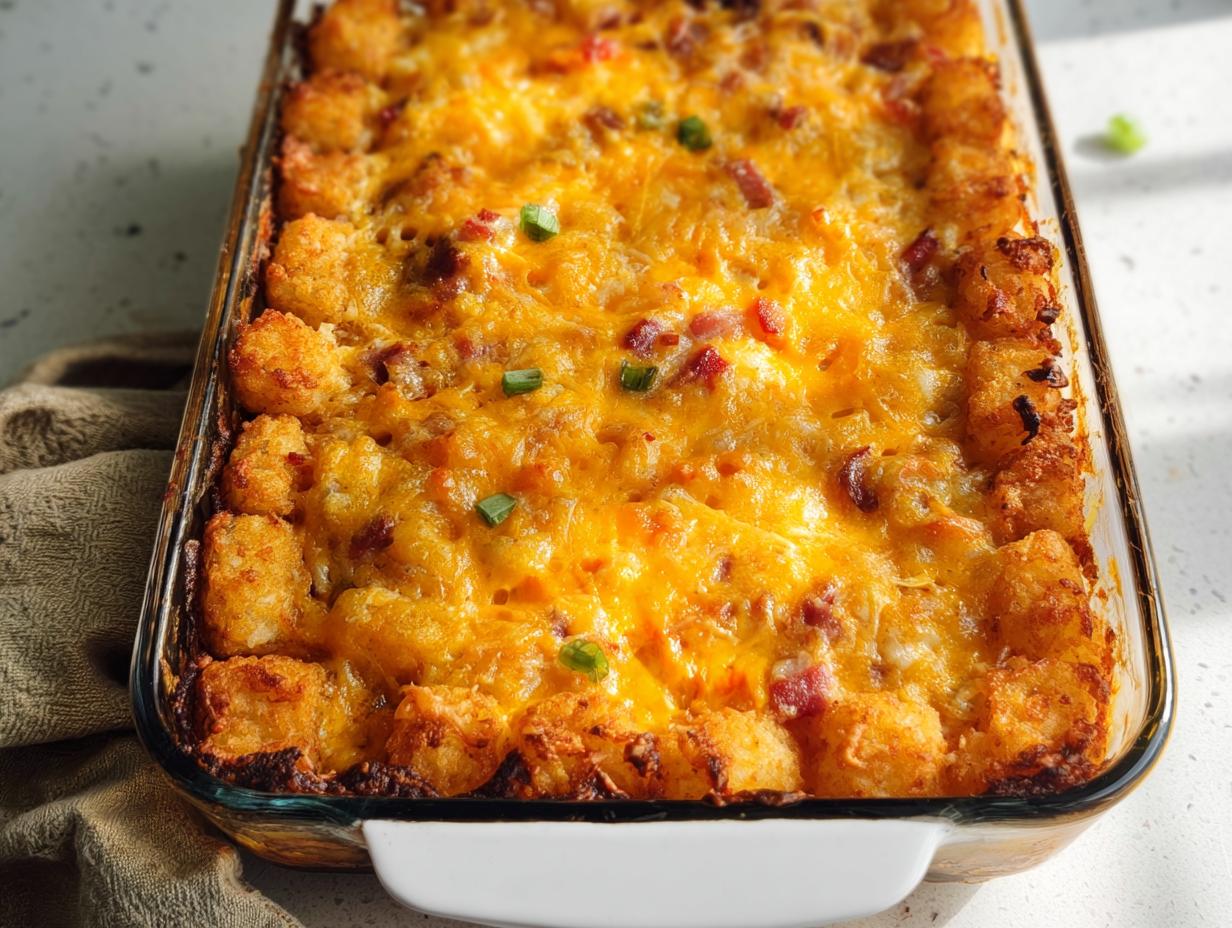
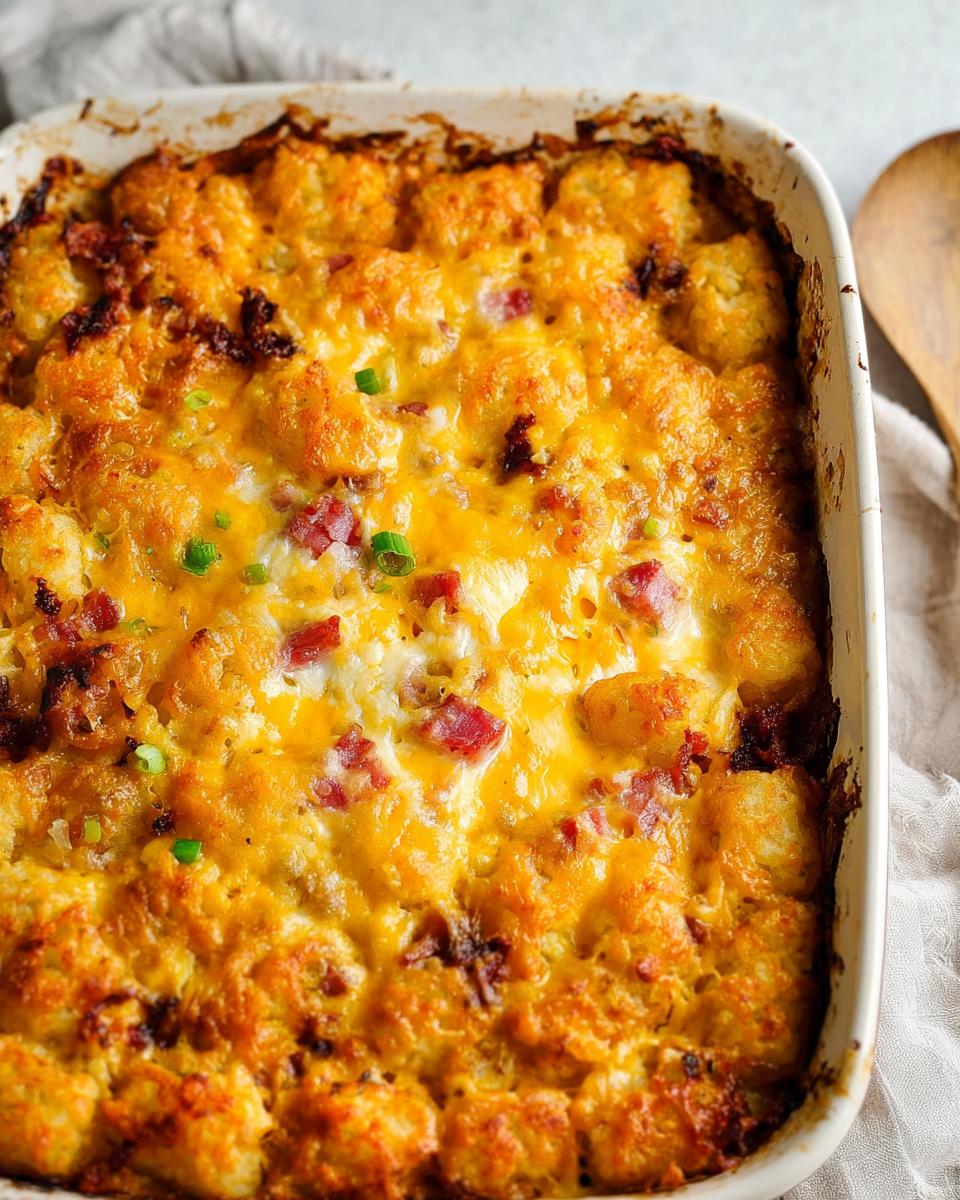
Are you tired of those slow, complicated Saturday morning breakfasts where you’re juggling three different pans before 9 AM? Me too! That’s why I lean hard on recipes that deliver massive flavor with minimal fuss, especially when it comes to my famous Tater Tot Breakfast Casserole (Crispy Top!). Trust me, the secret to this dish is locking in that satisfying, golden, crunchy topping before it even hits the table.
I still remember the first time I served this casserole to my family. It was a lazy Sunday morning, and I was in a rush to make something hearty without too much fuss. As I pulled the casserole out of the oven, the golden, crispy top beckoned with promise. The moment I served it, my kids’ faces lit up—who doesn’t love tater tots for breakfast? That morning became a new family tradition, and now, every time I make it, I’m reminded of those happy, chaotic weekends when we savor meals together. It’s more than just food; it’s about creating memories around the breakfast table, and this recipe is the cornerstone of that tradition now.
Why This Tater Tot Breakfast Casserole (Crispy Top!) Is Your New Weekend Staple
Seriously, you need this in your life, especially when the weekend rolls around and you want to impress without spending half the morning cooking. This isn’t just a meal; it’s a time saver that tastes like you spent hours on it. Here’s why you’ll be making variations of this for years to come:
- Zero Morning Stress: Because you can prep it the night before—yes, really! Pull it from the fridge, pop it in the oven, and go back to sleep for an extra 15 minutes. Hello, Easy Weekends!
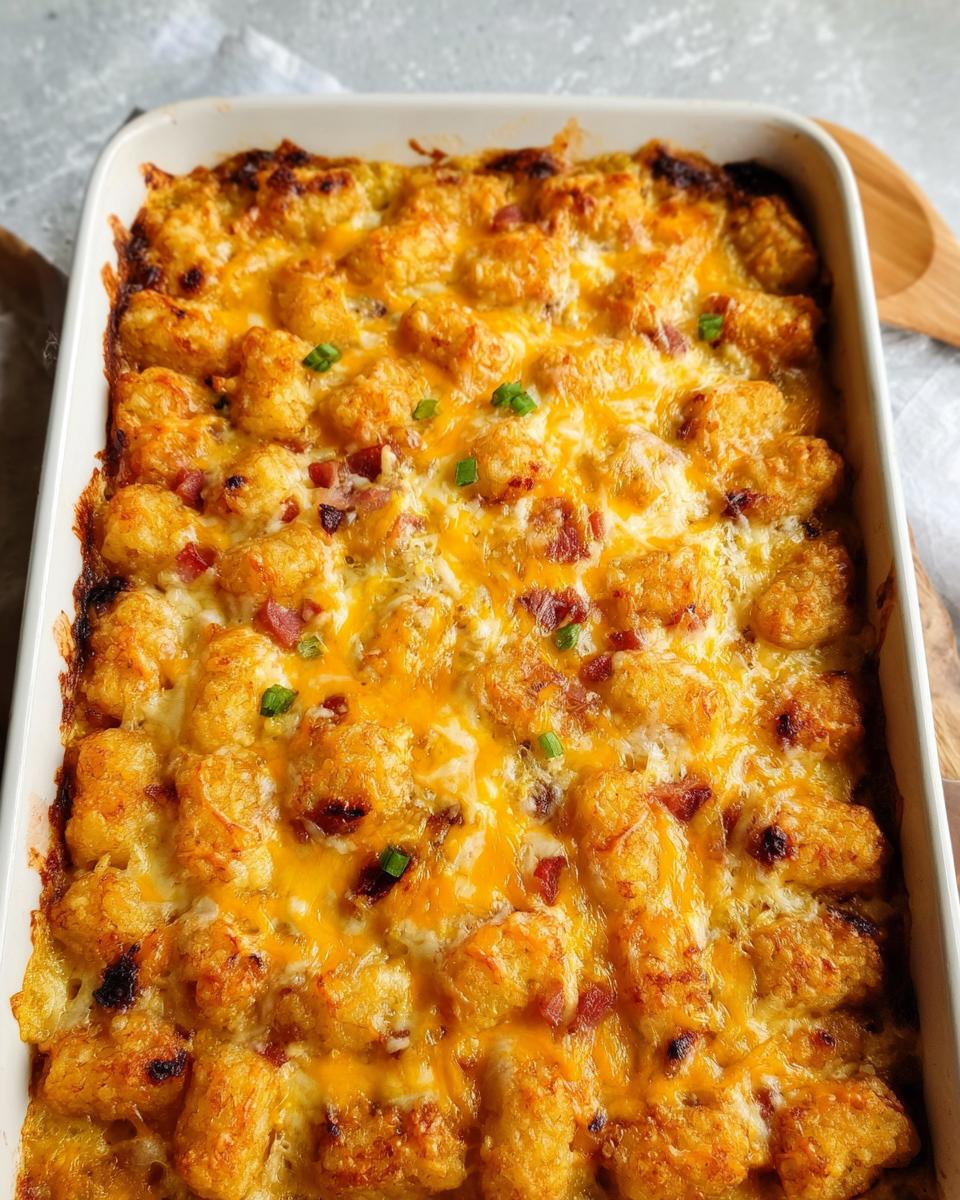
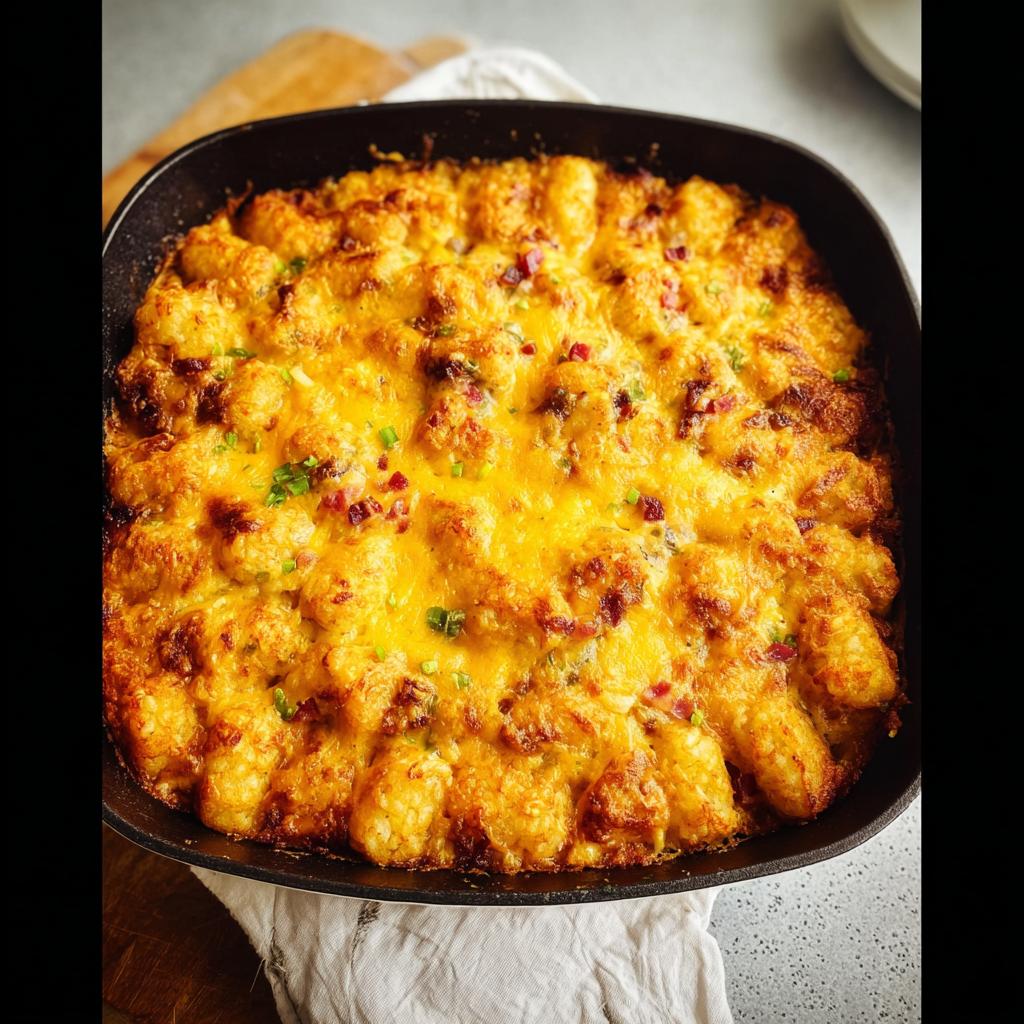
- That Guaranteed Crunch: We nail the crispy topping every single time. That satisfying sound when your fork breaks through the golden tater tots? That’s the sound of breakfast perfection.
- Massive Kid Appeal: If you have picky eaters, this is your secret weapon. It’s basically tater tots, cheese, and eggs wrapped up in one cozy package. It’s super Kid Friendly!
- Perfect for Crowds: Eight servings means leftovers are slim, but if you double it up for a big brunch, this one pan is easier than scrambling half a dozen eggs separately.
- Customizable Flavor: While the ham version is my favorite, it’s such a sturdy base that you can swap out meats or veggies easily.
- Hearty and Filling: This isn’t that sad, airy breakfast bake that leaves you hungry an hour later. This Tater Tot Breakfast Casserole keeps everyone satisfied until lunch.
Essential Ingredients for the Best Tater Tot Breakfast Casserole (Crispy Top!)
Okay, look, this recipe is super user-friendly, but the magic—the real, deeply satisfying flavor—comes from using the right players. Don’t skimp here! We are talking about layering flavor so that when you finally get that golden, crunchy topping, it’s riding on a delicious, savory foundation. I’ve kept the ingredients list straightforward, but make sure you read the notes, especially about the meat swap. This is how we keep things easy for those Easy Weekends!
For the Tater Tot Casserole Base
These are our workhorses, the things that give the casserole its structure and body. Make sure your tater tots are spread out as evenly as possible before the egg mixture goes in—that’s key for the crisp factor!
- 1 (30-32 ounce bag) Frozen Tater Tots
- 16 ounces Diced Ham (This is where you can get creative! See substitution notes below.)
- 1 cup Shredded Cheddar Cheese (The sharp stuff always tastes better, if you ask me!)
- 1 cup Shredded Mozzarella or Monterrey Jack Cheese (Gives you that amazing stretch.)
For the Creamy Egg Mixture
This liquid bath is what binds everything together and keeps the inside wonderfully tender while the outside gets crispy. Whisk this bowl like you mean it—you want this completely uniform before you pour it. No streaks allowed!
- 8 large Eggs (The binder champion!)
- 1/2 cup Milk (Any kind works, whole milk gives you a richer result.)
- 1 cup Sour Cream (Trust me on the sour cream; it adds necessary tang and structure.)
- 1/2 teaspoon Salt
- 1/2 teaspoon Pepper
- 1/2 teaspoon Garlic Powder
- 1/2 teaspoon Onion Powder
- 1-2 teaspoons Hot Sauce (Go ahead, add the hot sauce! It doesn’t make it spicy, just flavorful.)
And don’t forget the final flourish: 1/2 cup more Shredded Cheddar Cheese dedicated solely to topping the casserole right before the final bake. That’s what gives us that perfect, browned cheese layer right under the tots!
Step-by-Step Instructions for Your Tater Tot Breakfast Casserole (Crispy Top!)
Now that we’ve got all our ingredients ready to go, it’s time for the fun part—assembly! This process is so smooth, you’ll be amazed at how fast it comes together. Just follow these steps precisely and you’ll guarantee that beautiful golden crust and fluffy center we’re aiming for on this Oven Bake masterpiece. Remember, speed here means more time enjoying your morning!
Preheat and Layer the Base Ingredients
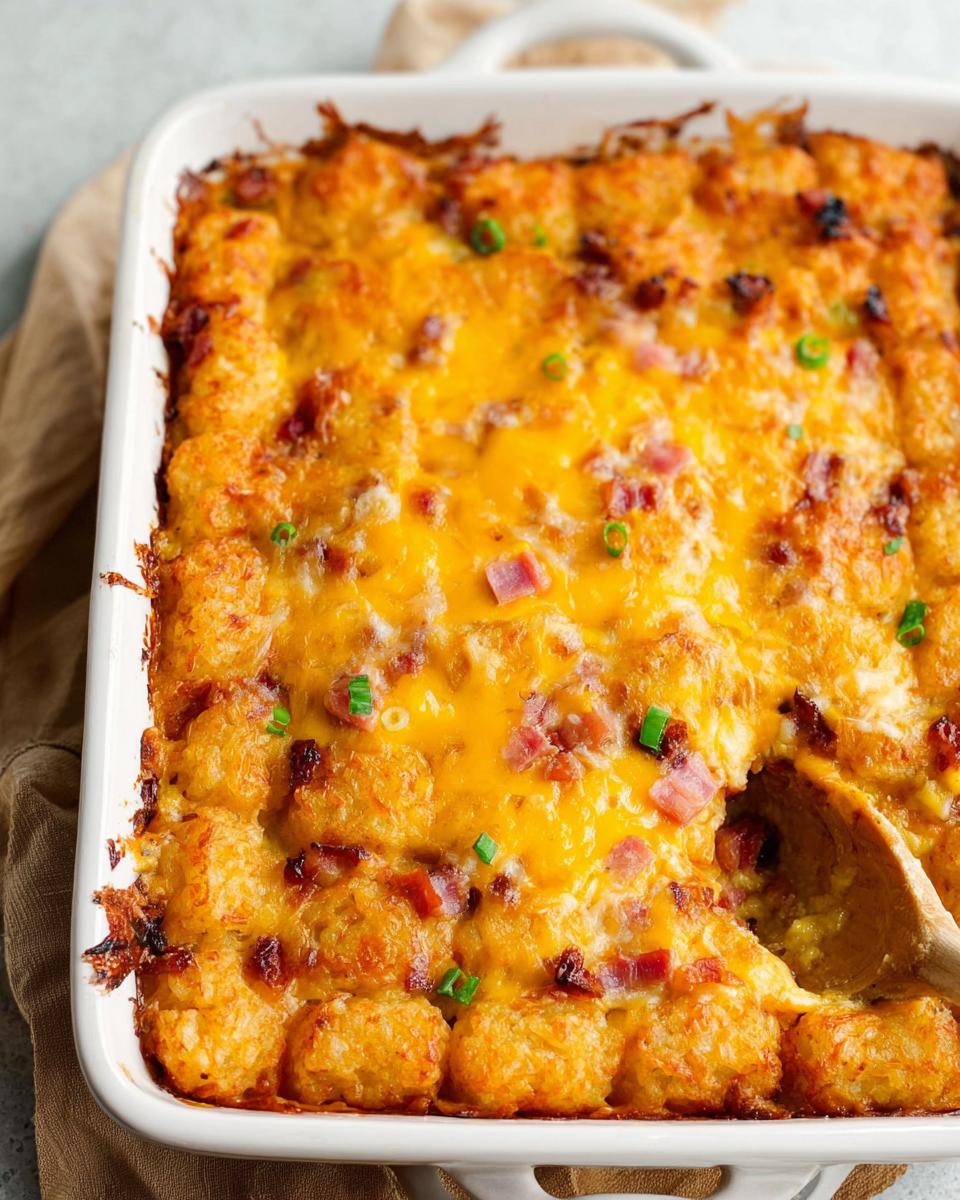
First things first, get that oven hot! Preheat your oven to 375 degrees F (190 degrees C). Give that 9×13 inch baking dish a good coating of non-stick spray—we don’t want any sticking drama later. Toss those frozen tater tots, your diced ham, the first cup of cheddar, and that mozzarella right into the dish. Use your hands to mix it all around so everything is pretty evenly distributed across the bottom. This initial layer sets up the texture!
Mixing and Pouring the Custard
Grab your big bowl and whisk up that egg mixture we put together. Whisk it until it looks smooth—no dry spots of sour cream hanging around! Once it’s happy and combined, slowly pour this liquid custard evenly over the tater tot base. Make sure you get it into all the corners. Don’t just dump it in the middle; taking an extra 10 seconds to pour it evenly makes a huge difference in how the interior cooks.
Baking for the Ultimate Crunchy Topping
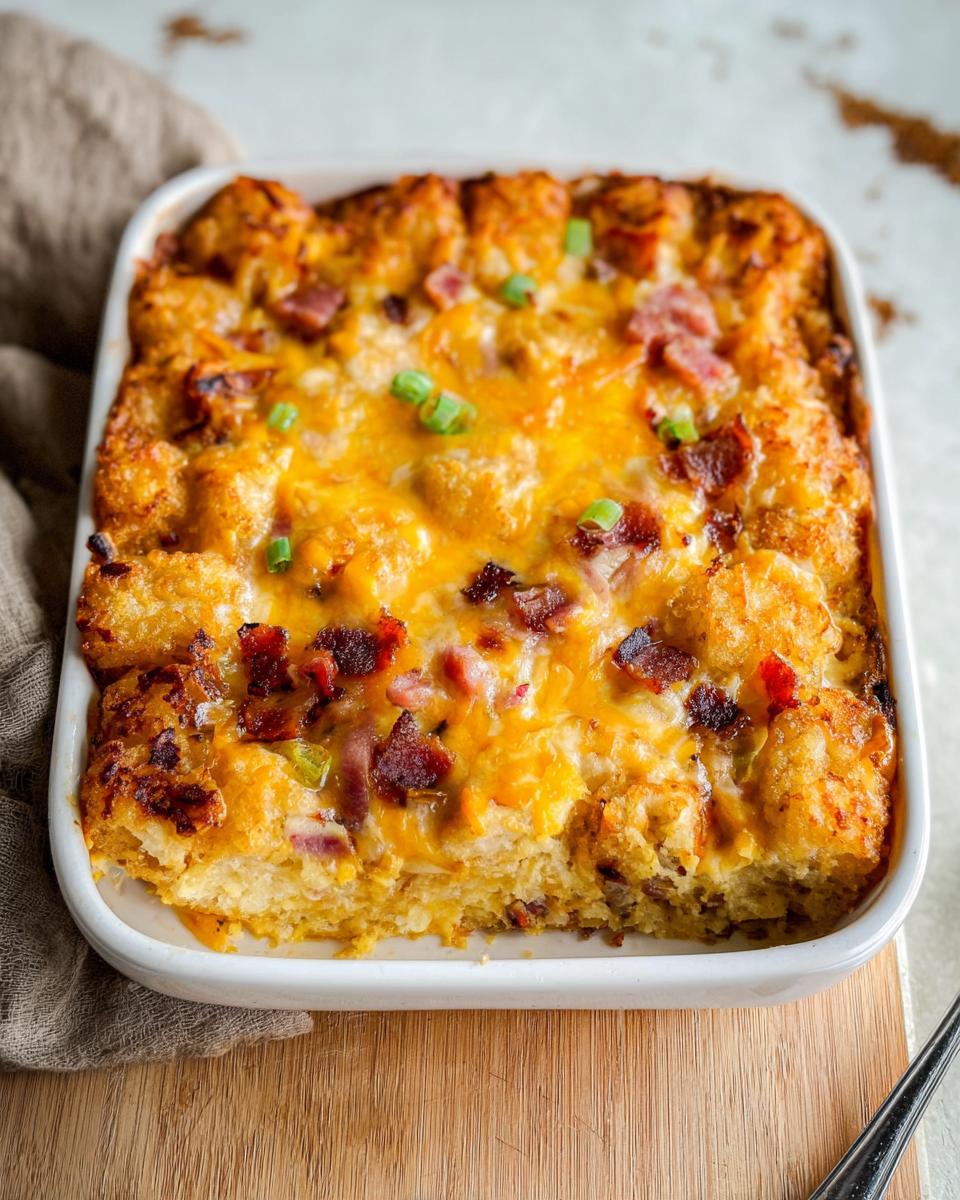
Into the oven it goes! Bake that beauty for a solid 45 minutes. You’ll know it’s almost done because it will look puffed up and golden brown. Now here’s the secret for the best Crunchy Topping: pull it out, sprinkle that final reserved 1/2 cup of cheddar right over the top, and slide it back in for just 5 more minutes. That final blast makes the cheese melt beautifully under the tater tots. Pull it out when that final cheese layer is bubbly. Dinner is served!
Expert Tips for the Perfect Tater Tot Breakfast Casserole (Crispy Top!)
I’ve made this recipe probably a hundred times now, and after all those chaotic weekend mornings, I’ve learned a few little tricks! Getting that perfect interior texture while keeping the tots on top delightfully crisp takes just a tiny bit more thought. When I first started making this, my tots would sometimes get soggy by the time the middle was set. Ruined!
But once I figured out how to treat those little potato nuggets right, this Tater Tot Breakfast Casserole became consistently amazing. My mission is for you to avoid that sad, soggy layer lurking beneath the cheese, so here are the things I swear by for that ultimate signature crunch we want!
Don’t Microwave the Tots! Seriously, I know sometimes we rush things. But if you try to pre-cook or thaw your tots in the microwave, they *will* release steam and turn mushy once they go into the egg bath. Keep them rock solid frozen. The 375-degree oven is hot enough to handle them perfectly.
The Single Layer Rule: Before you pour in any egg mix, take an extra minute to spread those tots out. If you have big clumps of tots layered on top of each other, the ones underneath are going to steam instead of bake! We want maximum surface area exposed to the dry heat for browning.
Don’t Forget the Butter Brush for Extra Crisp: This is a step I added more recently, and wow, does it pay off! If you really want that next-level crunch on your Crunchy Topping, pull the casserole out right before you add the final cheese layer (around the 45-minute mark). Melt about 2 tablespoons of butter and gently brush it over the visible tots. Then add the cheese and finish baking. It fries the surface just a little bit!
The Sour Cream Factor: I mentioned this in the ingredient section, but I have to emphasize it again: using that full cup of sour cream is essential for the texture. It makes the egg mixture richer and helps insulate the lower layer of tots from becoming completely saturated by the custard. It keeps that middle layer tender!
Follow those little tweaks, and you’ll get that perfect textural contrast—a fluffy, cheesy, savory interior protected by a shield of delicious, golden-brown tater tots. That’s the hallmark of a truly great Tater Tot Casserole Breakfast.
Ingredient Notes and Substitutions for Tater Tot Casserole Breakfast
Part of why this recipe is so fantastic for Easy Weekends is how flexible it is! I know sometimes folks don’t always have diced ham haunting the fridge, and that’s totally fine. This casserole is built like a sturdy little foundation just waiting for you to customize it. We want flavor, but we also need convenience, right?
Let’s talk about making swaps without ruining that amazing, crispy top we worked so hard for. The rule of thumb here is simple: whatever meat or veggie you swap in, just make sure it’s already cooked. We don’t have time in the baking cycle to cook raw sausage, and that extra moisture will sabotage our tots!
Meat Swaps: Bacon or Sausage for the Win
If you’re switching out the ham—and many of my readers do—crumbled, cooked bacon is my go-to. It adds that salty, smoky element that pairs unbelievably well with the cheesy eggs. You’ll want about one pound, just like the ham. Cooked, crumbled breakfast sausage works just as well, but make sure you drain off most of that grease. After cooking, crumble it up nice and fine so it disperses throughout the casserole evenly.
For my vegetarian friends who still crave that savory punch, don’t fret! You can skip the meat entirely. Instead, try adding about 1 to 1.5 cups of sautéed mushrooms and onions, or maybe some rinsed canned black beans thrown in with the tots. The trick is cooking down any veggies first—we need to drive out that water content so it doesn’t make your tots steam!
The Cheese Situation: Melt and Flavor
We are using two types of cheese in the base, and I highly recommend sticking to that mix. The cheddar brings the sharp, recognizable flavor that screams “breakfast,” while the mozzarella (or Jack cheese) is the stretch hero. That cheese melts down between the tots and the egg mixture, acting like a wonderful, gooey glue holding the softer interior together.
For the topping? Stick with that final half-cup of sharp cheddar. It browns up so nicely under those tater tots right at the end. If you use pre-shredded cheese, go ahead and toss it with a tiny sprinkle of cornstarch before mixing it into the base—this is totally optional, but it helps prevent clumping when the cheese melts!
Don’t Mess with the Sour Cream!
I’ve been asked if regular milk or heavy cream can replace the sour cream, and honestly, I strongly advise against it if you want the full experience. The sour cream isn’t there just for richness; its thickness and slight acidity help stabilize the egg custard. It keeps the middle fluffy and slightly tangy. If you absolutely can’t use it, substitute it with an equal amount of plain Greek yogurt. Just make sure the yogurt is full-fat for the best texture control!
Make-Ahead and Storage for Your Tater Tot Breakfast Casserole (Crispy Top!)
This is the section where I truly fall in love with my Tater Tot Breakfast Casserole (Crispy Top!)—it’s basically built for planning ahead! I often assemble the whole thing the night before a big family weekend, which means I get to enjoy those Easy Weekends without scrambling first thing in the morning. Having this ready to go is a game-changer, truly.
The absolute best way to handle this is to assemble everything exactly as the recipe says—tots, meat, cheese, and then pour that egg custard over it—but stop right before it goes into the oven. Cover that prepared dish tightly with plastic wrap or foil. We want to lock in that moisture and keep the tots from drying out in the fridge. You can keep this assembled casserole tucked away comfortably for up to 12 hours before baking. When you wake up, just pull it out, let it sit on the counter for maybe 20 minutes while the oven preheats, and then bake as directed. Easy peasy!
Storing Leftovers for the Week
Now, between my family and our extended brunch guests, we usually don’t have many leftovers, but if you manage to snag an extra slice? Great news! This casserole holds up beautifully in the refrigerator for up to 3 days. Just cover the dish tightly again—I prefer foil for leftovers as it traps steam better—and keep it chilled.
Reheating leftovers is tricky because you inevitably lose some of that original fresh crunch. My trick here is to reheat individual slices in a toaster oven or a regular oven set to about 350 degrees F. Skip the microwave if you can! The microwave heats the custard perfectly but turns the tots into soft potato clouds. If you *have* to use the microwave, heat it for just 45 seconds, then finish it in a dry skillet over medium heat for a couple of minutes just to crisp up the bottom layer of tots again.
Freezing Instructions for Big Batches
If you’re making this for a holiday or trying to stock your freezer for busy mornings, this casserole freezes like a dream. You have two options:
- Bake First, Then Freeze: Bake the casserole completely according to the directions, let it cool down fully (this part is important, don’t wrap it hot!), cover it tightly with plastic wrap, and then wrap it well in aluminum foil. You can safely freeze it for up to 2 months. When you want to eat it, thaw it overnight in the fridge, then reheat at 350°F until heated through.
- Freeze Unbaked (My Preferred Method): Assemble the whole thing in a disposable aluminum pan (if you want to save your good dish!). Wrap it securely and freeze it unbaked for up to 2 months. When you pull it out to bake, you’ll need to add about 15 to 20 minutes onto the bake time since it’s going into the oven completely frozen solid. You might want to skip the final cheese topping until it’s almost done baking.
Either way you choose, having this in your arsenal means you’re only 50 minutes away from a hearty, delicious breakfast, even if you haven’t been to the grocery store all week!
Serving Suggestions for This Kid Friendly Dish
Honestly, once this fantastic Tater Tot Breakfast Casserole (Crispy Top!) comes out of the oven, it’s pretty much a complete meal on its own, right? It’s hearty, it’s comforting, and it has all the major food groups hiding in there! But every great centerpiece needs a little something extra on the side, especially when you’re serving a crowd or trying to get those picky eaters to try something green.
Since the casserole itself is so rich and savory—all that ham, cheese, and potato goodness—I always lean toward sides that are bright, fresh, or slightly acidic to cut through the richness. It just balances everything out so nicely! Here are my top picks that keep the morning easy while elevating this amazing Tater Tot Casserole Breakfast.
Brighten It Up with Fresh Fruit
This is a non-negotiable suggestion for any heavy breakfast—you need something fresh! Since the casserole is warm and heavy, a cold, crisp fruit salad is a perfect counterpoint. We aren’t talking about complicated fruit arrangements here; just something simple.
- Citrus Power: Think peeled and segmented oranges or grapefruit halves sprinkled with a pinch of flaky sea salt. The acidity cuts right through the richness of the cheese and eggs beautifully.
- Berries Galore: Strawberries and blueberries are always huge hits, especially with the kids. They’re sweet, easy, and barely require any prep. Wash and serve!
- Melon Cubes: If you can find a nice sweet cantaloupe or honeydew, cubing that up makes for a wonderfully hydrating side that feels lighter than a fruit salad.
When you’re serving something so satisfying and Kid Friendly, having something colorful and cold next to the warm tots just makes the plate look happier!
Simple Sauces to Elevate the Flavor
Sometimes you just need a little something extra to drizzle on top. Now, this casserole doesn’t need gravy like some other breakfast dishes, but a little something vinegary or spicy can take it over the top!
If you are a hot sauce devotee like me, always have a little bottle of your favorite fiery concoction nearby! But if you want something a little more homemade, try these:
- Salsa or Pico de Gallo: A quick, chunky salsa adds freshness, onions, and a little spice that complements the ham and cheddar perfectly. It’s like breakfast nachos, but heartier!
- Avocado Crema: This is ridiculously easy. Blend half an avocado with a couple of tablespoons of lime juice, a splash of sour cream (use what’s left from the recipe!), and a tiny bit of water until it’s drizzle-able. It adds healthy fat and a lovely herbaceous note.
Quick Green Sides (Yes, Even at Breakfast!)
I know, I know, greens for breakfast sounds odd when you have crispy tots involved, but hear me out! Having a small side of greens makes the whole morning feel less heavy. Plus, it’s a great way to sneak in some extra nutrition.
My favorite trick is a quick, very light steam. Steam some asparagus spears for about three minutes until they are bright green, then hit them with a squeeze of lemon right before serving. You get a little crunch and sharpness that contrasts the soft eggs in the casserole perfectly.
Or, if you’ve got the time, some lightly toasted English muffins lightly buttered can be great for soaking up any residual egg mixture that pools on the side of your 9×13 dish. But honestly, the best side dish for this Tater Tot Breakfast Casserole (Crispy Top!) is usually just extra coffee!
Frequently Asked Questions About Tater Tot Breakfast Casserole
I know you’re going to love making this for your family, but naturally, questions pop up! When you’re looking for the perfect meal for Easy Weekends, you need total confidence in the results. Here are the things I get asked about most often concerning the texture and execution of my Tater Tot Breakfast Casserole!
Can I make the crunchy topping even crispier?
Oh, absolutely! If you live in a house where the Crunchy Topping is the absolute prize (like mine!), you need to try my secret extra step. Right after the initial 45-minute bake, before you sprinkle on that final layer of cheese, melt about 2 tablespoons of butter. Gently brush this melted butter over all the visible tater tots. Then, add the cheese and bake those last 5 minutes. That little bit of extra fat on top essentially flash-fries the surface of the potatoes, and wow, the crunchfactor goes through the roof without turning them greasy. It’s my favorite trick!
What vegetables work well in this Tater Tot Casserole Breakfast?
Veggies are a fantastic addition to bulk this up, especially if you’re trying to sneak in more greens for the kids! The *only* thing you must remember is moisture control. Raw veggies like onions, peppers, or spinach release tons of liquid when they bake, and we don’t want that liquid soggy-ing up your tater tots. So, yes to veggies, but only if you cook them first!
I love finely dicing half an onion and sautéing it until soft, or sautéing a handful of chopped bell peppers until they just start to brown. If you use spinach, wilt it down in a dry pan until all the moisture is gone. Then, mix those pre-cooked veggies in with the ham and the first layer of cheese. This keeps the overall casserole structure sound while adding tons of flavor!
How long does the casserole need to rest after baking?
This is such a good, practical question! If you try to slice into this right out of the oven, you’re going to get a bubbly, cheesy mess—not because it’s undercooked, but because the egg custard needs a moment to settle. While the outside looks totally firm, the interior custard is still vibrating from the heat.
Don’t cut it immediately! Let your gorgeous Tater Tot Breakfast Casserole (Crispy Top!) rest on the counter for a good 10 minutes after you pull it out. Those 10 minutes allow the custard to firm up just enough so that when you cut into it, you get those beautiful, clean squares. It makes serving so much tidier for your Easy Weekends brunch!
Estimated Nutritional Snapshot for Tater Tot Breakfast Casserole (Crispy Top!)
Okay, let’s talk fuel! Since we load this Tater Tot Breakfast Casserole (Crispy Top!) with cheese and ham, it’s definitely a hearty meal, not a light snack. But hey, we served 8 generous portions, so when we break it down, it’s a fantastic centerpiece for getting your family fueled up for a busy day!
Please remember that these numbers are just an *estimate*. I’m a cook, not a nutritionist! The final count definitely depends on *exactly* what kind of cheese you use and whether you swap the ham for bacon (bacon usually ups the fat content, just saying!). These figures are based on the standard recipe split across the full 8 servings.
Here’s what you can generally expect per serving when you dive into your slice:
- Calories: 380 kcal
- Protein: Around 18g (Thanks, eggs and ham!)
- Fat: Approximately 22g (Hello, cheese and tater tots!)
- Carbohydrates: Roughly 27g (Mostly coming from those wonderful potatoes!)
See? It’s satisfying comfort food that packs a punch! It’s definitely more of a weekend splurge than an everyday grab-and-go, but that’s part of what makes this Tater Tot Breakfast Casserole so special for those Easy Weekends we talked about. Enjoy every bite!
Share Your Tater Tot Breakfast Casserole Creations
Alright, this is where I need your help! I’ve given you all my best secrets for achieving that perfect, golden, impossible-to-resist Crispy Top! on the Tater Tot Breakfast Casserole, and now I need to know how it turned out for you and your crew.
Cooking is always better when you share the results, right? Whether you stuck strictly to the ham and cheddar, or you got wild and added those sautéed mushrooms I mentioned, I want to hear about it! Did your kids devour it? Did it truly save your morning?
Tell Me Everything in the Comments!
The comment section below is your personal culinary playground! Please, don’t be shy. Leaving a comment—even just a quick “It was great!”—helps other busy home cooks know that this recipe is reliable. If you ran into a snag, or if you discovered a new shortcut that I missed, share it! We’re all learning together here, trying to make those Easy Weekends as delicious as possible.
If you rate the recipe, please be honest! A 5-star rating tells me you loved the crunch and the flavor balance. If you gave it 3 stars, that’s just as helpful because it tells me what I need to clarify in the next version. I read every single one that comes through my inbox!
Show Off Your Masterpiece on Social Media
And since we eat first with our eyes, I absolutely demand pictures! Snap a photo of that beautiful, hot-from-the-oven Tater Tot Casserole Breakfast—especially if you captured the moment someone broke through that crunchy layer. Tag me on your favorite social platform when you share it! Seeing your beautiful family sharing a meal built around this recipe just makes my day.
It’s moments like those, seeing your family enjoy a meal that started in my kitchen, that keeps me excited to share these treasures. Go bake something delicious, and then come back and tell me all about it!
Tater Tot Breakfast Casserole (Crispy Top!)
Ingredients
Equipment
Method
- Preheat your oven to 375 degrees F (190 degrees C). Spray a 9×13 inch baking dish with non-stick cooking spray.
- Place the tater tots, diced ham, 1 cup of cheddar cheese, and 1 cup of mozzarella cheese into the prepared baking dish. Toss everything together with your hands to combine.
- In a large bowl, whisk together the eggs, milk, sour cream, salt, pepper, garlic powder, onion powder, and hot sauce if you are using it.
- Pour the egg mixture evenly over the tater tot mixture in the baking dish.
- Bake in the preheated oven for 45 minutes, or until the casserole is golden brown and set in the middle. Top with the remaining 1/2 cup of cheddar cheese and return to the oven for 5 more minutes, until the cheese is melted.
Nutrition
Notes
Tried this recipe?
Let us know how it was!
Precision Keto Scientist
Numbers don’t lie, and neither do my recipes. I’m a biochemist who fell into keto cooking through my own metabolic research—and I approach recipe development like a lab experiment, complete with macro calculations precise to the tenth of a gram.
My journey started in diabetes research labs at Johns Hopkins, where I spent six years studying how different macronutrient ratios affected insulin sensitivity. Personal experimentation with therapeutic ketosis for cognitive enhancement led me down a rabbit hole of recipe testing that eventually consumed more hours than my actual day job.
While other cookbook authors describe flavors and textures, I quantify ketone elevation curves and glycemic impact data. My recipe database contains 340+ formulations, each tagged with detailed nutritional analysis, predicted ketosis timing, and optimal meal spacing. I measure salt by weight, time cooking processes to the minute, and log ingredient sourcing obsessively for consistent results.
My breakthrough research on fat-protein ratios for sustained ketosis got published in the Journal of Nutritional Biochemistry. My “Macro Math Mastery” workshops have trained over 5,000 people in precision meal planning. I even collaborated with continuous glucose monitor manufacturers to create the first real-time feedback system for recipe optimization.
I left my pharmaceutical research position at Merck three years ago to focus on metabolic nutrition consulting. Now I work with professional athletes, biohackers, and medical professionals seeking therapeutic ketosis protocols. When I’m not in my lab-kitchen, I’m competing in chess tournaments or documenting my daily biomarker measurements with true data scientist obsessiveness.
Cooking is just applied chemistry—and chemistry follows predictable rules. Master the variables, control the outcomes.