

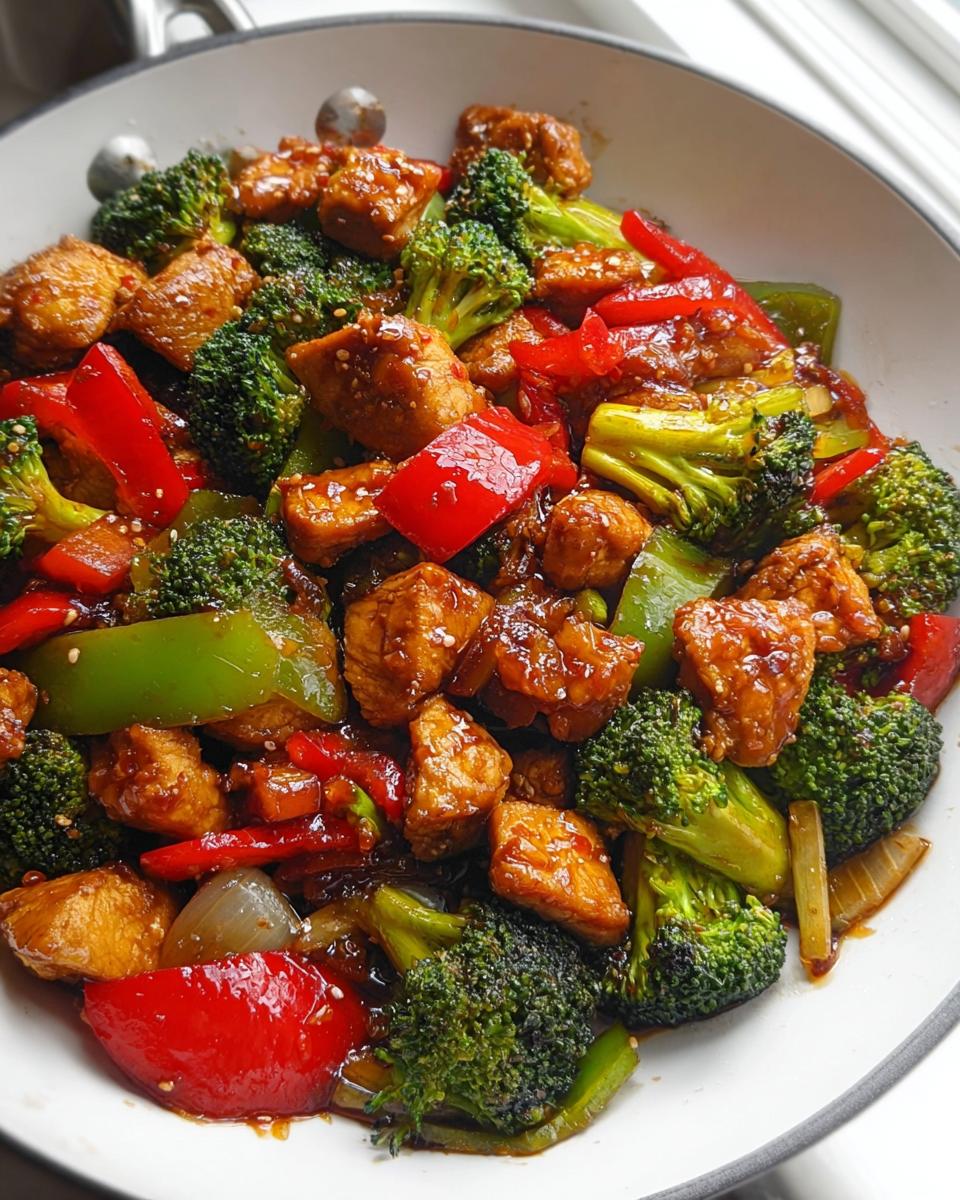
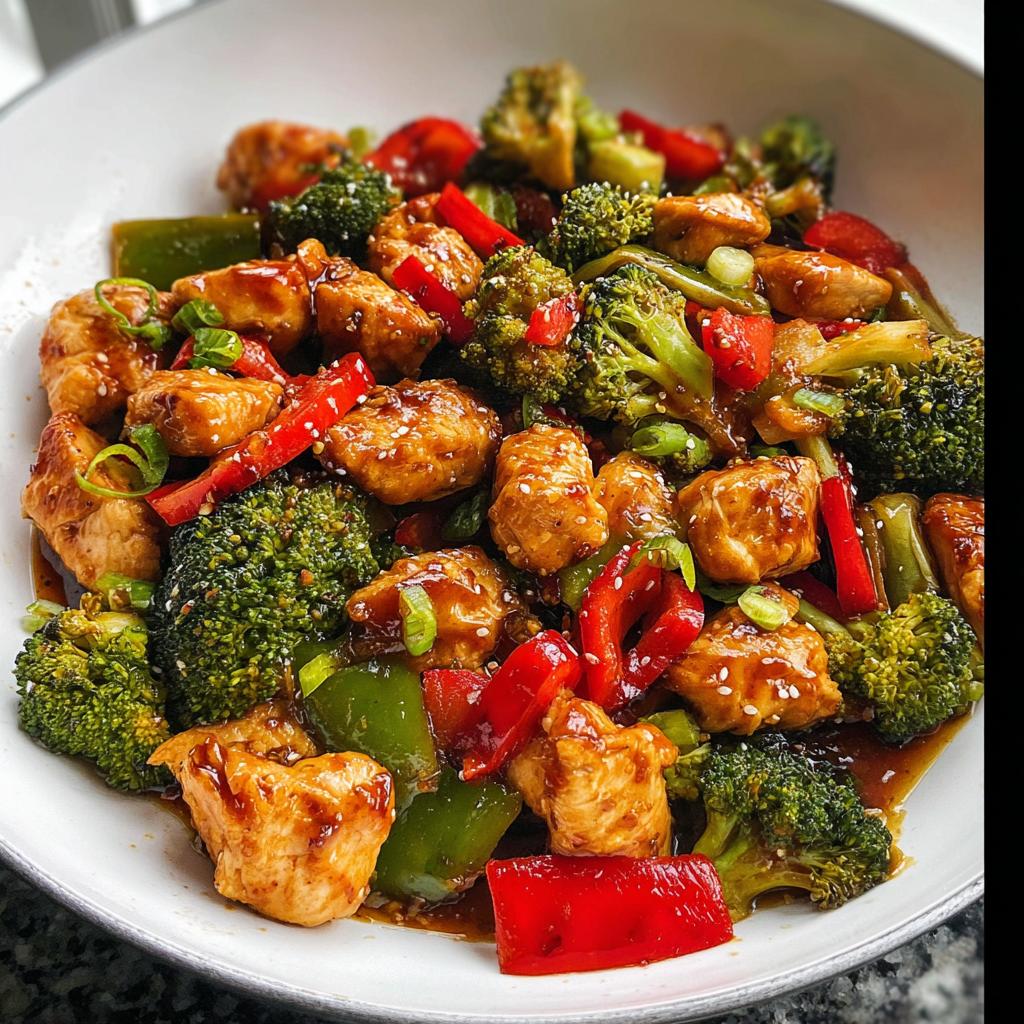
When those intense cravings hit for something punchy, savory, and deeply flavorful, I always turn to my Teriyaki Chicken Stir Fry. Forget those gloopy, overly sweet takeout versions; we are aiming for clean, vibrant flavor here! This recipe is my weeknight hero—ready in about 30 minutes, which means it’s perfect for busy evenings or getting those meal prep bowls stacked for the week ahead. I still remember those early days, trying to nail the perfect balance when I was mastering precision cooking techniques. I was dicing vegetables with the same focus I used in the lab at Johns Hopkins, trying to balance sweet and savory without overloading on carbs. That hard work paid off because this homemade sauce is exactly what you need for consistently amazing Asian flavor!
If you want more foolproof meal ideas that keep your kitchen chemistry on point, check out my guide on essential dinner ideas, ingredients, and temperature tips.
Why You Will Make This Teriyaki Chicken Stir Fry Often
Honestly, what’s better than a dish that tastes phenomenal but doesn’t require you to stand over the wok for an hour? That’s the beauty of this specific teriyaki chicken recipe. It’s designed for speed and maximum flavor impact, trusting that you have other things to do!
- It’s Lightning Fast: Seriously, you’re looking at 15 minutes of prep and 15 minutes of cook time. That’s dinner on the table in half an hour flat. We’ve got dinner ideas in 20 minutes covered, too, but this one checks so many more flavor boxes.
- Better Than Takeout, Guaranteed: When you control the sweetness and the fresh ingredients, your stir fry blows away those heavy, gloppy restaurant sauces. This is vibrant, savory goodness, plain and simple.
- Perfect for Meal Prep Bowls: If you’re planning ahead, this holds up beautifully. The sturdy stir fry veggies reheat wonderfully, and the sauce keeps everything perfectly bound together by day three. It’s one of my go-to foundations for easy 5-ingredient dinner ideas throughout the week.
- Flavor Science Winner: Because we are carefully balancing the acid (vinegar), the savoriness (soy sauce), and the sweetness (honey/brown sugar), the flavor profile is complex and satisfying every single time.
Essential Equipment for Perfect Teriyaki Chicken Stir Fry
Okay, you don’t need a massive, professional setup, but the tools you choose really matter when you’re going for that perfect texture—especially when we’re trying to get the chicken golden and the stir fry veggies crisp-tender, not soggy! If you skip the right pan size, you’ll end up steaming everything, and that’s just a tragedy when you’ve got great ingredients.
Here is what you absolutely need gathered before you even start chopping:
- Small Bowl or Jug: This is strictly for pre-mixing your sauce. You need to combine those liquids—soy sauce, vinegar, oils, the grated ginger—thoroughly before they hit the heat. If you try to mix them directly in the pan, you’ll end up with pockets of unmixed cornstarch, and nobody wants flavor globs like that.
- Large Skillet or Wok: This is the most important piece. Don’t try to cram this recipe into a tiny frying pan if you’re making four servings! If everything is crowded, the moisture released by the chicken and peppers has nowhere to go, and you end up steaming the food instead of searing it. We need high heat and space so the chicken develops a lovely golden crust, which is part of what makes this feel better than takeout.
That’s it! Two main tools, one for precision and one for execution. Keep your ingredients ready to go (that means all your chopping is done before the heat comes on!), and you’ll be set for a flawless execution of this amazing teriyaki chicken recipe.
Ingredients for the Teriyaki Chicken Stir Fry Sauce
Alright, let’s talk sauce! This sauce is where the magic happens, and honestly, it’s why this teriyaki chicken recipe tastes so fresh. When you mix everything ahead of time, you ensure that the fresh ginger and garlic (which you MUST use fresh, trust me on this!) integrate perfectly without you frantically stirring while everything else in the pan is burning.
Remember when I was talking about precision? This is where it counts. Measure everything exactly, pour it into your small bowl or jug we mentioned earlier, and give it a solid whisk. The cornstarch needs to be fully suspended before it touches hot oil!
Here’s what we’re combining for that amazing sweet-and-savory glaze:
- Low-Sodium Soy Sauce (or Tamari): We need about 1/4 cup. If you happen to be skipping gluten for any reason, make sure you use Tamari instead—it’s the perfect substitute and works just as well!
- Water: Another 1/4 cup to help keep the base thin enough to mix well before thickening.
- Honey: 2 tablespoons here for that essential glaze texture and sweetness.
- Brown Sugar: Gotta have that 1 tablespoon of brown sugar! It adds a touch of molasses flavor that white sugar just can’t replicate in Asian cooking.
- Rice Vinegar: Just 1 tablespoon of that clean, bright acid to cut through the richness.
- Toasted Sesame Oil: This is just a whisper—only 1/2 teaspoon—but that toasted nutty flavor is crucial for authenticity. Don’t skip it!
- Fresh Ginger: 2 teaspoons, and please make sure it’s peeled and grated finely. The tiny bits dissolve beautifully into the sauce.
- Fresh Garlic: We need 2 teaspoons, minced up small. Nobody likes big chunks of raw garlic in their finished sauce.
- Cornstarch: The final ingredient is 2 teaspoons of cornstarch. This is our thickening agent—it bridges the gap between a thin liquid and that beautiful, glossy coating that sticks perfectly to your stir fry veggies and chicken.
Whisk that all together until you don’t see any clumps of cornstarch popping up, and then set it aside. Done! Now we move on to cooking!
Ingredients for the Main Teriyaki Chicken Stir Fry Components
Now that your stellar sauce is ready to go, we need to gather the main players for the actual stir fry part of our teriyaki chicken recipe. This is where you focus on getting your protein cooked nicely and ensuring your vegetables are prepped correctly so they cook evenly in that super-hot pan. Remember, quick cooking means sharp chopping!
For this dish, which feeds about four people (and makes four fantastic meal prep bowls!), here is what you need staged and ready:
- Chicken Breasts: Grab about 1.25 pounds of boneless, skinless chicken. The absolute key here is the prep work: you need to dice this into cubes that are about 3/4-inch. If they are too big, the outside will dry out before the center is cooked when we sear them.
- Broccoli Florets: You’ll want about 3 cups of good, fresh broccoli florets. Make sure they’re cut into bite-sized pieces so they cook at the same speed as the peppers.
- Bell Peppers: Two cups of diced bell peppers, using a mix of red and green for color, is what I suggest. Dicing them means they soften nicely but still retain a bit of crunch.
- Vegetable Oil: Start with 1 tablespoon for cooking the chicken. You’ll likely need a tiny bit more when you toss in the vegetables, so keep an extra splash handy!
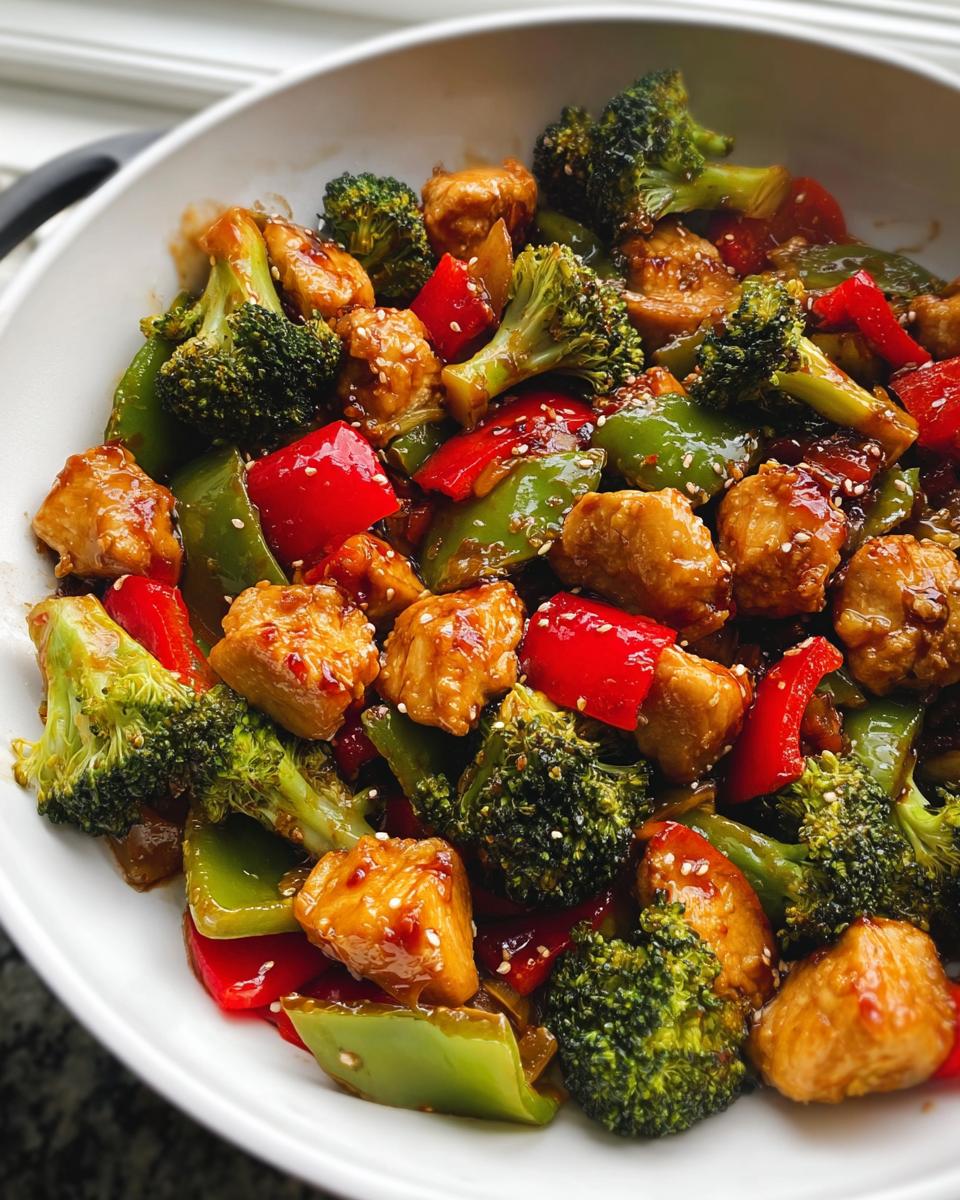
- Toasted Sesame Seeds: This is our final flourish! Just 1 teaspoon reserved for garnish right at the end. It adds the perfect visual appeal and a final nutty pop when you serve it over rice.
See? It’s simple, high-quality components. Having your chicken diced and your stir fry veggies chopped before you even turn the stove on means you can focus solely on managing the heat and getting that amazing sear. That control is what elevates this from a quick weeknight meal to truly something better than takeout!
Step-by-Step Instructions for Your Teriyaki Chicken Stir Fry
This is where all that prep work pays off! We really need to respect the timing here, especially because we are cooking the chicken and the vegetables in separate stages. This ensures maximum flavor development for both components of your perfect teriyaki chicken recipe. If you try to cook everything at once, you’ll end up compromising the sear on the chicken and ending up with mushy stir fry veggies.
We are keeping the heat up, but we’re adding things in order. Remember that guide on achieving the perfect sear we talked about? That technique is key right here when we start working with the chicken!
Preparing the Teriyaki Sauce Mixture
Okay, you already mixed this up, but this is the first thing we do to get going. Just take that small bowl or jug where you combined your soy sauce, honey, ginger, garlic, and cornstarch. Give it one final, vigorous whisk right now! That cornstarch settled out while we were chopping, and we need to make sure it’s perfectly suspended one last time so it thickens the sauce evenly later on.
Cooking the Chicken for the Teriyaki Chicken Stir Fry
Get your large skillet screaming hot over medium-high heat, then add that tablespoon of vegetable oil. Once the oil is shimmering—you’ll see it move slightly if you swirl the pan gently—carefully place your diced chicken cubes in the skillet. Don’t crowd them; they need personal space to develop color! If you want a little extra flavor boost, go ahead and dust them with some freshly cracked black pepper before they hit the pan.
Cook them for about 5 minutes, tossing occasionally, until they look golden brown and are cooked all the way through. Once that happens, yank them straight out of the skillet and put them on a clean plate. They are going to sit tight and wait for their sauce bath!
Sautéing the Stir Fry Veggies
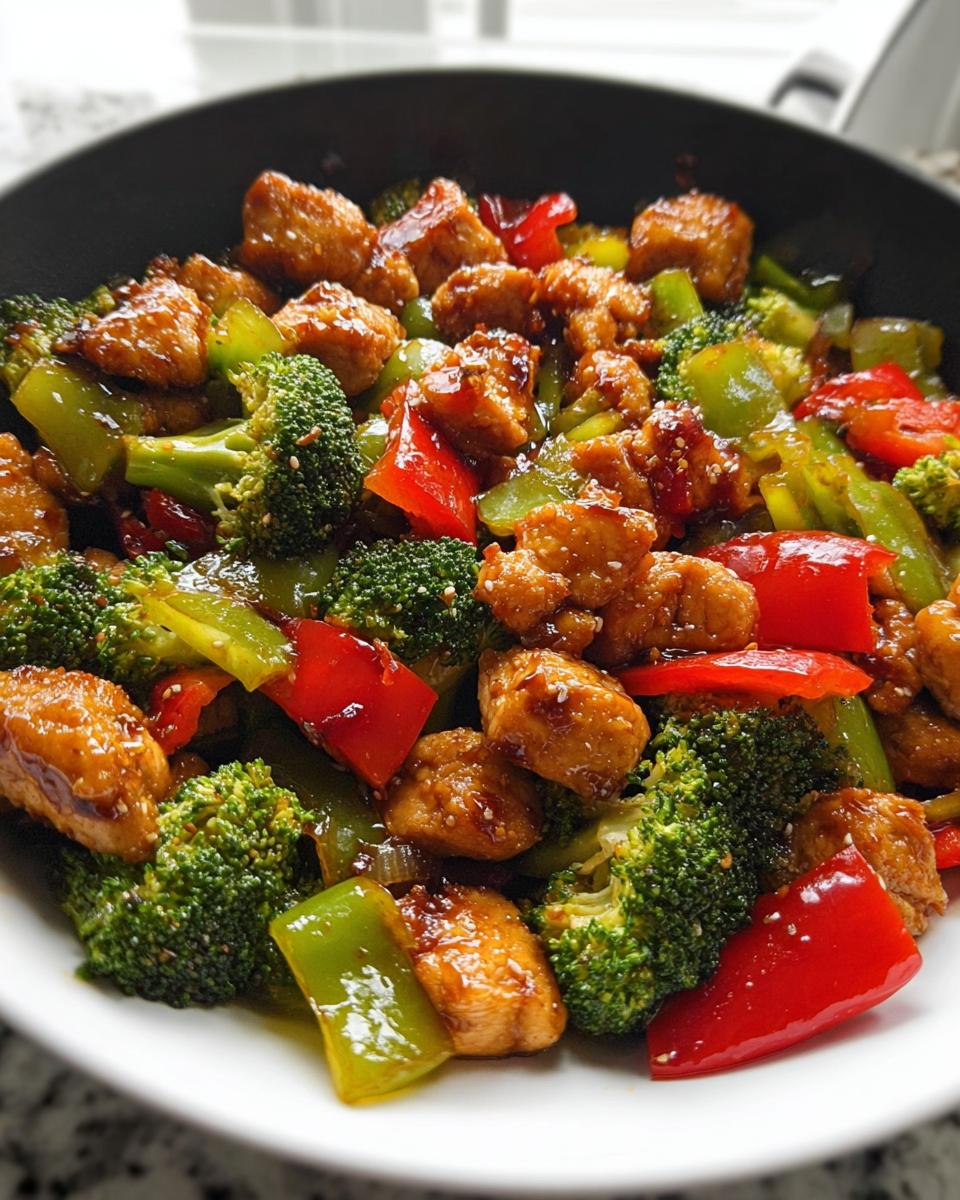
Don’t wipe out the pan! That little bit of chicken fond adds flavor. If the pan looks dry, toss in a bit more vegetable oil. Now, dump in your broccoli florets and those diced bell peppers. We’re sautéing them hard for about 3 to 4 minutes.
Listen, this is crucial: we only want them to get just softened right now. They need to stay crisp! If you cook them until they are floppy here, they will turn to complete mush when we add the sauce and heat them again later. We want that ‘al dente’ texture!
Thickening the Sauce and Combining the Teriyaki Chicken Stir Fry
Take your pre-whisked sauce mixture. Give it one more quick swirl and pour it gently right over those bright vegetables in the pan. Turn the heat down slightly to low-medium. Let this bubble gently for about 2 to 3 minutes. As it cooks, you’ll see it transform from thin liquid into a glossy glaze—that’s the cornstarch doing its job! You might see some bubbles thicken faster than others; if it gets too stiff, just splash in a teaspoon of water to loosen it back up, which is a great trick I learned from watching chefs: consistency control is everything!
Once the sauce is looking thick and sticky, toss that reserved, perfectly cooked chicken right back into the skillet. Stir everything together quickly until that chicken is perfectly coated in the shiny teriyaki glaze. Pull the whole pan immediately off the heat. Finally, sprinkle those toasted sesame seeds over the top for a final flourish. Serve this masterpiece immediately over rice, and enjoy the best Homemade Teriyaki Chicken Stir Fry you’ve ever had!
Ingredient Notes and Substitutions for Teriyaki Chicken Stir Fry
One of the best things about making your own teriyaki chicken recipe at home is complete control over what goes in, right? I’ve spent a lot of time tweaking my favorite flavor profiles, and I want you to feel empowered to adapt this for whatever you have on hand or whatever your dietary needs are. This recipe is robust enough to handle a few experiments!
If you follow the instructions precisely, you’ll get incredible results, but here are some common pivots I make, depending on what I’m grabbing from the pantry:
- For Gluten-Free Cooking: I already mentioned this briefly, but it bears repeating because it’s so important for those who can’t have gluten. You MUST use Tamari instead of standard soy sauce. Tamari is essentially just low-sodium soy sauce made without wheat. It swaps 1:1 and keeps that deep umami flavor intact for your stir fry veggies and chicken.
- Sweetener Swaps: Since I often try to keep my carbs down, I frequently ditch the honey and brown sugar combo. If you’re looking to make this a low-carb or keto-friendly version, you can absolutely substitute those sweeteners with a zero-carb alternative like erythritol or monk fruit sweetener, measured to your preferred level of sweetness. The texture might be slightly different because you lose the viscosity from the sugar/honey, but the flavor profile remains sharp and savory.
- Vegetable Flexibility: Don’t limit yourself to just broccoli and peppers! This is a perfect recipe for clearing out the crisper drawer. Hardy stir fry veggies that hold up well during reheating for meal prep bowls include carrots (use sparingly if counting carbs), snap peas, sliced mushrooms, and shredded cabbage. Cabbage is a fantastic, cheap filler that soaks up the sauce beautifully. Just remember the rule: add softer veggies like snow peas only in the last minute of cooking!
When you start swapping ingredients, you always need to approach it with that scientific mindset I use in my own kitchen—taste as you go! If you’re using a saltier soy sauce alternative, cut your initial soy sauce amount down and add more water or broth until the flavor settles. It’s all about finding that balance, and once you do, you’ll feel like you’ve unlocked the secret to foolproof dinner ideas every time.
Tips for the Best Teriyaki Chicken Stir Fry Results
You’ve got your sauce mixed, your veggies chopped—that’s fantastic! But achieving that truly restaurant-quality finish, the texture that makes this Teriyaki Chicken Stir Fry feel genuinely better than takeout, comes down to a few high-level execution details. Since my background involves a lot of precision work, I’ve learned that tiny cooking tricks make huge differences, especially when dealing with fast cooking methods like stir-frying.
These aren’t just suggestions; these are the secrets that guarantee your teriyaki chicken recipe turns out juicy on the inside and beautifully coated on the outside. Pay close attention to the pan!
Uniform Chicken Sizing is Non-Negotiable
I mentioned this when listing the ingredients, but I have to really hammer it home: the chicken pieces *must* be the same size. I said 3/4-inch cubes for a reason. If half your chicken is 1/2-inch and the other half is 1-inch, the small pieces will dry out and get stringy by the time the large pieces are actually cooked through. Precision in your initial knife work prevents uneven cooking later. It’s basic culinary physics!
When Using Cast Iron: The Sear-First Method
If you are using a cast iron skillet—and I highly recommend you try it sometime for that pure, high-heat searing surface—you need to learn how to treat your chicken. Don’t just toss it in and stir immediately! Cast iron retains heat incredibly well, and you want to use that to your advantage. Place the seasoned chicken cubes into the hot, oiled pan and then—and this is the crucial part—do not move them for a solid minute.
Resist the urge to poke! That minute lets the chicken develop a deep, golden-brown crust. That crust equals flavor that you just can’t replicate by constantly moving the pieces around. Once that initial sear has set, then you can toss them until they are cooked through, and certainly, pull them out before adding the vegetables.
Mastering the Sauce Consistency
The cornstarch slurry is wonderfully effective, but sometimes pans run hotter than expected or maybe your honey was thicker than mine that day. When you return the sauce to the heat to thicken, watch it *very* closely. It can go from perfect thickness to cement in about 15 seconds.
If you see it start to seize up or become too tight across the pan, stop cooking immediately and add a tiny splash of water—maybe a teaspoon at a time—while stirring constantly. This loosens the texture just enough without making it runny again. You want a glaze that coats the back of a spoon, not a thick paste. Keeping this beautiful glaze consistency ensures your final Teriyaki Chicken Stir Fry clings perfectly to the stir fry veggies, which is the hallmark of a great crispy-outside, juicy-inside meal.
Storing and Reheating Your Teriyaki Chicken Stir Fry
Wow, you made it! Hopefully, you have leftovers, because this Teriyaki Chicken Stir Fry actually tastes even better the second day when those amazing sauce flavors have completely married all the ingredients together. Since we’re aiming this recipe squarely at the busy cook who loves making meal prep bowls, proper storage and reheating are just as important as the cooking itself!
Don’t just throw the leftovers in any old container. If you want your chicken and stir fry veggies to stay looking vibrant and tasting fresh, you need to treat them right.
Airtight is the Only Way to Go for Storage
The single best thing you can do for longevity is ensuring these go into an airtight container. I suggest using individual containers if you are portioning out your meal prep bowls for the week. You want to minimize how much air gets to that sauce—air is the enemy of goodness, drying things out and inviting staleness!
When stored correctly in the refrigerator, this teriyaki chicken recipe holds up beautifully for about 3 days. If you try to push it to day four, you might notice the texture of the vegetables softening a little too much, especially if you’re planning on serving this over rice.
Reheating for Maximum Flavor
Forget the microwave if you can, okay? While the microwave is fast, it tends to heat unevenly and can sometimes make already cooked chicken feel a little tough. We want to bring that glossy glaze back to life!
The skillet method is unquestionably the best way to reheat your leftovers. Here’s what you do: Heat a clean skillet over medium heat. Add your portion of stir fry. Before it even starts to sizzle, add just a tiny splash—maybe a half teaspoon—of water. That water creates a little steam environment that gently warms everything through.
Toss it gently for just 2 or 3 minutes until everything is hot and the sauce looks glossy again. That little bit of moisture stops the sauce from scorching on the bottom of the pan and keeps the chicken feeling tender. This simple technique ensures that even your batch-prepped stir fry tastes almost as good as when it first came off the stove!
Frequently Asked Questions About Teriyaki Chicken Stir Fry
It’s totally normal to have questions creep up when you start trying to master a new teriyaki chicken recipe! I know I certainly did when I was first developing this because I was so focused on getting the science of that glaze right. Since this dish works so well for meal prepping and busy weeknights, I’ve compiled the questions I get asked most often about substitutions, flavor, and making sure your meal prep bowls look as good on day three as they did on day one.
Can I use a different protein in this teriyaki chicken recipe?
Absolutely, you can switch up the protein! Chicken is fantastic because it sears quickly and takes on the sauce flavor beautifully, making it a staple in tons of my quick dinner ideas. If you want to try something different, shrimp works wonderfully—just remember that shrimp cooks super fast, so you only want to put it in the pan for the last minute of cooking before the sauce goes in. Flank steak or thinly sliced beef also work great; just slice it thinly against the grain before you start cooking so it stays tender!
How do I make this better than takeout?
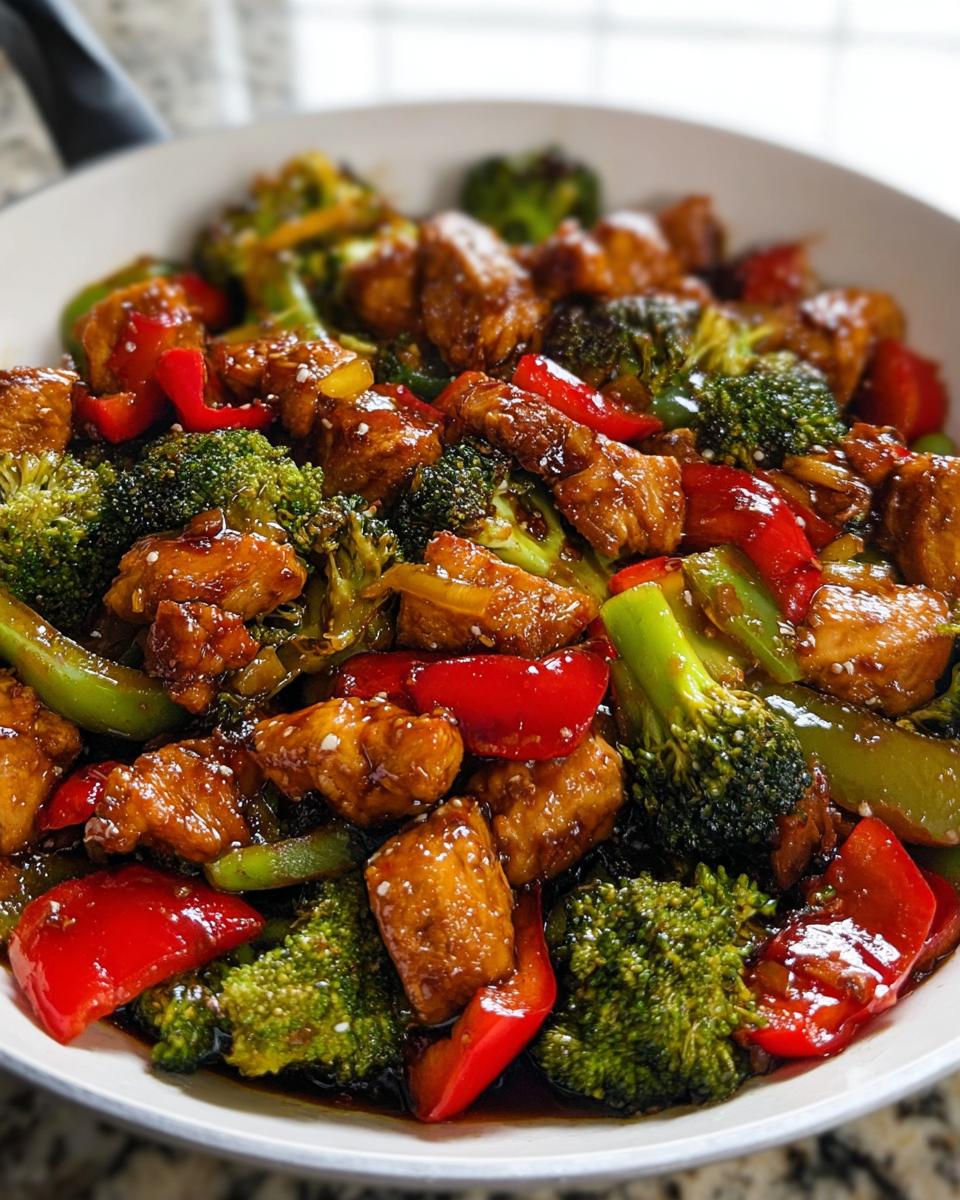
This is my favorite question! The secret that makes this Teriyaki Chicken Stir Fry genuinely better than takeout is twofold, and it all comes down to quality over quantity. First, the sauce: using fresh ginger and garlic you grate and mince yourself, combined with real honey or brown sugar, makes a massive difference compared to the corn-syrup-heavy sauces you get elsewhere. Second, the vegetables! We’re using fresh, crisp broccoli and peppers that we only briefly sauté. That means when you eat it, you get true texture, not soft, overcooked mush. It’s the freshness and the fact that you control the glaze that wins every time.
What are the best vegetables to use for meal prep bowls?
When you’re prepping ahead, you need hardy stir fry veggies that won’t turn to soup after a day or two in the fridge. Stick to ingredients that have a good structural integrity. My top recommendations for reliable meal prep bowls are broccoli, carrots (sliced thinly so they cook quickly but stay firm), snap peas, and cabbage. Bell peppers are great too, but they tend to soften slightly more than broccoli. Always remember to undercook your veggies slightly during the initial sauté phase; they will continue to soften as they cool down and when you reheat them later!
Estimated Nutritional Data for Teriyaki Chicken Stir Fry
When we talk about making sure our meals fit our goals—whether that’s maintaining energy for a busy day or watching macros for a specific diet plan—having the numbers is essential! Since this Teriyaki Chicken Stir Fry uses concrete measurements and fresh ingredients, we get a pretty reliable estimate of what we’re putting into our bodies. This data breakdown is super helpful for anyone stacking up those meal prep bowls for the week!
Here are the estimated nutritional values based on a single serving (one quarter of the total recipe):
- Calories: 297
- Protein: 34 grams
- Carbohydrates: 23 grams
- Fat: 8 grams
- Sugar: 15 grams
Now, I always have to toss in a quick disclaimer because I’m a scientist at heart—precision matters! These numbers are excellent guides. However, the final nutritional count for your own batch of Teriyaki Chicken Stir Fry will definitely vary based on brands. For example, the sodium level can jump around depending on whether you use a specialty low-sodium soy sauce or a standard one. Also, if you substitute the honey for a zero-carb sweetener, your sugar content will obviously drop, but that’s the beauty of customizing your own perfect teriyaki chicken recipe!
Teriyaki Chicken Stir Fry
Ingredients
Equipment
Method
- In a small bowl or jug, combine the sauce ingredients and whisk them briefly. Set the mixture aside.
- Heat the oil in a skillet over medium heat. Cook the chicken (you can season it with freshly cracked black pepper if you wish) for 5 minutes until it is golden and cooked through. Remove the chicken from the skillet and set it aside.
- Add more oil to the skillet and sauté the vegetables for 3 to 4 minutes until they are just softened. Do not cook them too long, as they will cook more with the sauce.
- Whisk the sauce mixture again and add it to the skillet. Cook over low-medium heat for 2 to 3 minutes until the sauce thickens. If the sauce thickens too much, add a small amount of water to loosen it.
- Add the chicken back into the skillet and stir to coat it well in the sauce. Remove the skillet from the heat, garnish with toasted sesame seeds, and serve over cooked jasmine rice.
Nutrition
Notes
Tried this recipe?
Let us know how it was!
Precision Keto Scientist
Numbers don’t lie, and neither do my recipes. I’m a biochemist who fell into keto cooking through my own metabolic research—and I approach recipe development like a lab experiment, complete with macro calculations precise to the tenth of a gram.
My journey started in diabetes research labs at Johns Hopkins, where I spent six years studying how different macronutrient ratios affected insulin sensitivity. Personal experimentation with therapeutic ketosis for cognitive enhancement led me down a rabbit hole of recipe testing that eventually consumed more hours than my actual day job.
While other cookbook authors describe flavors and textures, I quantify ketone elevation curves and glycemic impact data. My recipe database contains 340+ formulations, each tagged with detailed nutritional analysis, predicted ketosis timing, and optimal meal spacing. I measure salt by weight, time cooking processes to the minute, and log ingredient sourcing obsessively for consistent results.
My breakthrough research on fat-protein ratios for sustained ketosis got published in the Journal of Nutritional Biochemistry. My “Macro Math Mastery” workshops have trained over 5,000 people in precision meal planning. I even collaborated with continuous glucose monitor manufacturers to create the first real-time feedback system for recipe optimization.
I left my pharmaceutical research position at Merck three years ago to focus on metabolic nutrition consulting. Now I work with professional athletes, biohackers, and medical professionals seeking therapeutic ketosis protocols. When I’m not in my lab-kitchen, I’m competing in chess tournaments or documenting my daily biomarker measurements with true data scientist obsessiveness.
Cooking is just applied chemistry—and chemistry follows predictable rules. Master the variables, control the outcomes.