Oh, shrimp! I remember one unforgettable summer evening, visiting a tiny coastal town in Thailand. I had the absolute pleasure of sharing a meal with a local family, and they served this incredible shrimp dish. It was just swimming in fresh herbs and spices, so simple but bursting with flavor! Watching them cook was a total eye-opener – who knew you could do SO much with just a few ingredients? That experience kicked off my whole journey into exploring all the delicious ways to cook shrimp, and now I’m thrilled to share what I truly believe is The Only Shrimp Recipes Recipe You’ll Need (2025). As an International Keto Cuisine Explorer, I’ve played around with tons of recipes, but this one, and the adaptations I’ve found, really hit the spot. Get ready to fall in love with shrimp all over again!
Why This Coconut Shrimp Recipe Is The Only Shrimp Recipes Recipe You’ll Need (2025)
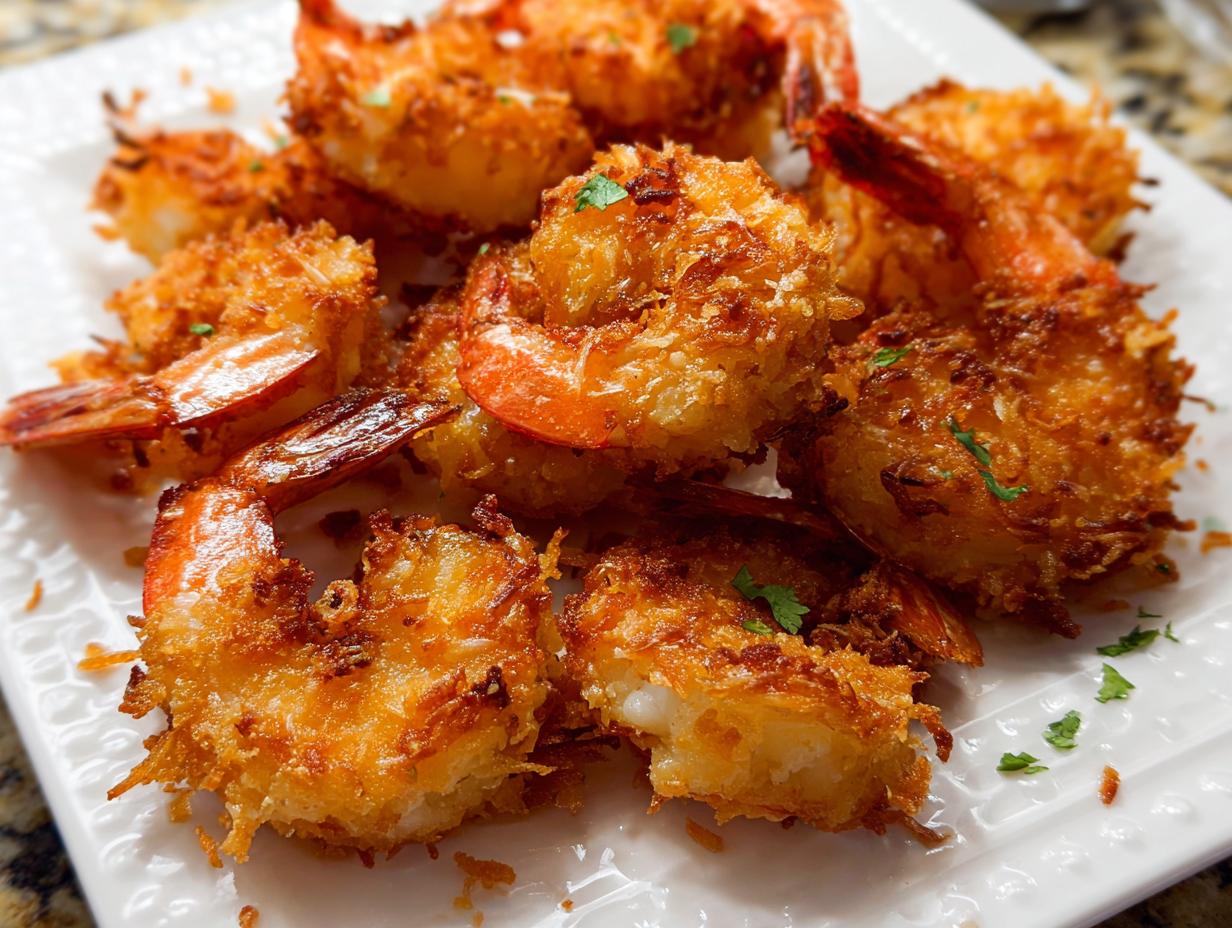
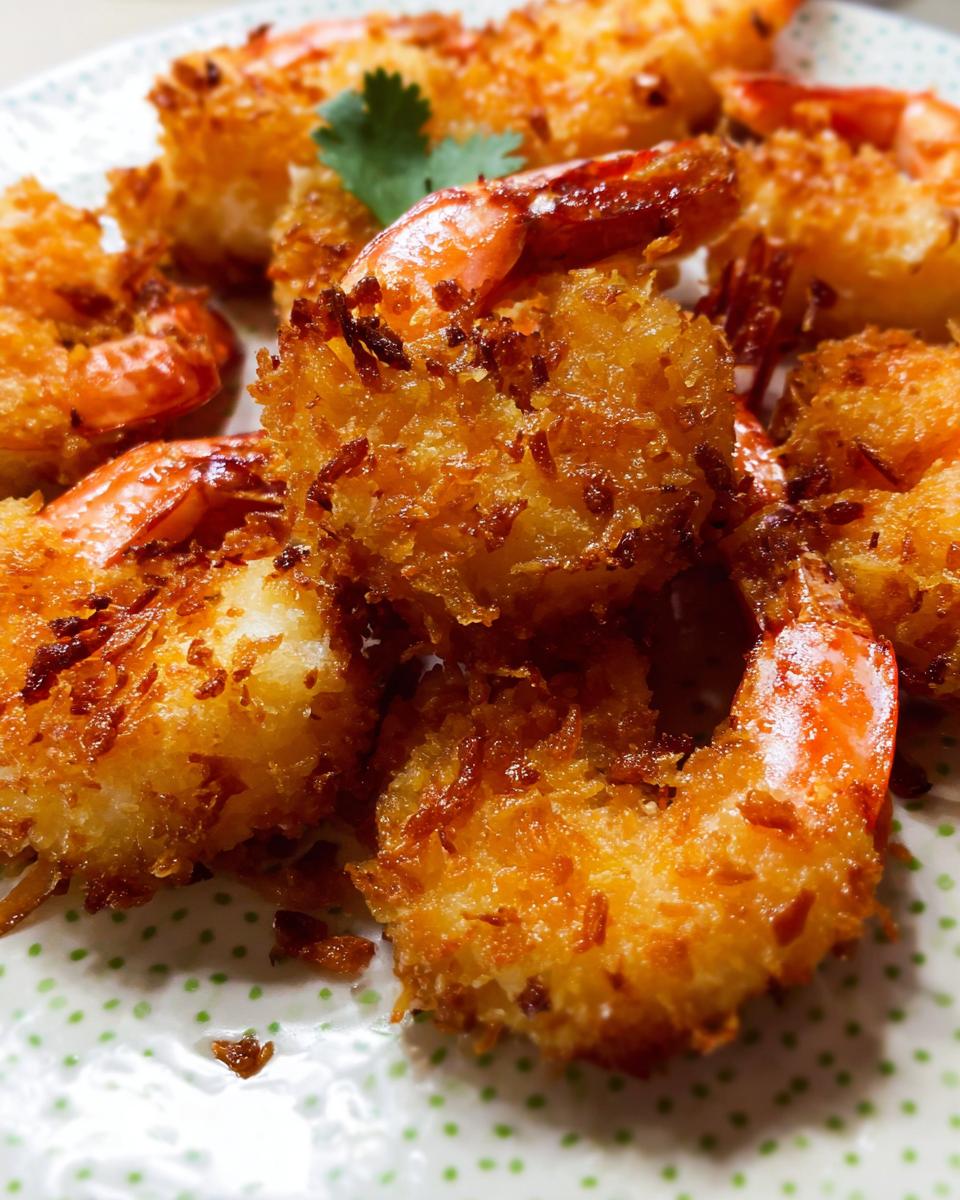
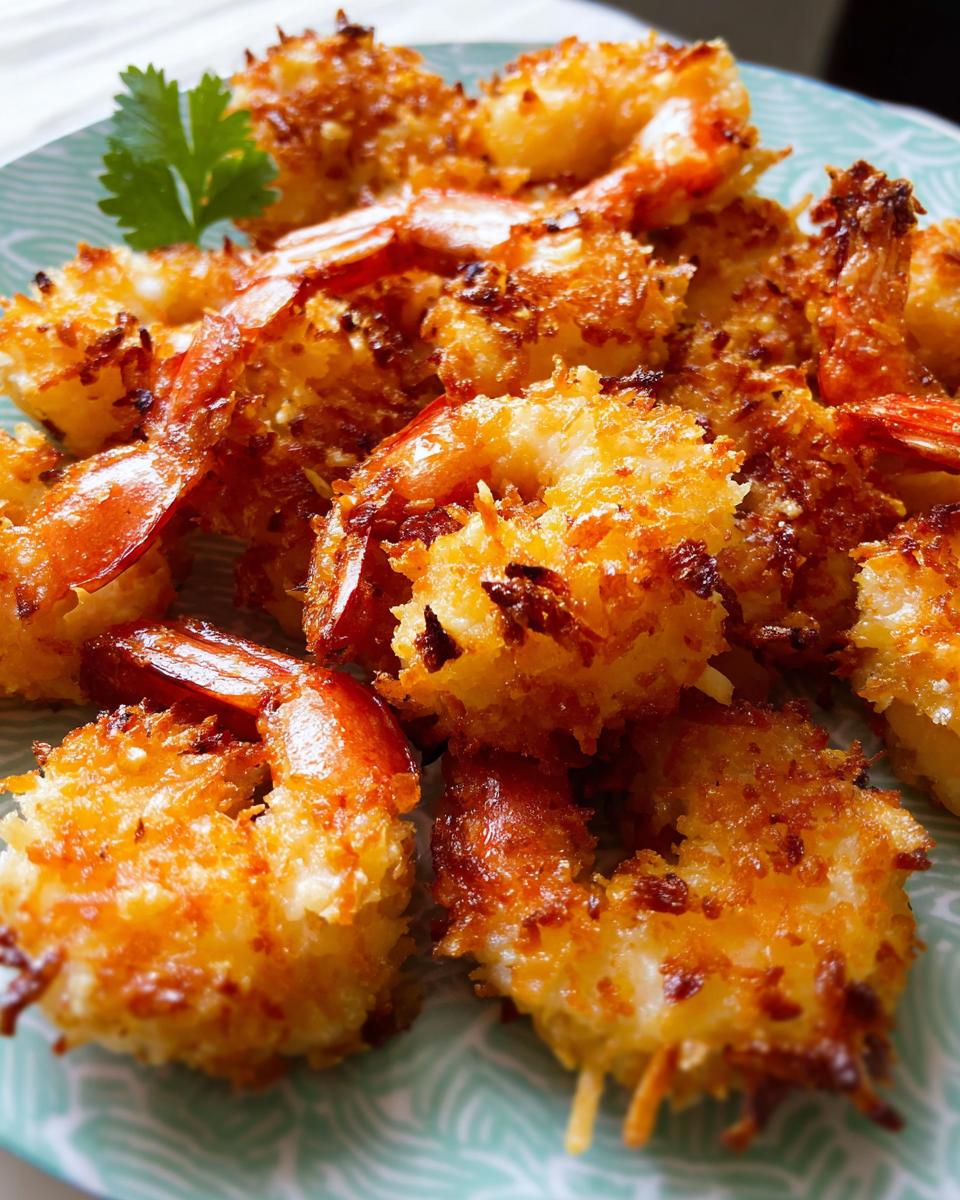
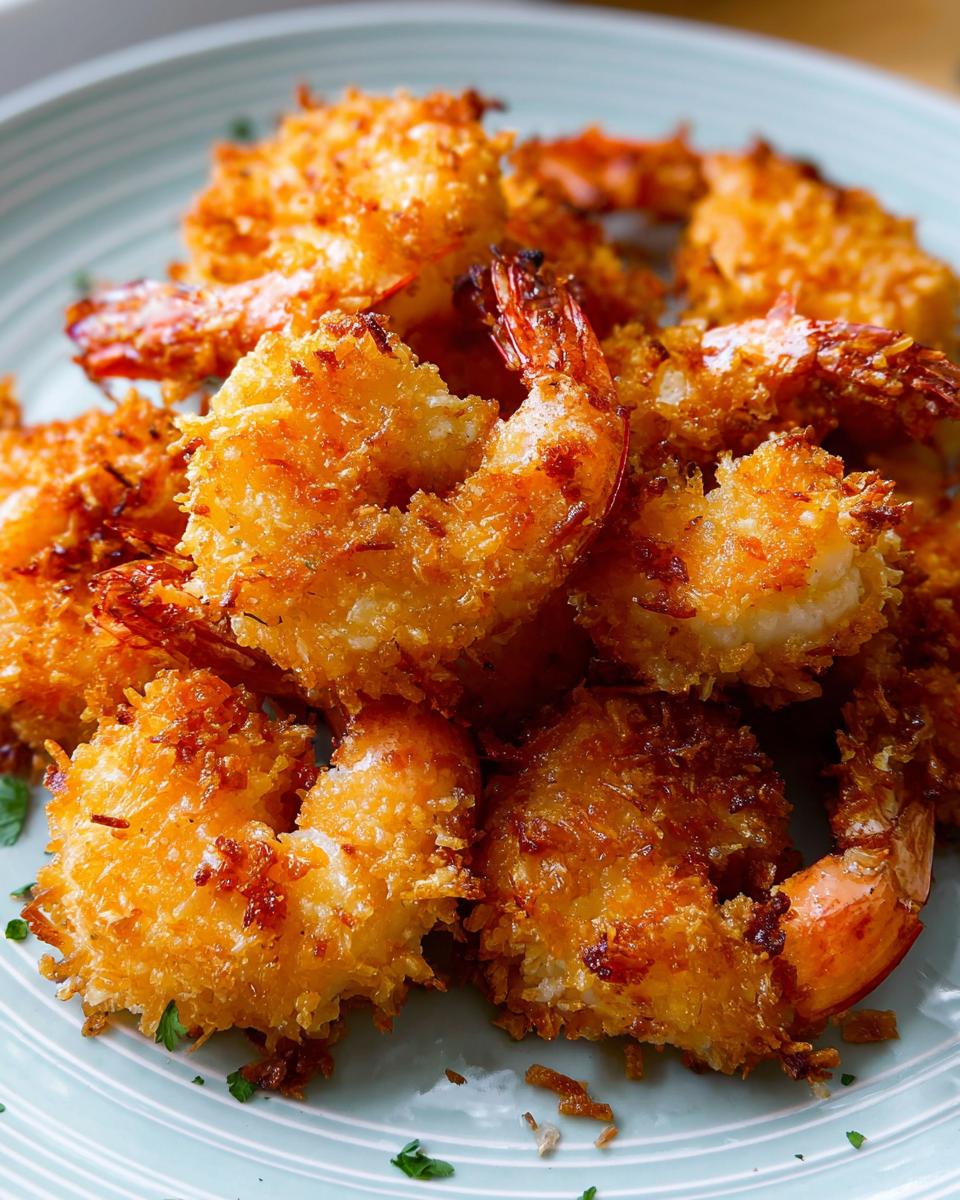
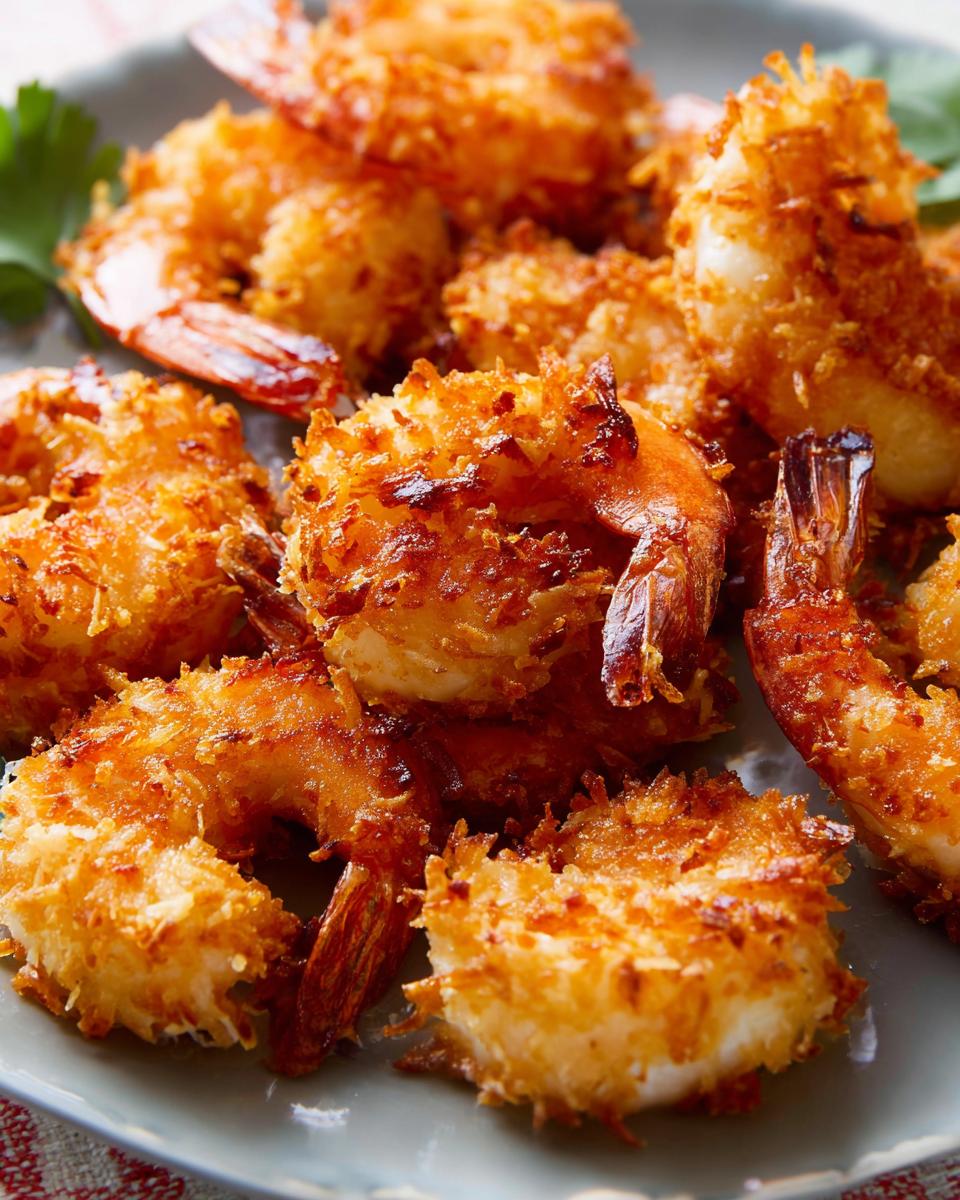
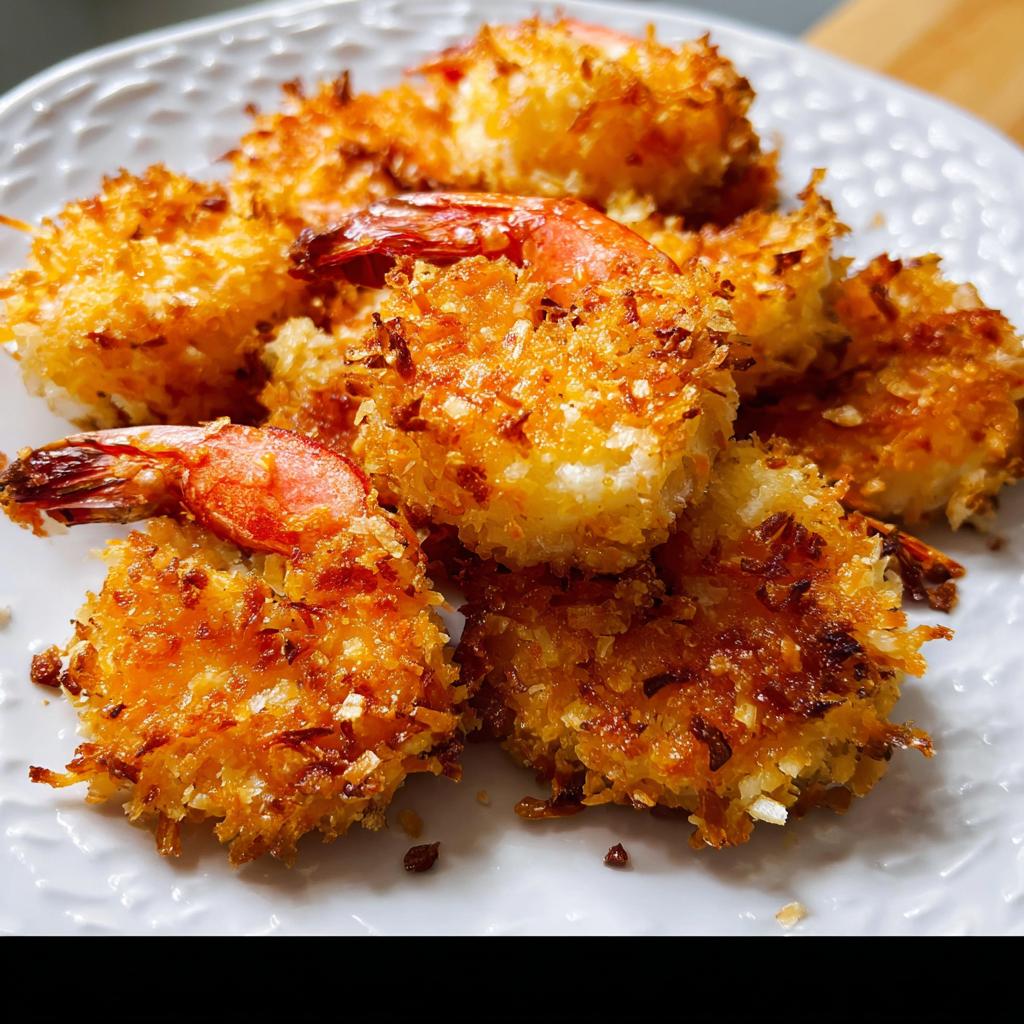
Okay, so why is this coconut shrimp recipe the *one*? Trust me, after trying countless shrimp dishes, this recipe is a total winner! It’s ridiculously easy to whip up, even on a busy weeknight, which is already a huge plus, right? But the flavor? Wow! That perfect crunchy, sweet coconut coating combined with the tender shrimp? It’s divine. Plus, it’s super versatile – serve it as an appetizer with that tangy dipping sauce, or pile it high over some fluffy rice for a fantastic main course. It’s just one of those recipes you can rely on to impress without breaking a sweat. Honestly, The Only Shrimp Recipes Recipe You’ll Need (2025) is the one you’ll keep coming back to, I guarantee it!
Gather Your Ingredients for The Only Shrimp Recipes Recipe You’ll Need (2025)
Alright, let’s get our kitchen prepped! To make these amazing coconut shrimp, you’ll need just a few things. Trust me, having everything measured out beforehand makes cooking a breeze. Here’s what you’ll want to grab:
For the Coconut Shrimp:
- 1/3 cup all-purpose flour (or whole wheat flour, spooned and leveled)
- 1/2 teaspoon salt
- 1/2 teaspoon ground black pepper
- 2 large eggs, beaten
- 3/4 cup Panko bread crumbs
- 1 cup sweetened shredded coconut
- 1 pound raw large shrimp, peeled and deveined with tails still attached
- 3-4 Tablespoons vegetable oil (or coconut oil or olive oil, for frying)
- 1 Tablespoon chopped cilantro (optional, for topping, but it looks so pretty!)
For the Serving Sauce (Optional, but highly recommended!):
- 3 Tablespoons Thai chili sauce
- 6 Tablespoons jam or preserves (orange, peach, or apricot work beautifully here)
See? Not too bad! Making sure your shrimp have their tails on makes them way easier to handle while dipping and frying – it’s like a little handle for us cooks! You can totally remove them before serving if you like, but I find it adds to the fun of eating them. For more inspiration on delicious coconut shrimp, check out this awesome recipe.
Step-by-Step Guide to Making The Only Shrimp Recipes Recipe You’ll Need (2025)
Alright, let’s get this shrimp party started! Following these steps will make sure you get that perfect, golden-brown crunch every single time. It’s easier than you think, and totally worth it!
-
First things first, let’s get our dipping stations ready! Grab three medium bowls. In the very first one, whisk together your all-purpose flour, that pinch of salt, and the black pepper. In the second bowl, beat those two eggs until they’re nice and frothy. For the third bowl, you’re going to mix up the Panko bread crumbs with the sweetened shredded coconut. Give that a good stir so it’s all combined.
-
Now for the fun part – coating the shrimp! Take each peeled and deveined shrimp (remember, tails on for easy handling!) and dip it first into the flour mixture. Make sure it’s lightly coated all over. Then, dunk it into those beaten eggs, letting any excess drip off. Finally, give it a good roll in that Panko and coconut mixture, pressing gently so it sticks really well. Place these beautifully coated shrimp onto a clean plate. Repeat with all your shrimp!
-
Time to fry! Get a large skillet going over medium heat. You’ll want about 3-4 tablespoons of vegetable oil (or coconut oil if you really want that flavor boost!) spread across the bottom. Once the oil is shimmery and hot – not smoking, just hot – carefully lay about 7-8 shrimp into the pan. Don’t overcrowd it, or they won’t get nice and crispy! Fry them for about 2 minutes on the first side, until they’re golden and beautiful. Then, flip ‘em over with some tongs and fry the other side for another 2 minutes. If you like them extra crispy, go for about 2:30-3 minutes per side. You’ll see!
-
As soon as each batch is perfectly golden, scoop the shrimp out of the skillet and place them on a plate lined with paper towels. This little trick helps soak up any extra oil, keeping them super crisp. Keep frying the rest of your shrimp, working in batches. Once they’re all done, sprinkle them with that optional chopped cilantro for a pop of color and freshness. If you made the sauce, just whisk those Thai chili sauce and jam ingredients together in a small bowl. Serve the shrimp immediately with that amazing sauce for dipping!
-
For more fantastic shrimp ideas that are keto-friendly, you’ve got to check out this garlic shrimp skillet – it’s a lifesaver!
Tips for Perfect Coconut Shrimp Every Time
You know, even with a great recipe, a few little tricks can make your coconut shrimp absolutely spectacular. First off, when you’re picking your shrimp, go for large ones with the tails still on. They’re just easier to handle during the dipping and frying process – think of them as built-in handles! Make sure your oil is really at that perfect medium heat; too low and they get greasy, too high and they burn before they get crispy. And please, don’t crowd the pan! Frying in small batches is key to getting that signature crunch. It takes a tiny bit longer, but it’s totally worth it for that golden, crispy perfection.
Serving Suggestions for Your Shrimp Recipes
Now that you’ve got these amazing coconut shrimp, what can you serve them with? Oh, the possibilities! For a classic pairing that’s just *chef’s kiss*, serve them over a bed of fluffy jasmine rice – it catches all those delicious little coconut bits. If you’re feeling a bit lighter, a crisp, fresh green salad with a zesty vinaigrette is divine. And for a real treat, especially if you’re keeping it keto like me, check out this creamy Tuscan shrimp and spinach – it’s a spectacular sidekick!
Make-Ahead and Storage for The Only Shrimp Recipes Recipe You’ll Need (2025)
Got leftovers? Lucky you! You can totally store these crispy delights in an airtight container in the fridge for up to 3 days. Just don’t expect them to be *quite* as crispy as when they’re fresh, you know how fried food goes!
If you want to get ahead even more, you can freeze them! Lay them on a baking sheet in a single layer until solid, then pop ’em into a freezer bag. Reheat them in a 350°F (177°C) oven for about 10 minutes, or until they’re warm and resurrected. They’ll be almost as good as the first time!
Frequently Asked Questions About Shrimp Recipes
Got questions about shrimp? I’ve got answers! Let’s dive into some of the most common things people ask about making the best shrimp dishes, especially this coconut shrimp recipe. For more amazing ideas, definitely check out all the recipes over at my recipe page!
Can I bake this instead of frying?
Oh, you totally can! If frying isn’t your thing, or you want a lighter version, baking works surprisingly well. Just arrange your coated shrimp on a baking sheet lined with parchment paper and bake at 400°F (200°C) for about 12-15 minutes, flipping halfway through, until they’re golden and cooked through. They won’t be *quite* as crispy as fried, but still super delicious!
What kind of shrimp is best for this recipe?
For this particular recipe, I really recommend using large raw shrimp with the tails still attached. The tails make them easier to handle when dipping and frying, like little edible handles! Just make sure they’re peeled and deveined before you start. If you’re using frozen shrimp, thaw them completely first – nobody wants watery shrimp!
How can I make this coconut shrimp spicier?
Great question! If you love a kick, there are a few ways to spice things up. You can add a pinch of cayenne pepper or red pepper flakes directly into the flour mixture. Or, for a real flavor boost, add a teaspoon or two of Sriracha to the egg wash before dipping the shrimp. And of course, you can always serve them with an extra dash of hot sauce!
How do I store and reheat leftover shrimp?
You bet! Leftovers can be stored in an airtight container in the fridge for up to 3 days. Just know that fried foods tend to lose a bit of their crispness once refrigerated. To reheat, I find popping them in a 350°F (177°C) oven for about 5-10 minutes is best. It warms them through and gives them a little crisp revival!
Nutritional Information (Estimated)
Hey there! Just a heads-up, this nutritional info is an estimate, okay? It can change a bit depending on the exact brands you use and if you go light or heavy on the oil. But generally, for one serving (about 4-5 shrimp with sauce), you’re looking at roughly 350-400 calories, around 20-25g of fat, 25-30g of protein, and 15-20g of carbs. Enjoy!
The Only Shrimp Recipes Recipe You’ll Need (2025)
Ingredients
Equipment
Method
- Prepare three medium bowls. In the first bowl, combine the flour, salt, and pepper. Beat the eggs in the second bowl. In the third bowl, mix the Panko bread crumbs and shredded coconut.
- Dip each shrimp first into the flour mixture, then into the beaten eggs, and finally dredge it in the coconut mixture. Press gently to ensure the coconut adheres well. Set the coated shrimp aside on a plate.
- Heat enough oil to cover the bottom of a large skillet over medium heat. Fry the coconut shrimp in batches of 7-8 shrimp at a time, ensuring not to overcrowd the pan. Flip the shrimp after 2 minutes and fry the other side for another 2 minutes, or until golden brown. For a darker crisp, fry each side for about 2:30-3 minutes.
- Place the cooked coconut shrimp on a plate lined with paper towels as you continue frying the remaining shrimp. Sprinkle with chopped cilantro if using. Mix the dipping sauce ingredients together and serve with the shrimp.
- Cover and store any leftover shrimp in the refrigerator for up to 3 days.
Notes
Tried this recipe?
Let us know how it was!