
Can you just feel that buzz in the air? New Year’s Eve is all about glitz, glamour, and making wishes when the clock strikes twelve! If you’re anything like me, you want your party food to shine almost as brightly as the confetti.
Forget boring old sugar cookies; we are making treats that actually look like a celebration. That’s why I’m sharing my absolute obsession: these 12 New Year’s Eve Cookies (Sparkly & Fun). They look complicated, but trust me, they come together beautifully. Seriously, check out the inspiration over at these sparkly examples; mine are just as dazzling!
I remember one year, I had a whole crew over, and we decided to have a massive baking marathon to prep for the night. Flour everywhere, laughter echoing, and by midnight, we had platters piled high with these shimmering beauties. Those cookies tasted like friendship and fun! They truly remind you how food can create the best memories.
If you’re looking to dazzle your guests with easy-to-make, incredibly festive desserts, you’ve found the right spot. Let’s get baking!
Why You Will Love These 12 New Year’s Eve Cookies (Sparkly & Fun)
Look, planning a party is stressful enough, right? You need desserts that look like you spent days fussing over them but actually took hardly any time at all. That’s the magic here!
These 12 New Year’s Eve Cookies (Sparkly & Fun) are going to make everyone at your gathering stop mid-conversation just to take a picture. Here’s why I insist everyone tries this design:
- They deliver maximum WOW factor with minimal artistic skill. Seriously, if you can cut a circle, you can make these cookies look gourmet.
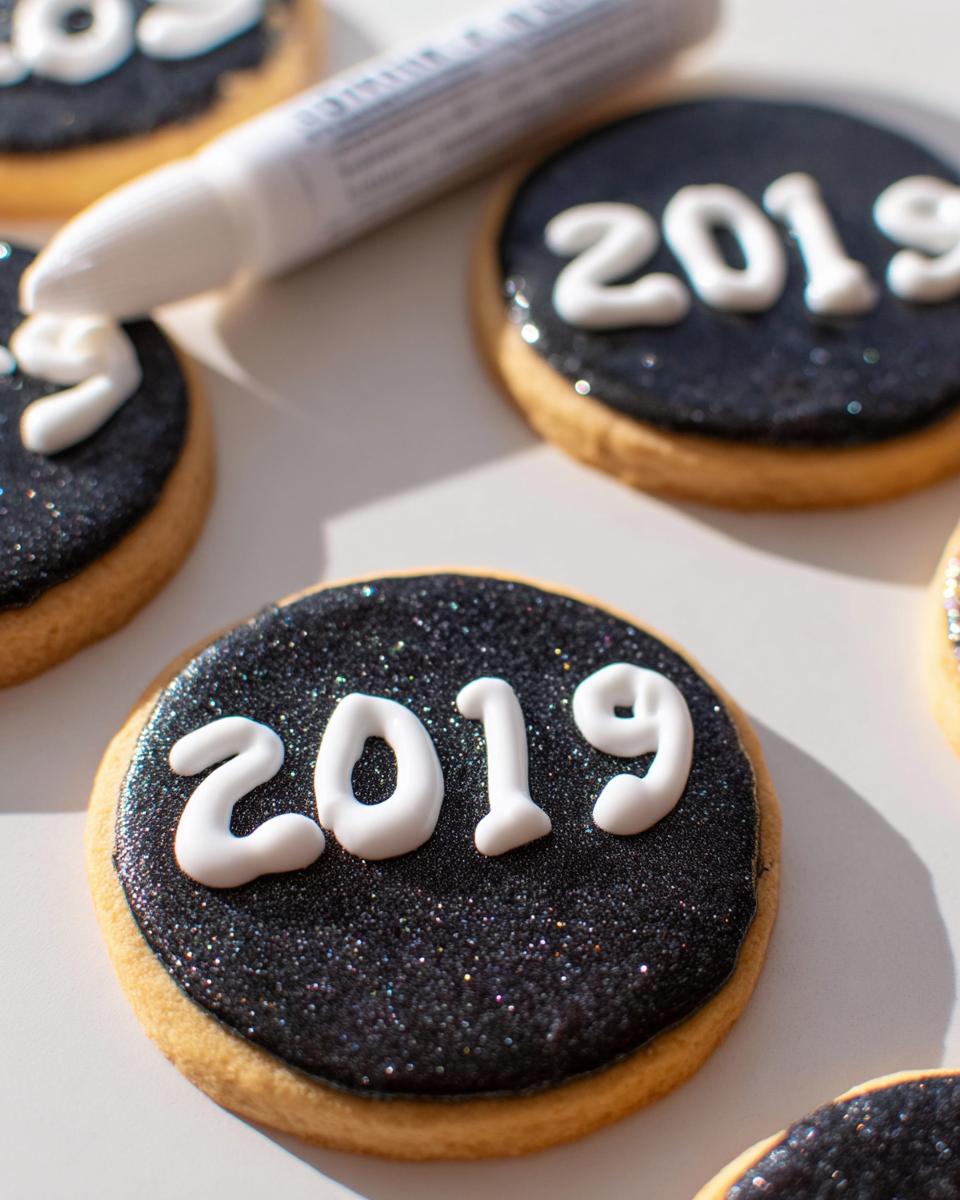
- The black fondant base paired with the edible glitter makes them look rich and sophisticated, ready for any fancy champagne toast.
- They hold up great! Unlike delicate pastries, these sturdy cookies are perfect for setting out early in the evening without worrying about them melting or crumbling.
- You get that delightful textural contrast—the smooth, slightly chewy fondant against the crisp sugar cookie edge. It’s heaven!
- Best part? They are so quick to decorate once the base is done. You’ll have a full platter ready fast, freeing you up to actually enjoy your own party!
Essential Equipment for Your 12 New Year’s Eve Cookies (Sparkly & Fun)
Okay, let’s talk tools. You don’t need a whole bakery setup for this fantastic design, but the right items make the whole process of turning out these 12 New Year’s Eve Cookies (Sparkly & Fun) so much easier.
My advice is always to use what you have, but invest in quality for the things that touch the food directly. Here are the must-haves for that perfect circle shape and handling the baked goods.
- Cookie Cutter: You absolutely need a good, sharp cookie cutter. Since we are topping these with fondant layers, you need two cutters that are the exact same size! I recommend a 3-inch circle—it gives you enough real estate to pipe those festive numbers without looking too cramped when you add the glitter.
- Wire Rack: This isn’t just for cooling; it’s vital! You need perfectly cooled cookies before applying the fondant, otherwise, the warmth will melt the base of the fondant and make everything super sticky. Make sure yours is large enough to hold the entire batch at once so they all cool at the same rate.
- Rolling Pin (for Fondant): You’ll need a dedicated, non-stick rolling pin, or maybe even just a clean piece of pipe or dowel rod if you have one. Fondant sticks to everything, so wiping it down with a tiny bit of powdered sugar or cornstarch before rolling is key to avoiding tearing.
- Small Offset Spatula or Butter Knife: We need something thin and flexible to gently press the fondant circles onto the cooled cookies without leaving fingerprints all over the edges.
Having these tools ready before you even start mixing your dough means zero panic when it’s time for the fun decorating part!
Gathering Ingredients for Your Sparkly & Fun New Year’s Eve Cookies
Alright, shopping list time! Getting the right ingredients is half the battle, especially when we are aiming for that show-stopping dark background and maximum sparkle. We are keeping the cookie itself super simple so we can focus all our energy on the decoration genius.
For these 12 New Year’s Eve Cookies (Sparkly & Fun), we are breaking everything down into two main supply piles. If you’ve already got the dough situation sorted, you can skip right down to the fun stuff. Remember, I’m assuming you have baking basics like salt and vanilla, so we’re highlighting the stars of the show!
I always check my pantry for basics before heading out. If you need a good foundational sugar cookie dough recipe, you can check out my go-to batch over at my main recipe hub, which works perfectly underneath this fancy topping!
For the Cookie Base
Since the decoration is the real star here, we’re using a solid, reliable sugar cookie dough. You need a dough that holds its shape beautifully when cut—no sad, spreading circles allowed!
- Sugar Cookie Dough: You need enough dough to yield 12 perfectly cut circles. Since this isn’t a full dough recipe, make sure your preferred recipe yields about 25 oz of dough total so you have enough thickness for the topping. Make sure it’s chilled thoroughly before rolling!
For the Dazzling Decoration
This is where the magic—and the necessary sparkle—lives! Don’t skimp on the glitter here; New Year’s Eve calls for over-the-top shine!
- Black Fondant: You’ll need about 5 to 6 ounces. This gives us that classy, dark backdrop perfect for making the gold numbers pop. If your store only sells white, grab some black food gel coloring and mix it in really well until the color is deep and rich.
- White Decorating Frosting: Just a small tub will do. This needs to be thick enough to pipe cleanly but thin enough to come out of a small round tip without dragging the fondant underneath.
- Edible Food Glitter: This is non-negotiable! Get the *finest* edible gold or silver glitter powder you can find. The key to these New Years Cookies looking expensive is covering almost every inch of that black surface with shimmer. Skip the chunky sprinkles; we are going for pure, blinding sparkle!
That’s it! Just three key decoration items, and you’re ready to transform those plain circles into something worthy of the countdown!
Step-by-Step Instructions for 12 New Year’s Eve Cookies (Sparkly & Fun)
Okay, now for the actual assembly. This is the part where you feel like a pastry chef, but honestly, it’s just layering things neatly. Trust me, if you follow these steps while your kitchen is still relatively calm, these 12 New Year’s Eve Cookies (Sparkly & Fun) will turn out perfectly symmetrical and absolutely gorgeous.
We are moving from the oven to the finish line fast. Remember that my baking marathon days taught me that rushing the cooling stage guarantees a sticky, messy disaster, so don’t skip that part!
Baking and Cooling the Cookie Base
First things first, get those circles ready to go! Take your chilled sugar cookie dough and roll it out on a lightly floured surface. You want it thick enough so it doesn’t crack when you move it, but thin enough to bake evenly.
Use your chosen cookie cutter to cut out all your circles. Bake them up following your usual sugar cookie instructions—don’t overbake them; we want tender bottoms!
Once they are out of the oven, carefully transfer them to your wire cooling rack. Here’s the time-sensitive part: you must let these cookies cool completely. I mean *completely*. That required 15-minute cooling time is crucial before we do anything else, or the fondant will just slide right off!
Applying the Black Fondant Layer
While those cookies are chilling out, it’s fondent time! Take your black fondant and start rolling it out. You are aiming for a thickness of about 1/4 of an inch. If it’s too thin, it’ll tear when you transfer it, and if it’s too thick, it’ll look bulky on our cookie.
Once you have a nice, even sheet, take that *exact same* cookie cutter you used before and punch out 12 black fondant circles. The beauty of this step is that the two layers will match perfectly.
Now, gently pick up one fondant circle—I like to lift mine using a wide, thin spatula to support it—and carefully press it right onto the top of one cooled cookie. Press down very lightly just around the edges to make sure it adheres evenly. We want a smooth, dark canvas!
Piping the New Year’s Design and Adding Sparkle
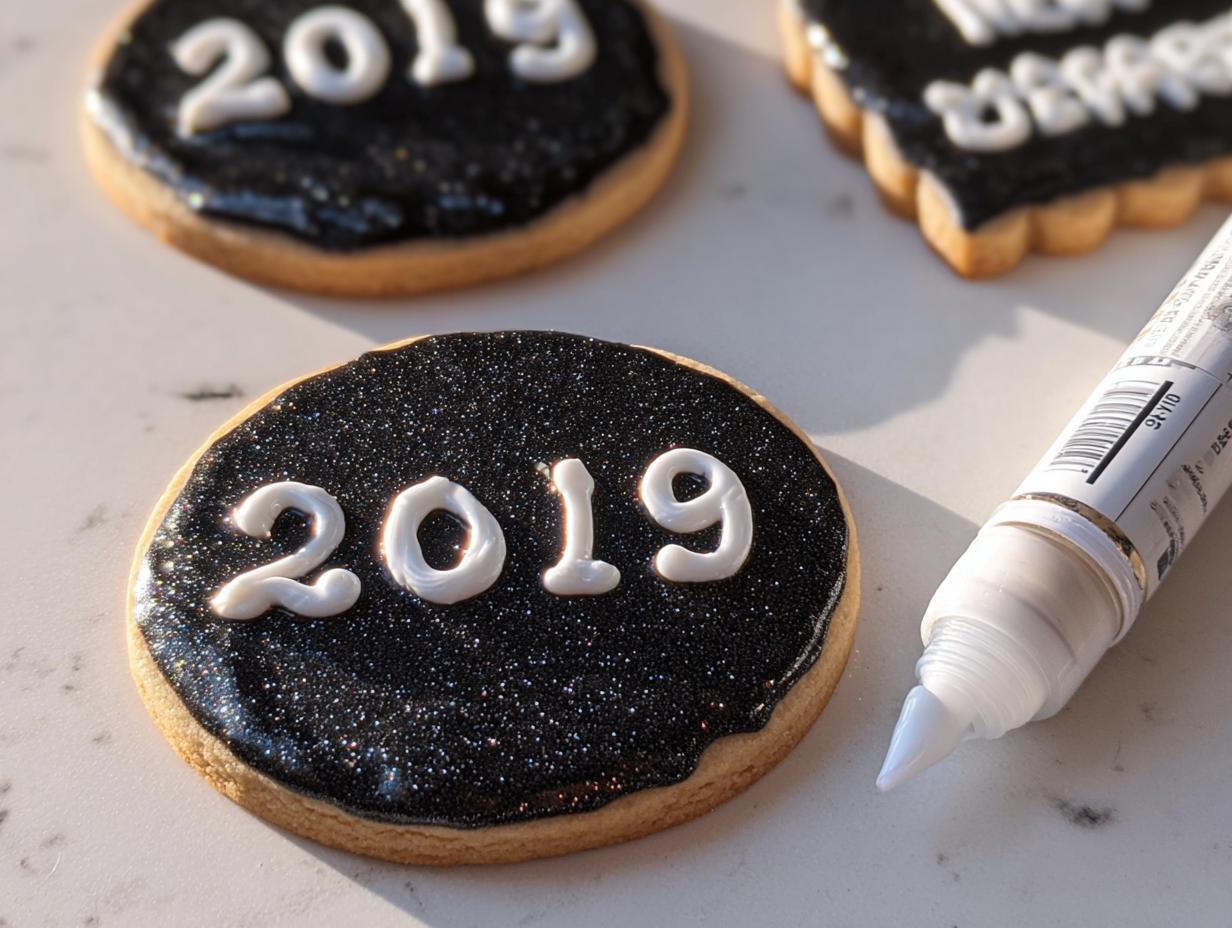
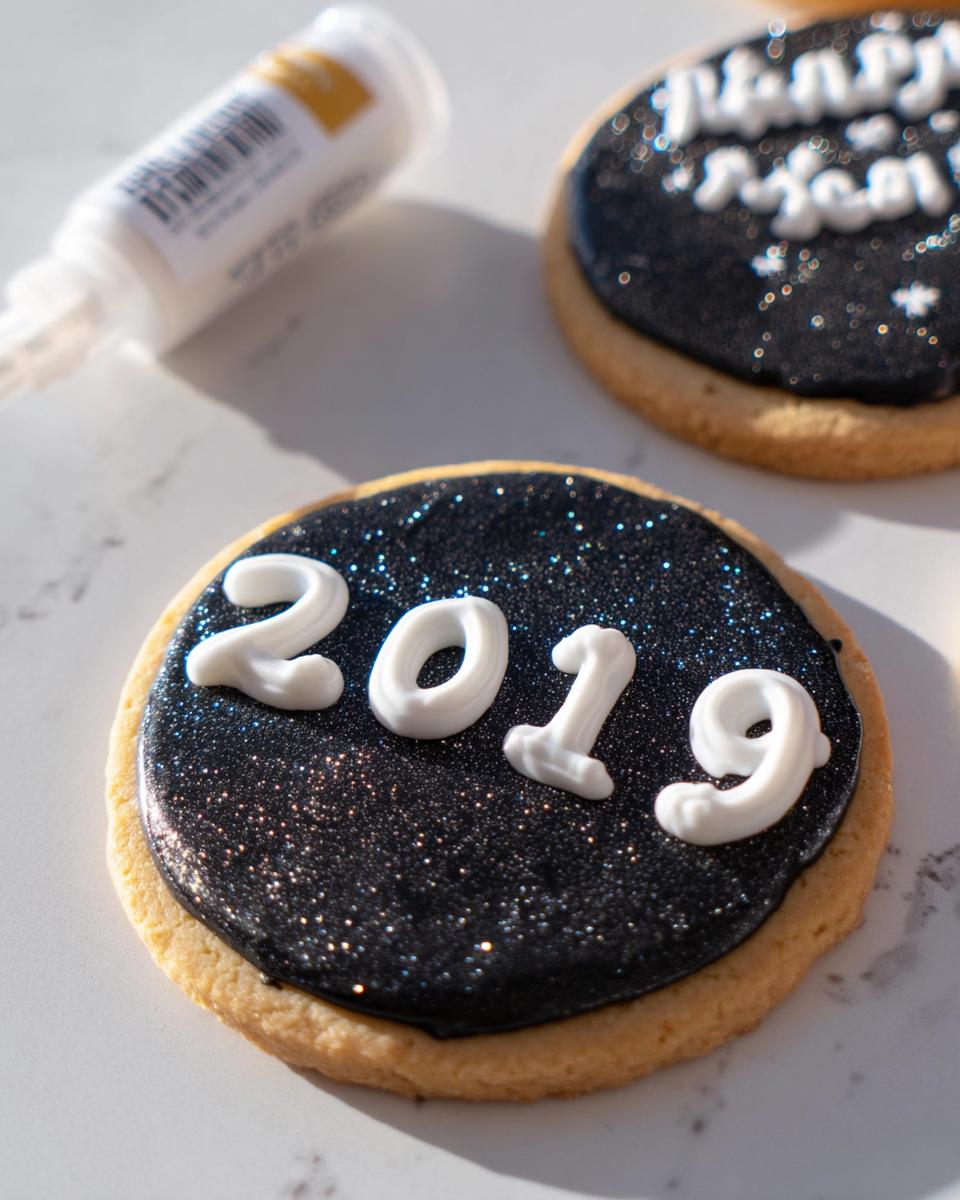
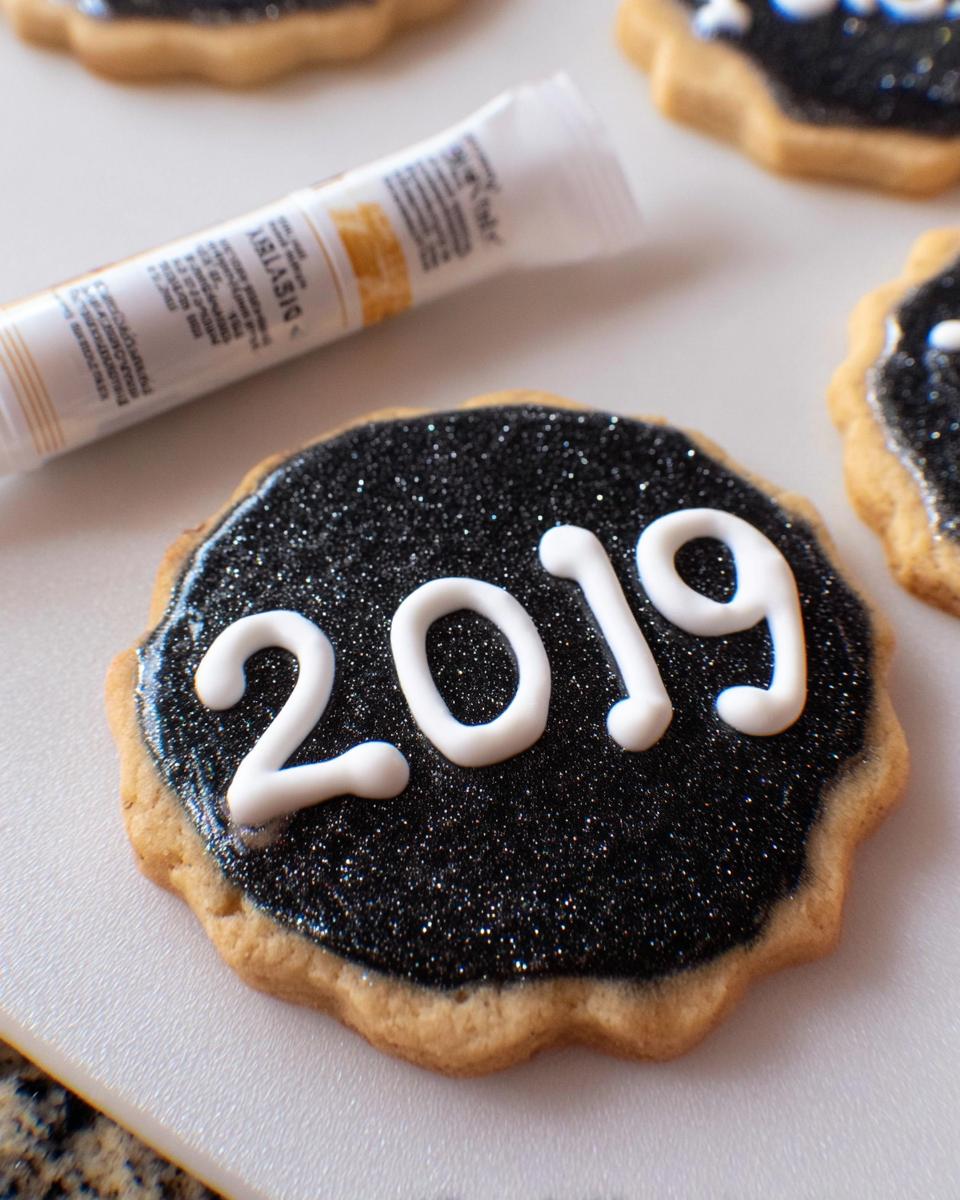
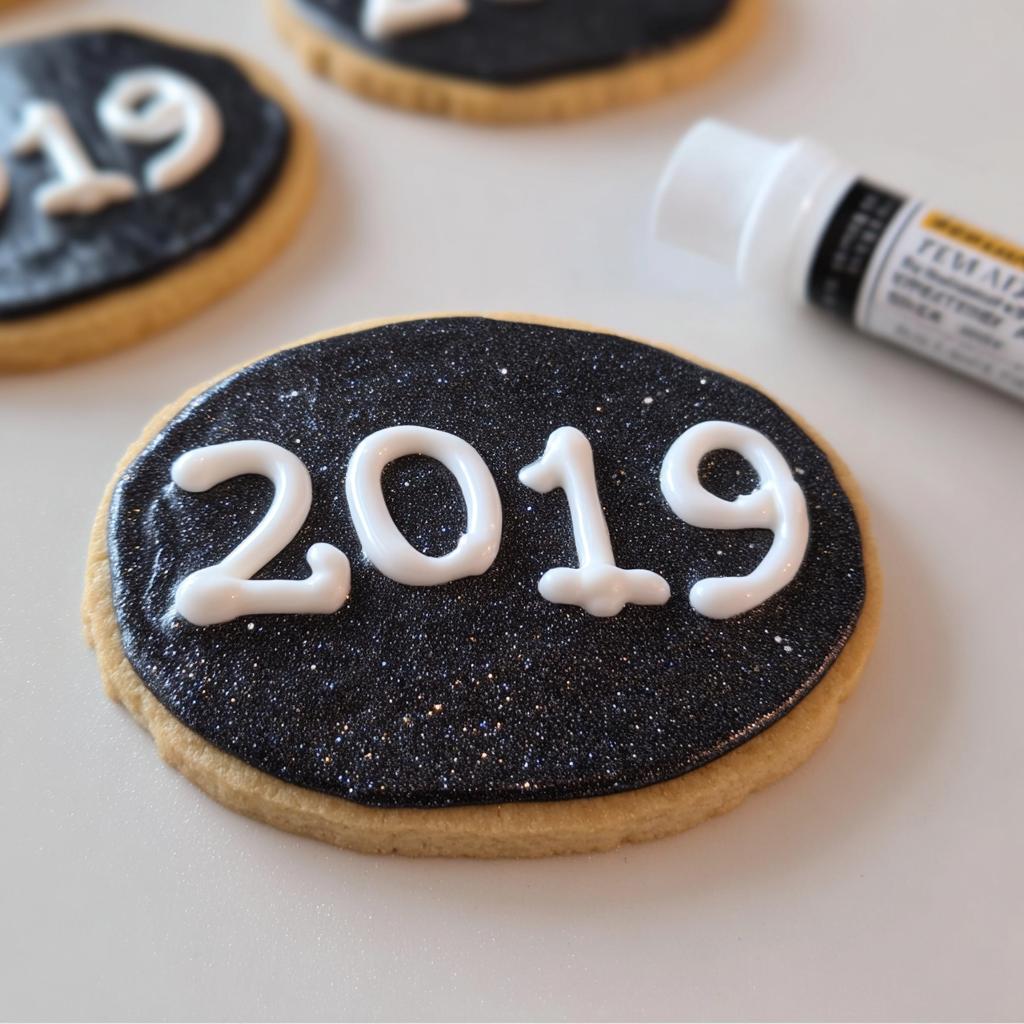
Time to bring out the decorating frosting! Fit your piping bag with a very small, round tip. Pipe the year—that’s usually “2019” or whatever year you are celebrating—right onto the center of that black fondant layer. Make your lines firm and clean. You want those numbers to stand proud against the dark background.
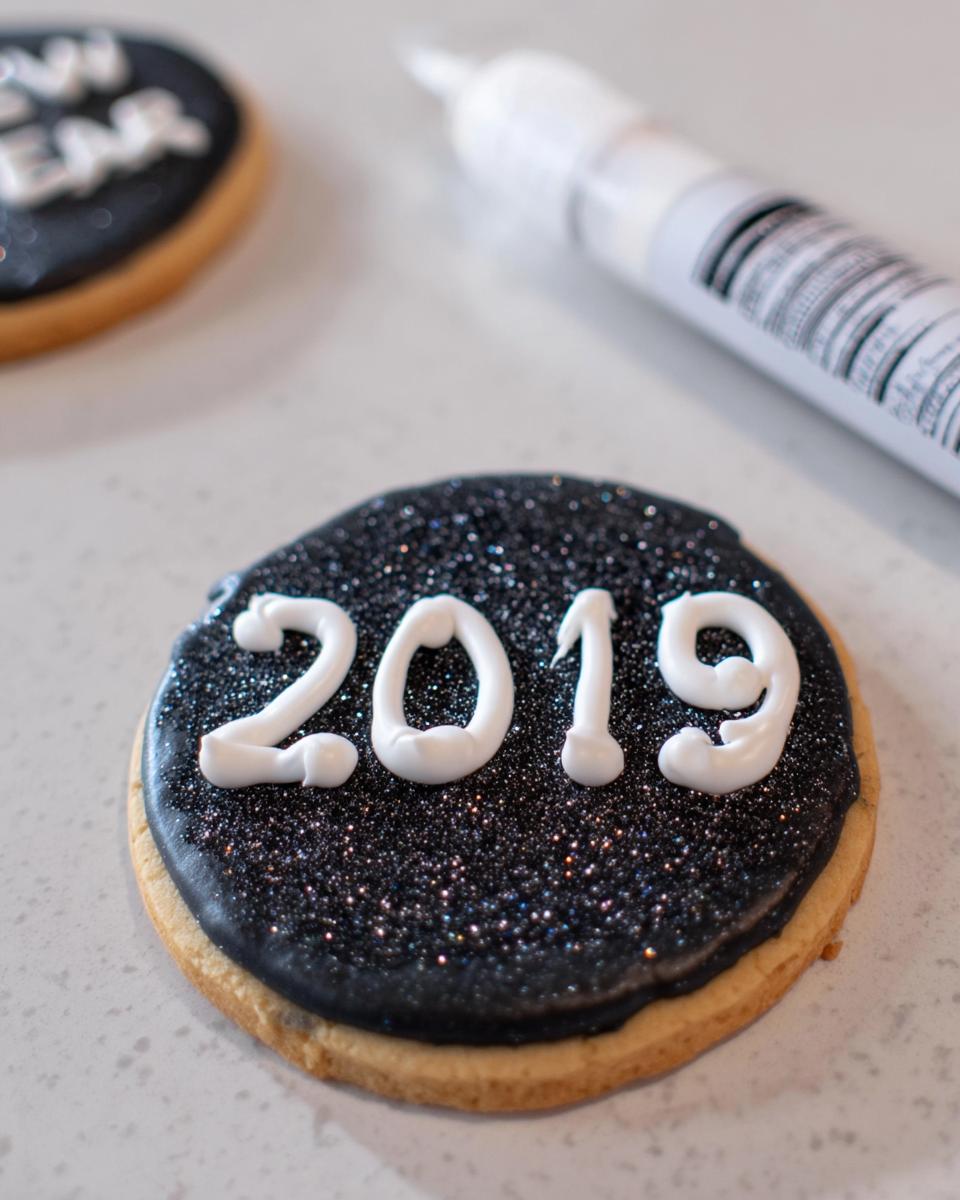
And now, the grand finale! This is what transforms the cookie into real party gold. Take your edible food glitter—and be generous!—and just sprinkle it liberally over the entire surface of the cookie. Don’t just dust the edges; cover every square millimeter of that black fondant and even try to catch some gold dust on the white frosting numbers!
Once you are happy with the shine, gently tap off any excess glitter back into your jar (don’t waste that sparkle!), and pop those beauties aside to set up. If you’re using my advice from my recent trends post, you’ll see that a little excess glamour never hurt anyone!
Tips for Perfect New Year Cookie Designs
You’ve got your cookies baked and cooled, and you’ve got your gorgeous black fondant ready to go. But a few sneaky little things can trick you up during the decoration phase, especially when you’re trying to maximize that high-end, ultra-sparkly look. I’ve made all these mistakes so you don’t have to!
Here are my best tricks for making sure your New Year Themed Cookies look like they came straight from a professional cookie studio:
- Keep Your Hands Cool: Seriously, this is crucial when working with fondant. If your hands are warm, the heat transfers right to the fondant, making it sticky and hard to handle. Before you start pressing the circles onto the cookies, run your hands under cold water and dry them *completely*. A little chill helps keep the fondant firm and easy to place perfectly on the cookie base.
- The Secret to a Seamless Glitter Finish: When you think you’ve added enough edible glitter, add a little more! You want that black base completely hidden. Here’s my pro tip: If you’re worried about the glitter falling off the black fondant, gently brush the fondant with a *tiny* bit of clear vanilla extract or vodka before sprinkling. The liquid acts as a light adhesive. Since the alcohol evaporates almost instantly, it won’t change the texture, but it locks that shimmer right in place! You can find great ideas for decorating on my dedicated dessert page.
- Fight the Fondant Stickiness: If your fondant sheet keeps dragging or sticking to your counter while you’re rolling it out, don’t just throw flour everywhere! Use a light dusting of powdered sugar or, even better, unflavored cornstarch. Cornstarch is drier and won’t affect the smooth finish of the black fondant as much as flour residue might.
- Piping Practice on Parchment: Before you even consider piping those important numbers onto your finished fondant layers, just squeeze a little frosting onto a sheet of parchment paper first. See how the line flows? Adjust the pressure or icing consistency until you get that perfect, clean bead. This prevents you from ruining a perfectly glittered cookie because your icing was too thick!
These little adjustments—keeping cool, wetting the surface for glitter adhesion, and practicing piping—really separate an okay cookie from an absolutely show-stopping one!
Storage and Making Ahead for Your 12 New Year’s Eve Cookies (Sparkly & Fun)
Planning a big bash means getting ahead where you can, and luckily, these sparkling beauties are built to last! You absolutely do not have to decorate these on New Year’s Eve day. In fact, I truly recommend making them ahead of time because decorating those sharp lines and getting that perfect layer of edible glitter takes focus!
For the best result with your 12 New Year’s Eve Cookies (Sparkly & Fun), I suggest freezing the cookie bases plain immediately after baking and cooling them completely. They freeze wonderfully!
When it comes to storage for the fully decorated cookies, we need to protect that glitter and those piped numbers. Here is how I manage the logistics:
- Making Ahead (Decoration): You can safely decorate these cookies up to two days in advance. Any longer, and the fondant starts to get a little too soft, even in airtight containers. The sugar cookie base itself stays fresh for nearly a week, but the decoration detail requires that shorter window.
- Airtight is Everything: Once the white frosting lines are dry—give them at least an hour at room temperature after the final glitter sprinkle—it’s time to seal them up. Place them in a single layer in a sturdy, decorative cookie tin or a hard-sided plastic container. Don’t stack them unless you put a layer of parchment paper or wax paper between each layer. Trust me, you don’t want that glitter from Cookie A ending up on the side of Cookie B!
- Freezing the Finished Cookie: If you absolutely need to make them a week out, you can freeze the finished, decorated cookie. Wrap each one individually in plastic wrap first, then tuck them all into a freezer-safe, airtight container. When you thaw them, leave them wrapped on the counter for an hour before unwrapping. This prevents condensation from making the glitter or fondant weep.
If you follow that advice, your desserts will be ready to go, and you can focus on the fun part—like checking out the best low-effort appetizers on my simple supper trends page!
Frequently Asked Questions About New Year Themed Cookies
I know you might still have a few little sticking points once you gather your supplies, especially when dealing with fun, multi-layered decorations like this. It’s totally normal to wonder about substitutions or the best methods for achieving that high-shine look on your New Year Themed Cookies!
Here are the questions I get most often when people try this sparkly design. If you still have questions after this, feel free to shout over to me via my contact page at my contact form!
Can I use royal icing instead of white decorating frosting?
Oh, absolutely you can! Royal icing dries much harder than the standard tub frosting I suggested. If you use royal icing to pipe your numbers, you will get a sharper, more defined look, which is great. The trade-off is the drying time. Royal icing takes longer to set up—sometimes hours, depending on humidity—before you can safely sprinkle the edible glitter on top without smearing it. If you have the patience for the drying time, go for it! If you need to move fast, the simple decorating frosting works quickly because it only needs to be tacky for the glitter to stick.
What is the best way to apply edible glitter?
This is the most important question for maximizing sparkle! Resist the urge to just shake it from a shaker container; you waste so much that way. The best method is the ‘dusting’ technique. Take a clean, small fluff-tip paintbrush—only use this brush for food, mind you!—and dip it directly into your edible glitter jar. Then, hold the brush over the cookie and give the handle a gentle tap or flick. This releases a fine, even cloud of glitter right where you want it. Do this a few times over the cookie until you achieve full coverage. It looks professional every single time.
Can I make these cookies without fondant?
Yes, you totally can! Fondant is great because it gives you that perfectly smooth, matte black backdrop, but it’s not everyone’s favorite texture. If you skip the fondant entirely, you have two other choices to get a dark look. Choice one: use a very dark chocolate ganache that has been chilled and set firmly as your base layer. Choice two, which is even easier: just use a plain sugar cookie base, then use black royal icing (colored dark navy or black) to cover the entire cookie surface. Let that icing dry completely, and then sprinkle your glorious edible glitter on top. It achieves a similar dark, sparkly effect!
Nutritional Estimate for These Party Dessert Cookies
Now, I know we are not making these cookies for their health benefits, right? They are for celebration, glamour, and having an amazing time ringing in the New Year! But for those of you who like to keep a rough eye on things (I totally get it; sometimes you just need a baseline!), I’ve put together a very rough estimate for one of these sparkly treats.
Please take this data with a massive grain of salt—and maybe a sprinkle of that edible glitter! Since we are using a stored sugar cookie dough and the fondant adds extra sugar, these are definitely an indulgence for your Party Dessert spread. This estimate is based on a standard, store-bought sugar cookie size and the average amounts of fondant and icing used per cookie.
For a true precision count, you would need to use my keto-focused recipes over at calorie-smart recipes page, but for these traditional, fun cookies, here’s the ballpark figures per cookie:
- Calories: Approximately 250 – 280 kcal
- Total Fat: Around 12g – 14g
- Protein: Roughly 3g
- Total Carbohydrates: Hovering near 35g – 40g (This includes all the sugar from the cookie, fondant, and frosting!)
They are rich, they are sweet, and they are worth every single calorie when you look at them glittering under the party lights! Don’t worry too much about the numbers; just make sure you have a glass of water handy, and enjoy every second of that delicious, crunchy edge and sweet frosting!
Share Your Sparkly & Fun 12 New Year’s Eve Cookies Creations
Wow, we did it! We’ve covered everything from keeping the fondant smooth to achieving that perfect, blinding edible glitter finish. I’m so excited for you to try making these stunning 12 New Year’s Eve Cookies (Sparkly & Fun) for your countdown celebration. I truly hope they bring as much joy and fun to your party as they brought to my baking marathon with friends years ago.
Baking is always meant to be shared, so I absolutely want to see what you create! Don’t just tell me about it—show me!
When you get these gorgeous treats onto your serving platter, I’d be thrilled if you stopped by to tell me about it in the comments below. Did you try a silver fondant instead of black? What number did you pipe on your New Year Cookie Designs? Let me know which of the 12 ideas you loved the most!
If you snapped a picture (and you totally should have, because these cookies beg to be photographed!), tag them on social media! Use the hashtag so I can find them easily. Seeing your beautiful, shimmering masterpieces truly makes my day and inspires me for next year’s baking adventures.
If you loved how simple yet dazzling this recipe was, please take a quick second to rate the recipe above—it really helps other party planners find the best holiday treats. And if you want more stunning, easy recipes for the upcoming year, make sure you check out all the fun stuff I’m constantly sharing on my About page!
Here’s to a night full of laughter, good company, and tons of delicious, sparkly cookies!
Sparkly & Fun New Year’s Eve Cookies
Ingredients
Equipment
Method
- Cut cookies into circles using a cookie cutter. Bake cookies according to recipe directions and allow to cool completely on a wire rack.
- Roll out your fondant so that it’s about 1/4 of an inch thick.
- Using the same cookie cutter that you used for your cookies, cut out circles from your black fondant.
- Press the circle fondant pieces on each cookie.
- With your decorating frosting, frost out “2019” on each cookie.
- Sprinkle the entire cookie with edible glitter.
- Serve and enjoy!
Notes
Tried this recipe?
Let us know how it was!
Precision Keto Scientist
Numbers don’t lie, and neither do my recipes. I’m a biochemist who fell into keto cooking through my own metabolic research—and I approach recipe development like a lab experiment, complete with macro calculations precise to the tenth of a gram.
My journey started in diabetes research labs at Johns Hopkins, where I spent six years studying how different macronutrient ratios affected insulin sensitivity. Personal experimentation with therapeutic ketosis for cognitive enhancement led me down a rabbit hole of recipe testing that eventually consumed more hours than my actual day job.
While other cookbook authors describe flavors and textures, I quantify ketone elevation curves and glycemic impact data. My recipe database contains 340+ formulations, each tagged with detailed nutritional analysis, predicted ketosis timing, and optimal meal spacing. I measure salt by weight, time cooking processes to the minute, and log ingredient sourcing obsessively for consistent results.
My breakthrough research on fat-protein ratios for sustained ketosis got published in the Journal of Nutritional Biochemistry. My “Macro Math Mastery” workshops have trained over 5,000 people in precision meal planning. I even collaborated with continuous glucose monitor manufacturers to create the first real-time feedback system for recipe optimization.
I left my pharmaceutical research position at Merck three years ago to focus on metabolic nutrition consulting. Now I work with professional athletes, biohackers, and medical professionals seeking therapeutic ketosis protocols. When I’m not in my lab-kitchen, I’m competing in chess tournaments or documenting my daily biomarker measurements with true data scientist obsessiveness.
Cooking is just applied chemistry—and chemistry follows predictable rules. Master the variables, control the outcomes.