
Life deciding to throw a last-minute get-together is the best kind of chaos, isn’t it? I swear, the doorbell rings just as I’m thinking about what to feed everyone. Forget spending an hour looking fancy; we can pull off absolute magic in under fifteen minutes. My secret weapon for those panicked moments is the **Cheese Board in 10 Minutes**. Trust me, you don’t need a pantry full of obscure ingredients to impress.
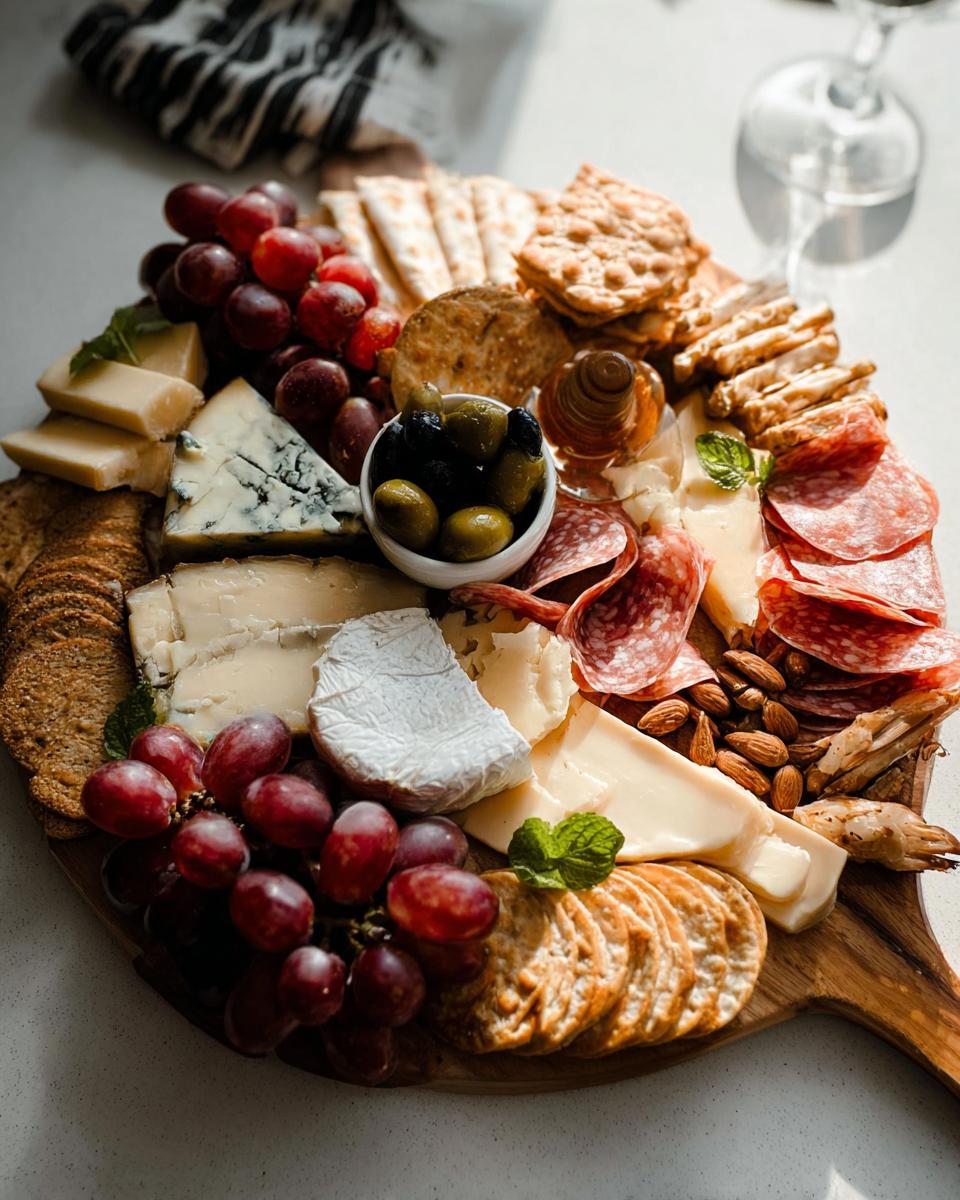
I remember hosting friends at my tiny Brooklyn place—they were literally walking up the stairs! I just grabbed what I had: a few cheeses, some almonds, and a bunch of grapes from the local market. It looked incredible! That night proved that stunning entertaining just needs simplicity and great ingredients, assembled quickly. This method is about making you look like a hosting wizard, fast.
Why You Need a Cheese Board in 10 Minutes for Effortless Entertaining
When you’re juggling city life and impromptu guests, stress eats up the fun. That’s why this fast approach is a game-changer for any busy host. Forget complicated cooking; we’re focusing on assembly. This makes your **10 Minute Appetizer** look deliberate and gourmet.
- It instantly elevates any gathering into a chic event.
- It cuts down on cleanup significantly because you aren’t using pots and pans!
- The **Quick Assembly** means you get to spend more time chatting and less time prepping.
The Secret to a Simple Grazing Board
The philosophy here is super simple: use high-quality ingredients that don’t need doctoring up. Focus on strategic placement—making a few amazing things look like dozens of choices. When the ingredients sing, you don’t have to work hard!
Essential Components for Your Cheese Board in 10 Minutes
Okay, the absolute key to creating a great Cheese Board in 10 Minutes is making sure everything is ready to eat right out of the package or fridge. We are talking zero cooking allowed for this speedy setup! We focus on textures and contrasting flavors so every little bite is interesting.
Selecting Your Cheeses: The Rule of Three or Four
You want variety, but don’t overthink it. For a board this fast, stick to three or four different types. I try to grab a soft one, like a creamy Brie, a hard, salty bite like Parmigiano Reggiano shards, and definitely something funky, like a pungent Blue or tangy Goat Cheese log. That mix covers all the bases perfectly.
Charcuterie and Savory Pairings for Your Quick Assembly
Charcuterie has to be pre-sliced, period. No time for folding specialty meats by hand! Grab some good quality, thinly sliced salami and beautiful folds of prosciutto. I toss them right onto the board near the harder cheeses—it just looks more abundant that way for a **Quick Assembly**.
Crunch and Sweetness: Crackers, Nuts, and Fruit
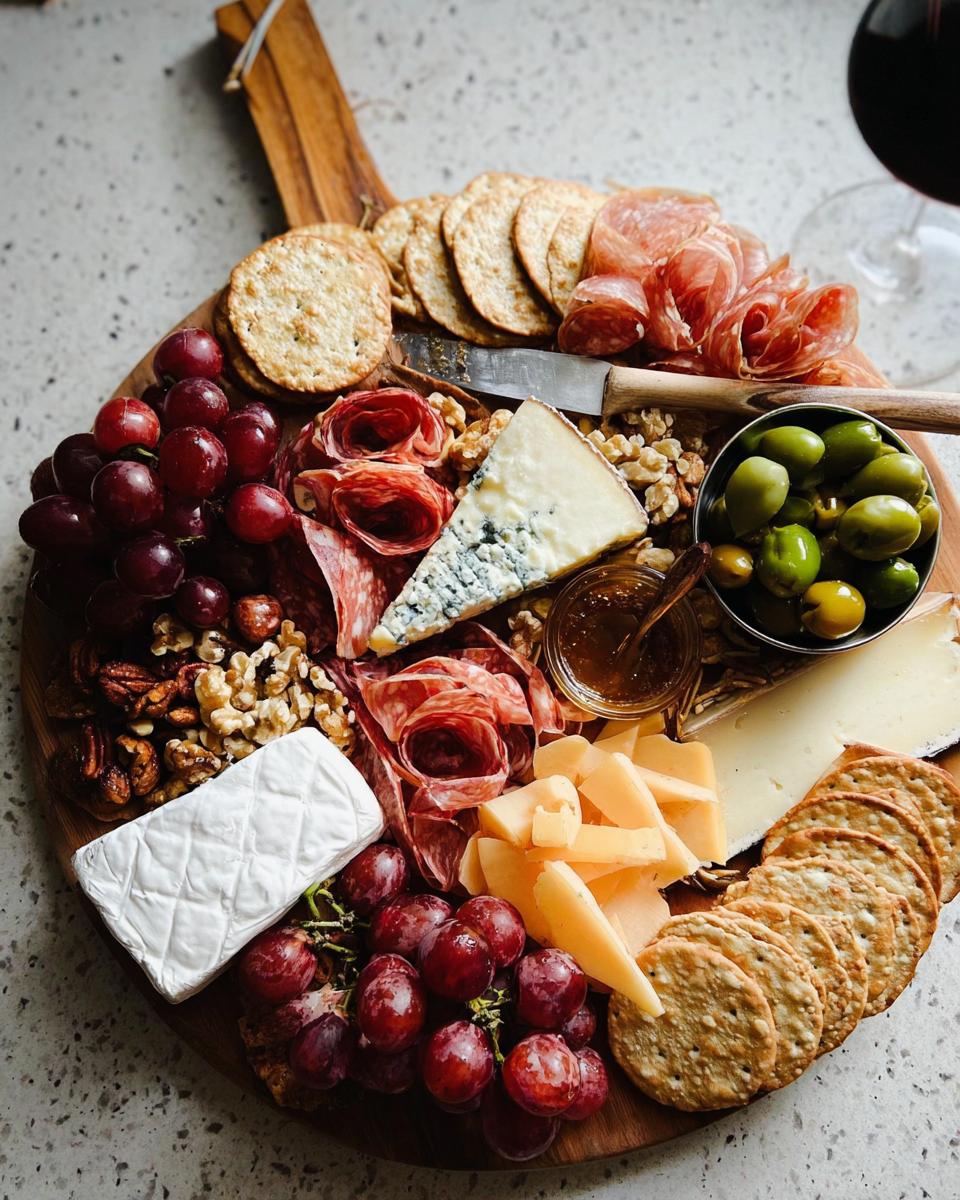
This is where texture comes in! We need crunch to balance the cheese textures. Always have a good plain water cracker box on hand, and toss in some toasted almonds or walnuts. And don’t forget structure: a bunch of red grapes or sliced apple adds that beautiful fresh element that makes the whole board pop.
Gathering Equipment for a Fast Cheese Presentation Tips
Listen, the less equipment you use, the less you have to wash later! When you’re putting together a **Simple Grazing Board** in a dash, your setup needs to be minimal but effective. You don’t need fancy slate tiles or tiny silver spoons; just grab what’s easy to access.
The most important thing for this quick setup is your actual surface. I usually grab my biggest, warmest piece of wood—a trusty cutting board is perfect. It instantly gives that rustic, ready-to-eat vibe. You can check out some other fun platter ideas over here if you’re looking for inspiration, but don’t get bogged down choosing!
Here’s the bare bones list of what you need to get plating fast:
- Your big cutting board or platter (wood or slate works best).
- Cheese knives! Seriously, use one knife for each cheese type if you can, even if they are just basic spreaders. It prevents the gorgonzola flavor from getting into your Brie.
- A butter spreader or two—these are actually amazing for scooping soft cheeses like goat cheese onto crackers.
That’s it! We’re keeping the equipment list short so we can get back to sipping wine!
The 10-Minute Assembly: Creating Your Cheese Board in 10 Minutes
Alright, this is the fun part where you get to channel your inner food stylist! Remember how I said my quick board looked vibrant? That’s because placement counts way more than time spent cooking. We are moving fast, so think big items first, then fill in the gaps. Once you get the hang of this rhythm, you truly can nail a gorgeous **Cheese Board in 10 Minutes**. If you love finding other quick meal ideas, check out my general recipe category here!
Step 1: Temperature Check and Foundation Placement
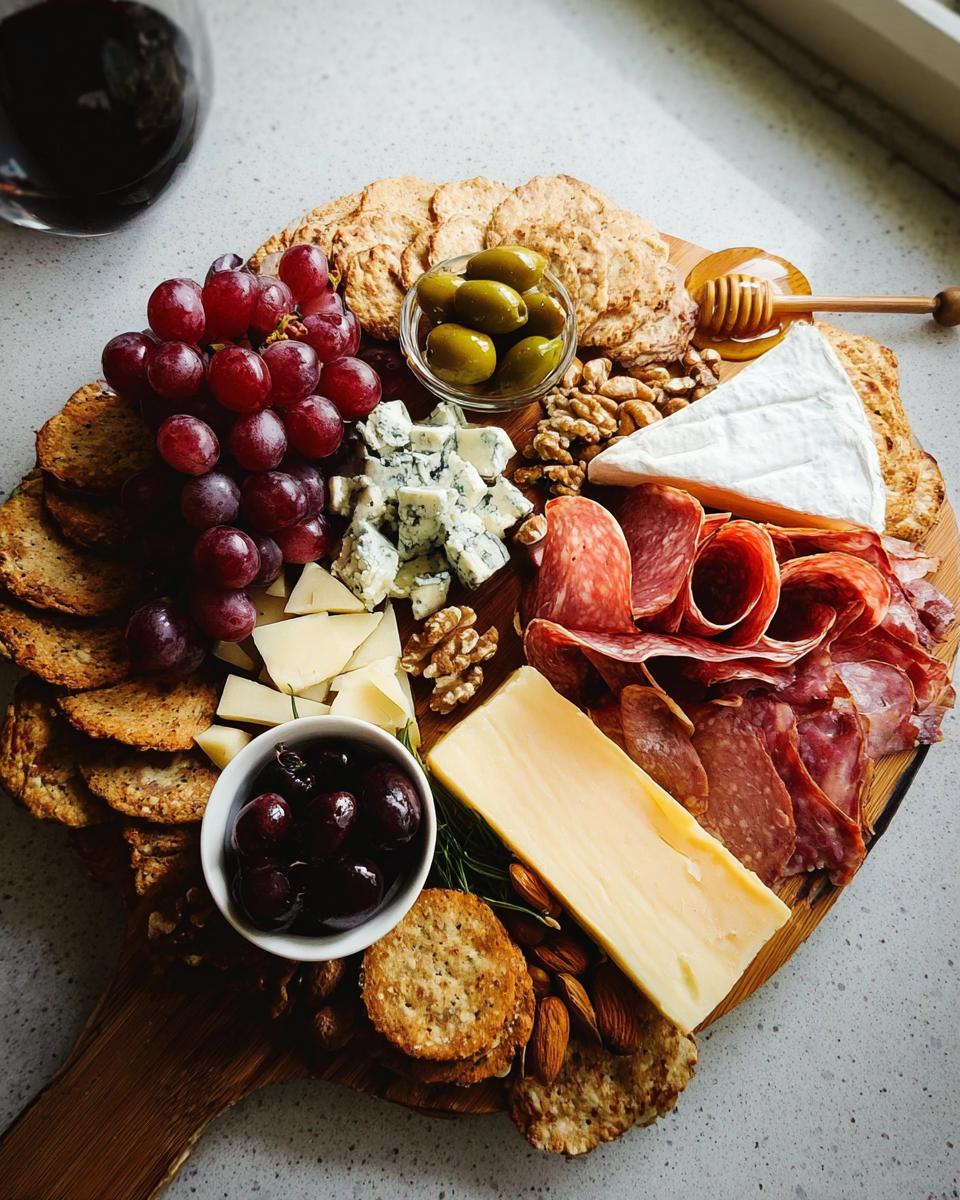
You absolutely cannot skip this, even if you’re rushed! Remember that 30-minute resting period we discussed? That’s non-negotiable for flavor. While that cheese is warming up, get your board ready. Once it’s time, start by placing your cheeses down first. I cut the Brie into wedges, leave the Cheddar in one chunk, and crumble the blue cheese onto the board. Scatter them nicely so they aren’t touching; this gives you pockets to build around.
Step 2: Arranging Meats and Creating Flow
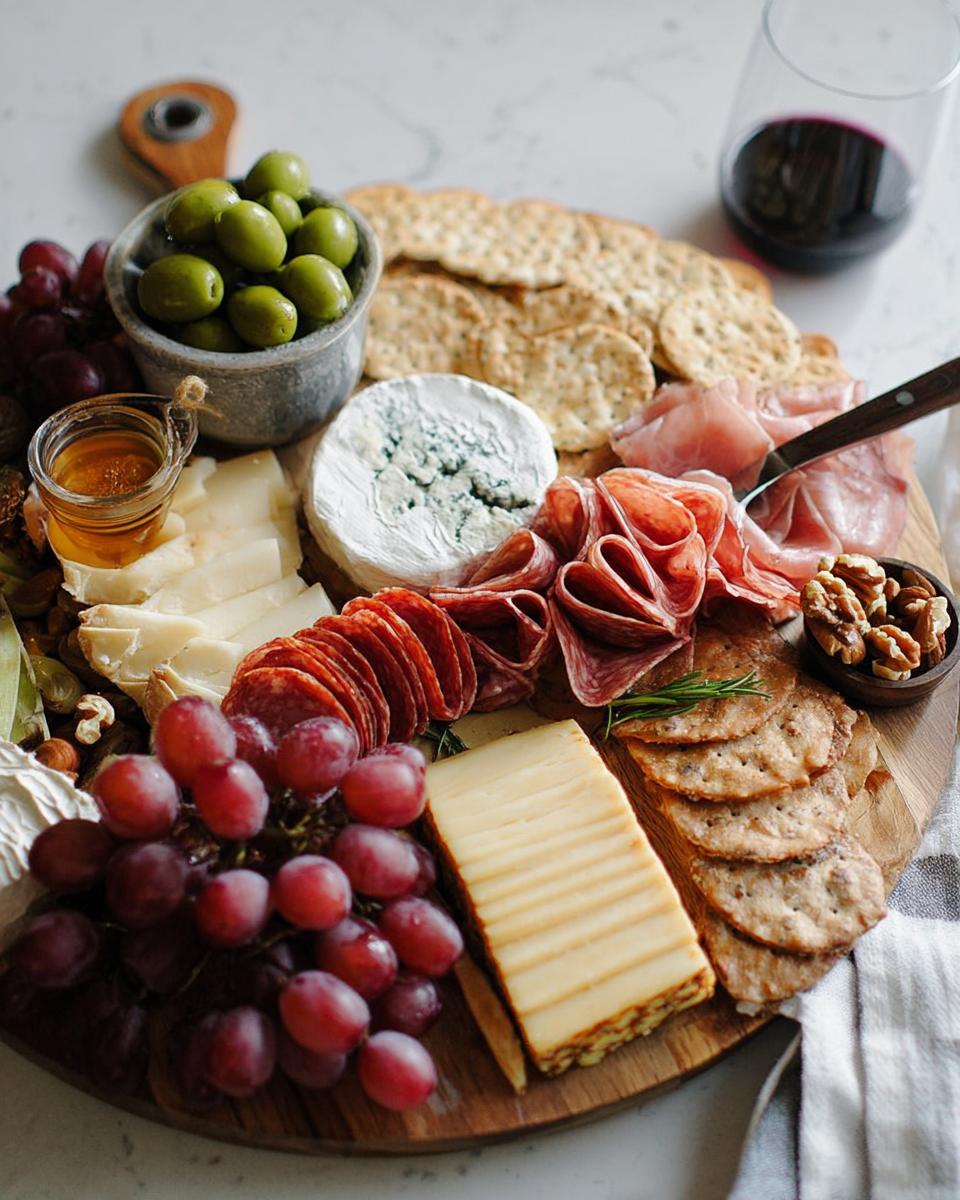
Next up are the meats. For speed, just loosely fold your salami and soppressata into thick ribbons and tuck them next to the harder cheeses. Take the prosciutto slices and gently drape them in a curvy line running between the Brie and the blue cheese. Don’t panic about making perfect rosettes; just create visual pathways so the eye travels across the board. It already looks like entertaining central!
Step 3: Filling Gaps with Accompaniments (The Final Touches)
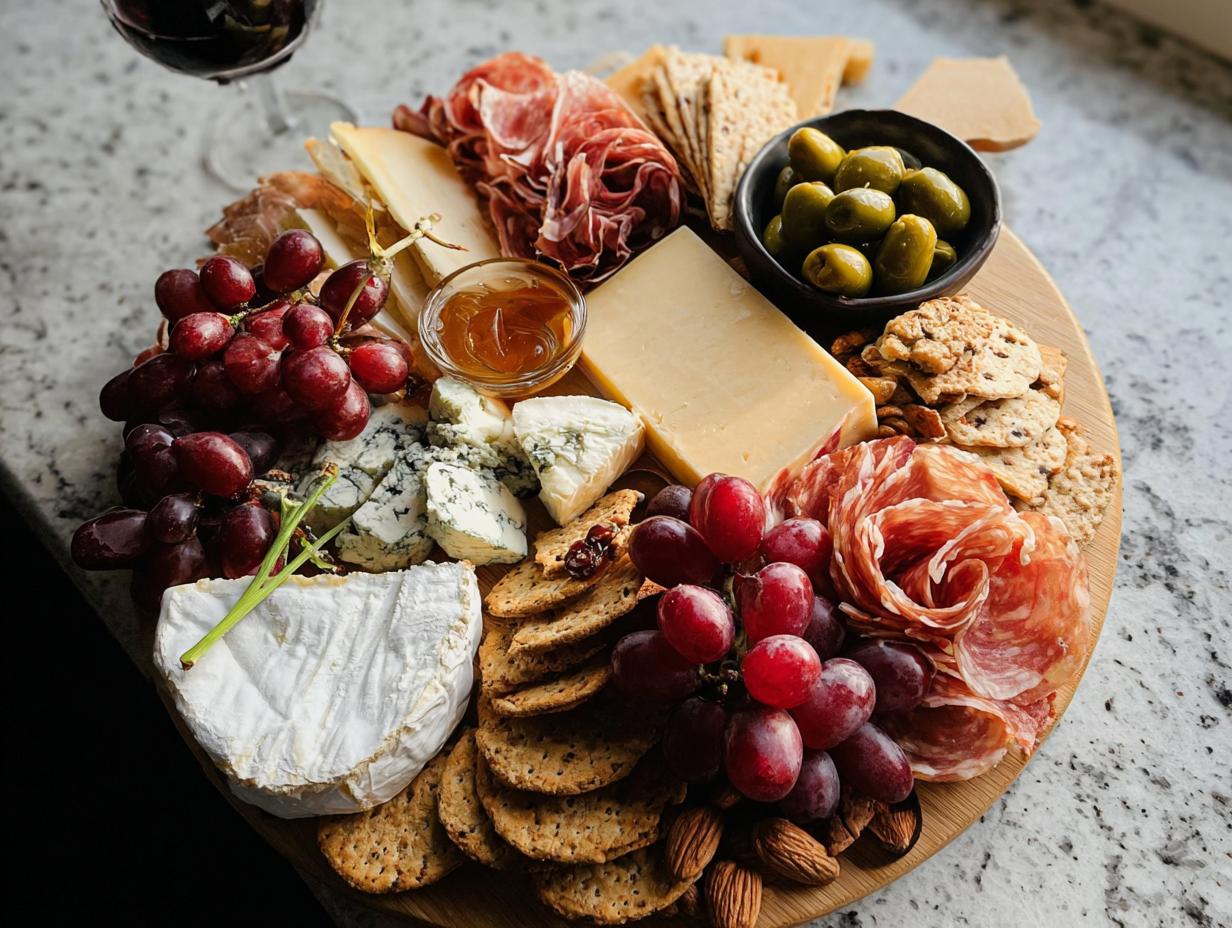
Okay, the clock is ticking down, but this step makes it look professional! Dump your almonds and walnuts into little piles in the empty spaces. Place the bowl of olives right next to the prosciutto. Now, this is my favorite part: take the red grapes and drape the vine right over the edge of the board; it looks amazing. Finally, drizzle that golden honey over the goat cheese or blue cheese—don’t be shy! A tiny bit of fresh arugula scattered around the edges is the final professional flourish to complete your **Cheese Board in 10 Minutes**.
Ingredient Notes and Substitutions for Your Simple Grazing Board
You know, sometimes you open the fridge for your **Simple Grazing Board** ingredients and realize you’re missing that one perfect item. Don’t panic! The beauty of this super-fast method is that substitutions work wonderfully, as long as you stick to the texture rules. I always keep a mental list of swaps ready for when I need a **Quick Assembly** because running to the store isn’t an option!
Cheese Swaps for Dietary Needs
If you’ve got guests who aren’t fans of the funkier stuff, it’s super easy to pivot. For the goat cheese, which can be a bit intense for some, swap it out for a nice, creamy, room-temperature Havarti or even a mild Muenster. They’re mild, spreadable, and blend right in visually.
Now, the dreaded blue cheese—some people love it, some people recoil! If you need to skip it, just bring in one more hard cheese, like an aged Gruyère, and cut it into interesting, jagged chunks. That rough texture still gives you that visual contrast you want without the strong flavor punch. Always prioritize what tastes good to your crowd!
Fruit and Nut Alternatives
Grapes are fantastic because they travel well and look great spilling off the board, but we can definitely change them up based on the season. In the fall, skip the grapes and use fresh sliced pears or a few dried figs—they look so luxe and pair beautifully with Cheddar.
If you know you’ll have someone who can’t touch nuts (allergies are no joke!), you still need that crunch element. My favorite nut-free filler is a little pile of crunchy breadsticks or pretzel crisps. They take seconds to place and give that satisfying snap when you bite into your cheese. If you’re out of olives, try cornichons or small pickled onions for that necessary salty brine!
Tips for Success When Creating a Cheese Board in 10 Minutes
When you’re moving at lightning speed, you have to rely on instincts for visual appeal, not complicated placement plans. These little tricks are what separate a messy pile of snacks from a gorgeous **Simple Grazing Board**!
First and foremost: contrast is your best friend. You don’t have time to make everything perfect, so make sure the colors fight each other a little bit! Place bright red grapes right next to the pale, creamy Brie. Tuck dark, savory olives next to the light cracker pile. This contrast makes the whole platter look richer almost instantly.
Also, embrace the height! We don’t want a flat board. That’s why cutting thick chunks of hard cheese works so well—it gives you a tall element. Then, loosely pile those salami slices; don’t stack them flat. A little bit of height draws the eye in. Don’t worry about making everything look neat; a little bit of ‘organized disarray’ looks way more inviting when you’re in a rush.
Remember that honey drizzle? Save that for the very last second. Drizzling it over the cheese right before you set it down ensures it’s still shiny and catches the light—it makes everything look fresh, even if it was assembled while you were on the phone!
To get great ideas on balancing flavors while you’re assembling this in a dash, I always look for inspiration on how to keep things simple and good. Sometimes seeing a well-laid-out plate helps me move faster, like these ideas for quick supper balancing acts.
Storage and Reheating Instructions for Leftover Cheese Board Items
Oh goodness, I hope you made too much! If somehow you managed to have leftovers from your **Cheese Board in 10 Minutes**, which is always my goal, the key is wrapping things correctly so they don’t dry out or mingle flavors overnight. Since this is an appetizer scenario, we aren’t really ‘reheating’ anything, but we absolutely need to keep that cheese quality high for snacking tomorrow!
The main thing to understand is that cheese hates plastic wrap touching its surface directly. It makes it sweat, and nobody wants slimy Brie!
How to Properly Wrap Leftover Cheese
For all your leftover hard cheeses, like that Cheddar or the Parmigiano Reggiano, wrap them tightly in wax paper or parchment first. Then, wrap that package loosely in foil or place it in a slightly open zip-top bag. This lets the cheese breathe a little bit while still keeping moisture in. Never wrap it airtight unless you like mold!
Softer cheeses—like that beautiful Brie or creamy Goat Cheese log—are a little trickier. If you only used a small part of the wheel or log, just press the original wrapping back snugly around the cut edge. If the original paper is gone, use wax paper, folding it carefully around the cut surface. Keep these types in the warmest part of your fridge, usually the veggie drawer, not right against the back wall where it gets too cold.
Storing Meats and Accompaniments
The charcuterie is the easiest, honestly. If you have leftover salami or soppressata that you unwrapped, just put them back in their original packaging or wrap them tightly in plastic wrap. Meats dry out faster than cheese does, so getting an airtight seal is important here.
For everything else—the nuts, the olives, the honey—just pop them into small, sealed containers. Those almonds and walnuts will stay cracker-crisp for ages in an airtight jar on the counter. Olives go right back into their brine in a little container in the fridge.
What to Avoid Storing Together
This might seem obvious, but never store cheese directly next to preserved meats or highly pungent items like those blue cheese crumbles. Cheese absorbs smells like a sponge, which is why we separated them on the board in the first place! If your blue cheese wraps are leaky, put them in their own small container inside the fridge so that strong flavor doesn’t ruin your mild Brie overnight. When you pull the cheese out the next day, remember to let it come back up toward room temperature for a good 20 minutes before anyone dives back in!
Frequently Asked Questions About Your Cheese Board in 10 Minutes
I get so many questions about how to keep the speed up without sacrificing style, especially when planning big **Entertaining Ideas**. It’s funny how asking a few quick questions can save you so much time! Here are the most common things people ask me when they’re trying to master the **Cheese Board in 10 Minutes**.
Can I prepare any part of this Cheese Board ahead of time?
Oh yes, prepare ahead where you can! That’s the real secret to speed. You absolutely need to pull your cheeses out 30 to 60 minutes before guests arrive, so you can’t prep that part. But you can totally wash and dry your grapes, and even pre-slice any sturdy fruits like apples or pears if you’re using those instead.
Also, measure out your honey and set out your crackers! Knowing exactly where the non-perishables go means when the cheese is ready, you spend those precious minutes just placing and drizzling, which keeps your **Quick Assembly** on track. Just keep anything cut or wet sealed up tight until the last second so it stays fresh!
How many people does this Simple Grazing Board serve?
The recipe I laid out here is designed to be a really beautiful, generous board for about two to four people as a substantial appetizer spread. If you’re hosting a bigger crowd—say, six to eight people—my advice is always to just double the amount of primary items, like the cheese and meats. Don’t try to fit it all on one board!
It looks much more abundant and impressive if you use two smaller boards instead of trying to cram everything onto one giant surface. You can even theme them! Maybe one board focuses heavily on savory meats and hard cheeses, and the second board is dedicated to sweeter items like Brie, fruit, and honey. This makes your **Simple Grazing Board** setup feel even grander.
What is the best way to cut hard cheese quickly?
This is a great question, especially when dealing with something rock-hard like Parmigiano Reggiano! You don’t want to waste time sawing away at it with your knife. For the fastest result, I take the back edge of a firm cheese knife or even the handle of a sturdy spoon and firmly press it into any natural fissure or line on the cheese. You’re not cutting; you’re breaking.
This technique causes the hard cheese to fracture into beautiful, rustic shards and chunks. Trust me, these jagged pieces look much more artisanal than perfectly square cubes for your **Entertaining Ideas**. It takes maybe three seconds per chunk and looks miles better!
If you have any specific setup questions while you’re trying this out live, feel free to reach out to me on my contact page—I love hearing when my quick tips save the day!
Share Your Quick Assembly Masterpiece
And just like that, you’ve conquered the art of effortless hosting! You have officially gone from panicked party-thrower to effortless entertainer. Seriously, take a moment to admire that gorgeous setup you created in under fifteen minutes. That stunning spread of cheese, meat, and fruit? That’s your new normal now.
I truly want to see what you came up with! Did you use olives AND dried figs? Did you drizzle that honey just perfectly? Don’t keep that delicious creativity bottled up!
Please, when you nail your own **Cheese Board in 10 Minutes**, snap a quick photo and share it with me. Tag me on social media so I can see those beautiful, fast assemblies! It helps me so much to know that these quick tricks are working for you too.
If this recipe saved your dinner party or elevated your simple Friday night snacking, please leave a rating right below! It really does matter to me. Making hosting accessible for everyone is what I’m all about, much like sharing the stories behind how I learned these tricks over on my About Page.
Go enjoy that board—you earned it!

Cheese Board in 10 Minutes
Ingredients
Equipment
Method
- Take cheese out of the fridge and let it come to room temperature for 30 minutes to 1 hour. Cheese should be served at room temperature.
- Assemble all ingredients on a large cutting board or platter.
- Enjoy!
Nutrition
Notes
Tried this recipe?
Let us know how it was!
Urban Forager & Hyperlocal Ingredient Specialist
My Brooklyn apartment balcony tells my story: vertical gardens packed with wild edibles, fermentation crocks bubbling with city-foraged greens, and the constant hum of dehydrators preserving herbs I’ve collected from unexpected urban corners. What started as weekend escapes to my aunt’s upstate farm during my Columbia botany studies turned into something bigger after I earned my Urban Ecology Master’s from The New School.
Instead of following traditional academic paths, I discovered that cities are actually amazing edible ecosystems—rooftop weeds, park-edge wild greens, vacant lot treasures that perfectly complement keto eating. Who knew that some of the best low-carb foods were growing right under our noses in Manhattan?
My recipe collections celebrate city seasons: spring dandelions and plantains, summer purslane from rooftops, autumn rose hips from community gardens, winter wild onions and cress. I’m certified through the New York Mycological Society and trained by Brooklyn Botanic Garden to forage safely and ethically. Over 180 of my recipes feature at least one urban-foraged ingredient—from sidewalk plantains to sumac berries and wild mint thriving in vacant lots.
My “Metropolitan Wild” column went viral after my dandelion coffee substitute hit social media. Now my weekend “Urban Wild Walks” through Central Park and Prospect Park sell out faster than I can schedule them. I teach city dwellers to spot safe, keto-friendly wild foods hiding in plain sight.
Currently, I’m partnering with local chefs to bring urban foraged elements to restaurant menus and developing an app that maps safe foraging spots across all five boroughs. Evenings find me tending my sourdough starters, pressing flowers for natural dyes, or weaving baskets from willow branches I collect during park maintenance.
Cities are wild food sanctuaries hiding in plain sight—keto eating becomes urban rebellion when you realize how much free, perfect nutrition grows right under our feet.