
Oh, the blissful feeling of that first sip of coffee when it’s creamy, cold, and perfectly sweet! If you think you need to stand in a long line or spend a fortune to get that café magic, I’m here to tell you, you absolutely do not. I’m Alexandra Bennet, and as an Urban Forager and Hyperlocal Ingredient Specialist, I believe the best things in life—even coffee—should be accessible and easy to make right at your own counter. Trust me, recreating that dreamy iced beverage is simpler than you think! I perfected this Vanilla Sweet Cream Cold Foam Cold Brew (Easy) after a sweltering afternoon in New York City where a single cup changed my whole outlook on summer drinks. I rushed home dedicated to making a homemade version that didn’t compromise on that luscious texture. It’s my absolute go-to now.

Why This Vanilla Sweet Cream Cold Foam Cold Brew (Easy) is Your New Favorite Drink
Look, I get it. Life is busy, and sometimes you just need that perfect caffeine fix without the fuss. This specific recipe for Vanilla Sweet Cream Cold Foam Cold Brew (Easy) isn’t just good; it’s what I turn to when I need a treat fast. I promise this will satisfy that craving for a professional coffee shop quality drink without the expense or the wait time.
- Quick Preparation Time: Seriously, we’re talking about maybe 10 minutes of active time here, tops! Once that vanilla syrup is made, assembling the drink is lightning fast.
- Café Style Flavor at Home: You get that luxurious, thick vanilla sweet cream that floats perfectly on top of the cold brew. It truly nails that creamy, sweet Starbucks Copycat experience, but you control exactly how much vanilla and sweetness goes in. Talk about customization!
Gathering Ingredients for Vanilla Sweet Cream Cold Foam Cold Brew (Easy)
Okay, let’s get organized! Because this is a slightly layered drink, keeping your ingredients straight is half the battle. Remember, since I focus on using the best ingredients I can find—like quality vanilla—it really pays off in the final taste. Don’t forget, you can find tons of general coffee tips over at The Healthy Maven if you’re looking for more inspiration!
We need two main batches of stuff: the syrup to sweeten everything up, and then the components for the actual drink assembly. It really feels official when you lay it all out like this, doesn’t it?
For the Homemade Vanilla Syrup
This is where the real flavor magic starts. Please, if you can manage it, use a real vanilla bean. The depth of flavor is incredible, but if you’re out, 1 tablespoon of pure vanilla extract works great too! Keep reading, and I’ll tell you how to store this batch so you’re set for weeks.
- 1 cup of water
- 1/2 cup of maple syrup (It browns nicely, adding depth!)
- 1 large vanilla bean, split open, or 1 tablespoon of vanilla extract
For the Cold Brew and Cream Topping
These are the ingredients for four glorious servings of that beautiful, layered drink. You can totally use your favorite store-bought cold brew concentrate here if you’re running ultra-low on time, but I always prefer the taste of my own!
- 1 cup of almond milk (This froths up beautifully!)
- 1/4 cup of the vanilla syrup we just mixed up
- 4 cups of homemade cold brew (or store-bought concentrate diluted correctly)
- Ice for serving – don’t skimp on this!
Step-by-Step Guide to Your Vanilla Sweet Cream Cold Foam Cold Brew (Easy)
Alright, let’s get down to the fun part! Making this Vanilla Sweet Cream Cold Foam Cold Brew (Easy) is totally achievable, even if you’ve never touched a specialized coffee machine. We’re going to handle the syrup first because that needs time to chill out before we can use it. I also tossed a link to my main recipe category right here if you want more easy recipes!
Making the Vanilla Syrup Base
Grab that small saucepan—no need for anything fancy! You’re combining the water and the maple syrup first. Bring that mixture just up to a boil; you want to see it bubbling so you know everything is dissolved nice and neat. The second it hits that rolling boil, kill the heat immediately. Seriously, turn that burner off!
This next part is crucial for flavor: toss in your vanilla bean—or the extract if you used that instead. If you leave the heat on when adding the vanilla, you can actually cook off all those beautiful, subtle flavors. Let it sit off the heat while it cools completely down to room temperature. Once cool, fish that vanilla bean out, pour the syrup into a jar, and tuck it away in the fridge. It’ll keep for ages!
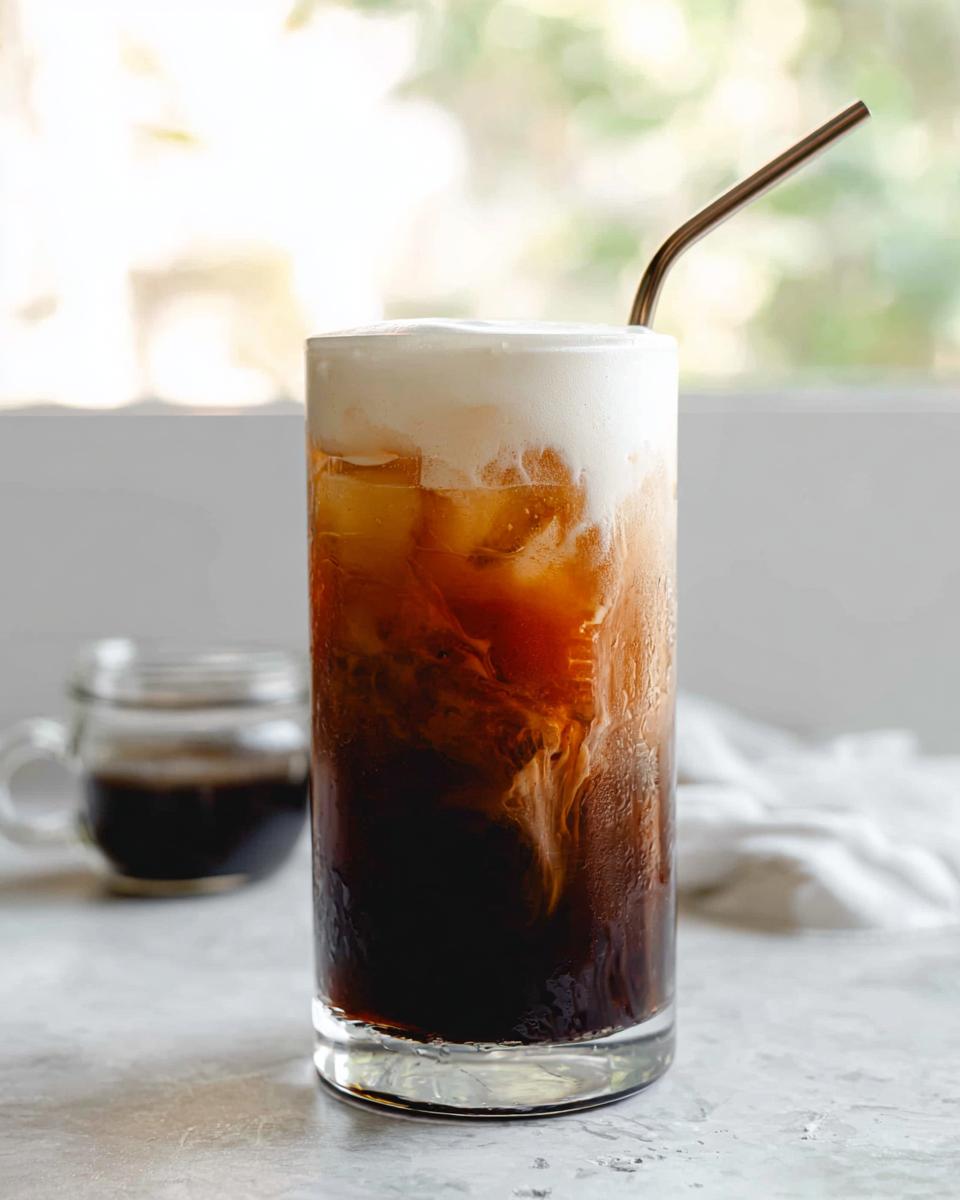
Creating the Sweet Cream Foam
Now for the fun, foamy part! This is where your specific kitchen tools come in handy, but you have options. The recipe calls for almond milk and about a quarter cup of that glorious vanilla syrup you just made. If you have a decent blender, just pulse it on high until the mixture looks thick and airy—like whipped topping, basically. Be careful opening it, though, sometimes things want to escape when blended!
If you don’t want to dirty the blender, don’t sweat it! You can use a handheld milk frother directly in a jar with the ingredients, or—my old trick—just seal the mixture tightly in a mason jar and shake like you mean it until it gets bubbly and voluminous. It takes a bit more arm work, but it totally works for that DIY Beverage vibe.
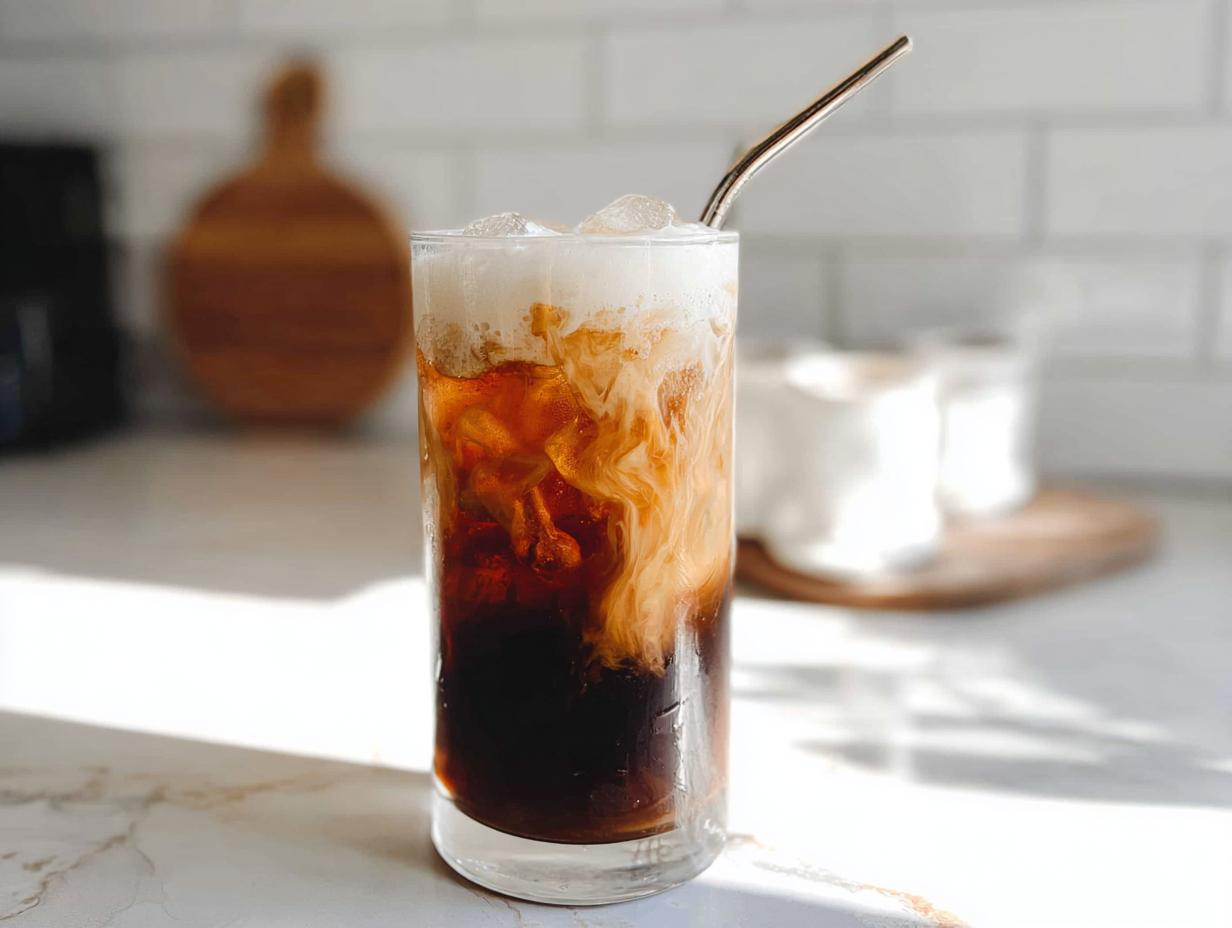
Assembling the Vanilla Sweet Cream Cold Foam Cold Brew (Easy)
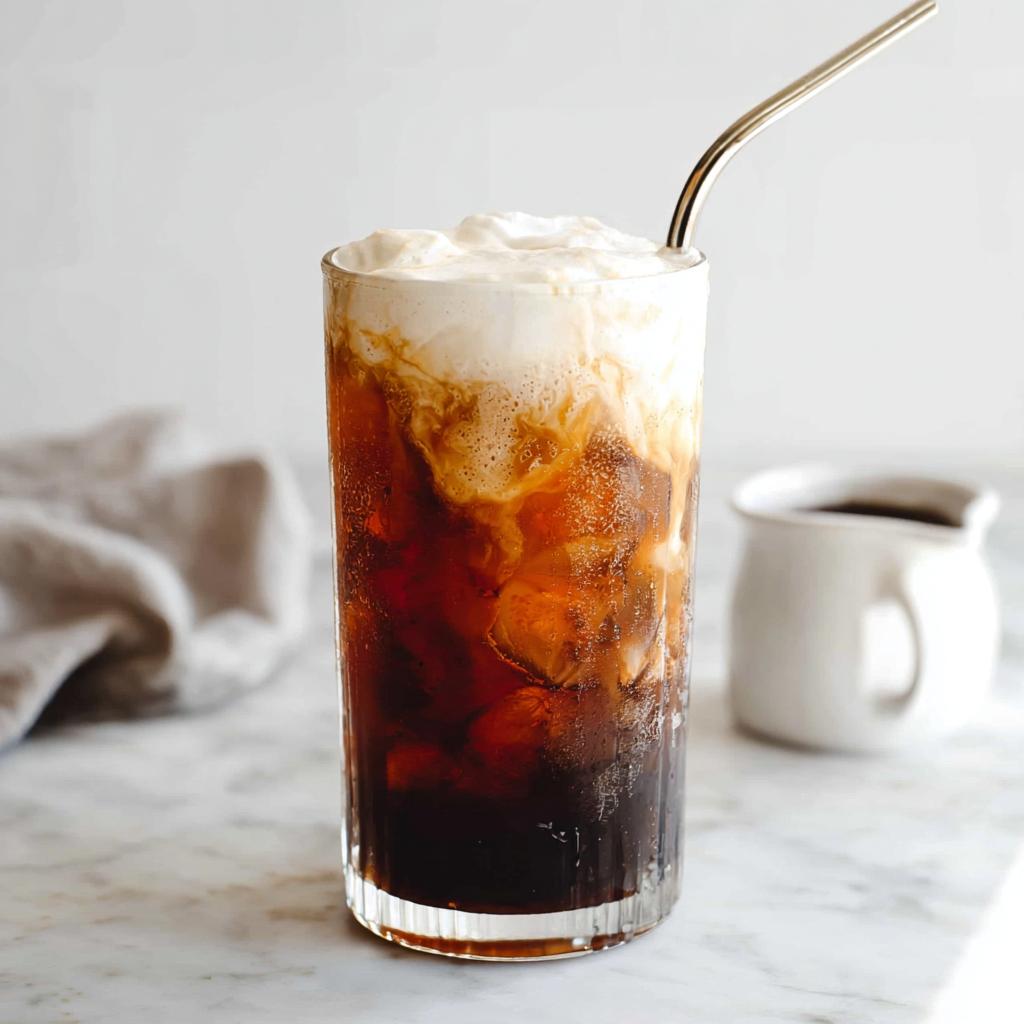
Time to build that beautiful layered drink! Grab your tallest, prettiest glass. Fill it up really well with ice first. Next, measure out about one cup of your cold brew and pour it right over the ice. It should look dark and inviting.
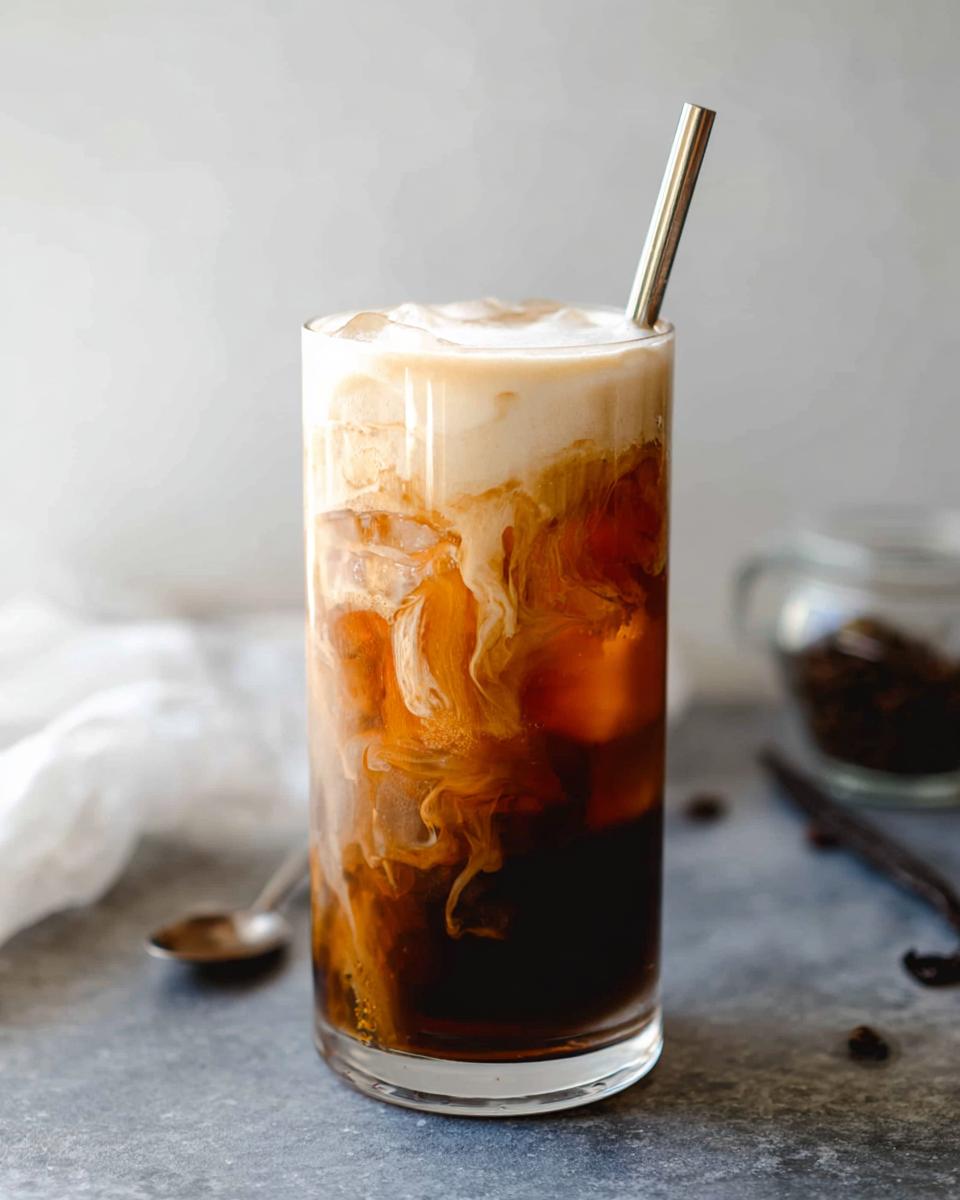
Here comes the best bit: gently spoon or drizzle that freshly frothed vanilla sweet cream right over the top of the cold brew. Don’t stir it right away! You want that visually striking layer before you take that first sip. Taste as you go; if you feel like you need more syrup mixed into the coffee layer, go ahead and stir it in, but load up that foam!
Tips for Perfecting Your Homemade Cold Brew
Listen, I’m an Urban Forager, so I truly believe that the quality of your base materials dictates the quality of your final creation. And honestly, this fancy coffee drink is about 70% about how good your cold brew is! You can nail the Vanilla Sweet Cream Cold Foam part perfectly, but if your cold brew is thin or bitter, the whole experience falls flat. Don’t let that happen to you!
My biggest secret, which ties into making this an Easy Recipe overall, is that you need to make your cold brew ahead of time. It takes zero active time, and it means that when you wake up craving this luxurious Homemade Coffee, the hard work is already done. I usually steep a huge batch every Sunday, and it lasts me through the week.
When you’re steeping your grounds, don’t go too fine on the grind. If it’s too powdery, it’s a nightmare to strain, and you end up with muddy coffee. A coarse, almost chunky grind is what you’re aiming for. Think rough sea salt texture. That gives you a cleaner extraction and a smoother base for that sweet cream to float on top of.
Also, be gentle when you stir it, especially if you’re using a concentrate that you dilute later. If you agitate it too much, you can introduce unnecessary bitterness. We want smooth, cold, clean coffee here so that the maple syrup notes from the foam really shine through. You can find some great ideas for balancing flavors in other home cooking areas over at my Pinterest trends board!
Ingredient Notes and Substitutions for Vanilla Sweet Cream Cold Foam Cold Brew (Easy)
One thing I learned living in a city is that we don’t always have exactly what we need when we need it! But fantastic coffee doesn’t require a perfect pantry, so let’s talk about swapping things out in this Vanilla Sweet Cream Cold Foam Cold Brew (Easy) recipe to keep things accessible for everyone.
The vanilla syrup uses maple syrup, which I love because it adds a warmer, caramel note than plain sugar. If you don’t have maple syrup on hand, you can absolutely use regular white granulated sugar instead. Just measure it cup-for-cup but know that the flavor will be slightly cleaner and less complex. Simple syrup (equal parts sugar and water, heated until dissolved) works wonders too if you have that already made!
Now, for the milk component in the sweet cream. I used almond milk because it tends to froth up nicely without being overly heavy, which is perfect for floating foam. If you prefer oat milk, go for it! Oat milk is fantastic in coffee. If you try heavy whipping cream, be careful—you’ll need way less syrup, and the texture will be much denser, almost like whipped cream, rather than that signature airy foam. Since we are aiming for a lighter, café-style topping, I usually stick to the lighter dairy or non-dairy alternatives.
And remember that lovely homemade cold brew? If you absolutely must use a store-bought concentrate, just be mindful of how strong it is. You might need to use less of it, as concentrates often pack a serious caffeine punch compared to my milder homemade batches. Always taste your cold brew before adding your sweetener!
Storage and Make-Ahead Guide for Your Coffee Components
This is the part of the recipe where we talk about setting yourself up for success during the whole week! Since making any single Vanilla Sweet Cream Cold Foam Cold Brew (Easy) takes just minutes to assemble, the real key to making this an Easy Recipe is batch prepping the components beforehand. I love having everything ready to go so my morning coffee routine is completely stress-free.
First up: that gorgeous homemade vanilla syrup. Remember when we cooked that up? You need to store it correctly to keep it tasting fresh and safe to drink. That maple syrup gives it a bit of staying power, but refrigeration is a must!
- Vanilla Syrup Storage: Once that syrup has cooled completely, transfer it to a really clean, airtight jar—a cute Mason jar works perfectly, like I mentioned. Pop it into the fridge immediately. If you made it right with equal parts water and sweetener, it should last beautifully for up to three months! Three months! Can you believe it? Just give it a quick shake before you measure out your portion for the day.
Next, we have the main body of the drink: the cold brew. If you’re making a big batch of cold brew (which you totally should be!), storage is simple, but you need to keep it away from strong freezer smells or light.
- Cold Brew Storage: Keep your brewed concentrate in a sealed container in the coldest part of your fridge. If you used the coarse grind method I recommended, strong cold brew should stay great for about seven to ten days. After that, it can start to taste a little flat, though it won’t hurt you. It’s always best used within the first week for that punchy coffee flavor you want.
What about that gorgeous vanilla sweet cream foam? That’s the one component I always highly recommend making fresh the day you plan to drink it.
Why? Well, when you blend the almond milk and syrup, you’re introducing air bubbles. Those bubbles deflate so quickly once they warm up, and nobody wants a sad, flat layer floating on their coffee! It takes two minutes to froth up, so just treat yourself to the freshness. If you’re looking for tips on cutting food costs while batch prepping things like this, check out my guide here—it applies to pantry staples too!
Frequently Asked Questions About Vanilla Sweet Cream Cold Foam Cold Brew (Easy)
You know I love talking coffee! Whenever I share something amazing like this Vanilla Sweet Cream Cold Foam Cold Brew (Easy) recipe, people always have great follow-up questions. Coffee making—even the easy stuff—can feel intimidating, but let’s clear up any confusion so you can enjoy this treat without a worry.
How much caffeine is in this Homemade Coffee?
Ah, the big question! Since I encourage you to use your own Cold Brew, the caffeine content totally depends on your base. My homemade batch is usually moderately strong, but if you use a super-concentrated store-bought version, you’re going to get a real kick! If you’re tracking your intake, I always say to check the label on your concentrate first, or taste your diluted brew before topping it with the sweet cream. That way, you’re completely informed about your caffeine level!
Can I make the Vanilla Sweet Cream Cold Foam without a blender?
Absolutely! That’s why this is such an incredibly Easy Recipe! If you don’t want to pull out the blender, my go-to alternative is a handheld immersion blender wand with a frothing attachment—they are inexpensive and work like a charm. Or, you can just pour the almond milk and syrup into a sturdy Mason jar, screw the lid on tight, and shake, shake, shake! It takes a bit more muscle, but you get that beautiful, thick foam layer needed for the drink.
What is the best milk to use for the Cold Brew foam?
In the recipe, I stuck with almond milk because it tends to be lighter and gives you that classic, airy foam that floats nicely over the Cold Brew without sinking immediately. If you want something richer, oat milk is a fantastic, creamy substitute. If you use heavy whipping cream, you’ll get a much firmer, dessert-like topping, and honestly, you might want to cut back on the maple syrup quite a bit because the cream is naturally richer!
If you have any other questions about this process, feel free to reach out anytime via my contact page! Happy brewing!
Estimated Nutritional Information for This Beverage
Now, I know what you’re thinking: “This tastes like a heavenly treat, but how naughty is it really?” Because we are using maple syrup instead of traditional sugar and almond milk instead of heavy cream, this Vanilla Sweet Cream Cold Foam Cold Brew (Easy) comes out surprisingly balanced! Since I use locally sourced ingredients when possible, my exact nutrient profile shifts a little, but I wanted to give you a solid benchmark for one serving.
Keep in mind that the final numbers here depend heavily on the concentration of your cold brew and exactly how much of that delicious sweet cream you decide to pour on top. If you skip the foam, your numbers drop significantly! Treat these figures as a fantastic starting point for enjoying your Homemade Coffee.
- Estimated Calories: 150 – 180 per serving (This heavily depends on syrup usage!)
- Estimated Fat: 2g – 4g (Mostly from the almond milk used in the foam)
- Estimated Protein: 2g – 3g
- Estimated Carbohydrates: 30g – 35g (Remember, maple syrup has some natural sugars!)
Just a little friendly reminder: since we are working with homemade ingredients, these aren’t the exact figures you’d find on a label, but they give you a really good idea of what you’re sipping on. This is why I always encourage folks to taste as they go when making this DIY Beverage—you’re in total control of the final profile!
Share Your Homemade Coffee Creations
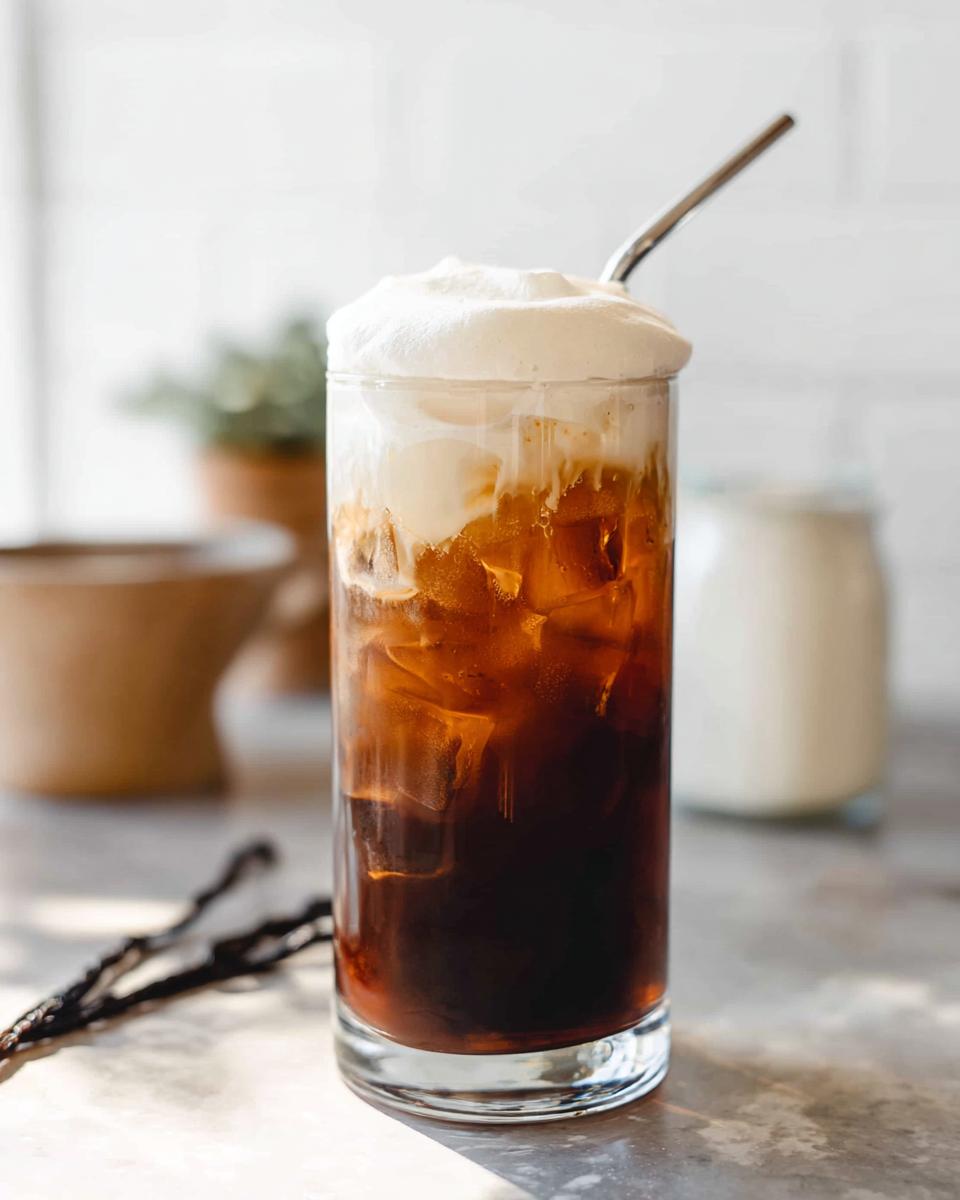
Well, that’s it! We’ve done the work, we’ve mastered the syrup, we’ve frothed the perfect topping, and now you’re holding what I truly believe is the best Vanilla Sweet Cream Cold Foam Cold Brew (Easy) you can make outside of a fancy café.
I honestly can’t wait to see your creations! Sharing these simple, delicious recipes is what my work is all about. Whether you’re sipping this on your porch watching the sunrise or enjoying it as a well-deserved afternoon boost, I want to hear what you think. Did you use oat milk? Did you add a dash of cinnamon on top? Tell me everything!
Head over to the comments section below and leave a rating when you try it out. Seriously, those five stars help other coffee lovers find this easy recipe! If you snapped a picture of your perfectly layered cold brew, tag me on social media! It makes my day to see you enjoying the results of this simple kitchen adventure.
If you want to learn more about my philosophy on ingredient sourcing and why simple, balanced cooking is key to a happy home kitchen, check out my About Page! Happy sipping, my friends!
Vanilla Sweet Cream Cold Foam Cold Brew (Easy)
Ingredients
Equipment
Method
- For the vanilla syrup: Add water and maple syrup to a small saucepan and bring to a boil.
- Once maple syrup has dissolved, turn off heat, add vanilla bean, and let cool to room temperature.
- Remove vanilla bean and store in a mason jar or glass container in the fridge for up to 3 months.
- For the Vanilla Sweet Cream Cold Brew: Add almond milk and 1/4 cup of vanilla syrup to your blender and blend until it reaches a whipped consistency. Alternatively, add to a mason jar and shake vigorously and/or use a milk frother to froth into a cream foam.
- Add ice to a large glass and top with 1 cup of cold brew. Pour in your vanilla sweet cream to taste. Stir to combine.
Notes
Tried this recipe?
Let us know how it was!
Urban Forager & Hyperlocal Ingredient Specialist
My Brooklyn apartment balcony tells my story: vertical gardens packed with wild edibles, fermentation crocks bubbling with city-foraged greens, and the constant hum of dehydrators preserving herbs I’ve collected from unexpected urban corners. What started as weekend escapes to my aunt’s upstate farm during my Columbia botany studies turned into something bigger after I earned my Urban Ecology Master’s from The New School.
Instead of following traditional academic paths, I discovered that cities are actually amazing edible ecosystems—rooftop weeds, park-edge wild greens, vacant lot treasures that perfectly complement keto eating. Who knew that some of the best low-carb foods were growing right under our noses in Manhattan?
My recipe collections celebrate city seasons: spring dandelions and plantains, summer purslane from rooftops, autumn rose hips from community gardens, winter wild onions and cress. I’m certified through the New York Mycological Society and trained by Brooklyn Botanic Garden to forage safely and ethically. Over 180 of my recipes feature at least one urban-foraged ingredient—from sidewalk plantains to sumac berries and wild mint thriving in vacant lots.
My “Metropolitan Wild” column went viral after my dandelion coffee substitute hit social media. Now my weekend “Urban Wild Walks” through Central Park and Prospect Park sell out faster than I can schedule them. I teach city dwellers to spot safe, keto-friendly wild foods hiding in plain sight.
Currently, I’m partnering with local chefs to bring urban foraged elements to restaurant menus and developing an app that maps safe foraging spots across all five boroughs. Evenings find me tending my sourdough starters, pressing flowers for natural dyes, or weaving baskets from willow branches I collect during park maintenance.
Cities are wild food sanctuaries hiding in plain sight—keto eating becomes urban rebellion when you realize how much free, perfect nutrition grows right under our feet.