
Are you totally done with weeknight dinners that feel like a marathon? I get it. Sometimes you just need something bursting with flavor that takes less time than emptying the dishwasher! That’s why I’m obsessed with these Crispy Baked Garlic Chicken Thighs. They hit that perfect spot between easy and impressive. If you’re looking for guidance on everything from ingredients to cooking temps, make sure you check out my Ultimate Dinner Ideas Guide!
I still remember the first time I made these. It was a Tuesday, I’d just gotten back from an urban foraging walk with my bag full of wild garlic, and I went for it. As they cooked, the most amazing, pungent aroma filled my little Brooklyn apartment—it even drew smiles from my neighbors! When I served them up, everyone instantly wanted the details. That moment showed me how stunning simple home cooking can be. If you need foolproof, quick, and unbelievably tasty; this is your answer.
Why You Will Make Crispy Baked Garlic Chicken Thighs Every Week
Honestly, this recipe is my secret weapon when I’m short on time but refuse to eat takeout. It’s the perfect combination of speed and flavor, and the texture is just unbelievable. Seriously, you won’t believe these haven’t been deep-fried!
- The total time is nearly nothing—we’re talking 15 minutes max! You can find more quick solutions in my list of 20-minute dinners!
- You get that incredible crispy exterior combined with unbelievably juicy insides every single time.
- It tastes like fancy restaurant food, but you only need a handful of basic ingredients, like what I share in my 5-ingredient guide.
- That garlic butter sauce? It’s everything. It makes these garlic butter dinners truly unforgettable.

Essential Ingredients for Perfect Crispy Baked Garlic Chicken Thighs
Okay, let’s talk turkey—or in this case, chicken! The beauty of these crispy chicken thighs is their simplicity. You don’t need a huge shopping trip for this one. We are using about 700 grams of skinless, boneless chicken thighs—that’s usually five or six nice pieces. Make sure they are patted truly dry; surface moisture is the enemy of crisp!
We season them simply with 1 teaspoon of garlic powder (yes, powder for the initial crust!) and salt and pepper to taste. Then we need 1 tablespoon of olive oil to get things going in the pan.
For the magic sauce, we bring in 25 grams of unsalted butter (that’s about 2 tablespoons, so don’t be shy!), 2 large garlic cloves that need to be minced finely, and finally, about 1/2 cup of dry white wine. If you don’t keep wine around—no problem! Just use chicken broth or even water for that crucial deglazing step.
Ingredient Clarity and Preparation Notes
Listen, while I love fresh garlic, we use the powder for the initial seasoning because it sticks better and crusts up beautifully during that first sear. But for the sauce, you absolutely must use fresh minced garlic; the flavor difference is night and day!
When you measure that butter, use the real stuff—unsalted is best so we can control the saltiness. And remember that wine substitution: broth is great, but water works in a pinch if you’re simmering quickly. We need that liquid to loosen up all those browned, tasty bits stuck to the bottom of the skillet!
Equipment Needed for Your Crispy Baked Garlic Chicken Thighs
You are going to love how minimal the cleanup is for this recipe. Seriously, this belongs in the easy sheet pan meals category even though we use a skillet! You don’t need fancy gadgets, just the basics.
First, make sure you have a large skillet. It needs to be big enough that your chicken thighs aren’t totally slammed together. We need some breathing room so those edges get nice and crisp, not steamy! You might be tempted to crowd the pan, but trust me on this one; give them space.
The only other tool you really need is a good, sturdy spatula. You use it to press the chicken down initially, and then later to scrape up all those wonderful browned bits of flavor from the bottom of the pan. If you want to see more basic tools that make dinner foolproof, check out my post about foolproof cooking!
Step-by-Step Instructions for Crispy Baked Garlic Chicken Thighs
Alright, time to work some magic! Since we aren’t strictly baking but searing for crispness—which is honestly way faster for boneless thighs—we need to pay close attention to the heat. You’re going to get that beautiful crust associated with excellent oven baked chicken right on your stovetop.
First things first: season up! Take your chicken thighs and sprinkle both sides generously with that garlic powder, salt, and pepper. Don’t be shy here; this is where the base flavor starts. Now, heat a tablespoon of olive oil in your large skillet over medium heat until it shimmers a bit.
Seasoning and Initial Sear for Crispy Baked Garlic Chicken Thighs
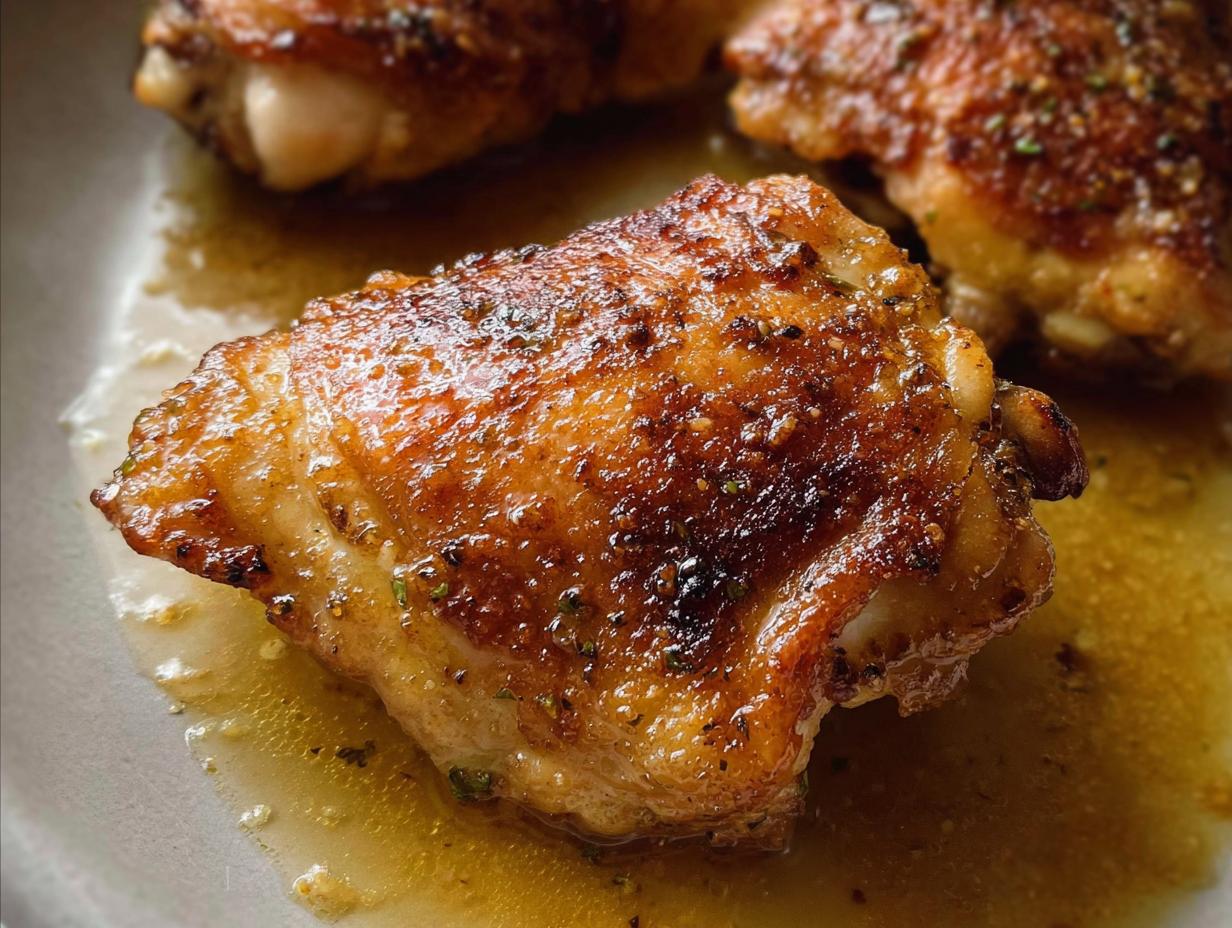
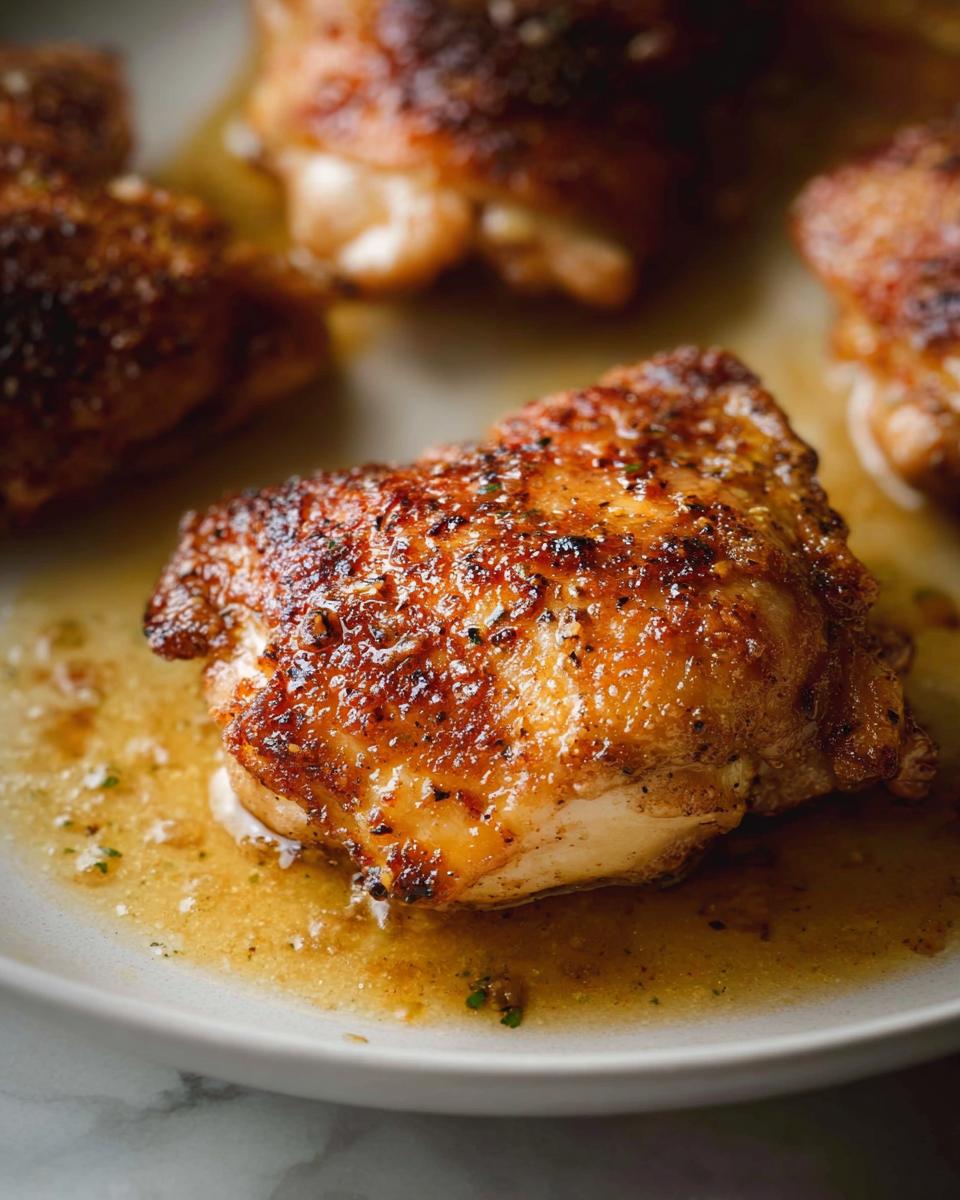
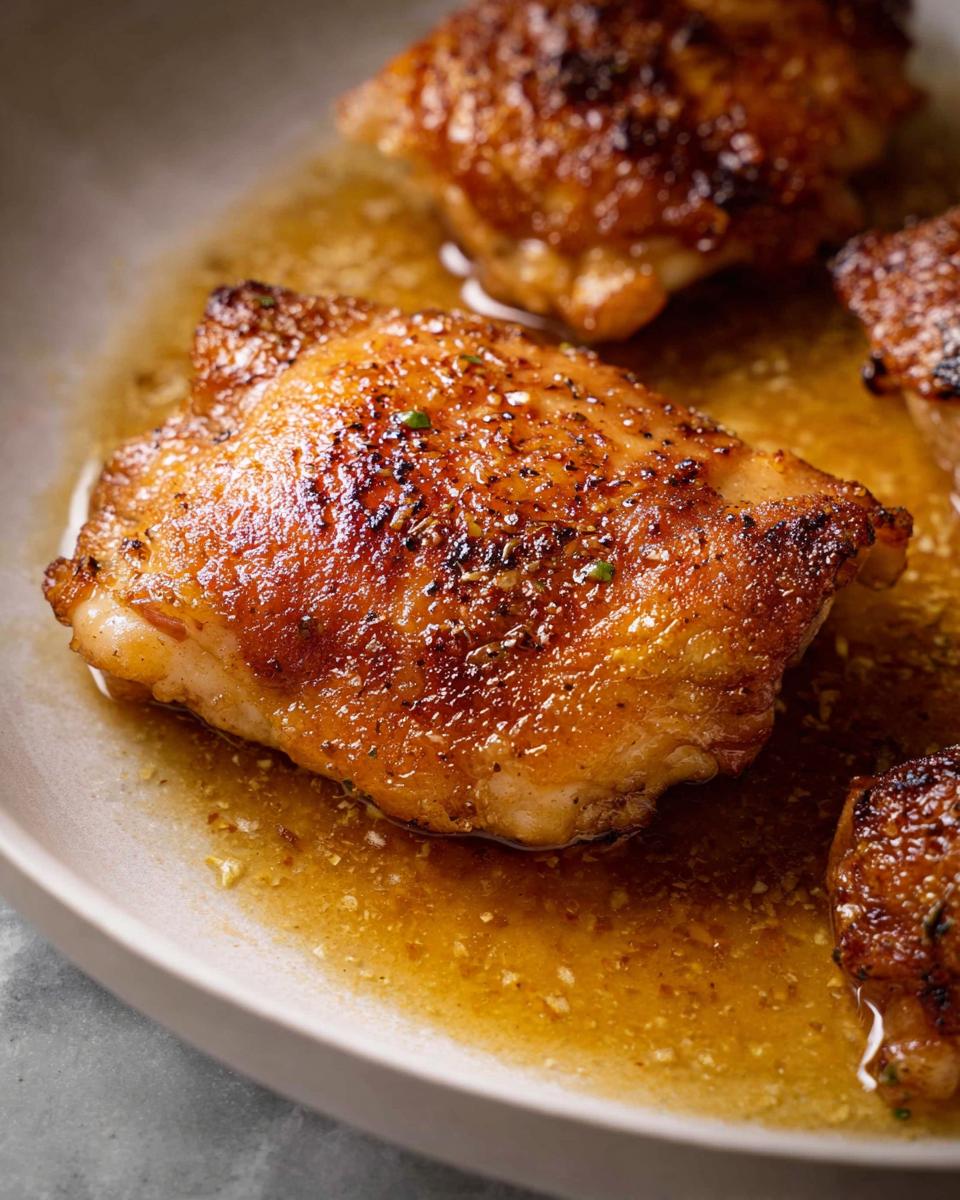
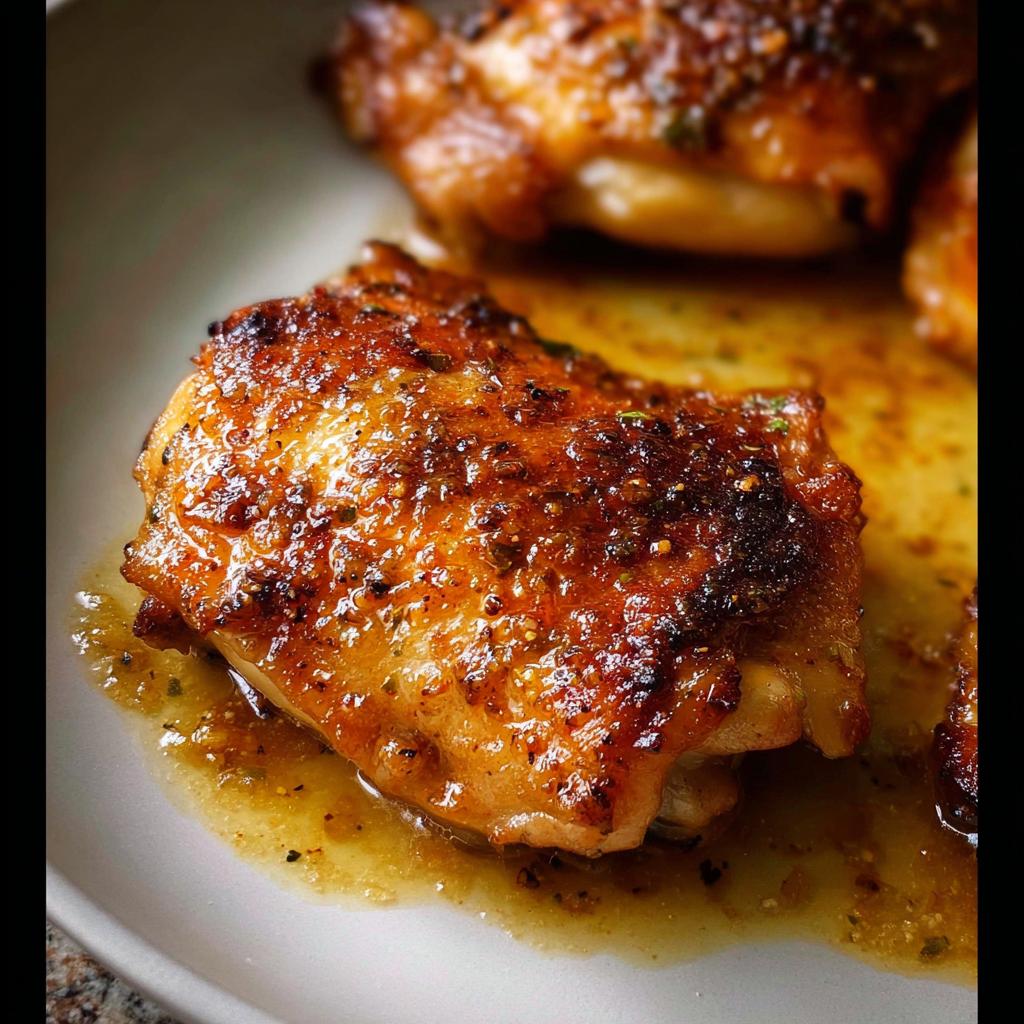
Gently place your seasoned chicken thighs into that hot skillet, smooth side down. This is critical: grab your spatula and press down lightly on each piece for about five seconds. We need maximum contact with the hot pan surface to create that golden, irresistible crust. Don’t touch them for five minutes! You want it deep golden and crispy. Seriously, don’t peek too early!
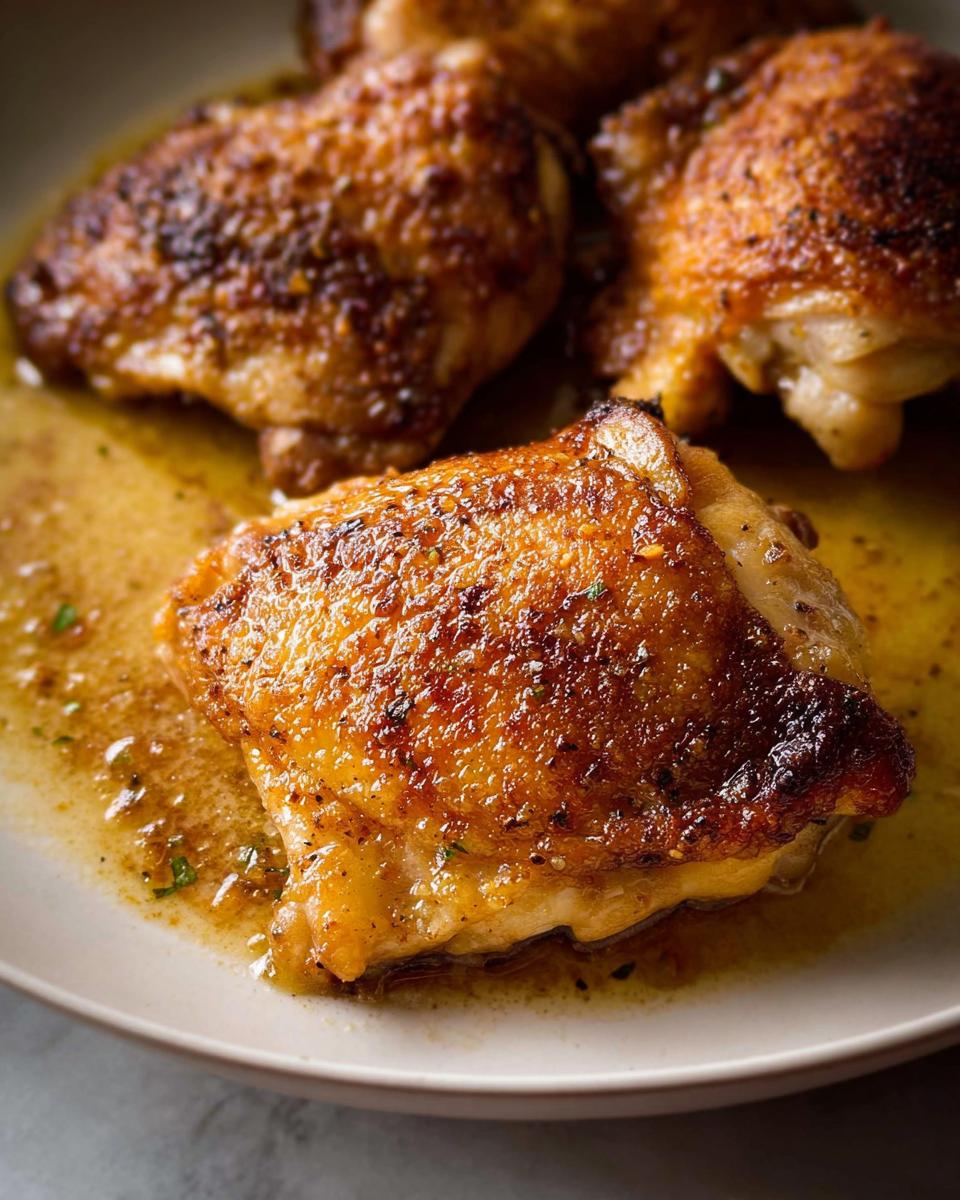
Once the five minutes are up, carefully flip them. Press down lightly again and cook for just two more minutes. We aren’t done cooking them through yet; we’re mainly developing color and setting that crisp exterior. If you want to see more crispy tips, check out my guide on getting crispy food!
Building the Garlic Butter Pan Sauce
Now we build the sauce! Reduce the heat slightly. Toss in your 2 tablespoons of butter and those two cloves of minced fresh garlic. Cook for just about one minute until the garlic starts smelling fragrant and turns light gold. Be fast here—burnt garlic is bitter garlic! If you are making these for the first time, you can see an example of excellent chicken by checking out this garlic chicken recipe for visual inspiration.
Next, pour in that half-cup of wine (or broth). Turn the heat up a bit! Scrape your spatula around frantically to dissolve all those dark, crusty bits stuck to the bottom—that’s called the fond, and it’s pure gold flavor for these garlic butter dinners. Let that simmer rapidly for about 90 seconds until the alcohol smell cooks off. Remove the pan from the heat, maybe toss on some optional parsley, and you are absolutely done. Serve that sauce right over the top!
Expert Tips for Achieving Ultimate Crispy Baked Garlic Chicken Thighs
Even though this recipe is fast, a few little tricks take your crispy chicken thighs from good to famous. The first, most important thing for crispiness—even on boneless thighs—is surface dryness. I always place my thighs on a paper towel-lined plate and pat them down hard right before seasoning. Any surface moisture turns to steam, and steam ruins crispness, plain and simple!
Managing your heat is the next big tip. Don’t rush the initial sear! Medium heat is perfect for the first cook time. If it’s sizzling violently, turn it down. If nothing is happening, turn it up. You are looking for a steady, happy sizzle that builds a deep golden crust without scorching the seasonings.
When you make that incredible sauce later, don’t let that minced garlic sit too long! It goes from golden and fragrant to bitter in seconds. Once the wine is simmering down, keep that pan moving so the butter emulsifies slightly and coats everything beautifully. Achieving that perfect consistency is easy if you just follow the 90-second simmer rule. For more ways to ensure your dinners always turn out right, don’t miss my foolproof guide!
Making Crispy Baked Garlic Chicken Thighs Ahead: Storage and Reheating
I know, I know, these are best eaten the second they come out of the pan, dripping with that garlic butter sauce. But sometimes life happens, right? These crispy chicken thighs are fantastic for meal prep, but we have to be careful about how we bring back that crunch.
You can keep leftovers safely in an airtight container in the fridge for about three to four days. The sauce will naturally gel up a bit, which is totally fine. When you’re ready to eat them again, please, please skip the microwave! It just steams the chicken and makes everything soggy.
Instead, I recommend two methods for reviving them. The fastest way is a quick toss in an air fryer for about four minutes at 375°F—that wakes that crispness right back up! If you don’t have an air fryer, just pop them back into a hot skillet with maybe a teaspoon of fresh oil over medium-high heat for just a couple of minutes per side. It works like a charm and brings them close to the original magic. For more minimal cleanup meals, check out my tips on one-pan cooking!
Serving Suggestions for Your Garlic Butter Dinners
Now that you have the star of the show—gloriously crisp chicken bathing in rich garlic butter—you need the perfect supporting cast, right? You can’t just eat chicken thighs with a fork! These garlic butter dinners pair beautifully with almost anything. Keep your starch simple so the sauce can shine, or go green!
My absolute favorite sides, taken straight from our flavor notes, are creamy, comforting Roasted Broccoli or some fluffy Smashed Potatoes. They soak up just enough of that pan sauce. If you want something heartier, you can’t beat the savory taste of Cowboy Rice Salad. Find more inspiration for easy, balanced meals like these on my Simple Balanced Suppers page. Trust me, these combinations make a complete, impressive meal!
Frequently Asked Questions About Crispy Baked Garlic Chicken Thighs
I always get tons of questions when people make these the first time! It’s just so different from standard oven baked chicken, so I totally get why you might pause before stepping into the kitchen. Here are the ones I hear most often.
Can I use bone-in, skin-on chicken thighs instead of boneless?
Oh, you definitely can, but you need to adjust your expectations and timing! If you use bone-in, skin-on thighs, you will need to ditch the quick stovetop sear and actually bake them to render that fat and crisp that skin properly. Increase the oven temp slightly and plan on about 20-25 minutes total baking time, depending on thickness. The sauce process would need to happen afterward with the drippings!
How can I adapt this to be an ‘easy sheet pan meal’ like the category suggests?
That’s a great thought! Since we are using a skillet, it’s close, but to make it a true sheet pan meal, you’d cook your seasoned thighs on a parchment-lined sheet pan in the oven until nearly done (maybe 15-20 minutes at 400°F). Then, you’d make the garlic butter sauce separately in a tiny saucepan and toss the cooked chicken in that sauce right before serving. It keeps the sauce brighter!
Why did my garlic burn before the chicken was done?
Oops! That’s usually a heat management issue because the chicken thighs need longer to cook through than the garlic needs to brown. Remember, the recipe says to add the garlic *after* the initial 5-minute sear and 2-minute flip. If you add it too early, you’ll burn it while the chicken is still cooking medium-rare. Always add the garlic and butter near the very end—that’s what gives us those amazing garlic butter dinners!
Are there any other spice variations for these crispy chicken thighs?
Yes! I love experimenting with these! If you want to move away from classic garlic, swap the garlic powder for smoked paprika and a tiny pinch of cayenne pepper. It gives the chicken a lovely smoky depth that pairs well with the wine deglaze. For more ideas on modifying recipes, check out my lightened-up dinner ideas for inspiration!
Quick Guide to Nutritional Value of Crispy Baked Garlic Chicken Thighs
Even though these crispy chicken thighs taste incredibly indulgent because of that gorgeous garlic butter sauce, they are actually fantastic for keeping things balanced! They pack a real protein punch to keep you full until the next meal. Remember, these numbers below are just estimates; what you use matters a lot!
For approximately five servings, you are looking at:
- Calories: About 450
- Fat: Around 25g
- Protein: A whopping 45g!
- Carbohydrates: Very low, only about 2g
- Sodium: Roughly 400mg
This recipe is a great example of how you can make meals that fit into almost any diet without sacrificing that amazing flavor. For more meals that help keep your counting simple, take a peek at my calorie-smart recipes collection!
Crispy Baked Garlic Chicken Thighs
Ingredients
Equipment
Method
- Sprinkle both sides of chicken with garlic powder, salt, and pepper.
- Heat oil in a large skillet over medium heat. Place chicken in skillet smooth side down.
- Press down lightly with a spatula. Cook for 5 minutes until deep golden and crispy.
- Turn and press lightly with a spatula. Cook for 2 minutes. Add garlic and butter, cook for 1 minute until garlic is light golden and smells fragrant.
- Add wine, then turn up the heat. Stir around the chicken to dissolve golden bits stuck on the skillet into the wine. Simmer rapidly for 1 1/2 minutes or until the alcohol smell evaporates.
- Remove from heat. Serve chicken with the sauce and optional parsley.
Nutrition
Notes
Tried this recipe?
Let us know how it was!
Urban Forager & Hyperlocal Ingredient Specialist
My Brooklyn apartment balcony tells my story: vertical gardens packed with wild edibles, fermentation crocks bubbling with city-foraged greens, and the constant hum of dehydrators preserving herbs I’ve collected from unexpected urban corners. What started as weekend escapes to my aunt’s upstate farm during my Columbia botany studies turned into something bigger after I earned my Urban Ecology Master’s from The New School.
Instead of following traditional academic paths, I discovered that cities are actually amazing edible ecosystems—rooftop weeds, park-edge wild greens, vacant lot treasures that perfectly complement keto eating. Who knew that some of the best low-carb foods were growing right under our noses in Manhattan?
My recipe collections celebrate city seasons: spring dandelions and plantains, summer purslane from rooftops, autumn rose hips from community gardens, winter wild onions and cress. I’m certified through the New York Mycological Society and trained by Brooklyn Botanic Garden to forage safely and ethically. Over 180 of my recipes feature at least one urban-foraged ingredient—from sidewalk plantains to sumac berries and wild mint thriving in vacant lots.
My “Metropolitan Wild” column went viral after my dandelion coffee substitute hit social media. Now my weekend “Urban Wild Walks” through Central Park and Prospect Park sell out faster than I can schedule them. I teach city dwellers to spot safe, keto-friendly wild foods hiding in plain sight.
Currently, I’m partnering with local chefs to bring urban foraged elements to restaurant menus and developing an app that maps safe foraging spots across all five boroughs. Evenings find me tending my sourdough starters, pressing flowers for natural dyes, or weaving baskets from willow branches I collect during park maintenance.
Cities are wild food sanctuaries hiding in plain sight—keto eating becomes urban rebellion when you realize how much free, perfect nutrition grows right under our feet.