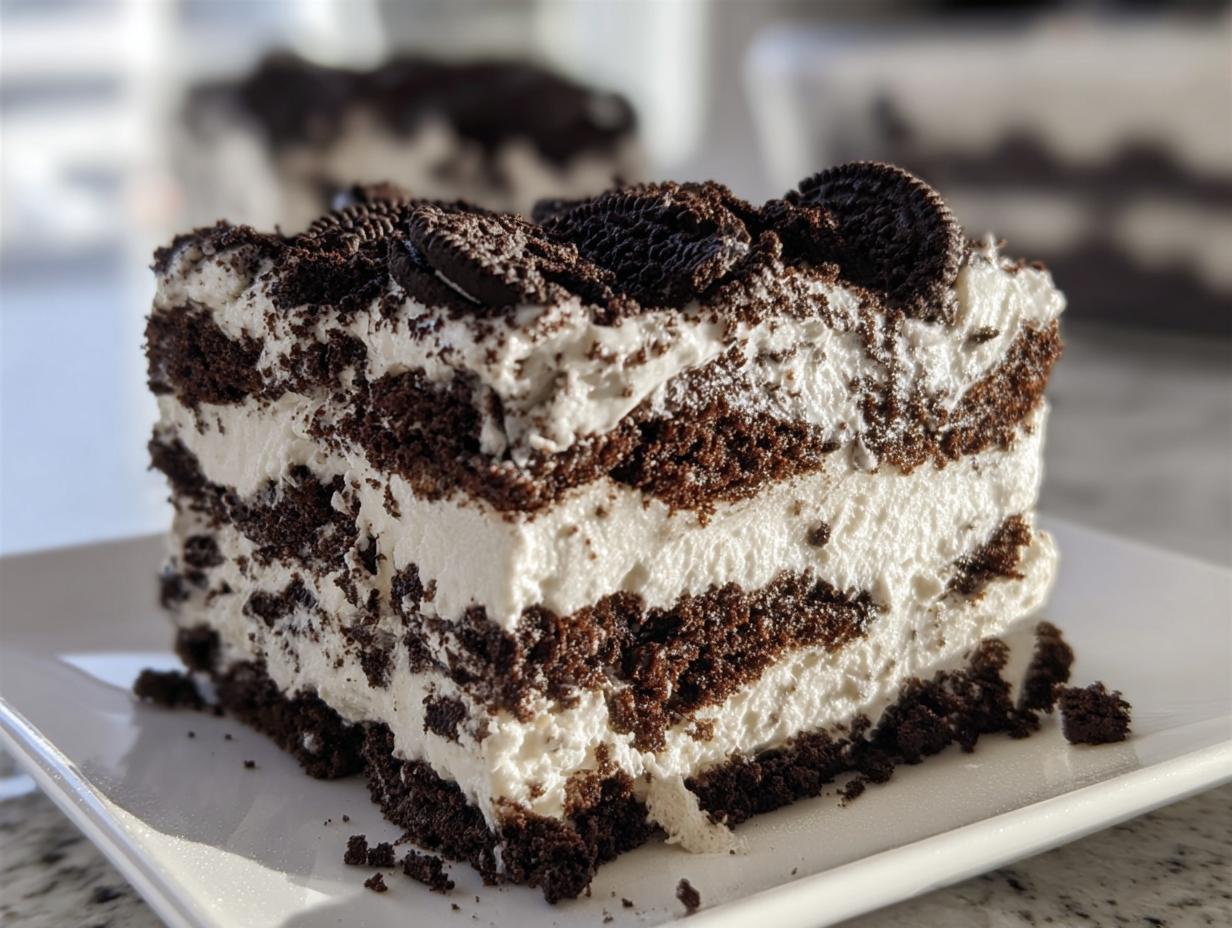
Remember sneaking those chocolate sandwich cookies after Mom tucked you in, washing them down with a giant glass of milk? Oh, that taste is pure, sticky nostalgia! Well, friends, I’ve taken that incredible flavor and whipped it into my famous Oreo Cookies and Cream Icebox Cake. It’s ridiculously easy and requires zero oven time. Honestly, it’s the easiest no bake cake you’ll ever make!
When I was exploring the food scenes in Italy a few years back, I became obsessed with these incredible layered desserts they layer without baking. That inspired me! Stuck in my keto exploration phase later, I desperately missed those chocolate cookies. I adapted that layering spirit using the classic crème filling. That first bite? Wow! It instantly brought me back to sharing cookies with my family, proving you can recreate the flavors of the past, even when keeping things low-carb. It’s a little piece of childhood luxury, ready in under an hour of hands-on time.

Why This Oreo Cookies and Cream Icebox Cake is Your New Go-To No Bake Cake
Listen, sometimes you just need a showstopper dessert without turning on the stove, right? That’s where this recipe shines. It’s all about minimum fuss and maximum nostalgic reward. Trust me, once you see how simple this is, you’ll be adding it to your rotation immediately.
Here’s why the Oreo Cookies and Cream Icebox Cake always wins:
- It’s genuinely quick! You only need about 15 minutes of kitchen time.
- It’s the ultimate kid friendly treat; they love helping layer the cookies!
- That overnight chill turns hard cookies into tender, cake-like layers.
- It satisfies that deep craving for cookies and cream desserts without any baking stress.
For more simple, satisfying sweets, you should definitely check out my collection of easy keto desserts. This icebox cake fits right in!
Essential Ingredients for Your Oreo Cookies and Cream Icebox Cake Recipe
Okay, for this unbelievably easy icebox cake recipe, you don’t need a huge grocery cart, but the ingredients you *do* use matter a lot. Since there’s no baking involved, everything needs to taste great right out of the package or bowl. We are building this flavor profile around two main players: that gorgeous, light whipped cream and those addictive chocolate cookies.
The cream is everything here, folks. It’s what transforms the hard snap of the cookies into a wonderfully soft, melt-in-your-mouth cake texture after chilling. So, when you get your heavy whipping cream, make sure it’s good quality! We are using all fresh ingredients for that truly classic cookies and cream desserts flavor.
For the Cream Filling
For the luscious filling that holds this whole thing together, you’ll grab three simple things. You need exactly two full cups of heavy whipping cream—don’t skimp here; this has to whip up stiff! Then we stabilize it with one cup of powdered sugar. I always use pure vanilla extract, grabbing one full tablespoon because I think vanilla really wakes up the chocolate notes. Mix these three together, and you have magic.
For Layering and Topping the Oreo Cookies and Cream Icebox Cake
Now for the structure! You need about 30 whole, untouched Oreo cookies destined for the layers. These are crucial so they have enough body to soften properly overnight. You’ll also need a specific amount—about 12—of cookies that you’ll crush or chop up specifically for the beautiful topping. And finally, make sure you have an 8×8 baking dish ready for assembly. That size gives us the perfect height for layering this no bake cake.
Making the Perfect Oreo Cookies and Cream Icebox Cake: Step-by-Step Instructions
Alright, get ready for the fun part! Since this is a quick 15-minute assembly job—seriously, that’s all it takes before chilling—you don’t have much time to waste, but don’t rush the mixing! We want to trap all that glorious air in there. This recipe is designed to let those cookies get perfectly soft during the long chill, transforming your layers into true cake texture.
Whipping the Cream Base
First things first, get your mixer bowl ready with the cream, powdered sugar, and vanilla. Start slow! I mean, start on the absolute lowest speed you have so the powdered sugar doesn’t turn into a cloud floating around your kitchen—trust me on that one! After about a minute, crank it up. You need to beat this until you get stiff peaks, which usually takes a solid 7 to 8 minutes. When you pull the whisk out, the peaks should stand straight up without flopping over. If you struggle with this step, check out my tips on making perfect mixtures; it applies here too!
Assembling the Oreo Cookies and Cream Icebox Cake Layers
Grab your 8×8 dish. This is where the magic happens! Lay down your first complete layer of whole Oreos right across the bottom. You might have to trim a cookie or two if your dish is awkward, but try to make it as solid as possible. Once that base is covered, gently spread about half of your gorgeous whipped cream on top, smoothing it out with an offset spatula. Now, another layer of the whole Oreos goes on top of that cream! Finish it off by spreading the rest of the whipped cream over that second cookie layer. Make sure the top is nice and even.
The Crucial Chilling Time for This No Bake Cake
This is the hardest part: waiting! This no bake cake needs time—a minimum of 8 hours, but honestly, overnight is what unlocks the true potential of the Oreo Cookies and Cream Icebox Cake. During this time, the moisture from the cream soaks right into the cookies, softening them perfectly. You must cover that dish securely with plastic wrap or a lid before setting it in the fridge. If you try cutting it early, you’ll just have stiff cookies in cream, not that wonderful, sliceable cake experience we are looking for. If you’re looking for inspiration on layering techniques, I found a great resource here that explains simple layering!
Tips for Success When Preparing Your Oreo Cookies and Cream Icebox Cake
I know it seems simple—it’s just cream and cookies, right? But there are a few little rules that take this from being just okay to being the absolute best Oreo Cookies and Cream Icebox Cake you’ve ever had. My notes from my trials taught me these things the hard way, so you don’t have to!
My number one rule, and I mean this emphatically: please, please do not try to substitute that homemade whipped cream for the canned stuff or, heaven forbid, Cool Whip. I tried it once when I was in a real pinch, and I regretted it instantly! Store-bought toppings just don’t stabilize the way fresh heavy cream does when it sits in the fridge for hours. They get watery or weirdly spongy. We need that structure for the cookies to absorb moisture evenly. Stick to the real deal, and you’ll see that beautiful, sturdy slice the next day.
Another thing I learned perfecting this for my lower-carb explorations is about presentation. If you want maximum visual impact for your cookies and cream desserts, wait until the absolute last minute to add the topping. If you crush those remaining 12 Oreos and spread them on top before chilling, they will get damp and gooey from the ambient moisture in the fridge. You want that delightful crunch contrast!
So, my personal baking wisdom here is simple: Chill it fully for structural integrity, and then just before you slice it open, shower the top with those glorious crushed cookies. It gives that wonderful textural surprise. For more tried-and-true methods that make cooking less stress and more fun, take a peek at my general recipe archives. These tips tend to work across most simple baking projects!
Serving Suggestions for Cookies and Cream Desserts
So, your magnificent Oreo Cookies and Cream Icebox Cake is perfectly chilled, the cookies have transformed, and the whole thing smells like heaven. Now, how do we make the serving experience even better? We’re talking about turning a fantastic dessert into a little centerpiece moment!
Because this no bake cake is so rich and creamy on its own—that thick, homemade whipped cream is no joke—you don’t need much fuss around the edges. Simplicity is key here. A little drizzle goes a long way, especially if you’re serving this to company and want to flex those presentation muscles.
If you happen to have some zero-carb chocolate syrup or maybe a simple, sugar-free caramel sauce on hand, drizzle just a tiny ribbon right over the top of that crushed cookie topping before you put the knife to it. It looks stunning and adds just a touch more richness without getting heavy. These little additions are fun ways to personalize your cookies and cream desserts.
As for what to *drink* with it? My absolute favorite pairing, especially when I’m winding down after a long day of testing recipes, is a tall, frosty glass of cold almond milk. That creamy, cold milk just cuts through the chocolate richness perfectly, taking me right back to childhood cookie raiding days. If you’re looking for lighter companion ideas for your meals overall, you might want to peek at some of my thoughts on lightened-up dinner ideas—sometimes a lighter main course makes dessert feel even more satisfying!
Storage and Reheating Instructions for Your Oreo Cookies and Cream Icebox Cake
The best part about making a great Oreo Cookies and Cream Icebox Cake is that it’s usually even better the next day! But you need to know how to store this beauty correctly so those cookie layers stay perfectly soft and the cream doesn’t wilt.
Since this is an icebox cake—meaning it relies on refrigeration to work its magic, not freezing or heating—storage is pretty straightforward. You absolutely must keep this cake covered. If you don’t use the original pan lid, grab some plastic wrap and make sure you press it gently onto the surface of the topping, or at least cover the dish tightly.
This helps keep out any rogue fridge smells that could mess with the delicate cream flavor. I find that flavor holds up beautifully for about three to four days in the refrigerator. Seriously, the cookies keep absorbing that cream and getting softer and more cake-like as time goes on. It’s a real treat to have a slice waiting for you!
Now, the next question I always get is about reheating. Folks, you can’t reheat an icebox cake! You don’t need to, either. Heating it would completely melt that beautiful whipped cream base we worked so hard to stiffen up. If you accidentally left your serving out on the counter for more than an hour or two, it’s best to just enjoy it soft, but never try to warm up the leftovers.
So, in summary: covered, refrigerated, and enjoy within four days! That’s the secret to keeping this incredible Oreo Cookies and Cream Icebox Cake tasting fresh long after you first pull it out of the cold.
Frequently Asked Questions About the Icebox Cake Recipe
I always get a flood of questions whenever I post my favorite no-bake creations, and this classic icebox cake recipe is no exception! People want to know about timing, texture comparison, and if their little helpers can join in the fun. Here are the top three things I hear most often about making the perfect Oreo Cookies and Cream Icebox Cake.
Can I make this Oreo Cookies and Cream Icebox Cake ahead of time?
Yes, you absolutely should! This isn’t one of those desserts you rush at the last minute. Because the entire point of an icebox cake is allowing time for the cookies to absorb the moisture from the cream, making it ahead is ideal. When I make this, I usually assemble it the morning before a party, or even the day before. That long, slow chill time—at least 8 hours—is what transforms those crisp cookies into that soft, wonderfully cake-like layer. It just gets better the longer it sits (within reason, of course!).
What is the difference between this and a regular ice cream cake?
That’s a wonderful question that gets right to the heart of what an icebox cake is! See, an ice cream cake usually involves layers of pre-frozen components—like ice cream or maybe a frozen mousse. They stay hard and frozen until they start melting. This Oreo Cookies and Cream Icebox Cake is different because it relies on very cold refrigeration, *not* the freezer, to work its magic. The cold temperature firms up the homemade whipped cream, and the moisture slowly softens the cookies. You get a sliceable, creamy texture that melts in your mouth, instead of one that needs to thaw slightly!
Is this a good recipe for children to help make?
Oh, this is one of the best recipes for involving the kids! It’s fantastic for making great kid friendly treats because there is zero hot equipment involved. They absolutely love handling the repetitive layering part. Let them be in charge of placing those whole Oreos down for the base and the middle layer. They can also help with sprinkling the crushed cookies on top right before serving—just make sure they don’t eat all the topping before it gets there! If you need tips on managing kitchen chaos while baking with little ones, reach out to me through my contact page; I have a whole playbook for that!
Estimated Nutritional Data for This Oreo Cookies and Cream Icebox Cake
Look, I know some of you are keeping track of everything, and while this is a comfort food for me, I want to be totally transparent about what goes into one slice of this glorious Oreo Cookies and Cream Icebox Cake. Since we are keeping this simple, the numbers come straight from the base ingredients we used, like the heavy cream and those chocolate cookies.
Remember, because this is a no bake cake that sets in the fridge, the texture is different—it’s rich! Here is the breakdown for one slice, serving 8 total people. Don’t worry too much about the exact totals, though; the magic of this dessert is how little hands-on time it takes!
- Calories: 469
- Total Fat: 29g (with 15g saturated)
- Carbohydrates: 51g
- Protein: 4g
Just a quick note from my kitchen to yours: these numbers are based on using standard, full-fat ingredients and recipe ratios. If you start making substitutions for the cream or the sugar, obviously, the true count will shift. Keeping track of macros is important when you’re aiming for specific goals, so if you want to see how I manage weekly tracking, check out my guide on how to create a cheap keto grocery list and meal plan! It helps keep the indulgence balanced.
Share Your Experience Making This No Bake Cake
Now that you know all my secrets for turning a few simple ingredients into the most delicious, nostalgic Oreo Cookies and Cream Icebox Cake, I need to hear from you! Seriously, that’s the best part of sharing these recipes.
There is nothing better than seeing photos of this creamy, dreamy treat sitting on someone else’s Easter table or making an appearance at a summer BBQ. Did you chop your topping finely or leave those chunks chunky? Did you sneak a slice before dinner after the 8 hours of chilling were up? Tell me everything!
Please take a picture of your perfectly layered no bake cake and tag me on social media! I absolutely love seeing how you adapt these classics. Your feedback helps me figure out what recipes to share next, and your attempts—even the messy ones!—build our community here.
If you followed this icebox cake recipe and loved the results, don’t forget to give it a rating right here on the page! Five stars really helps other bakers find this gem. And if you’ve got questions I didn’t cover, drop them in the comments below. I try to pop in and answer everyone. For more background on how I ended up exploring these delicious, simple recipes, you can always read my story over on the About page. Happy slicing!

Oreo Cookies and Cream Icebox Cake
Ingredients
Equipment
Method
- Add the heavy whipping cream, powdered sugar, and vanilla extract to a large mixing bowl. Use a hand mixer or a stand mixer with the whisk attachment.
- Start mixing on low speed, then increase the speed as the mixture thickens. Beat until stiff peaks form, which takes about 7 to 8 minutes.
- In an 8×8 baking dish or pan, place a single layer of whole Oreos on the bottom. You might need to cut a few cookies to fill the gaps.
- Spread half of the whipped cream mixture over the layer of cookies and smooth the top using a spatula.
- Add another layer of Oreo cookies on top of the cream.
- Spread the remaining whipped cream over the second layer of cookies and smooth the top surface.
- Cover the pan with a lid or plastic wrap. Refrigerate for a minimum of 8 hours, or preferably overnight.
- Top the icebox cake with the crushed Oreos just before you plan to serve it.
Nutrition
Notes
Tried this recipe?
Let us know how it was!