
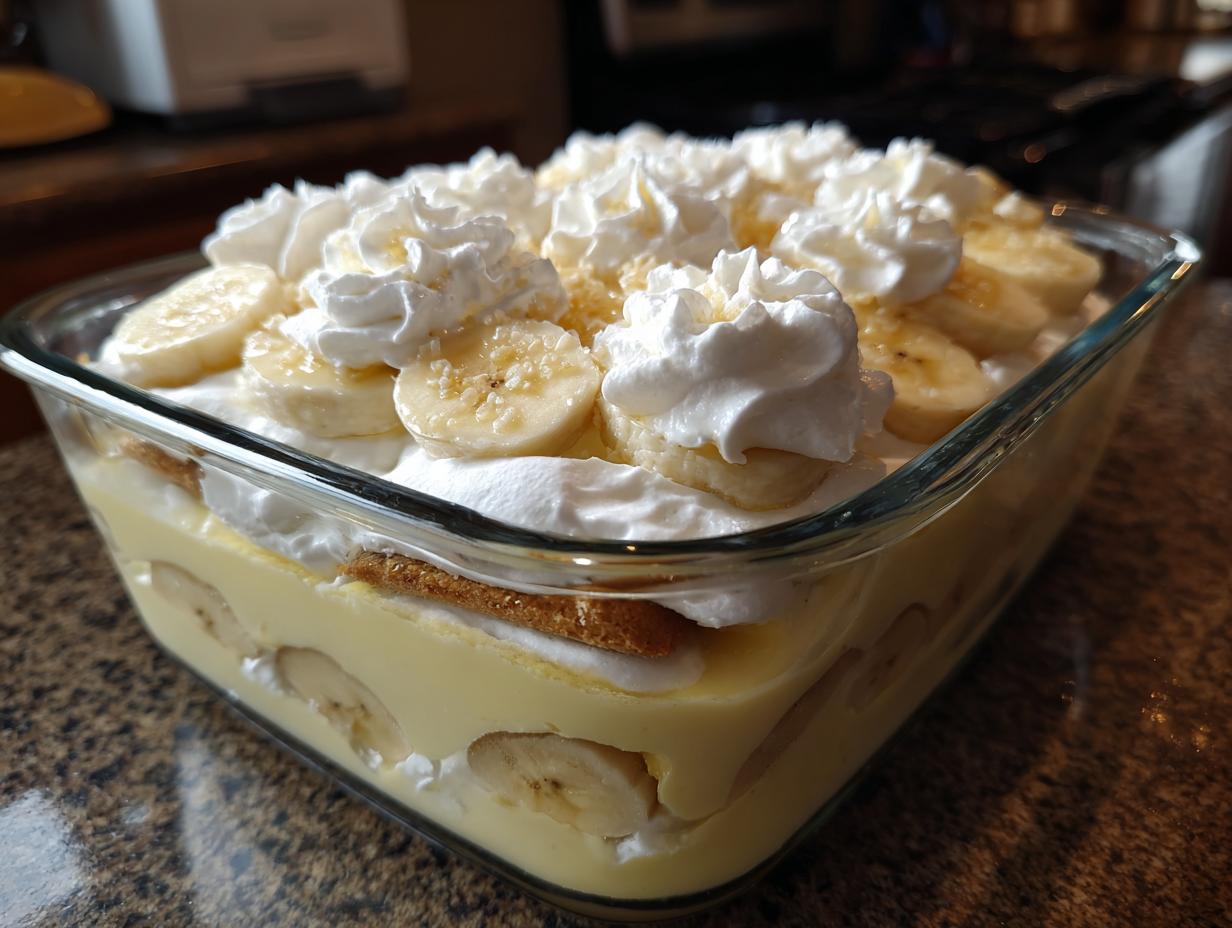
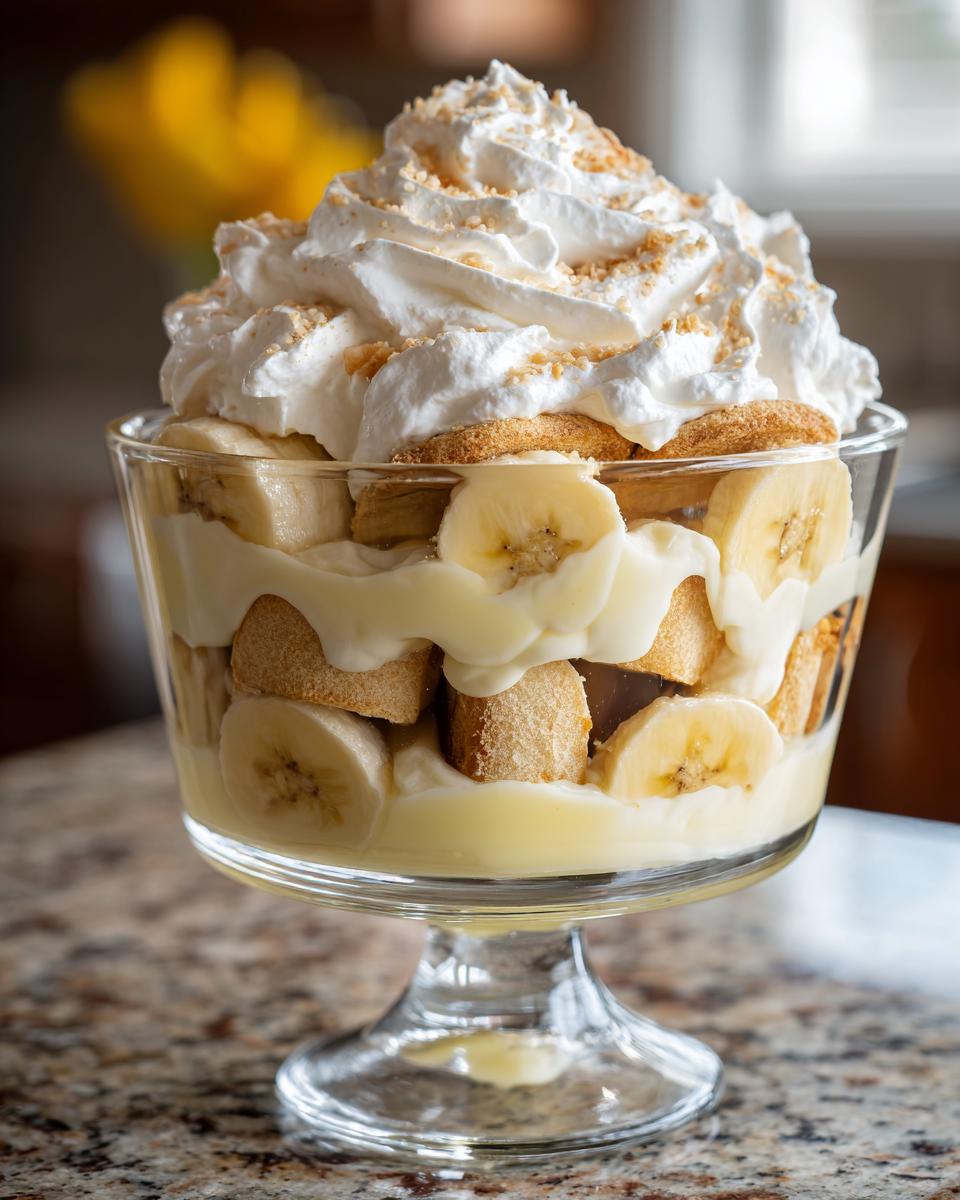
Oh, there’s just something about a dessert that feels like a warm hug, right? And for me, nothing says comfort quite like a perfectly made Classic Banana Pudding With Homemade Whipped Cream. Forget those dusty boxed mixes; this is the real deal, the kind that grandma would make with a twinkle in her eye. It’s this beautiful symphony of flavors and textures: soft, creamy vanilla custard that just melts in your mouth, sweet, slightly firm slices of fresh banana, and those tender vanilla wafers soaking up all that goodness. And the crowning glory? A cloud of fluffy, homemade whipped cream that’s just pure bliss. I remember making this for the first time for a family get-together, and my nephew, who’s usually shy, just kept asking for seconds! It’s truly a showstopper that’s surprisingly easy to pull off.
Why You’ll Love This Classic Banana Pudding
Seriously, this banana pudding recipe is a winner! Don’t even get me started on how much your family and friends will adore it. Here’s why it’s become a staple in my kitchen:
- Super Easy to Make: You won’t believe how simple it is to whip up. Most of the magic happens on the stovetop and then in the fridge!
- Crowd-Pleaser Guaranteed: Whether it’s a holiday, a potluck, or just a Tuesday, this dessert is always a huge hit. It’s pure comfort food!
- That Homemade Touch: Using real, homemade whipped cream just elevates this pudding from good to absolutely spectacular. Trust me, it’s worth the extra minute!
- Perfect Textures: You get that wonderful balance of soft custard, tender wafers, fresh bananas, and airy whipped cream. It’s a party in every spoonful!
- Nostalgia on a Spoon: It brings back all those happy memories of simpler times and grandma’s kitchen. Pure, unadulterated dessert joy!
Ingredients for Your Classic Banana Pudding
Okay, let’s talk about what you’ll need to make this amazing banana pudding happen. It’s all about simple, quality ingredients coming together to make something truly special. We’ve got a few components here, so let’s break them down:
For the Creamy Custard
- 1/2 cup granulated sugar: For that perfect sweetness.
- 1/4 cup cornstarch: This is our thickening magic!
- 1/4 teaspoon salt: Just a pinch to balance everything out.
- 3 cups whole milk: Whole milk really makes the custard rich and creamy.
- 4 large egg yolks: Make sure they’re lightly beaten before you add them.
- 2 tablespoons butter: Unsalted is best here, so we can control the saltiness.
- 1 teaspoon vanilla extract: The classic flavor that makes everything better!
For Assembly Magic
- 1 package vanilla wafers: About 6 ounces. These get nice and soft – yum!
- 3-4 ripe bananas: Sliced into lovely rounds. Make sure they’re ripe but not mushy!
For the Heavenly Whipped Cream
- 1 cup heavy cream: Make sure it’s nice and cold straight from the fridge.
- 2 tablespoons powdered sugar: For a lightly sweet, airy topping.
- 1/2 teaspoon vanilla extract: To give our whipped cream that extra yummy flavor.
Step-by-Step Guide to Making Classic Banana Pudding
Alright, let’s get down to business! Making this classic banana pudding with homemade whipped cream is a journey, and trust me, the destination is absolutely delicious. Don’t worry if it sounds a little fussy; I’m here to walk you through every step. It’s all about building delicious layers of flavor and texture!
Making the Creamy Custard Base
First things first, we need that gorgeous, luscious custard. Grab a medium saucepan and whisk together the sugar, cornstarch, and salt. Pour in the milk, whisking until it’s all smooth and there are no lumps – this is key if you don’t want a lumpy pudding! Now, cook this mixture over medium heat, stirring constantly like your life depends on it (okay, maybe not *that* dramatic, but keep stirring!). You want it to thicken and just start to bubble. Let it cook for another minute after it bubbles. Then, take it off the heat. Whisk a little of that hot milk mixture into your beaten egg yolks – this is called tempering, and it stops the eggs from scrambling into little bits. Pour that back into the saucepan with the rest of the milk mixture. Cook it stirring for just one more minute. Don’t let it boil! Stir in your butter until it’s melted, then add the vanilla. Pour this into a bowl, press some plastic wrap right onto the surface (this stops that weird skin from forming), and let it cool down a bit. We’re not aiming for cold yet, just not piping hot.
Assembling Your Perfect Banana Pudding
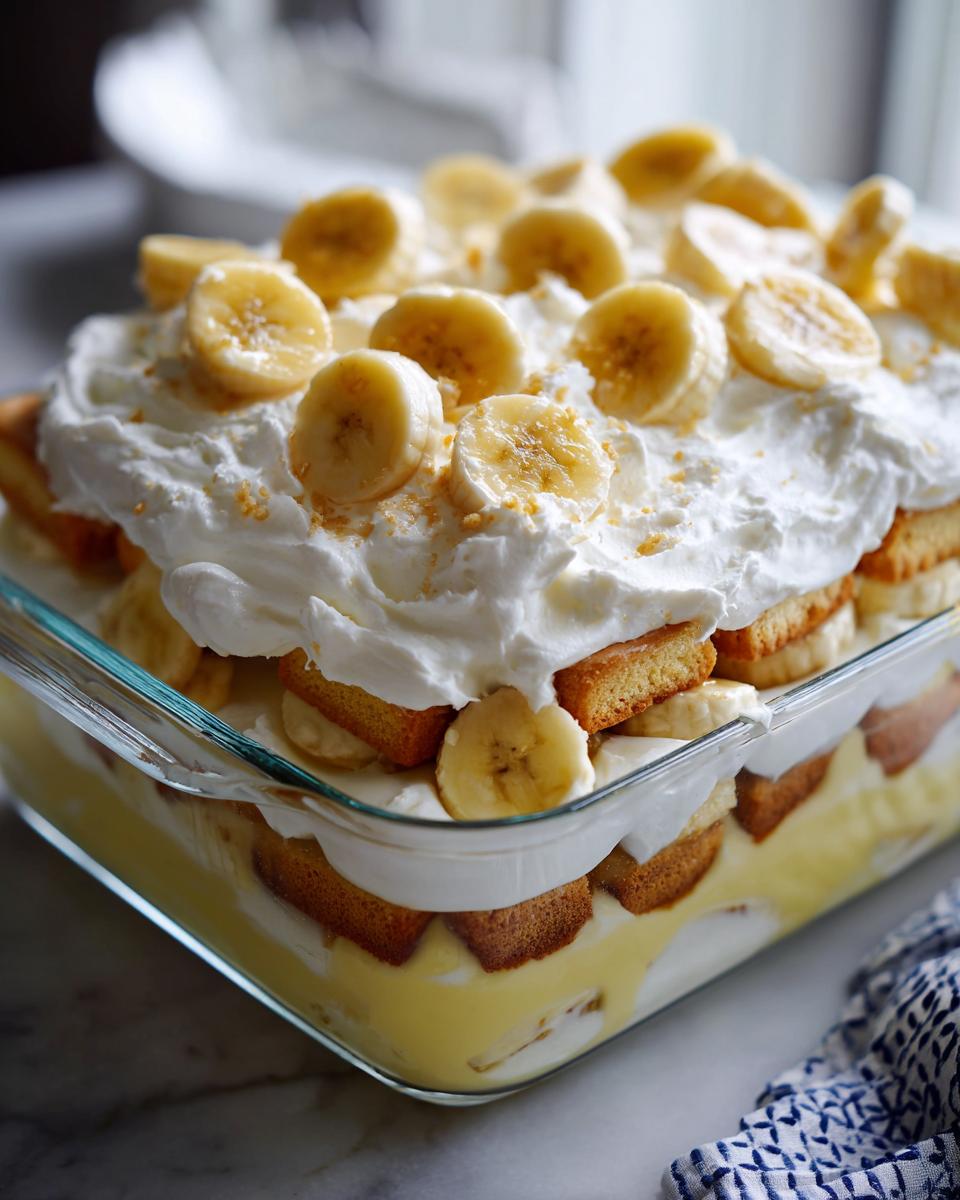
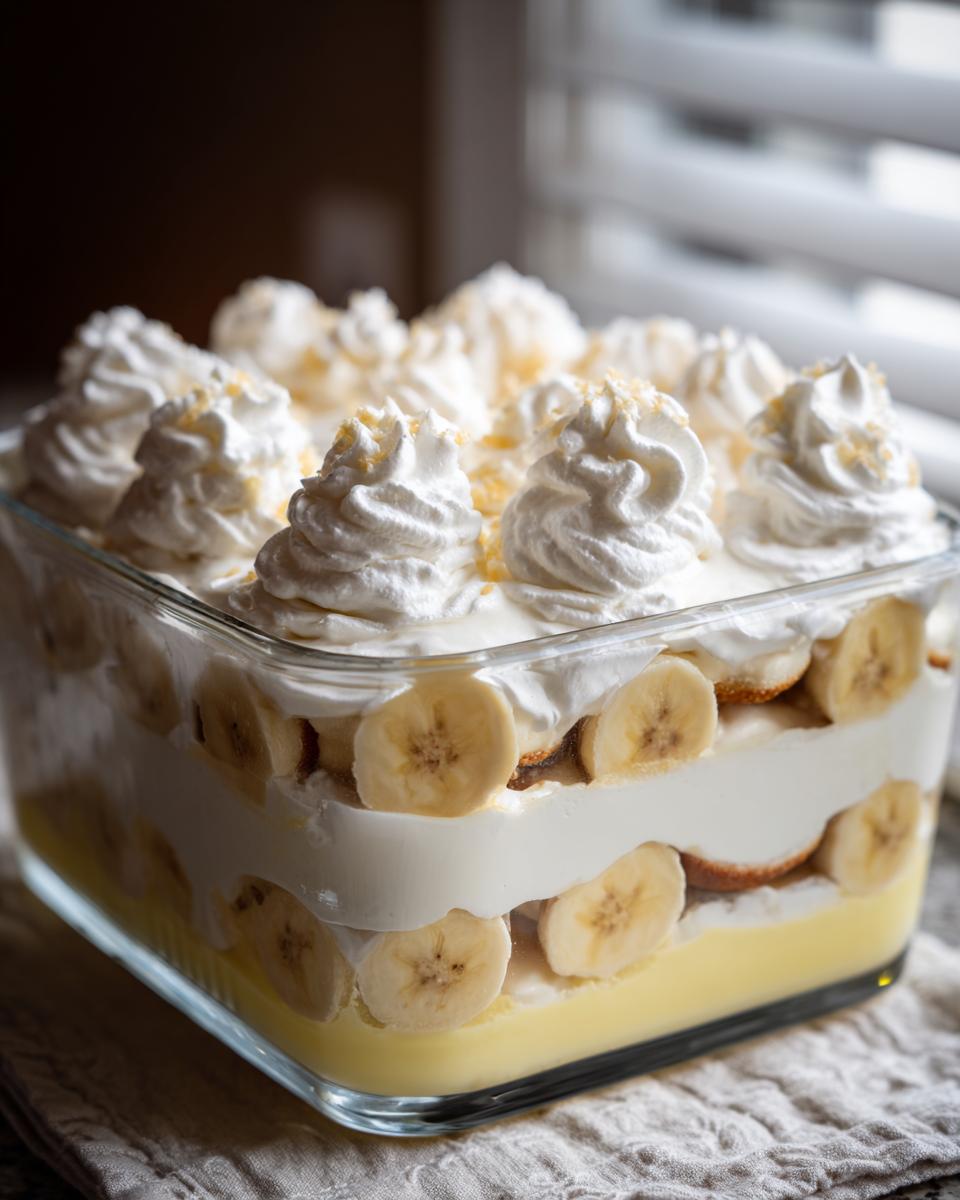
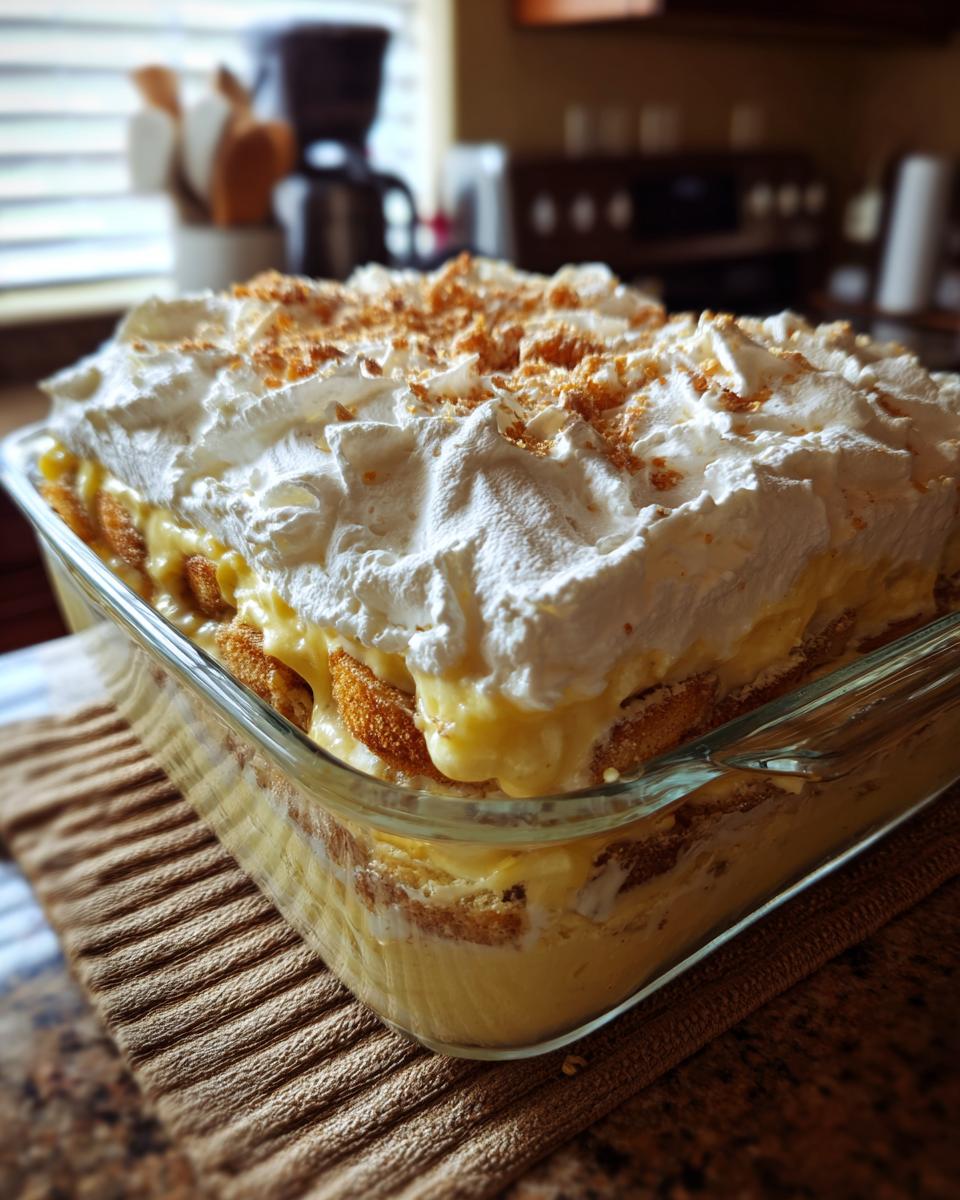
Now for the fun part – building your masterpiece! Grab your pretty serving dish. Spread a nice, even layer of those wonderful vanilla wafers on the bottom. Pop a layer of your sliced bananas right on top of the wafers. Now, spoon about half of that lovely, slightly cooled custard over the bananas. See? It’s already looking amazing! Time to repeat. Add another layer of vanilla wafers, then more banana slices, and finally, pour the rest of your glorious custard over everything. All those layers will meld together beautifully in the fridge. Cover it up and let it chill for at least 2 hours, but honestly, longer is better so all those flavors can get to know each other and the wafers soften up just right. It’s like magic happening in the cold!
Crafting the Homemade Whipped Cream
This is the grand finale, folks! Grab a chilled bowl – seriously, the colder, the better for whipping cream. Pour in your cold heavy cream and start beating it with your electric mixer. Watch it closely! You want it to get thick and form soft peaks, like little fluffy clouds. Then, beat in your powdered sugar and vanilla extract until you get nice, stiff peaks. This means when you lift the beater, the cream stands up straight. This luscious homemade whipped cream is going right on top, so make sure it’s perfect!
Tips for the Best Banana Pudding
Making a truly amazing banana pudding isn’t rocket science, but a few little tricks can really take it from good to *wow*! Trust me, I’ve learned a thing or two along the way, and I want yours to be perfect. So, here are my top tips for the best Classic Banana Pudding With Homemade Whipped Cream experience:
- Banana Ripeness is Key: You want bananas that are ripe, with those lovely brown spots just starting to appear. They’ll be sweeter and mashier, which is exactly what we need for that pudding bliss. But avoid *overly* mushy ones, or they might just turn to goo.
- Don’t Fear the Wafer Softening: I know, I know, we want that soft, melty wafer texture. That’s why chilling is so important! Letting it sit for at least 2-4 hours (or even overnight!) allows the wafers to soak up that delicious custard. If you like a *slight* chew to your wafers, just chill for 2 hours. For super soft, almost dissolved wafers, go for longer. It’s all about your preference!
- Custard Consistency Check: When you’re making the custard, remember that ‘thickened and bubbling’ is your goal. If it’s too thin, it won’t set properly. If you accidentally cook it a *little* too long and it gets too thick, just whisk in a tiny splash more milk off the heat until it’s just right. A smooth, creamy custard is non-negotiable!
- Cold is Your Friend for Whipped Cream: Seriously, anything you can chill – your bowl, your beaters, even your cream itself – will help you get those perfect stiff peaks for your homemade whipped cream. It makes all the difference in getting it light and airy!
- The Ripple Effect: When you layer, don’t be afraid to sort of “swirl” the custard slightly over the bananas. It makes for prettier layers and ensures that yummy custard gets everywhere. It’s like a little art project before dessert! Plus, check out this classic apple crisp for another comforting dessert idea!
Ingredient Notes and Substitutions
Sometimes you might be missing a specific ingredient or just want to tweak this classic banana pudding recipe a bit. No worries! Here are a few notes to help you out and keep things delicious. For the custard, while whole milk gives you the richest texture, 2% will work in a pinch, though it might be a *little* less creamy. Just avoid skim; we need that fat for flavor! If you can’t find vanilla wafers, something like shortbread cookies or even graham crackers could be used, but they’ll give a slightly different flavor and texture, so keep that in mind. And for the bananas, go for ripe but still firm – the super soft ones can get a little too mushy in the layers.
Make-Ahead and Storage Instructions
One of the best things about this Classic Banana Pudding With Homemade Whipped Cream is that you can totally get some of it done ahead of time! Life gets busy, right? You can absolutely make the custard a day in advance. Just pop it in a container, press plastic wrap right on the surface to keep that skin from forming, and pop it in the fridge. The homemade whipped cream is best made right before you plan to serve it, but you *can* whip it up a few hours ahead, cover it tightly, and keep it chilled. Just remember, assembling the whole pudding and letting it chill is a must for those wafers to get nice and soft, so plan for at least a couple of hours in the fridge before serving. For more great make-ahead ideas, you should totally check out these easy dinner recipes!
Frequently Asked Questions About Banana Pudding
Got questions about making the perfect Classic Banana Pudding With Homemade Whipped Cream? I’ve got you covered! It’s a simple dessert, but sometimes little things can stump you. Here are some common queries I get:
Can I use store-bought whipped cream?
You absolutely can, and it’ll still be delicious! But honestly, the homemade whipped cream takes this dessert to a whole other level of creamy, dreamy goodness. It’s so much lighter and fresher than anything from a can. Just a cup of heavy cream, a little powdered sugar, and vanilla – you can do it!
How do I prevent soggy wafers?
This is a common concern! The trick is all about timing and assembly. You want the wafers to soften, but not turn to complete mush. Assemble your pudding and let it chill for at least 2-4 hours. This gives them time to absorb some custard but keep a little texture. If you’re worried about it sitting too long, assemble it a few hours before serving, and add the whipped cream *right* before you bring it to the table for the best contrast.
What kind of bananas are best?
For this banana pudding, you want bananas that are ripe but still a little firm. Look for ones with those lovely brown spots, as they’ll be nice and sweet, but avoid bananas that are overly mushy. Overripe bananas can break down too much during chilling and make your pudding watery.
Can I make this ahead of time?
Yes, you totally can! You can make the custard base and the homemade whipped cream a day ahead and keep them stored separately in the fridge. Assemble the pudding layers a few hours before you plan to serve it so those wafers have time to soften up in the custard. Just add the whipped cream right before serving for the freshest look and taste!
Estimated Nutritional Information
When you’re diving into a slice of this delightful Classic Banana Pudding With Homemade Whipped Cream, know that you’re enjoying pure comfort! On average, each serving has about 450-500 calories, with roughly 25-30 grams of fat. You’ll also get about 5-7 grams of protein and a generous 50-60 grams of carbohydrates. Keep in mind these are just estimates, as the exact numbers can swing a bit depending on the brands you use and how precisely you measure everything. Enjoy every bite!
Classic Banana Pudding With Homemade Whipped Cream
Ingredients
Equipment
Method
- Make the custard: In a medium saucepan, whisk together sugar, cornstarch, and salt.
- Gradually whisk in the milk until smooth.
- Cook over medium heat, stirring constantly, until the mixture thickens and bubbles. Cook for 1 minute more.
- Remove from heat. Whisk a small amount of the hot mixture into the beaten egg yolks, then return the egg yolk mixture to the saucepan.
- Cook, stirring constantly, for 1 minute more. Do not boil.
- Stir in the butter and vanilla extract until the butter is melted and the custard is smooth. Pour the custard into a bowl. Cover the surface directly with plastic wrap to prevent a skin from forming. Let cool slightly.
- Assemble the pudding: Spread a layer of vanilla wafers in the bottom of your serving dish.
- Layer sliced bananas over the wafers.
- Spoon about half of the custard over the bananas.
- Repeat the layers: wafers, bananas, and the remaining custard.
- Cover and refrigerate for at least 2 hours, or until well chilled.
- Make the whipped cream: In a chilled bowl, beat the heavy cream with an electric mixer until soft peaks form.
- Beat in the powdered sugar and vanilla extract until stiff peaks form.
- Spread or pipe the whipped cream over the chilled pudding just before serving.