
Oh my goodness, themed baking is my absolute joy, isn’t it? There’s something so satisfying about making a treat that doubles as a decoration! For those intense celebrations—you know, the ones where we count down the seconds—I finally perfected what I call my Clock Face Countdown Cookies. These aren’t just sugar cookies shaped like clocks; trust me, these are legitimately keto-friendly, which is a huge win, especially when I’m catering to strict dietary needs.
I came up with this idea right before a big family blow-out. We always do that silly tradition of counting down to midnight, and I wanted a fun activity for the kids that wasn’t just sugar overload. So, using almond flour and my favorite sweetener blend, I baked a batch of sturdy clock-shaped cookies. As we decorated them together, painting on the numbers and hands, the kitchen filled with so much laughter! They weren’t just snacks; they became part of the tradition. It just proves that even when you have to stick to the keto plan, creativity and joy thrive!
Why You Will Love These Clock Face Countdown Cookies
I know you’re going to be obsessed with bringing these to your next theme party. They solve so many problems at once, which is exactly what I look for in a successful recipe. Here’s why these little timepieces are making it into my permanent rotation:
- They are perfectly sturdy, so they handle detailed decorating without snapping—crucial for those little clock hands!
- You get that classic, buttery sugar cookie flavor, but without the awful sugar crash, which is a huge score for busy parents like us.
- They adapt to any theme! New Year’s Eve, birthdays, or even just reminding the kids when it’s time for bed—the clock design is super versatile.
- For my keto friends, you can easily substitute the standard ingredients, making this a truly inclusive and delicious treat for everyone at your gathering.
Essential Equipment for Perfect Clock Face Countdown Cookies
Baking cookies that hold their shape so beautifully requires the right tools, especially when you want those clear clock lines. Don’t try to cut corners here; precision matters when you’re aiming for a perfect circle! If your cutters aren’t up to snuff, your Clock Face Countdown Cookies might end up looking more like abstract art than timepieces.
Based on my trials (and trust me, there were a few wonky batches!), here is the equipment that made the process smooth and yielded about 24 beautiful cookies:
- Stand Mixer: This makes creaming the butter and sugar so much easier than doing it by hand. It ensures you incorporate just enough air without overdoing it.
- Rolling Pin: You absolutely need a good, weighty rolling pin. Consistency is key for these, so aim for that perfect 1/4-inch thickness across the board.
- Cookie Cutters: This is where you should invest! You need great circle cutters. Look for ones with a slightly thicker blade edge—they cut through the chilled dough cleaner and prevent the edges from bunching up and losing that sharp clock shape.
- Baking Sheets: Standard sheets are great, but make sure they are heavy-duty. Thin sheets cause hot spots, and we don’t want burnt bottoms on our countdown cookies!
- Plastic Wrap: Essential for properly chilling the dough so it firms up nicely before slicing.
Honestly, having these items ready means less cleanup and much better-looking cookies when they come out of the oven. Go check your drawers—if your cutters are flimsy, maybe it’s time for an upgrade!
Ingredients for the Base Clock Face Countdown Cookies
Before we get to the fun decorating part, we need a sturdy cookie base. The structure of these Clock Face Countdown Cookies is non-negotiable because if they spread even a tiny bit, drawing a perfect ’12’ becomes impossible! This recipe makes about 24 cookies, ready for chilling and baking.
Here’s what you’ll need for the cookie dough itself. Make sure you measure everything precisely, especially the flour and baking powder. That’s the difference between crisp and crumbly!
For the Cookies
- 1/2 cup butter, softened—and I mean truly softened, not melted!
- 2/3 cup white sugar (See my note below on keto swaps if you need them!)
- 1 egg
- 1 egg white (This extra white helps keep the cookie sturdy!)
- 1/4 tsp vanilla extract
- 1 2/3 cup all-purpose flour
- 3/4 tsp baking powder
- 1/4 tsp salt
Ingredient Notes and Keto Substitutions
Now, listen up, fellow low-carb bakers! If you’re like me and have to stick to the diet, don’t panic. The beauty of this base is its adaptability. Instead of the all-purpose flour, you’ll want to swap in about 1 and 3/4 cups of fine almond flour. You also need to get rid of that white sugar and use about 2/3 cup of your favorite granular keto sweetener—erythritol blends work really well here.
These swaps let everyone enjoy the cookies without compromise. You can find more of my tried-and-true recipe variations over at my recipe index if you want to explore other keto desserts. But for these clocks, follow the substitutions exactly for the best texture!
Step-by-Step Instructions for Clock Face Countdown Cookies
Alright, here is where the precision comes in. We need these instructions followed quite closely so that when you go to decorate your Clock Face Countdown Cookies, they are perfectly flat and ready to go. No spreading allowed in my kitchen when we’re aiming for perfect clock hands!
Mixing the Cookie Dough
If you have a stand mixer, get it out now! You want to start by creaming together that softened butter and the white sugar. Mix it until it looks truly light and fluffy—this takes a minute or two. Then, toss in your egg and the vanilla extract. Mix just until everything is combined together. Don’t let it run too long here, or you’ll try to make meringue instead of cookie dough!
Next comes the dry stuff. In a separate bowl, whisk together your all-purpose flour, baking powder, and salt. Now, you’re going to add this dry mix into the wet ingredients gradually. Stop mixing the second you see everything just come together into a cohesive ball of dough. Seriously, stop! Overmixing flour always equals tough cookies, and we want these sturdy but tender.
Chilling and Rolling Clock Face Countdown Cookies
This step is non-negotiable for beautiful shapes, so don’t skip it! You need to wrap that dough ball up tightly in plastic wrap. Into the refrigerator it goes. I always recommend chilling it for a full hour, but honestly, if you can leave it overnight—like I do sometimes—it’s even better for those sharp edges on your Clock Face Countdown Cookies.
Once chilled, preheat your oven to 400 degrees Fahrenheit (that’s 200 Celsius). Make sure you line those baking sheets with parchment paper; that’s just good insurance against sticking. Dust your work surface lightly with flour. Roll out that cold dough until it is exactly 1/4 inch thick. Use your round cookie cutters and press straight down firmly to get those clean edges. A gentle wiggle is fine, but tilting the cutter will distort your clock face!
Baking and Cooling
Carefully place your cut-out cookies onto the prepared sheets. They usually bake fairly quickly because they’re rolled thin. Pop them in the oven for about 7 to 8 minutes. You’re looking for the edges to just barely start turning golden brown. If you wait until they are deeply golden, they’ll be too dark once cooled.
When the time is up, pull them out. Let them hang out on the warm baking sheet for just about five minutes. This lets them firm up a bit so they don’t snap when you move them. Then, gently transfer them over to a wire rack to cool completely before you even think about putting any icing on them!
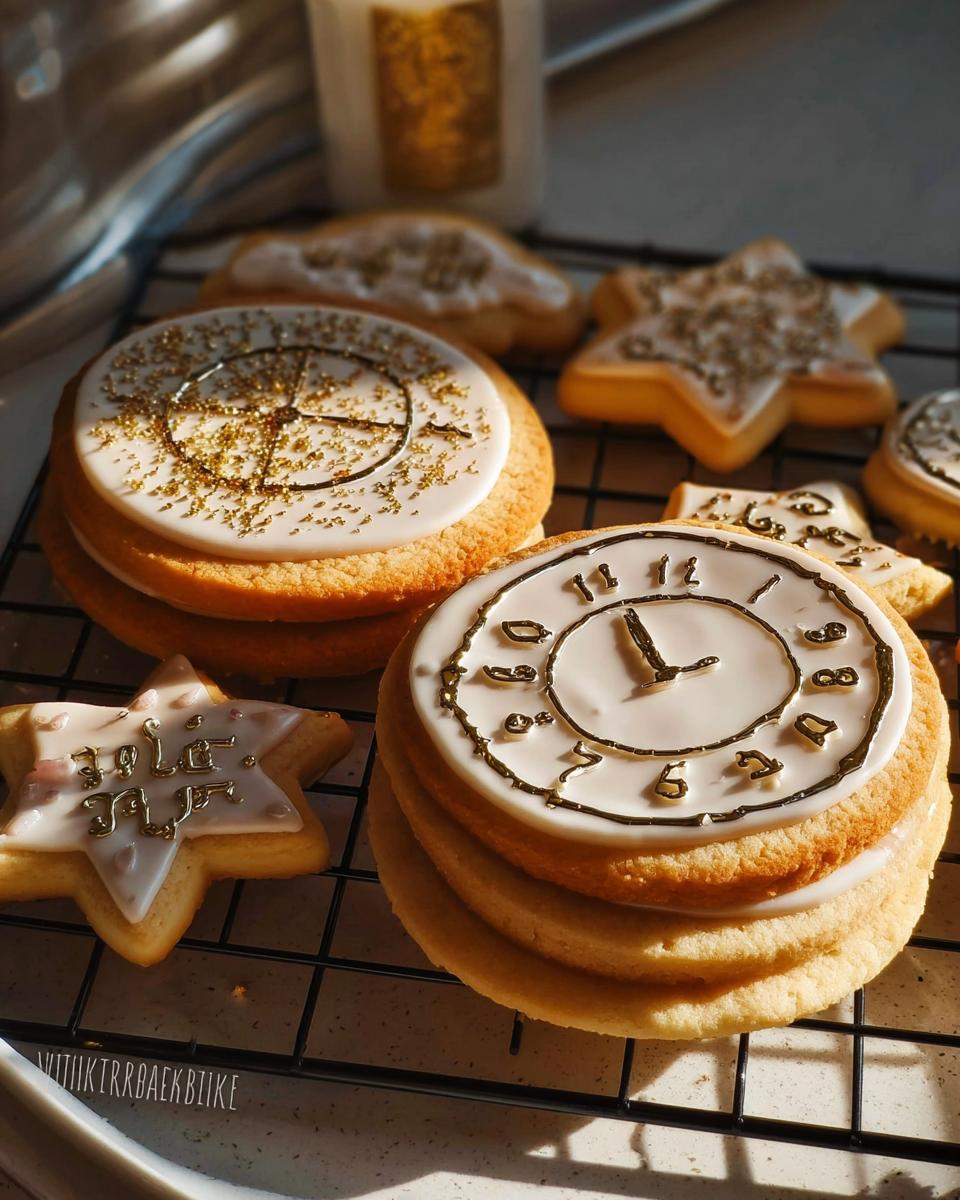
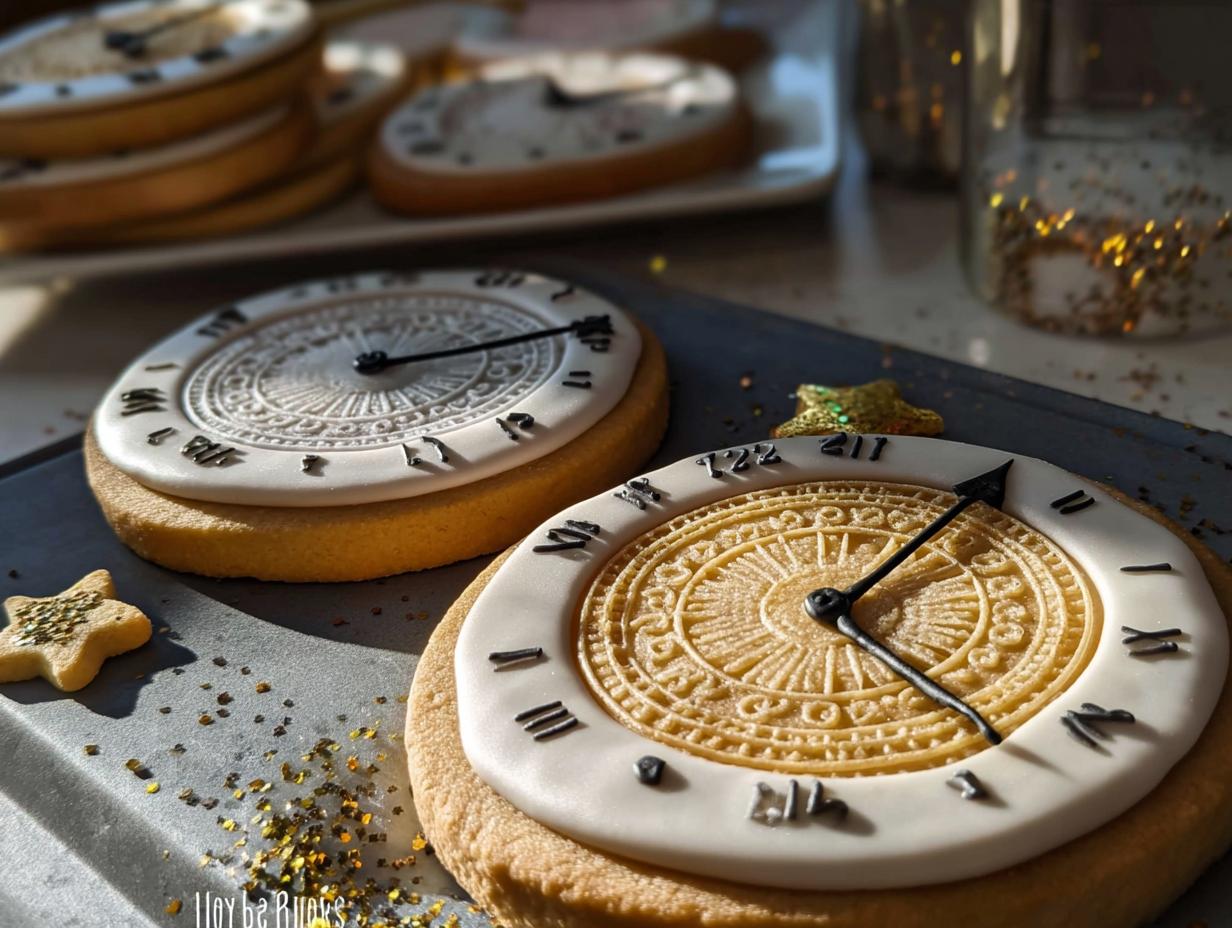
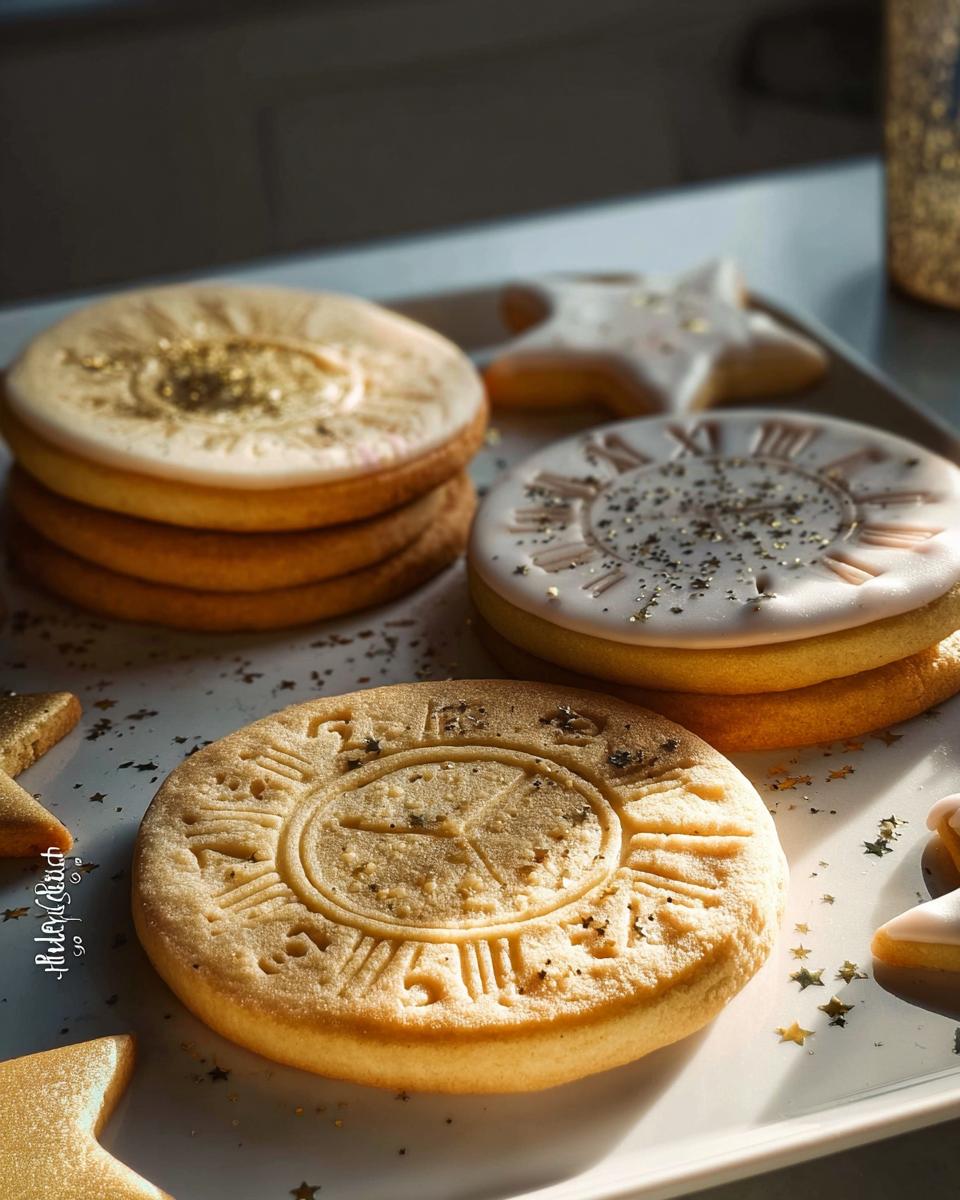
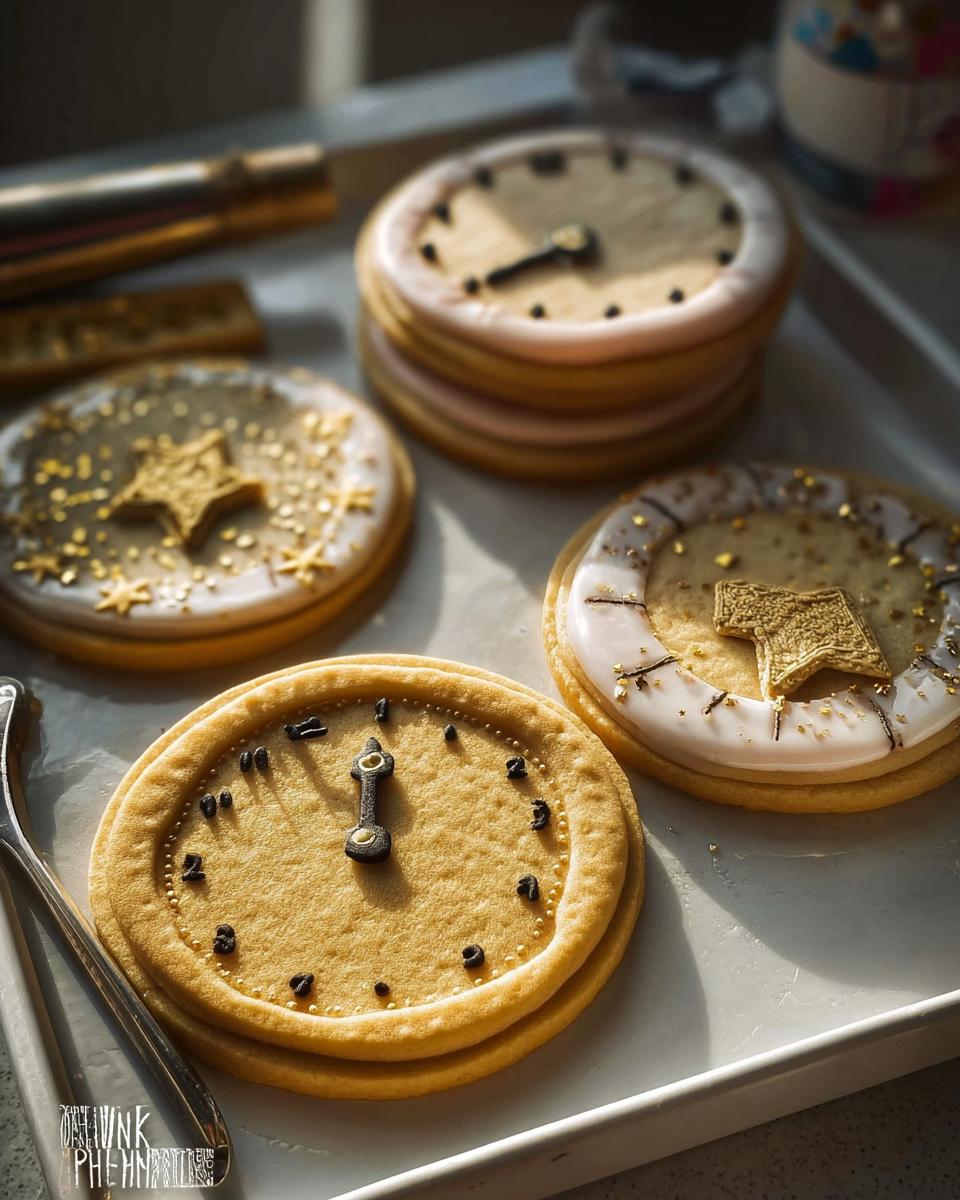
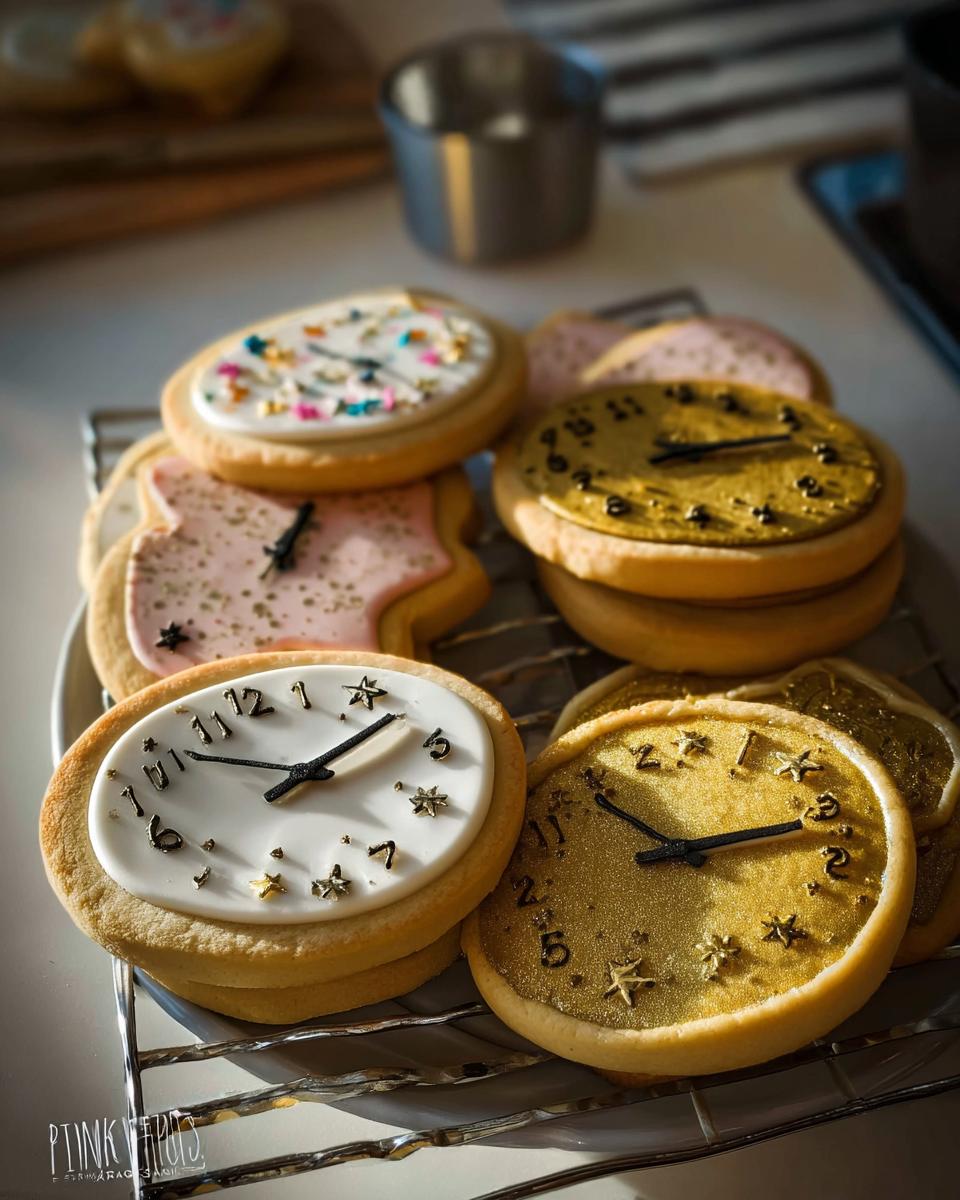
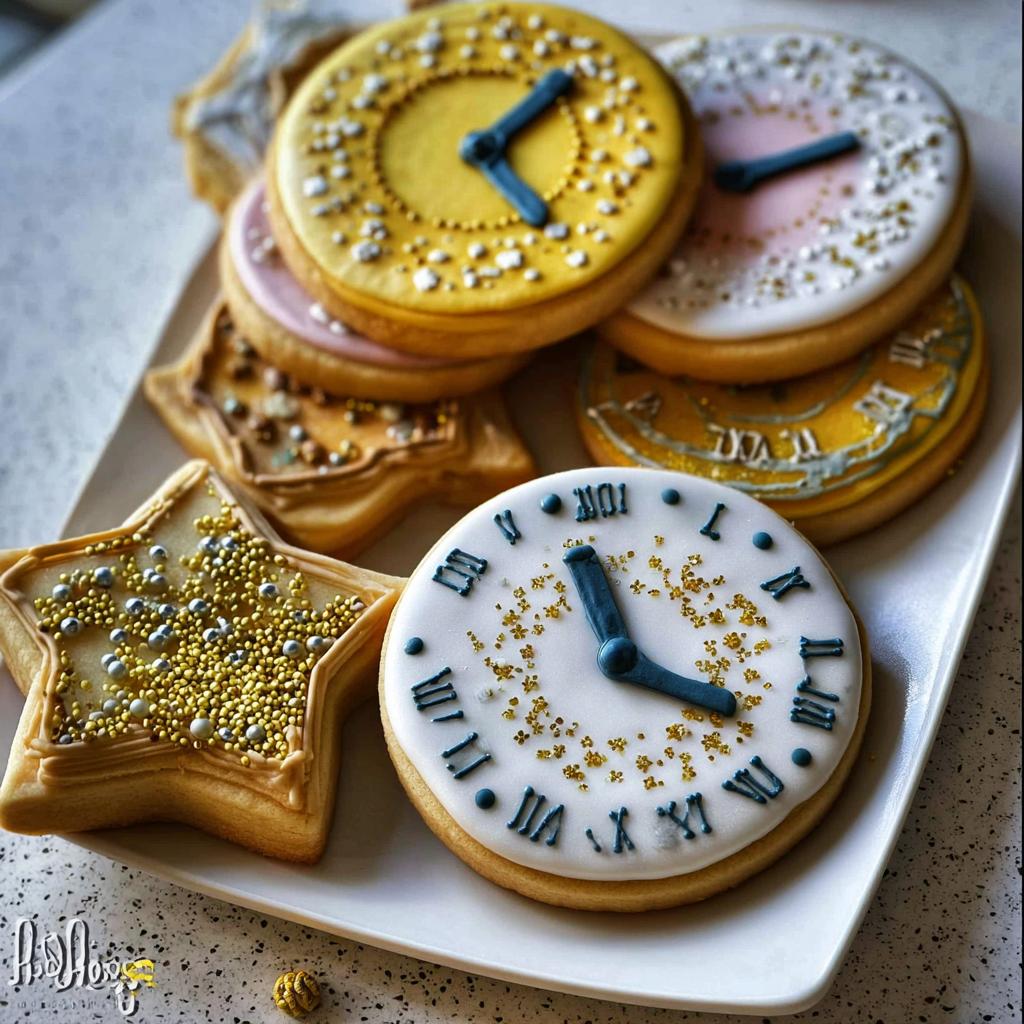
Decorating Your Clock Face Countdown Cookies with Royal Icing
Okay, now for the fun part—turning these perfectly baked circles into beautiful Clock Face Countdown Cookies! You simply have to use Royal Icing for this. Nothing else gives you those sharp, precise lines that you need for drawing numbers and delicate clock hands without bleeding everywhere. Trust me, I tried stiff buttercream once, and it looked like the clocks needed a chiropractor!
Royal icing is the secret weapon for decorated cookies because it dries hard and smooth. If you’re looking for major visual inspiration on how others have tackled countdown cookies—especially around New Year’s—you might want to sneak a peek at some ideas for New Year’s Eve treats. It gets the creative juices flowing!
Don’t forget, since we’re already talking keto options, you can definitely whip up a keto-friendly Royal Icing using powdered keto sweetener, though it takes a little more careful whisking than the regular stuff. You can see my preferred sweet recipes in my keto desserts category if you need a recipe for that specialized icing.
Royal Icing Consistency and Piping Ideas
The number one rookie mistake with Royal Icing is thinking you just need one consistency. Nope! You need at least two, and maybe even three, depending on how fancy you want to get with your Countdown Cookies.
- Outline Consistency (Thick): This needs to be thick—like toothpaste—so it holds its shape when you pipe it onto the cookie. Use this first to trace the outer edge of your clock face and to draw the numbers (1, 2, 3, etc.) and the main clock hands. This holds the flood icing in place.
- Flood Consistency (Medium/Thin): Once your outlines are set and dry (give them maybe 15 minutes!), you switch to your flood consistency. This is thinner, pourable icing. You use this to fill in the entire center of the clock face. It should spread itself out smoothly, leaving you with a perfect, flat canvas on which to draw the final time.
For piping the numbers 1 through 12, I always use a small, round piping tip—like a Wilton #1 or #2. Pipe the numbers right onto the dried flood layer. If you are making a specific countdown, say to 9 PM, pipe the ‘9’ large and bold, and then pipe a slightly thinner minute and hour hand pointing to that number. It’s all about clear contrast!
Tips for Perfect Clock Face Countdown Cookies Every Time
Even with the best recipe, sometimes baking throws us a curveball! I’ve learned through trial and error exactly how to troubleshoot my Clock Face Countdown Cookies so they come out looking bakery-perfect every single time. Since these treat you like a canvas, precision is everything!
Here are a few non-negotiable tips I swear by:
- Keep That Dough Cold: I cannot stress this enough—if your dough warms up while you’re cutting shapes, those beautiful clock edges will spread in the oven. If you notice the dough getting soft while cutting the second batch, stop immediately! Put the whole tray back into the fridge for 10 minutes. A cold cookie is a non-spreading cookie.
- Handle the Extra Egg White: Notice we use one whole egg and one extra egg white in the base recipe? That extra white is key for structure. It adds protein without adding too much moisture from the yolk, which helps the cookie stay dense and flat so your royal icing doesn’t sink or slide off your Clock Face Countdown Cookies.
- Use the Right Flour Amount: When measuring your flour (or almond flour if you’re keto!), make sure you spoon it lightly into your measuring cup and then level it off with a straight edge. Scooping directly from the bag packs it down way too much, resulting in dry, crackly cookies that are impossible to decorate cleanly.
- Bake Low and Slow (If They Spread): If, despite everything, your cookies spread a bit too much and look puffy, pull them out a minute early and let them cool completely on the sheet. Then, while still slightly warm (but not soft!), gently use a flat, wide spatula to press the puffed edges down just slightly. It’s a risky move, but it can save a few misshapen Clock Face Countdown Cookies.
Storage and Making Ahead for Your Party Treats
This is the part I love because it means I can bake ahead of time! We all know party days are hectic, so setting aside time to make these Clock Face Countdown Cookies early is a lifesaver. The storage method depends entirely on whether they are plain or fully decorated with that pretty royal icing.
For baking your base dough, remember that perfectly stable cookie dough? You can actually wrap that dough ball *very* tightly and keep it in the fridge for up to three days! I’ve done this before a big weekend event. Just let it sit on the counter for about 15 minutes to soften slightly before rolling out those circles. It makes the morning of the party so much less stressful because the hard part is already done.
When it comes to the baked cookies—the ones without any icing on them yet—they are incredibly resilient. Store them in an airtight container at room temperature. I find they stay perfectly crisp and delicious for a solid week. This is perfect if you want to get the baking done early but wait until closer to the actual celebration to do the decorating.
Now, once you’ve applied the royal icing onto your Clock Face Countdown Cookies, things change a little bit because the icing needs protection. Always store the decorated cookies in a single layer, or use parchment paper between the layers if you absolutely must stack them. If you stack them without paper, I can promise you that the hands and numbers will stick together, and that’s just tragic!
They usually last beautifully for about 5 to 7 days once decorated, provided your kitchen isn’t super humid. If your house is humid, or if you used a keto royal icing, I sometimes feel safer letting them set up in a cool, dry spot for 24 hours, and then placing them very carefully in a container in the pantry. Avoid the fridge if you can, especially the traditional ones, because the condensation can soften that gorgeous, hard icing shell. Getting these Clock Face Countdown Cookies ready ahead of time takes so much pressure off the final day!
Frequently Asked Questions About These Cookies
I totally get it—when you’re following a specific eating plan, like keto, or you’re baking for an important party theme, you need absolute certainty before you start mixing! These Clock Cookies are so fun, but precision matters. Here are a few things readers often ask before they start whipping up their own batch of Countdown Cookies.
Can I make these Clock Cookies without chilling the dough?
Oh, honey, please don’t skip the chill time! I know we’re busy, and waiting an hour feels like an eternity when you’re excited to bake, but trust me on this one. If you try to roll out and cut the dough while it’s warm—even slightly warm—it will spread out like a puddle in the oven. We need that butter rock solid to hold those perfect circles for the clock faces. If you skip chilling, your adorable clock shapes will just turn into soft, uneven circles, and you won’t get the crisp surface needed for detailed icing.
What is the best way to get perfectly round Clock Cookies?
Getting those perfect circles is all about your cutter technique! First, make sure your dough is rolled evenly to that 1/4 inch thickness. When you press your round cookie cutter down, press straight down firmly and quickly. Avoid twisting or turning the cutter at all costs! Twisting is what drags the dough and warps the shape before it even hits the pan.
If you have a particularly large circle cutter, sometimes the outer edge doesn’t cut through perfectly, especially after the dough has been handled a bit. My little trick for the absolute crispest edges on my Countdown Cookies is this: After cutting the shape, I gently lift the cookie onto the parchment paper using a thin metal spatula. If I see any tiny bit of tearing or bunching on the edge, I quickly use a small offset spatula to smooth that edge back into place while the cookie is still resting on the spatula before setting it down. It takes two seconds, but it makes the final presentation so much cleaner!
I know some bakers use specialized templates, but honestly, a quality, sharp, medium-sized cookie cutter and cold dough will give you gorgeous results every time. You can read more about my general baking philosophies and precision methods over at my ‘About’ page!
Estimated Nutritional Data for Clock Face Countdown Cookies
I always try to be transparent about what’s going into our bodies, especially when we’re trying to stick to a specific plan like keto, even if my standard recipe uses cane sugar! Please remember that these numbers are based on the original recipe using all-purpose flour and white sugar, divided across 24 cookies. If you swap to almond flour and keto sweeteners, your carb count, especially net carbs, will look drastically different!
These estimates are just a starting point so you have a better idea of what you’re working with before you add the royal icing decorator’s glaze on top, which adds extra sugar. For anyone needing a detailed rundown on macros, I highly recommend you check out my guide on tracking your keto progress; it has free templates that really help me map out these recipes!
Here is the best estimate I can give for one standard, undecorated Clock Face Countdown Cookie:
- Calories: Approximately 95-105 kcal
- Total Fat: Around 5g
- Protein: Roughly 1.5g
- Total Carbohydrates: About 10g
Again, if you use the keto substitutions we talked about earlier—almond flour and a zero-calorie sweetener—those carbohydrate numbers will drop significantly! The fat content will likely increase slightly because almond flour is higher in fat, which is usually a good day for my keto friends. Bake responsibly and enjoy keeping track of time with these fun treats!
Share Your Themed Baking Creations
Well, that’s it! We’ve covered everything from creaming the butter for the perfect dough to getting those icing lines sharp enough to tell the future. I truly hope you have as much fun making and decorating your Clock Face Countdown Cookies as I do every time I take them out!
Now, the best part of sharing a family recipe like this is seeing how you all adapt them. Did you make them for a birthday countdown? Are you using bright neon icing for a glow party theme? I’m dying to see them!
Take a picture, share it on your favorite social spot, and tag me! I absolutely love seeing your beautiful, themed creations that bring joy to your own family celebrations. And seriously, if you made this recipe—whether you used the standard ingredients or went full keto on them—please pop down below and leave a rating. It helps other bakers know that this recipe is sturdy and reliable for their own special moments!
If you have any burning questions that weren’t covered in the FAQ, or if you just want to send me a note about how much your kids loved ticking down the hours with their cookies, you can always reach out through my contact page. Happy baking, and may your time always be sweet!
Clock Face Countdown Cookies
Ingredients
Equipment
Method
- If you have a stand mixer, cream together the softened butter and white sugar until well combined. Add the egg and vanilla extract, and mix until incorporated.
- Stir in the all-purpose flour, baking powder, and salt. Mix until a cohesive dough forms.
- Cover the dough with plastic wrap. Chill in the refrigerator for at least 1 hour, or preferably overnight.
- Preheat your oven to 400 degrees Fahrenheit (200 degrees Celsius). Line baking sheets with parchment paper.
- On a lightly floured surface, roll out the chilled dough to 1/4 inch thickness. Use cookie cutters to create your desired shapes, such as circles for clock faces.
- Place the cut-out cookies onto the prepared baking sheets. Bake for 7-8 minutes, or until the edges are lightly golden.
- Allow the cookies to cool on the baking sheets for a few minutes before transferring them to a wire rack to cool completely. Decorate as desired.
Notes
Tried this recipe?
Let us know how it was!
Precision Keto Scientist
Numbers don’t lie, and neither do my recipes. I’m a biochemist who fell into keto cooking through my own metabolic research—and I approach recipe development like a lab experiment, complete with macro calculations precise to the tenth of a gram.
My journey started in diabetes research labs at Johns Hopkins, where I spent six years studying how different macronutrient ratios affected insulin sensitivity. Personal experimentation with therapeutic ketosis for cognitive enhancement led me down a rabbit hole of recipe testing that eventually consumed more hours than my actual day job.
While other cookbook authors describe flavors and textures, I quantify ketone elevation curves and glycemic impact data. My recipe database contains 340+ formulations, each tagged with detailed nutritional analysis, predicted ketosis timing, and optimal meal spacing. I measure salt by weight, time cooking processes to the minute, and log ingredient sourcing obsessively for consistent results.
My breakthrough research on fat-protein ratios for sustained ketosis got published in the Journal of Nutritional Biochemistry. My “Macro Math Mastery” workshops have trained over 5,000 people in precision meal planning. I even collaborated with continuous glucose monitor manufacturers to create the first real-time feedback system for recipe optimization.
I left my pharmaceutical research position at Merck three years ago to focus on metabolic nutrition consulting. Now I work with professional athletes, biohackers, and medical professionals seeking therapeutic ketosis protocols. When I’m not in my lab-kitchen, I’m competing in chess tournaments or documenting my daily biomarker measurements with true data scientist obsessiveness.
Cooking is just applied chemistry—and chemistry follows predictable rules. Master the variables, control the outcomes.