
Okay, let’s talk about the absolute easiest way to impress your friends without breaking a sweat in the kitchen. My recipe for No Bake Oreo Cheesecake is a total game-changer when it comes to dessert recipes with no bake Oreo cheesecake for easy parties. Seriously, I stumbled upon this one years ago when I was desperate for a showstopper dessert that didn’t involve turning on the oven, and it’s been a staple ever since. I remember the first time I made it for a summer BBQ; jaws literally dropped. It looks so fancy and decadent, but trust me, it’s ridiculously simple!
This isn’t just *any* no-bake cheesecake; it’s got that irresistible crunch of Oreo cookies and a super creamy filling that people go absolutely wild for. Whether it’s a birthday bash, a holiday get-together, or just a spontaneous Friday night treat, this dessert is your golden ticket. You get all the flavor and satisfaction of a classic cheesecake, but with none of the baking drama. It’s perfect for anyone who loves a good dessert but maybe doesn’t love spending hours slaving away. Plus, the cleanup? A breeze!
Why You’ll Love This No Bake Oreo Cheesecake
Honestly, this no-bake Oreo cheesecake is a lifesaver. It’s one of those recipes that just works every single time, and it makes you look like a total kitchen wizard with minimal effort. Here’s why it’s my go-to:
- Seriously Easy Peasy: It’s pretty much fool-proof. No fancy techniques, no stress about over-baking. Just mix, press, spread, and chill.
- Kid-Friendly (and Adult-Approved!): Who doesn’t love Oreos? This cheesecake is a guaranteed hit with everyone, from the little ones to the grown-ups.
- Fast and Flavorful: You can whip up the main parts in about 20 minutes, then just let it do its thing in the fridge. The flavor is out-of-this-world amazing – creamy, chocolatey, and perfectly sweet.
- Minimal Cleanup is Key: With no baking, you’re not dealing with a messy oven. Usually, it’s just a couple of bowls and your mixer. Less scrubbing, more mingling at the party!
Gather Your Ingredients for No Bake Oreo Cheesecake
Okay, let’s talk about what you’ll need to whip up this dreamy no-bake Oreo cheesecake. It’s honestly just a handful of simple ingredients that come together like magic. Trust me, gathering these is the most effort you’ll put in, and even that’s a breeze!
First up for the crust, you’ll need:
- 24 Oreo cookies: Make sure they’re finely crushed! I usually toss them into my food processor for a minute, but you can totally toss ’em in a Ziploc bag and go at ’em with a rolling pin if you’re feeling a bit primal.
- 6 tablespoons butter: Gotta be melted for this part. It’s what holds those cookie crumbs together.
Now for that luscious filling:
- 24 ounces cream cheese: This is the star, so make sure it’s softened! Take it out of the fridge at least an hour before you plan to start. Cold cream cheese just doesn’t mix as smoothly, and we want perfection here.
- 1 cup powdered sugar: This gives it that lovely sweetness without any grittiness.
- 1 teaspoon vanilla extract: Just a splash to boost all those yummy flavors.
- 1 cup heavy cream: This needs to be whipped up to stiff peaks. It’s what makes the filling so light and airy.
- 10 Oreo cookies: These are for chopping up and stirring right into the filling. It gives you those awesome chunky bits of cookie goodness in every bite!
Essential Equipment for Your No Bake Oreo Cheesecake
You don’t need a gazillion gadgets for this easy dessert! Just a few kitchen staples will do the trick. You’ll definitely want a9-inch springform pan because it makes releasing the finished cheesecake a total dream – no wrestling required! Afood processor is super handy for getting those Oreos perfectly crushed for the crust, but a good old Ziploc bag and a rolling pin works too. And of course, anelectric mixer (handheld or stand) is a must for getting that cream cheese filling perfectly smooth and for whipping the cream. Lastly, a couple ofmixing bowls will be your best friends for bringing all these delicious components together.
Step-by-Step Guide to Making Your No Bake Oreo Cheesecake
Alright, let’s get down to business! Making this no-bake Oreo cheesecake is honestly one of the most satisfyingly simple things you can do in the kitchen. It feels fancy, but it’s mostly just mixing and waiting. My secret weapon? I always make sure my cream cheese is *really* soft – like, seriously room temperature. Cold cream cheese is the enemy of smooth filling, trust me. And speaking of creamy delights, if you’re ever looking for a lighter, protein-packed dessert option, check out my easy cottage cheese chocolate mousse. But back to this cheesecake!
First, we need to talk about getting that crust just right. It’s the foundation for all that creamy goodness!
Preparing the Oreo Crust
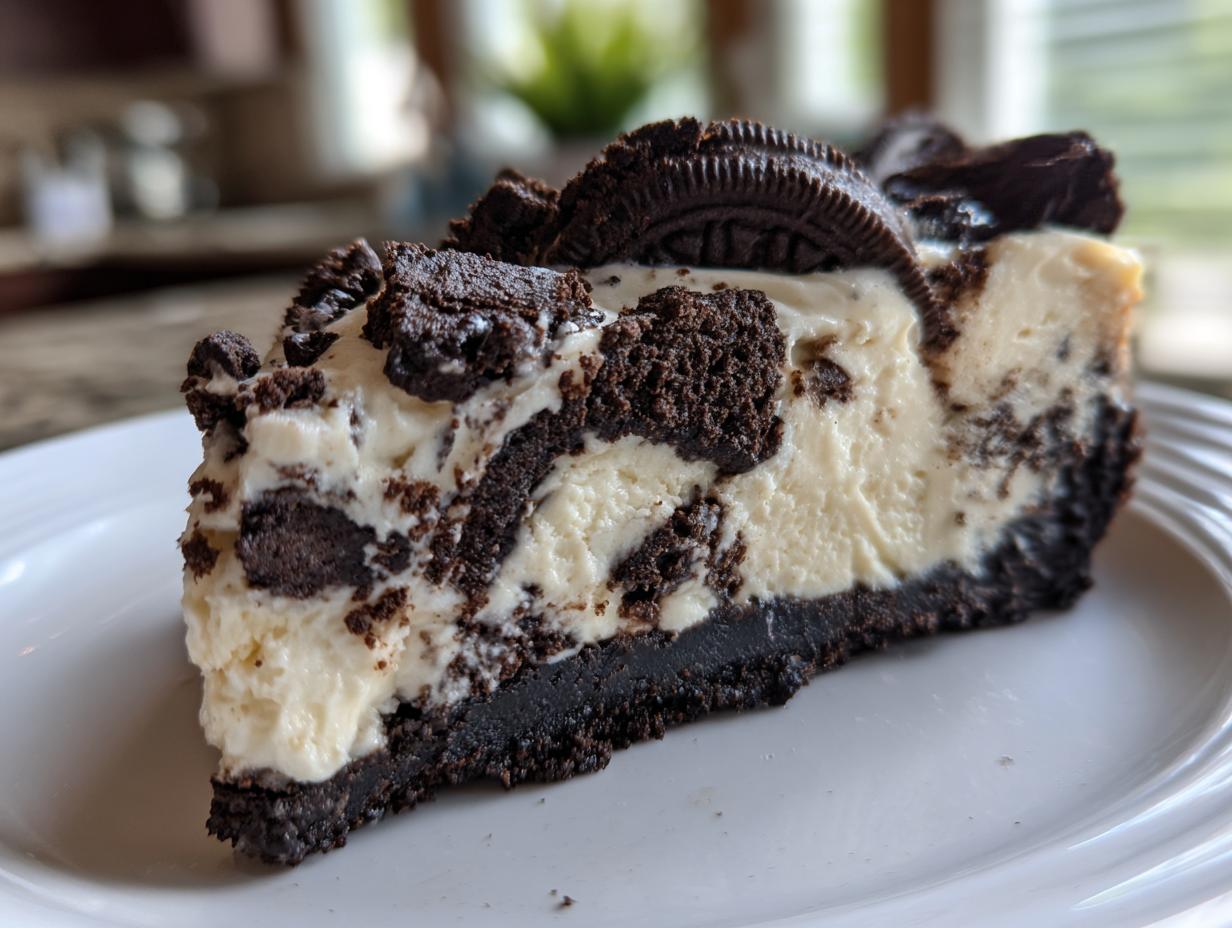
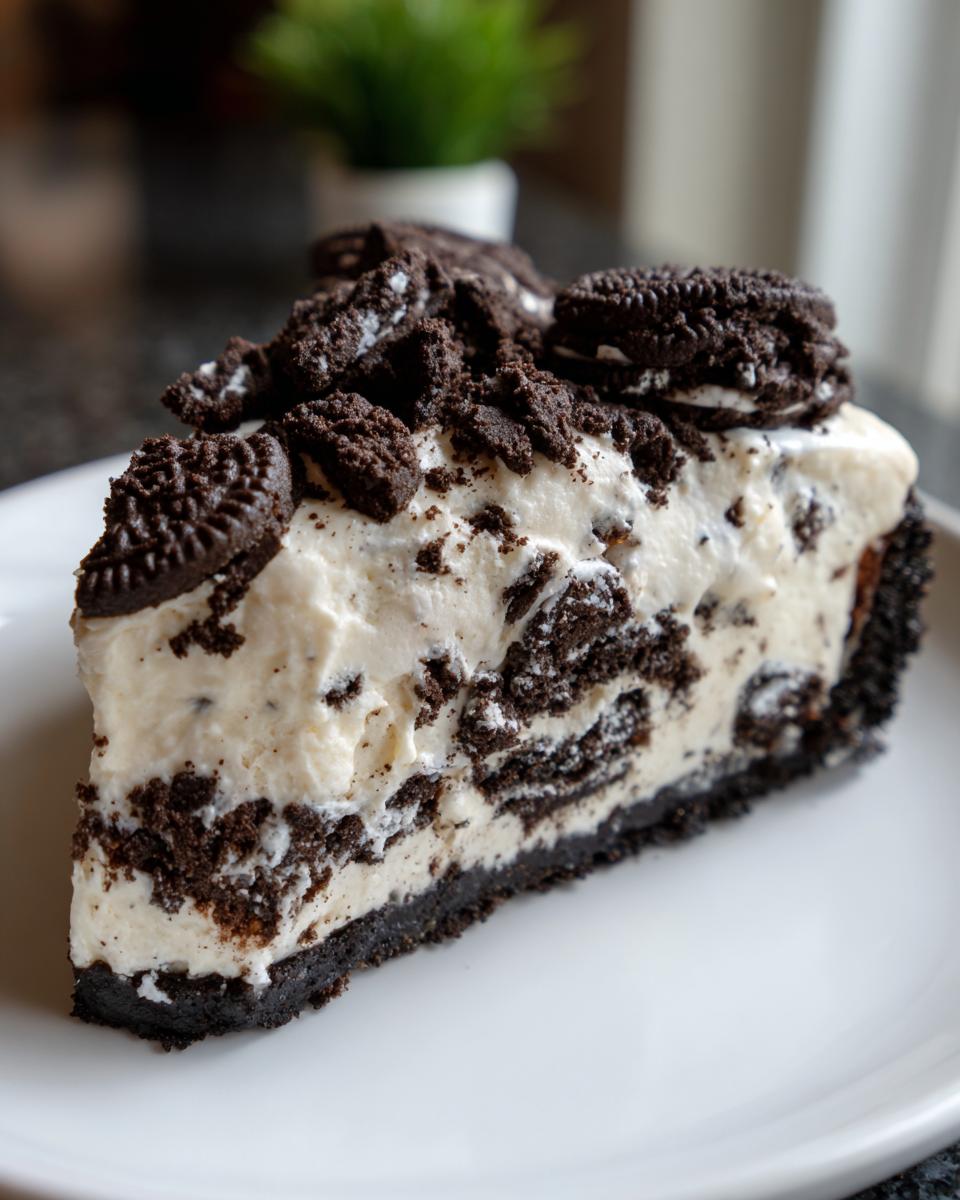
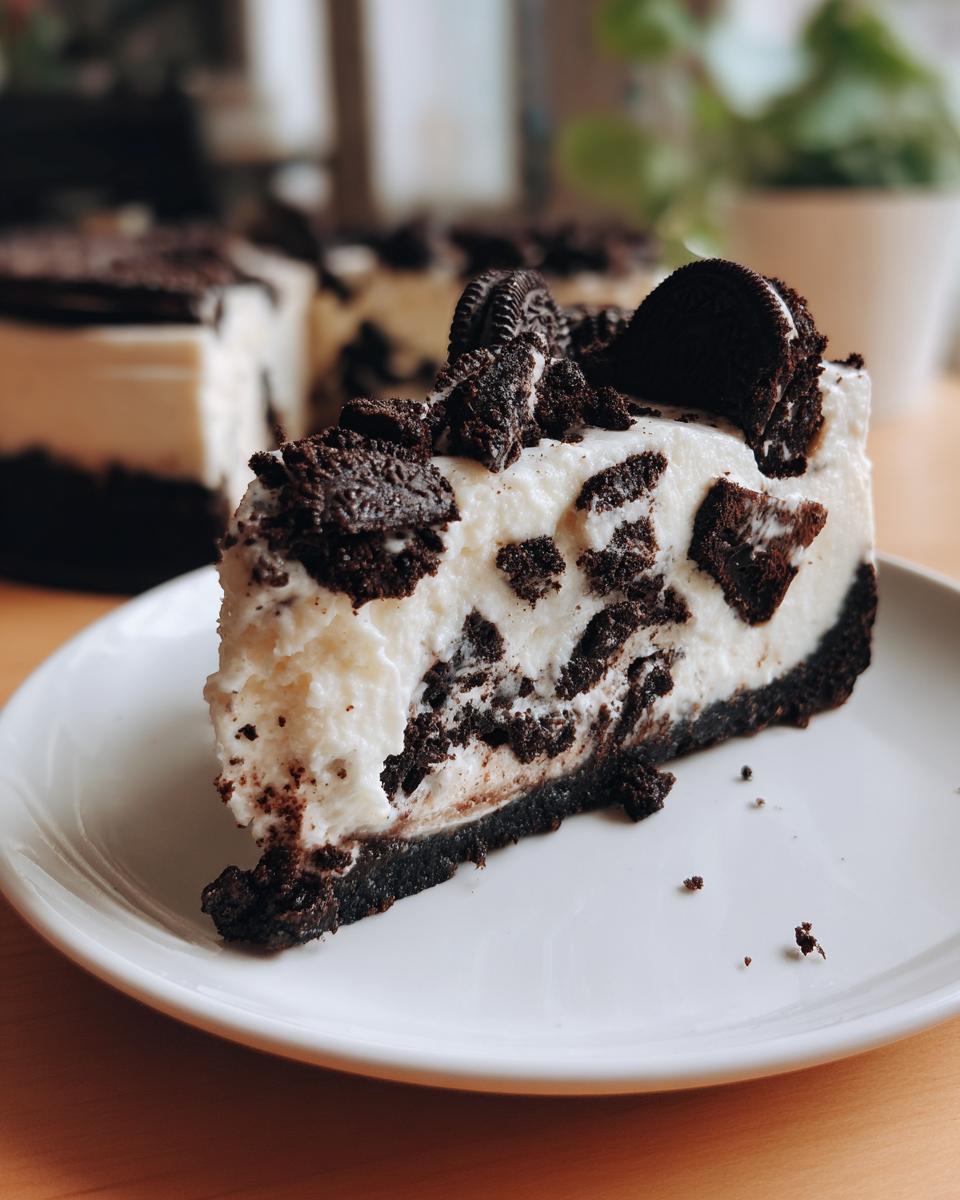
This part is super quick. Just take your 24 finely crushed Oreo cookies and dump them into a bowl with that 6 tablespoons of melted butter. Give it a good stir with a fork, or even your hands (my favorite way!), until it all looks like wet sand. Then, press this mixture evenly into the bottom of your 9-inch springform pan. I like to use the bottom of a glass or measuring cup to get it nice and firm. Don’t be shy here – a sturdy base is key!
Now for the star of the show – that luscious, creamy filling!
Crafting the Creamy Cheesecake Filling
Grab your biggest mixing bowl. Pop in your softened cream cheese and beat it with your electric mixer until it’s completely smooth. Seriously, no lumps allowed! Then, gradually add in the powdered sugar and that teaspoon of vanilla extract. Keep beating until everything is perfectly combined and super creamy. This is where the magic starts! You want it to look like a pale, fluffy cloud.
This next step is all about lightness and those chunky bits of cookie bliss!
Folding in the Whipped Cream and Oreos
Once your cream cheese mixture is smooth and lovely, it’s time to gently fold in the whipped heavy cream. You want to do this carefully so you don’t deflate all that air you just whipped into it! It should make the filling incredibly light and airy. Then, fold in those 10 chopped Oreo cookies. I like them a little chunky, so I don’t chop them too finely. It’s like finding little treasures in every bite!
The hardest part? Waiting!
Chilling Your No Bake Oreo Cheesecake
Now, carefully spread that glorious filling evenly over your prepared Oreo crust. Pat it down gently. Cover the whole thing tightly with plastic wrap – you don’t want any funky fridge smells getting in. Pop it into the refrigerator for at least 2 solid hours. This chilling time is super important; it allows the cheesecake to set up properly and become wonderfully firm. If you poke it gently after 2 hours and it feels firm, you’re good to go!
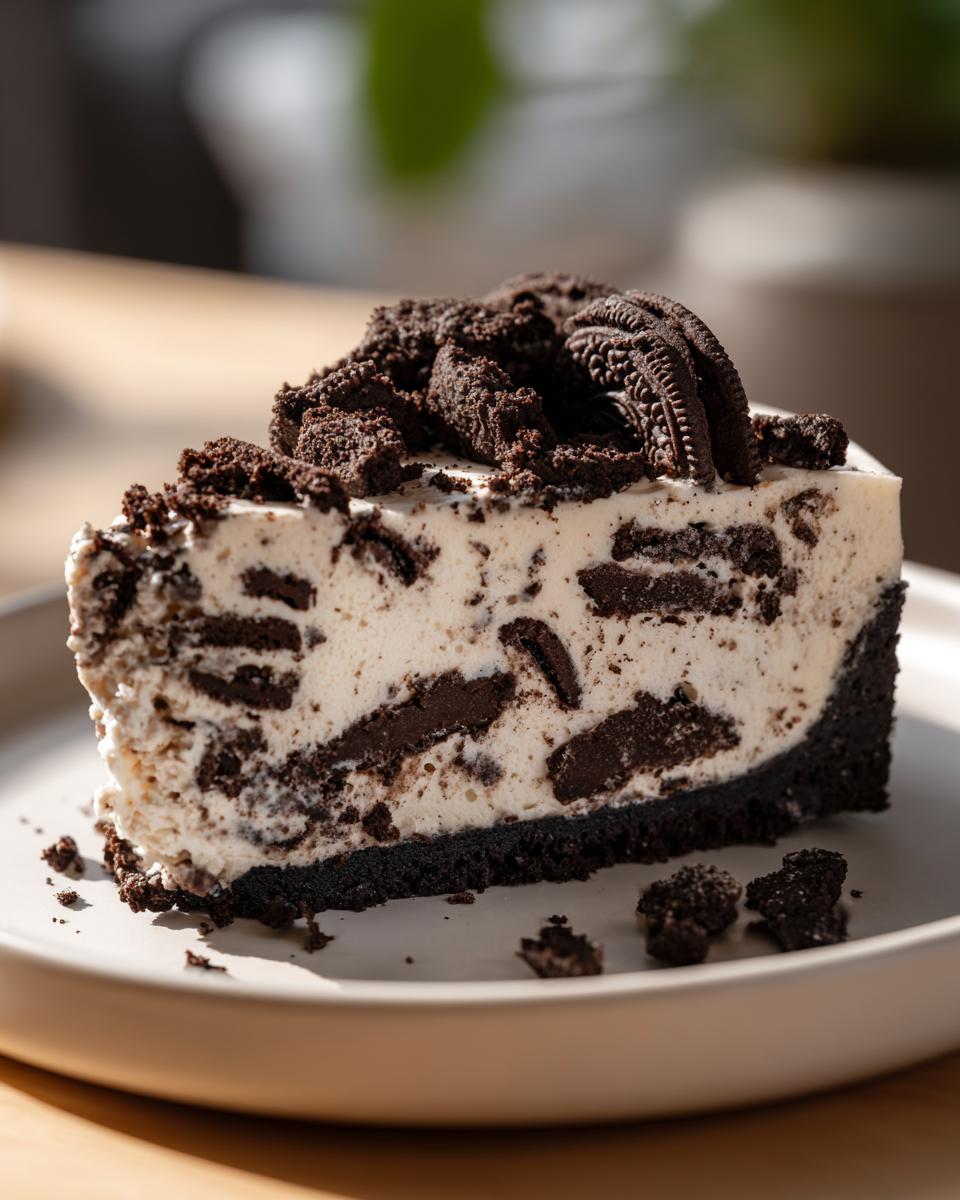
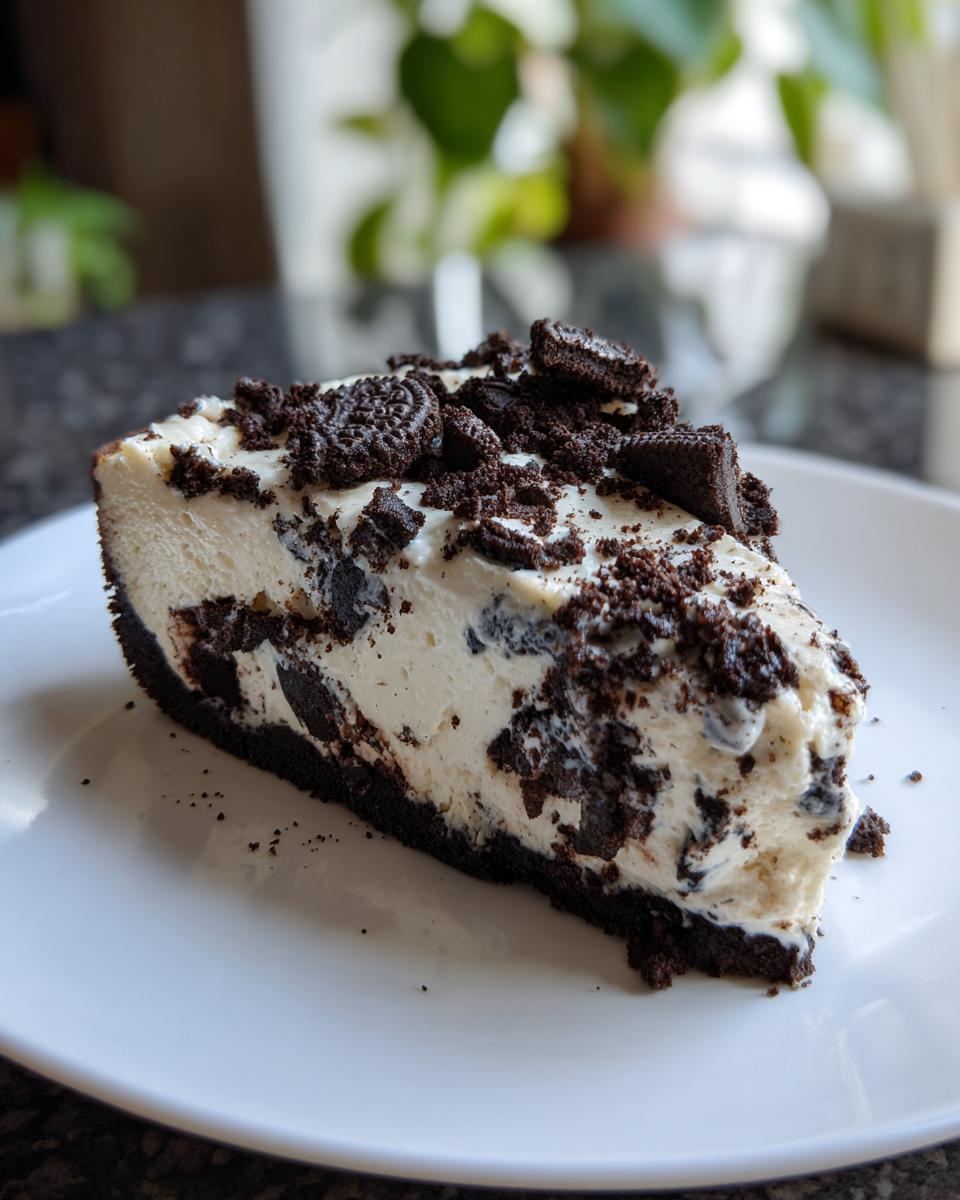
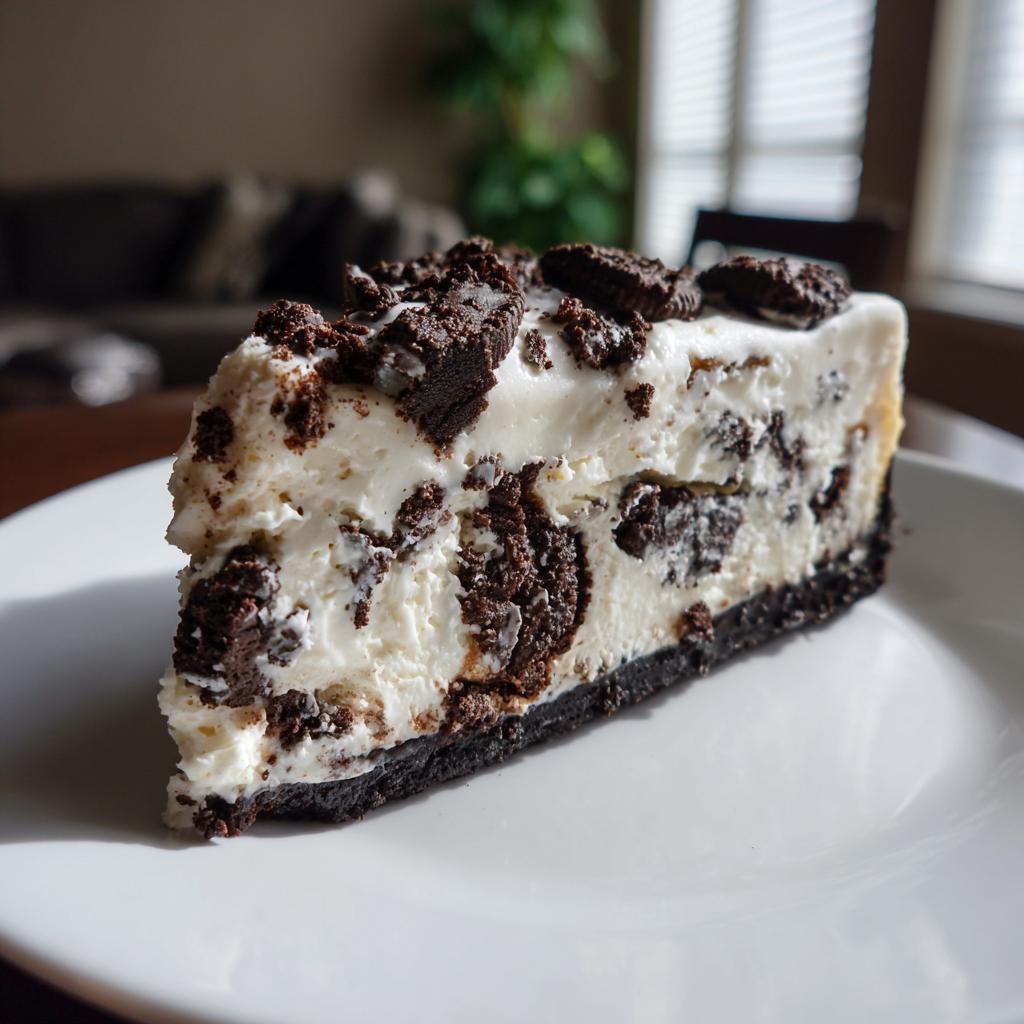
Before serving, you can always add a few more crushed or whole Oreos on top for that extra wow factor. I love doing this because it really shows off what’s inside this amazing dessert, and it looks so professional. So go ahead, make it shine!
Looking for more No Bake Oreo Cheesecake ideas? This one from Taste of Home is great, but honestly, mine has that special something. 😉
Tips for the Best No Bake Oreo Cheesecake
Alright, so you’ve got the recipe, you’ve got the ingredients, but you want to make sure this no-bake Oreo cheesecake is absolutely perfect, right? I hear ya! I’ve made this more times than I can count, and I’ve picked up a few little tricks along the way that really make a difference.
First off, let’s talk ingredients! Make SURE your cream cheese is truly softened. I can’t stress this enough. If it’s cold, you’ll get lumps, and nobody wants lumpy cheesecake. I usually take mine out of the fridge about an hour, maybe even 90 minutes, before I start. Also, for your whipped cream, make sure it’s whipped to *stiff* peaks. If it’s too soft, it won’t give the filling that lovely structure it needs. You want it to hold its shape when you lift the whisk.
Don’t be afraid to really press that crust down firmly into the pan. A solid crust is key to a cheesecake that slices cleanly. And when you’re folding in the whipped cream and chopped Oreos, be gentle! You’re working with air here, folks. Easy does it so you don’t lose all that fluffy goodness. This is why I love my healthy no-bake Oreo cheesecake bites recipe too – same principles, smaller package!
And speaking of slicing, a hot knife trick works wonders! Dip your knife in hot water, wipe it dry, and then slice. It makes cutting through even a chilled cheesecake so much cleaner. You can find more helpful tips on avoiding common no-bake cheesecake pitfalls over at RecipeTin Eats. Oh, and don’t forget the notes from the recipe: adding a tablespoon of cocoa powder to the cream cheese mixture can give it an even deeper chocolate flavor. And if you don’t have a springform pan? A regular pie plate works, but just know that getting it out cleanly might be a bit trickier!
Serving and Storing Your Easy Party Dessert
Alright, dessert is made, and it looks absolutely stunning! Serving this no-bake Oreo cheesecake is almost as easy as making it. You can just lift the sides of your springform pan and voilà – a perfect, creamy circle of happiness. For an extra flair, I love to sprinkle a few more crushed Oreos or even some chopped up cookie pieces right on top just before serving. If you’re feeling real fancy, a drizzle of chocolate syrup or a dollop of whipped cream is never a bad idea! It really makes it feel like a special occasion, even if it was super simple to put together.
Now, what if you have leftovers (which, let’s be real, sometimes happens!)? Just cover the cheesecake tightly with plastic wrap or foil, or pop it back into the springform pan with the sides still on and wrap that. It’ll keep beautifully in the refrigerator for up to 3 to 4 days. The crust will stay nice and crisp, and the filling will stay perfectly firm. Honestly, I think it tastes even better the next day as the flavors really meld together. If you’re looking for other easy layered desserts, my Oreo Cookies and Cream Icebox Cake is another winner that’s perfect for parties!
Frequently Asked Questions about No Bake Oreo Cheesecake
Got questions about this glorious no-bake Oreo cheesecake? I’ve got answers! This recipe is pretty straightforward, but sometimes little things pop up. Let’s clear them up!
Can I make this ahead of time?
Absolutely! That’s one of the best parts about this no-bake wonder. You can totally make it a day or even two in advance. In fact, I think the flavors really meld together nicely after chilling overnight, making it even more delicious. Just make sure you cover it snugly before popping it in the fridge!
What if I don’t have a springform pan?
No springform pan? No problem! You can totally use a regular 9-inch pie plate. Just press your crust in the same way. The only difference is that it might be a little trickier to get those super clean slices out when you serve it. You can try carefully loosening the edges with a spatula, or even just scoop it out like a yummy pie!
How do I get clean slices?
Ah, the dream of a perfect slice! For a super clean cut, let your cheesecake chill for the full recommended time. Then, before you slice, dip a sharp knife into a tall glass of hot water. Wipe it completely dry with a towel, and then slice through the cheesecake. Wipe the knife and repeat for each slice. It really makes a difference!
Can I use different cookies for the crust?
You can totally get creative! While Oreos are classic for that chocolatey kick, you could also use chocolate graham crackers, chocolate sandwich cookies that aren’t Oreos, or even vanilla wafers if you want a lighter crust. Just stick to about the same amount of crushed cookies and melted butter, and you should be good to go!
Estimated Nutritional Information
Now, I’m no registered dietitian, but based on the ingredients in this glorious no-bake Oreo cheesecake, you’re looking at roughly around 400-450 calories per slice. That usually breaks down to something like 35-40g of fat, maybe 25-30g of carbs, and about 5-7g of protein. Of course, this can totally change depending on the specific brands of Oreos and cream cheese you use, so think of these as good ballpark figures! If you’re looking for something a bit lighter, my 3-ingredient cookies and cream mousse is a great option!
No Bake Oreo Cheesecake
Ingredients
Equipment
Method
- Combine the crushed Oreo cookies and melted butter in a bowl. Press the mixture evenly into the bottom of a 9-inch springform pan.
- In a large bowl, beat the softened cream cheese until smooth. Gradually add the powdered sugar and vanilla extract, beating until well combined.
- Gently fold the whipped heavy cream into the cream cheese mixture until just combined. Stir in the chopped Oreo cookies.
- Spread the filling evenly over the crust. Cover the cheesecake and refrigerate for at least 2 hours, or until firm.
- Before serving, you can garnish with additional crushed or whole Oreo cookies if desired.